
One of those little bit technical Photoshop tools that most people will never even touch is the Slice tool. But if you take the time to get to know it, you’ll discover that it’s very helpful.
Although it is just as simple to use as the crop tool, it is much more versatile. Even graphic designers and app developers prefer it when they need to segment high-resolution photographs.
What does it do, though, exactly? Well, I’m going to show you in this article how it’s used.
I have over five years of Adobe Photoshop experience and am Adobe Photoshop certified. In this article, I’ll teach you how to use the slice tool in Photoshop.
Key Takeaways
- With the slice tool, you can extract a slice of your original background image without losing the original.
- With the help of the Slice tool, you may split an image into smaller pieces that fit together.
How to Use the Slice Tool in Photoshop
Step 1: Open the image you wish to use.
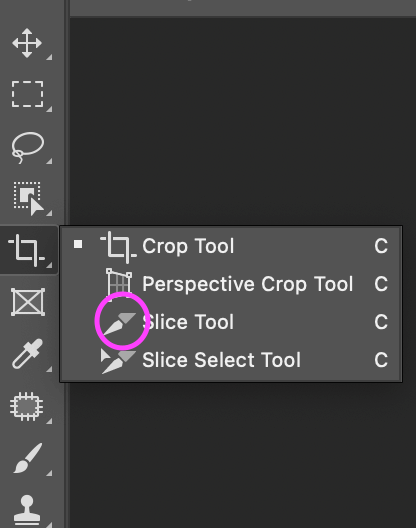
Step 2: Go ahead and select the Slice Tool from the sidebar menu as shown.
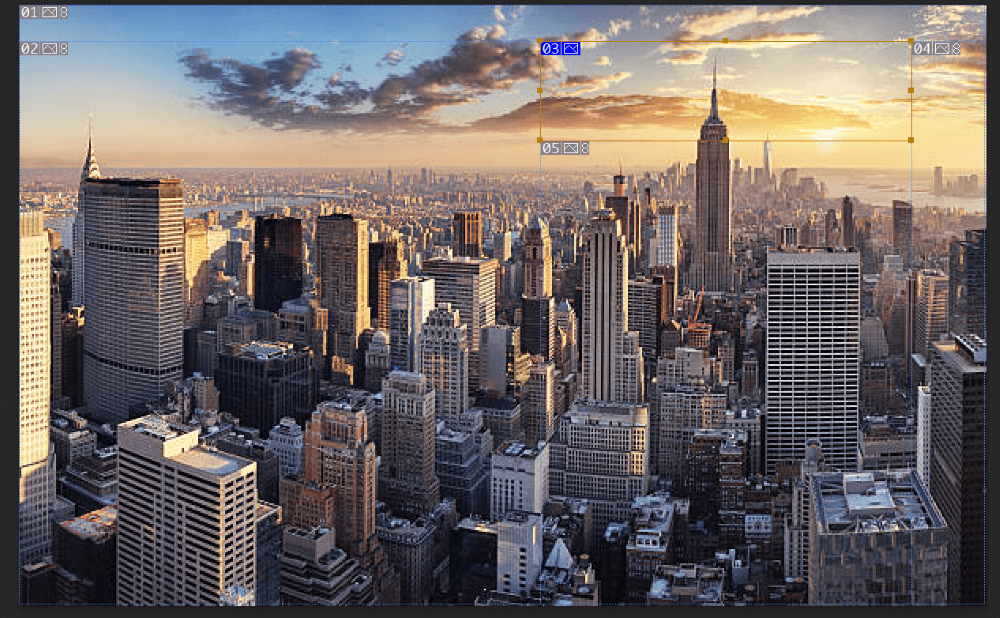
Step 3: Now cut a piece of the image from the desired location. You will notice that once the first slice is drawn, Photoshop automatically creates further slices to match the rest of the document.
The slice that we made is indicated by the orange-bordered box in the diagram above, and Photoshop created the other blue-bordered boxes automatically.
The slice that we made is indicated by the orange-bordered box in the diagram above, and Photoshop created the other blue-bordered boxes automatically.
Each slice can have its details edited in one of two ways once it has been formed.
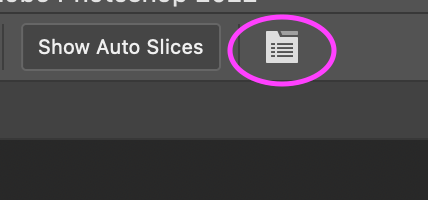
To edit a slice, first, select it with the Slice Select Tool, then in the menu bar, click the icon next to the Show Auto Slices button.
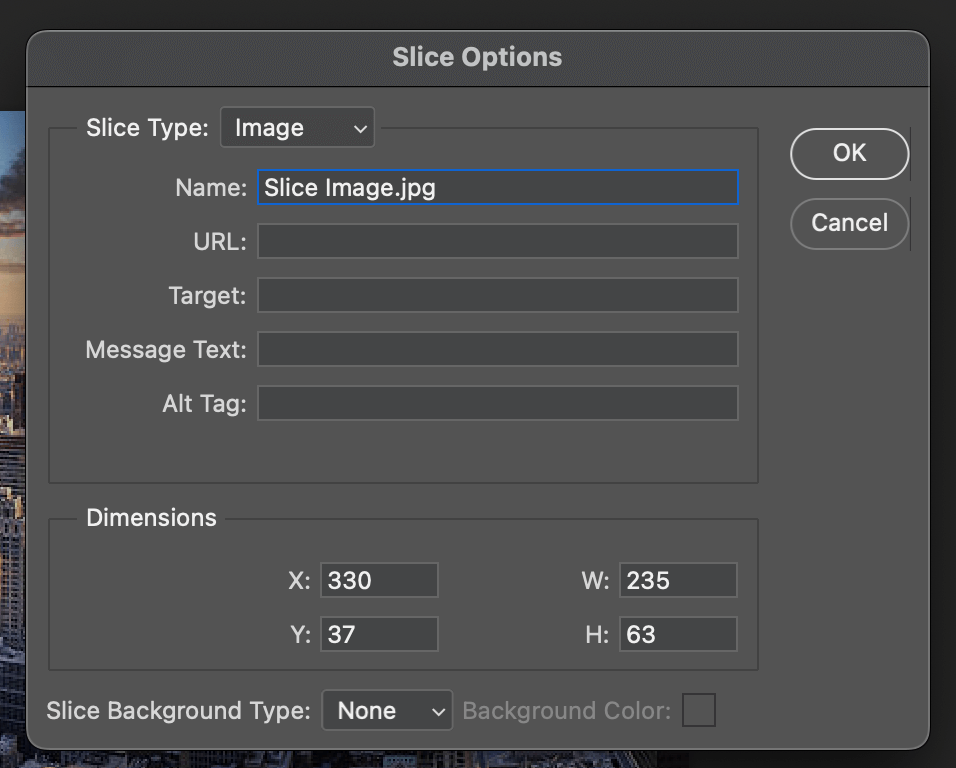
Another option is to right-click on the slice and, in the popup menu, click on Edit Slice Options.
Once you are satisfied with your layout, go to File > Save for Web to save/export slices and you’re all set!
As you can see, if you have a large image, image slicing can be helpful. By segmenting it, some of the images will load first, informing the viewer that more is to follow. For people with slow connections, this is useful.
Pro Tips
- Remember always to save your work, you don’t want to start over from scratch.
- You can set options for each slice – such as slice type, name, and URL – in the Slice Options dialog box.
- You can optimize each slice using different optimization settings in the Save For Web dialog box.
Final Thoughts
Slices are divided into groups based on how they were made and the type of content they include (Table, Image, or No Image) (user, layer-based, auto).
User slices are those made using the Slice tool; layer-based slices are those made from a layer. In order to account for the remaining portions of the image, extra auto slices are created when you create a new user slice or layer-based slice.
To put it another way, auto slices fill in the image’s empty spaces left by the user- or layer-based slices. Every time you add or change user slices or layer-based slices, auto slices are generated again. Auto slices can be changed into user slices.
Using your newfound knowledge of text slicing in Photoshop, design some stunning visuals for your website or blog. Try out several fonts, colors, and layouts until you discover one that suits you best.
Any questions about slicing in Photoshop? Leave a comment and let me know.
About Aly Walters