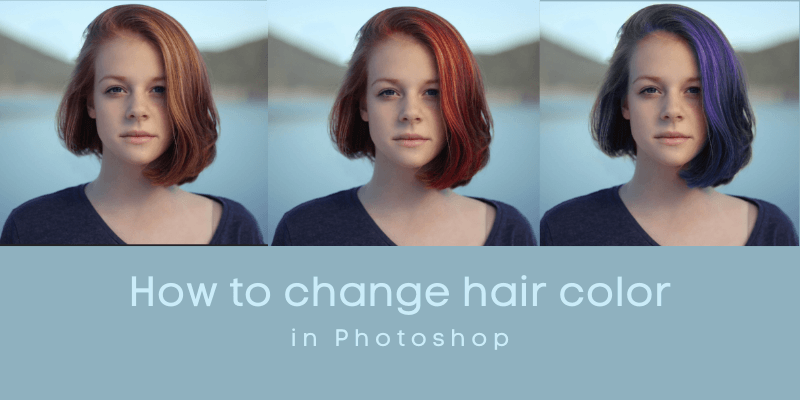
Have you ever thought it would be fun to change up your hair color for a day? The trouble is, you don’t actually want to dye your hair. How about having a different hair color just for one picture?
Hello! I’m Cara, a professional photographer. Sometimes photo manipulation can get really fun! Today I’m going to show you an easy way to quickly change hair color from an image in Photoshop.
Check it out!
Table of Contents
The Easy Way to Change Hair Color in Photoshop
Note: the screenshots below are taken from the Windows version of Photoshop CC. If you are using the Mac version, they will look slightly different.
Step 1: Duplicate the Background Layer
The hardest part about changing hair color is selecting the hair. It’s hard enough to select a subject in Photoshop without having all these little flyaway hairs and such to worry about.
That’s why we’re NOT going to select the hair. Instead, hit Ctrl + J (Command + J on Mac) to duplicate the background layer.
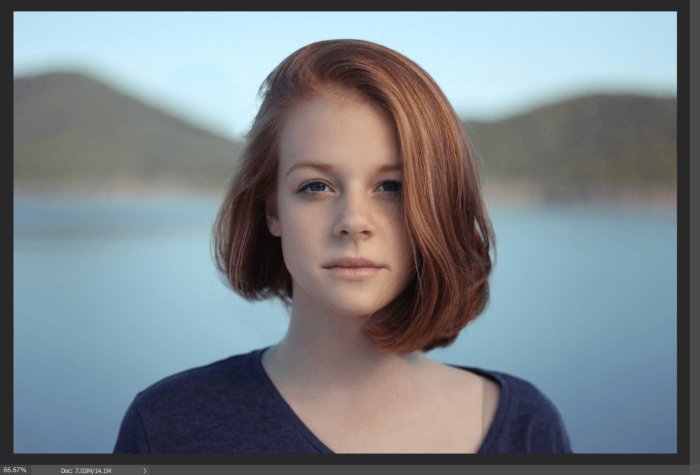
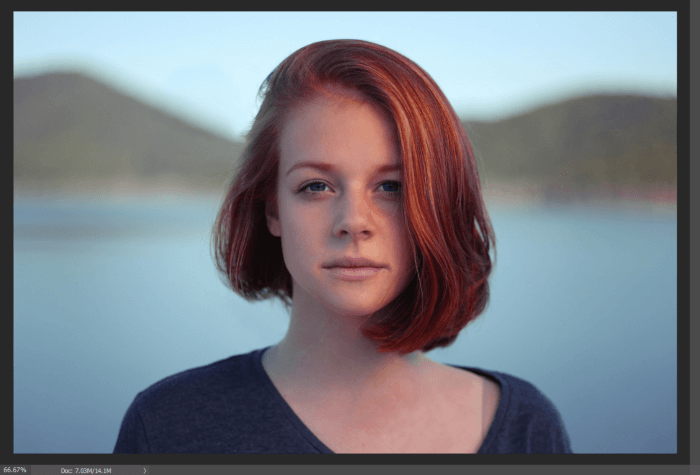
This is the image I’ll be working with today.
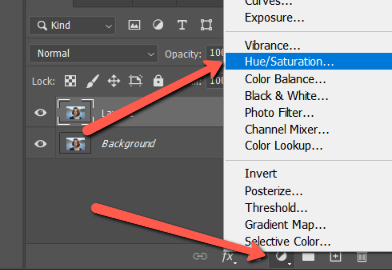
Step 2: Create a Hue/Saturation Layer
Click the half-filled circle below the layers panel and select Hue/Saturation from the menu that appears.
Step 3: Choose Your Color
In the hue/saturation adjustment panel, select the color range you want to work with. In this case, her hair has a reddish hue, so I’ll choose the reds.
If you’re not sure what color to choose, click that little hand next to the box. Then click somewhere in the hair and the color range selection at the bottom will jump to the appropriate area. You can adjust the sliders up and down to include more colors or less as needed.
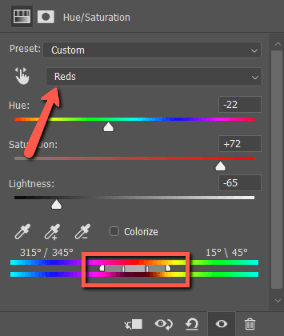
Once you’ve got the appropriate color range, play with the Hue, Saturation, and Lightness sliders until you get the color you want. It will probably affect other parts of the image, but don’t worry about that at this point. Just focus on the hair.
Now she’s got a lovely copper red shade, but her skin and lips look a little funky. We’ll fix it, don’t worry.
Step 4: Invert the Mask
Hit Ctrl + I (Command + I) to invert the layer mask. The image will now revert back to the way it was.
Step 5: Select Your Brush
Select the Brush Tool from the toolbar or hit B on your keyboard.
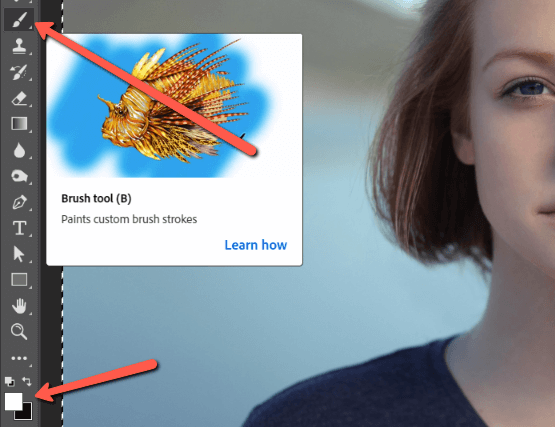
Choose white as the foreground color. Make sure that white is on top of the two squares at the bottom of the toolbox.
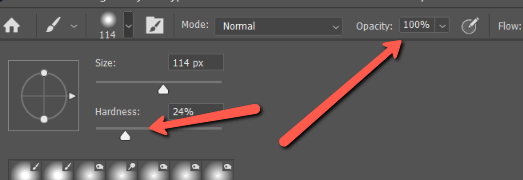
Choose an appropriate brush size for your image. It’s a good idea to reduce the hardness so the color will go on soft. You can also drop the opacity so the effect goes on a little lighter.
Now paint over the part of the image that you want to change color. Because we’ve restricted the change to the reds, the brush won’t affect the background in this particular image. It will affect her skin, however, so zoom in on this area and work carefully.
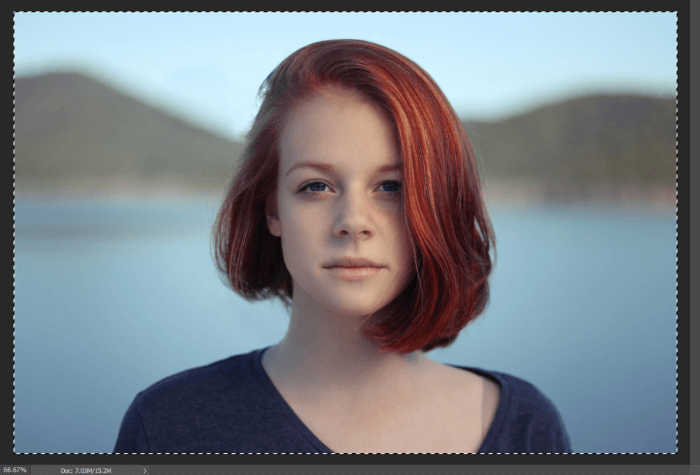
Now she’s got that lovely copper-red shade again and her skin looks normal once more!
That’s pretty much it.
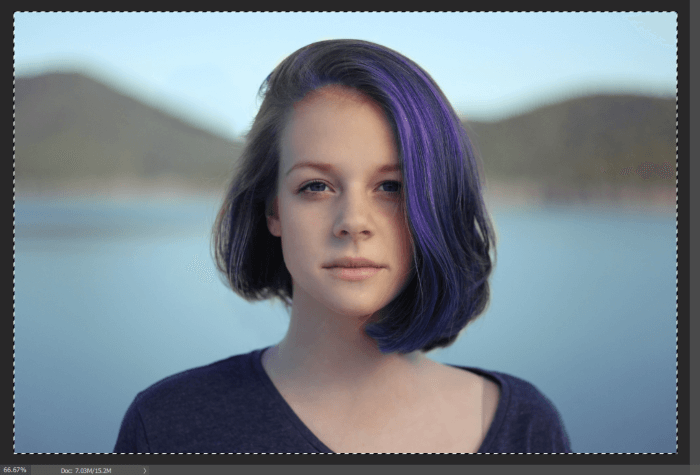
This simple trick works well to quickly recolor hair in Photoshop for most images. You can use it to create natural looks, but also get funky and try purple, blue, or even green. Have fun with it and see what you can come up with!
Have we sparked your image manipulation creativity? Check out this other tutorial on how to change eye color in Photoshop here!
About Cara Koch