What do you do with an off-center image in Photoshop?
Has this ever happened to you when working in Photoshop? Perhaps you expanded the background or made some other edit and now your image is off-center. Then you’ll need to adjust the image position.
Hey there! I’m Cara and as a professional photographer, I need my images to be perfect every time. Just “eyeballing” it isn’t going to cut it.
So, let me show you how to quickly and easily center images in Photoshop without having to painstakingly guesstimate.
Table of Contents
Step 1: Select What You Want to Move
This method of centering images works for layers, objects, text, and pretty much anything else that you can select in Photoshop.
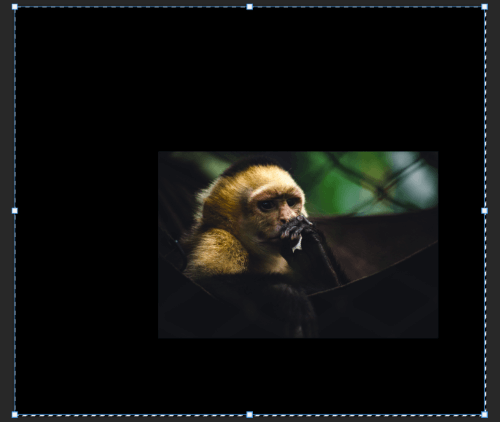
To show you how this works, I put this image of a monkey that I took a couple of weeks ago on a black background. To snap him quickly to the center, you’ll need to first select the monkey image layer.
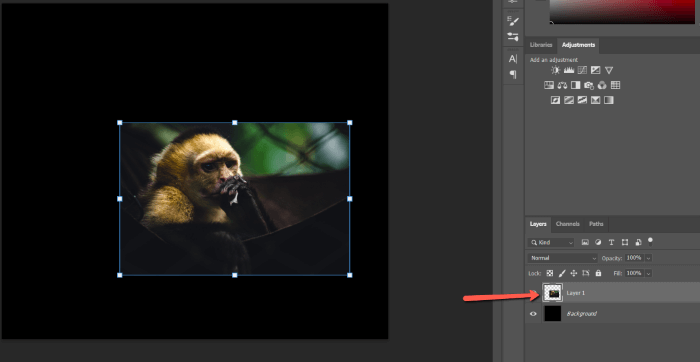
The selected layer is indicated by the lighter gray stripe on the layer.
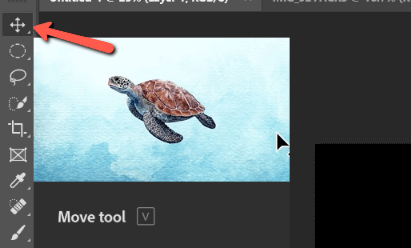
Step 2: Select the Move Tool
Select the Move tool from the toolbar on the left. Or you can hit V on the keyboard.
Step 3: Select All
This step is easy to miss and many people get here and wonder why the alignment controls don’t work. You need to Select All to activate the controls.
Hit Ctrl + A or Command + A on the keyboard to do this. Alternatively, you can go to Select in the menu bar and click All.
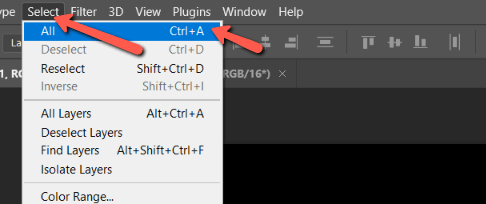
You’ll see the marching ants appear around the edges.
Step 4: Align the Image
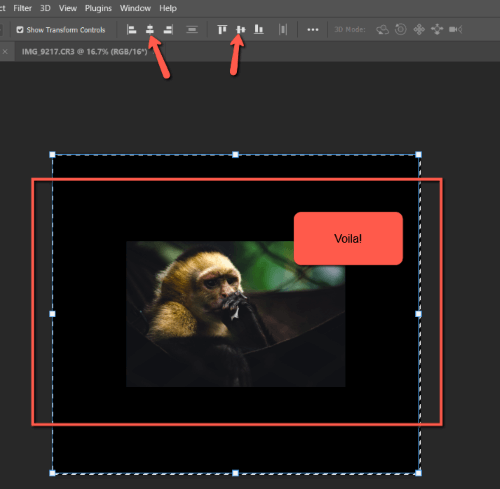
With the image selected and the Move tool active, simply go up to the Options bar where you’ll find the Alignment controls.

They’re pretty self-explanatory once you understand the symbols. The three on the left align the image vertically and the three on the right align it horizontally.
The first button on the left snaps the image to the left edge, the center button to the center vertically, and the right button snaps the image to the right edge.
The first button in the second group snaps the image to the top, the center button to the center and the rightmost button snaps the image to the bottom.
To center the image, you simply need to hit both center buttons to align both vertically and horizontally.
Once you get the steps down it literally takes 3 seconds to center your images!
How to Center Images Manually in Photoshop
If you want to center things manually, you can do that as well. Select the layer with your image or object on it just as we explained earlier.
Select the Move tool by hitting V on the keyboard.
Instead of selecting all and using the alignment tools, you can simply grab the image and position it yourself. The guide (these purple lines) will pop up to guide you when you have the image exactly in the center.
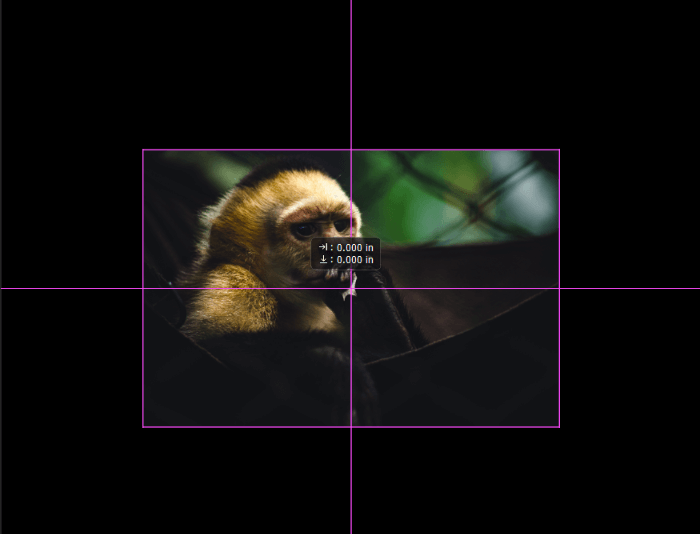
The lines should be easy to line up with. What if you find it super touchy and nearly impossible to get both the vertical and the horizontal lined up at the same time? This probably means the snapping feature is turned off.
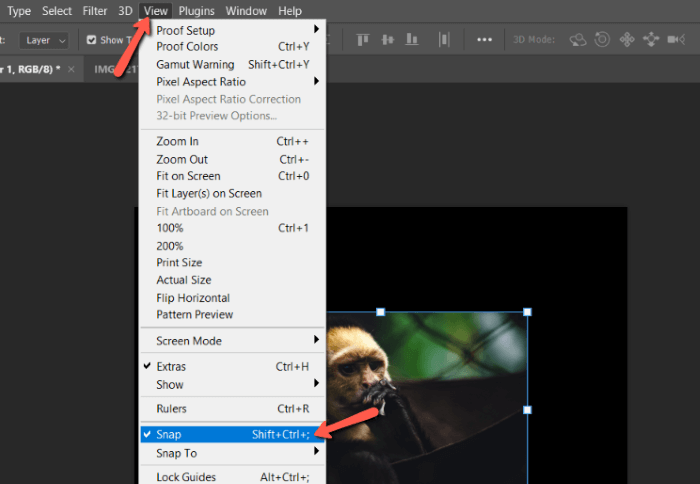
This handy feature will “snap” the image to an alignment line as you drag your image close to it. It will also hold it there until you drag it a certain distance away. This makes it far easier to line things up.
To make sure the snapping feature is on, go to View in the menu bar. Scroll down to Snap and ensure there is a checkmark to the left. Click on it to activate it if there is no checkmark.
Once again, Photoshop offers us some fantastic tools to work with images and designs exactly how we want!
Excited to learn more? Check out how to merge two images together in this fun tutorial!
About Cara Koch