
Do you know how annoying it is to see text in a design that is just slightly off-center? It doesn’t look interesting like it is when you purposely place it off-center, it just looks…off.
But, painstakingly dragging your text around to get it right in the perfect spot is…well…painstaking. There’s gotta be a better way.
Hey there! I’m Cara, a lover of all things photography, including Photoshop. I’m here to tell you there is a better way. Check out the easy way to center-align text in Photoshop here!
Table of Contents
Method 1: Center Text Using the Move Tool
To get started, let’s open a new document with Ctrl + N or Command + N. Choose whatever size you want for your project and hit OK.
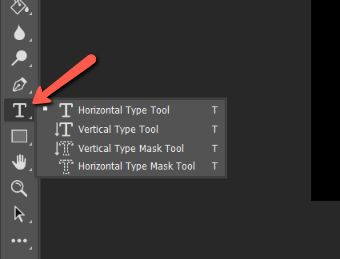
Add some text by choosing the Horizontal Text tool from the toolbar on the left or hitting T on the keyboard.
Press V on the keyboard to select the Move tool or grab it from the top of the toolbar.
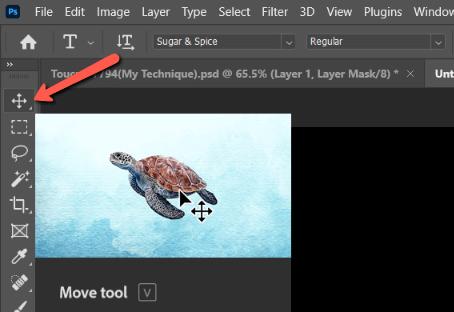
This will put a blue box around your text. You can now click and drag on the text to move it around as you please.

But, we’re looking at an easier way. So hit Ctrl + A or Command + A to select the entire canvas instead. You’ll notice the marching ants appear around the edges.

Now go up to the Options bar and hit the two buttons I’ve pointed out below. The left one centers the text vertically and the right one centers it horizontally.
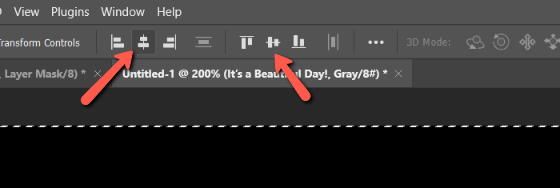
Click both and boom! Your text is perfectly centered. This technique works with objects, images, and other elements as well. Hit Ctrl + D or Command + D to deselect the canvas.

Method 2: Center Text via Guides and Snapping
What if you want to stick with clicking and dragging? While eyeballing it can get the text close to the center, it’s really difficult to be 100% accurate. Photoshop gives us a handy way to help that speed up finding the center considerably.
You can use guides and snapping.
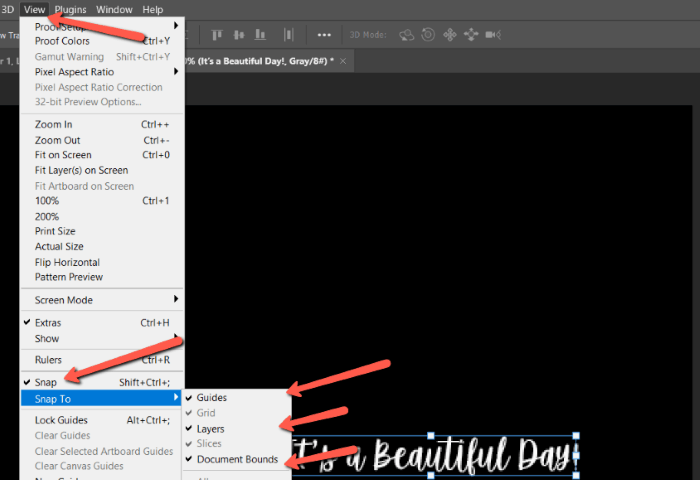
To ensure that snapping is enabled, go to View in the menu bar. Go down and make sure that Snap has a checkmark next to it. Click on it if it doesn’t. Then hover over Snap To and make sure that Guides, Layers, and Document Bounds all have checkmarks.
Now, as you drag around, purple lines will appear to show that you’ve reached the center. This one shows me that I’ve centered the text vertically.

The program will also “snap” the text to the nearest line to help you hold it there. Once you’ve found one line, hold the Shift key as you move. This will keep the text stuck to the line as you move around to find the second line.

That’s all there is to it!
How to Center Text on a Portion of the Canvas
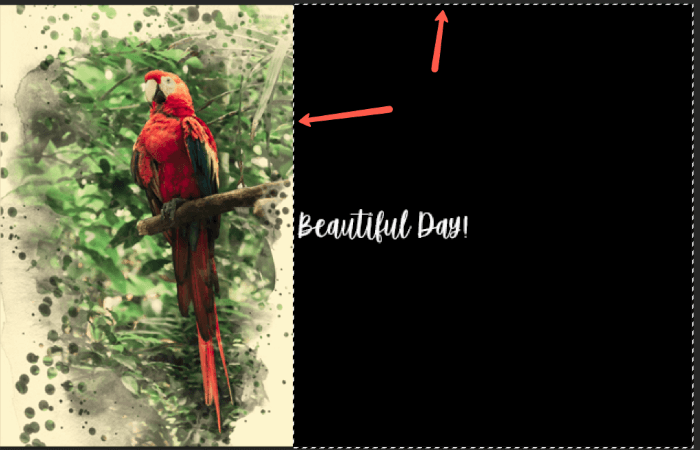
What if you want to center the text in a part of the canvas? For example, you’re creating a collage or card with other text and images. If I use the move tool method, the text will snap to the exact center of the whole canvas, but I want it to be centered in just the black part.

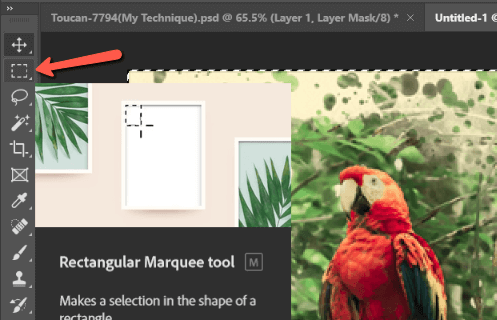
Remember that we centered the text with the Move tool by selecting the whole canvas? This means we need a different selection. Grab the Marquee tool directly under the Move tool.
Click and drag to make a selection around just the black part of the document. Notice that the marching ants appear around the black section.
Switch back to the Move Tool. Now hit those centering buttons as before and the text will jump to the center of the selected area.
Voila!

Now you can create perfectly centered, beautiful designs!
To learn more about fun things to do with text in Photoshop check out our tutorial on how to make a metallic text effect.
About Cara Koch