
When you look at a person’s face, where do you generally look? The eyes, of course! They are the “windows to the soul” after all.
With Photoshop, you can brighten the eyes of your subject to create a truly captivating image. I’m Cara, a professional photographer, and today I’m going to show you how you can quickly and easily brighten eyes in Photoshop.
Let’s get started!
Table of Contents
How to Brighten Eyes in 5 Steps
Note: the screenshots below are taken from the Windows version of Photoshop CC. If you are using the Mac version, they will look slightly different.
Step 1: Duplicate the Background Layer

I pulled this portrait from Pixabay to work with today. The young woman’s skin is evenly lit and she has some beautiful catchlights in her eyes. However, they are a touch dark, so let’s lighten them up a bit!
Hit Ctrl + J (Command + J on a Mac) to duplicate the background layer.
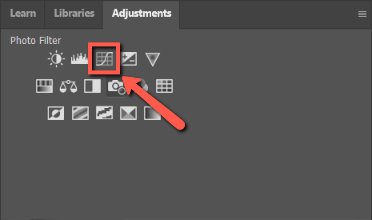
Step 2: Open a Curves Adjustment Layer
Select the Curves Adjustment Layer from the Adjustments panel above the layers panel on the right side of your screen.
This will open the Curves panel where you’ll see a graph with a diagonal line running through it. We want to brighten the highlights so click a point near the right end of the diagonal line and drag it upwards.

The whole image will lighten at this point, but that’s okay. Just pay attention to the eyes.
Step 3: Invert the Mask
Hit Ctrl + I (Command + I) to invert the layer mask. The image will revert to normal as the changes go behind the top layer. The white box that was next to the adjustment layer in the layers panel will turn black.

Step 4: Choose the Brush Tool
Choose the Brush Tool from the toolbox on the left-hand side of the screen. Alternatively, you can hit B on the keyboard. Make sure that the foreground color is white in the little boxes at the bottom of the toolbox panel.

Zoom in on the eyes with the zoom tool or by hitting Ctrl + + (Command + +). Set your brush to an appropriate size for the eyes in your image. Then, carefully paint over the eyes.
Be careful not to paint outside the irises or the whites of her eyes will look strange.
Step 5: Fine-Tune
If necessary, you can fine-tune the image. If you want to brighten the eyes more, reopen the Curves adjustment and drag the diagonal line up higher.

If the effect is too strong, you can either drag the line back down or reduce the opacity of the Curves layer.
Be Bright-Eyed and Bushy-Tailed!
Now you can be bright-eyed in any image with just a few minutes in Photoshop! What do you think of this image? Her eyes really pop now, don’t they?

Delighted with what you learned today? We have a simple tutorial on how to change eye color in Photoshop that is just as easy. Check it out as well!
About Cara Koch