
Bokeh is a beautiful effect that many photographers strive for in their images. The easiest way to get it naturally is to place your subject in front of a lot of small lights, such as strings of Christmas lights. With a blurred background, big blurry circles of light will appear in the background of your image.
Hey there! I’m Cara and I hope you already know what bokeh is because my description doesn’t sound that amazing. However, in the right image, the effect is stunning.
But what if there are no strings of tiny lights behind your subject? Is there a way to create the effect in Photoshop? Of course! You can buy bokeh overlays online and add them to your images. But finding one that offers just the look you want can sometimes be challenging.
Thus, I recommend following the technique I’m going to show you here. With it, you can create and customize your own bokeh from any image.
Let’s get started!
Note: I took these screenshots from the Windows version of Photoshop CC. If you are working with a Mac you will find that the workspace looks a little different!
Table of Contents
Step 1: Choose an Image and Open it in Photoshop
You can use this technique to create a bokeh in any image, but it won’t necessarily look good in every image. Even though we’re creating an effect that isn’t there, it will generally look better if the presence of bokeh seems somewhat plausible.
Of course, that’s not a hard rule. You’re being creative, you can do whatever you want with your images.
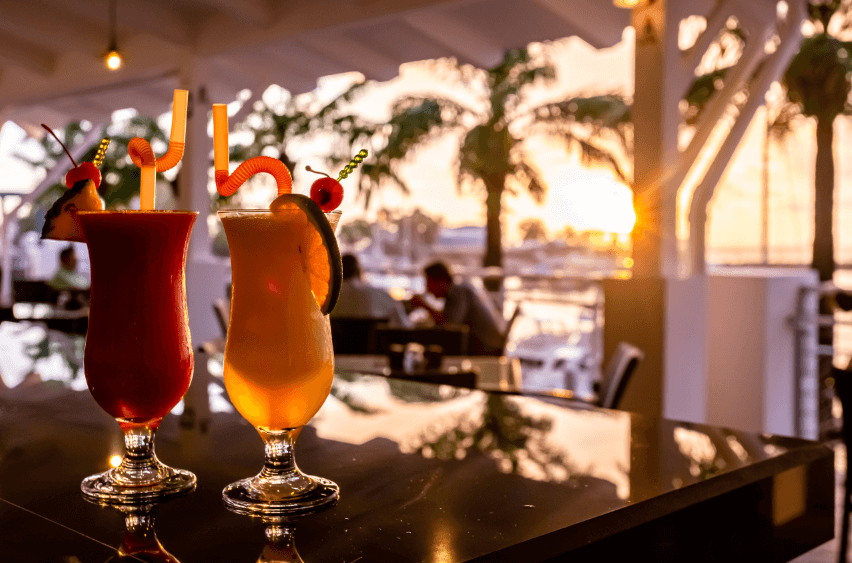
I’m going to choose this image that I took in a restaurant here in Quepos, Costa Rica, and open it in Photoshop.
Step 2: Create Your Bokeh Layer
Now we need to create a bokeh layer to place on top of this image. Add a new layer to the project by clicking the New Layer button at the bottom of the Layers panel.
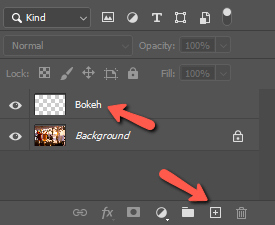
To keep things organized, double-click on the layer’s name and call it bokeh.
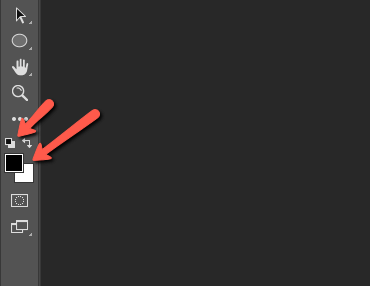
Now make sure that your foreground and background colors are set to the default black and white at the bottom of the toolbar on the left of your workspace. If they aren’t black and white, you can press the smaller squares to reset the defaults or press D on the keyboard.
We want to fill this layer with black. You can do this through the Fill command in the Edit menu. Or just press Alt + Backspace or Option + Delete on a Mac.
Step 3: Add Noise and Blur
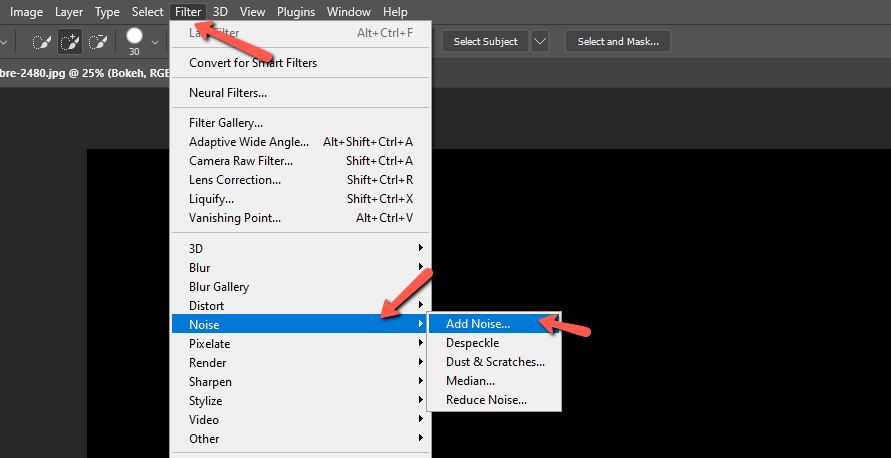
What we’re going to do next seems a little weird, but hang in there with me. Go up to Filter in the menu, hover over Noise, and choose Add Noise.
In the box that opens, you’ll choose the amount of noise. How much depends on the size of your image. So slide the slider up until you get something similar to what you see here.
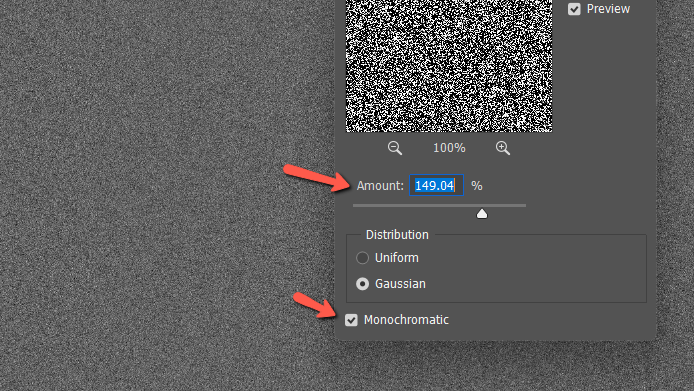
And make sure to check the Monochromatic box at the bottom of the panel. Otherwise, you’ll end up with some weird colors in your bokeh.
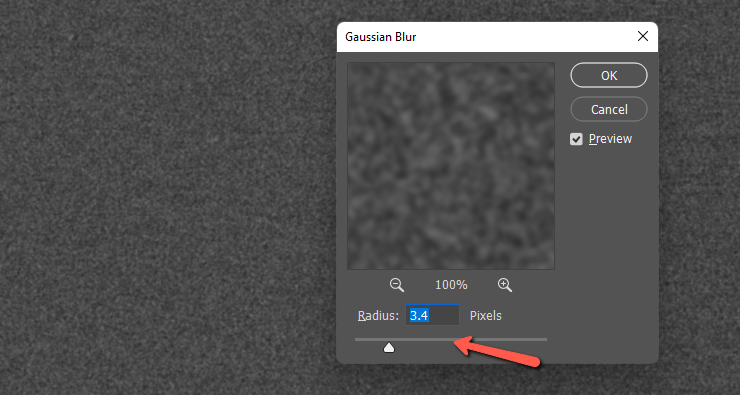
Now we want to blur this noise so go back up to Filter, hover over Blur, and choose Gaussian Blur.

Add blur to the noise until it looks roughly like what you see here. Again, the actual value will depend on the size of your image.
Step 5: Adjust the Noise
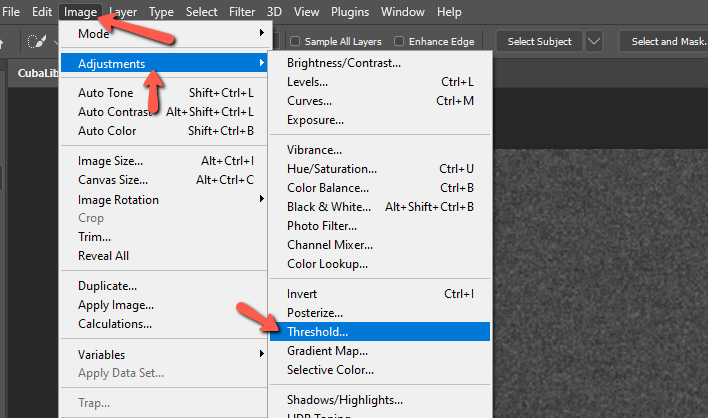
Now we want to create the bokeh pattern. Go up to Image in the menu bar, hover over Adjustments, and choose Threshold.
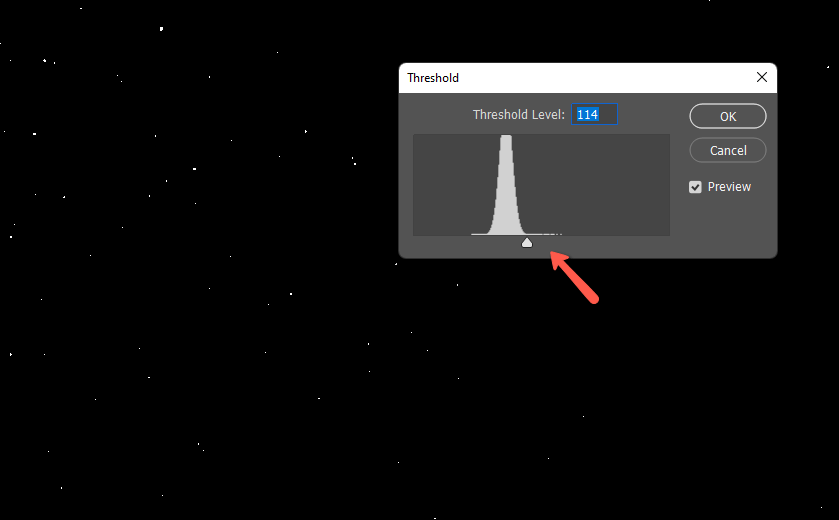
As you move the slider to the left you’ll see white specks appear on your black bokeh layer. The specks are what turn into a bokeh circle so think about that as you choose where to place this slider. Too many white specks will make the image too busy but too few will create a far too subtle effect.
Step 5: Adjust the Bokeh Slider
Wait, what!? Yes, there is a bokeh slider in Photoshop. You might be wondering why I didn’t lead with that. But if we tried to apply the effect to the entire image, we’d end up with a mess. Nope, we need to use the bokeh slider after prepping the canvas as we’ve done here.
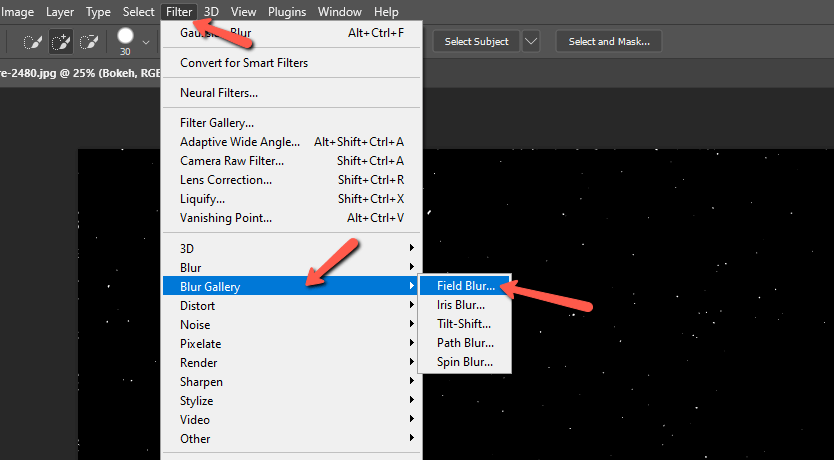
Go to Filter, hover over Blur Gallery, and choose Field Blur.
You’ll find the Light Bokeh slider on the right side of your screen. Slide it up to brighten the bokeh spots. To make the bokeh spots bigger and blurrier, find the Blur slider at the top of the right panel and slide it up.
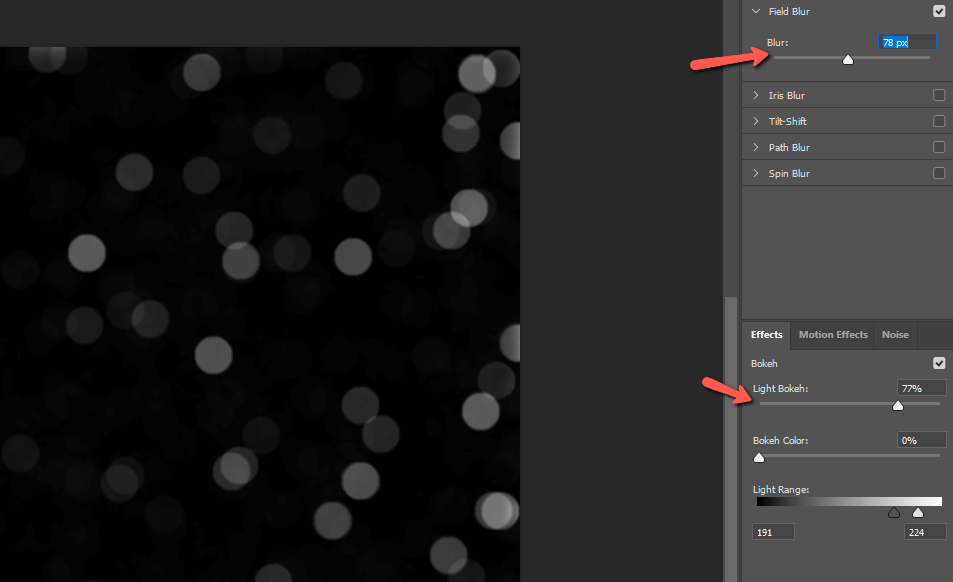
You’ll probably have to adjust both a few times until you’re happy with the look. Press OK when finished.
Step 6: Color Match the Bokeh
This is a fun and surprisingly easy part of making your bokeh effect in Photoshop. Imagine if you had a real bokeh. The circles would take on colors of the lights or other items in the background.
You could choose a color for your bokeh, but every circle would be the same color. Real bokeh varies with the background color of the image.
So let me show you this ridiculously easy method to color-match every part of your bokeh exactly to your image.
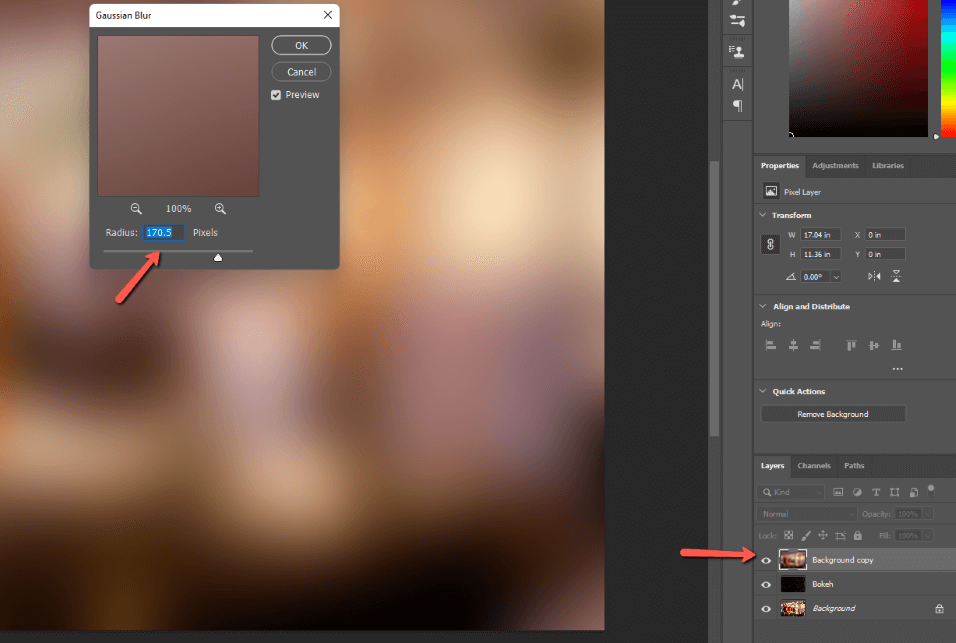
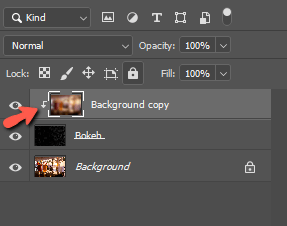
Select the Background layer in the Layers panel and press Ctrl + J or Command + J to duplicate the layer.

Grab the copy and drag it on top of the bokeh layer. Now go to Filter, Blur, and choose Gaussian blur to remove the details of the image while maintaining the colors.
Hold Alt or Option while hovering over the line between the bokeh layer and your blurred-out background copy.
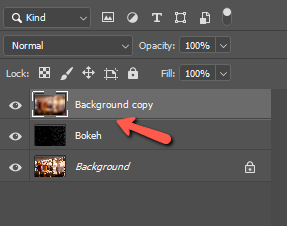
The cursor will turn to a little box with a 90-degree arrow. Click to create a clipping mask.
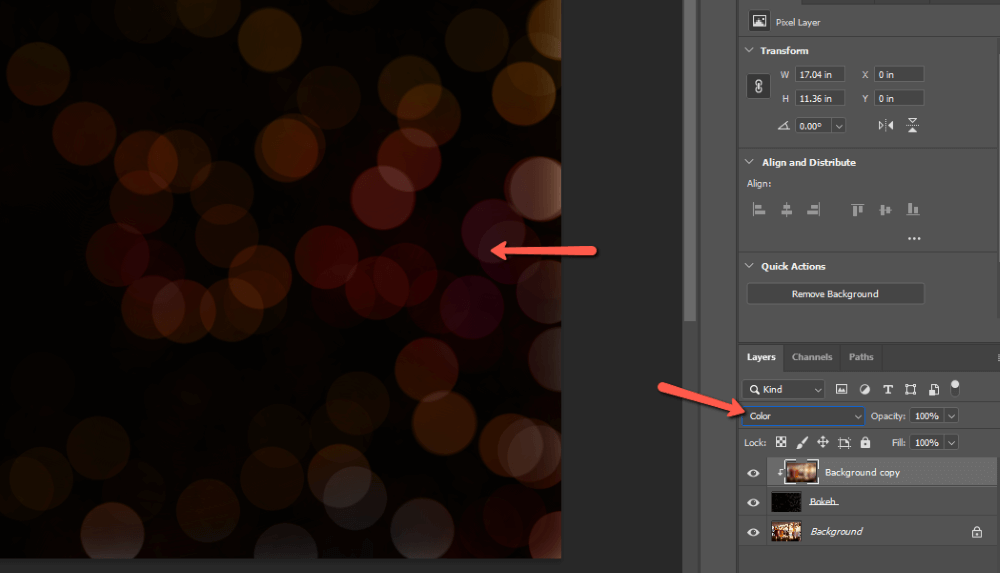
Near the top of the Layers panel, you’ll see a box that says Normal. That’s your blend mode. Change it from Normal to Color. Now you’ll see the bokeh layer peeping through and the circles have taken on the colors of the blurred background copy layer.
Step 7: Bring the Image Through
We’ve got our bokeh all ready but we can’t see the image. To bring it through, select the bokeh layer and change the blend mode from Normal to Screen.
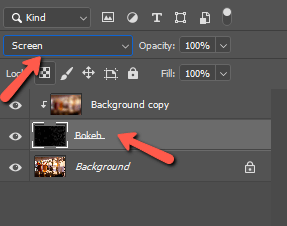
This removes the black pixels from the bokeh layer and only the light pixels remain.

Pretty nifty!
Step 8: Final Adjustments
Unless you did an amazing job with the guesswork, the bokeh might look different than you envisioned. But, no worries, we can adjust the intensity of the effect from here.
Go to Image, Adjustments, and pick Levels.
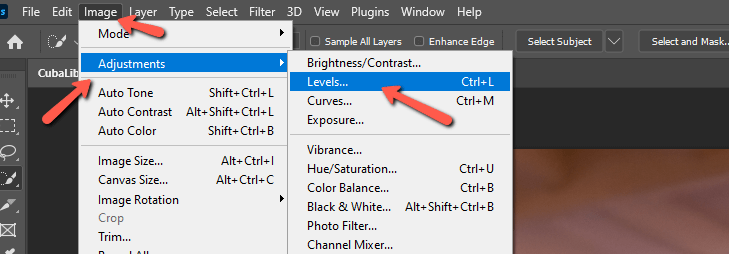
Grab the center slider in the Input Levels box. Slide it down toward the whites to make the bokeh more intense or slide it away to lessen the intensity.
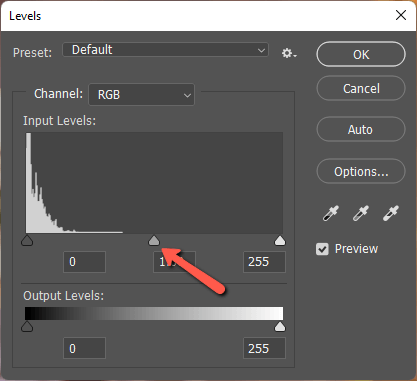
I’m going to up the intensity of my bokeh just a touch.

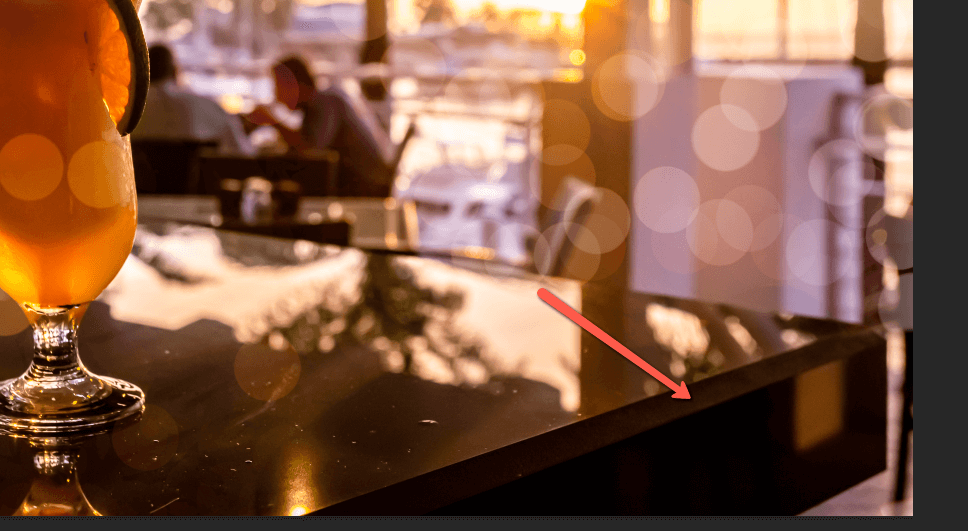
You may want to remove the bokeh from parts of the image. Perhaps it is placed distractingly on the subject’s face or someplace else it doesn’t belong. For example, it seems weird on the edge of the table in my photo.
Press B to open the Brush tool. Select the bokeh layer and make sure the foreground color is set to black. Paint over any areas of the photo where you want to remove the bokeh. Easy peasy!
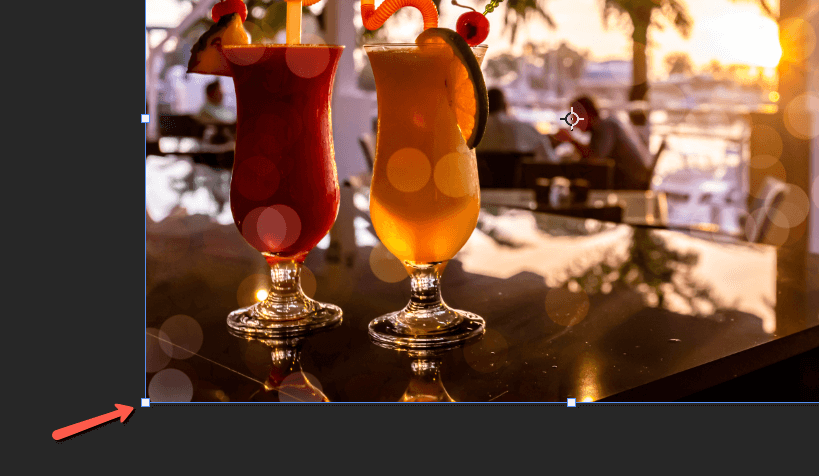
You can also adjust the size and placement of the bokeh. With the bokeh layer selected, press Ctrl + T or Command + T to activate the Transform tool. Grab the corners and pull out to make the bokeh bigger. Drag it around the reposition the bokeh until you like how it looks.
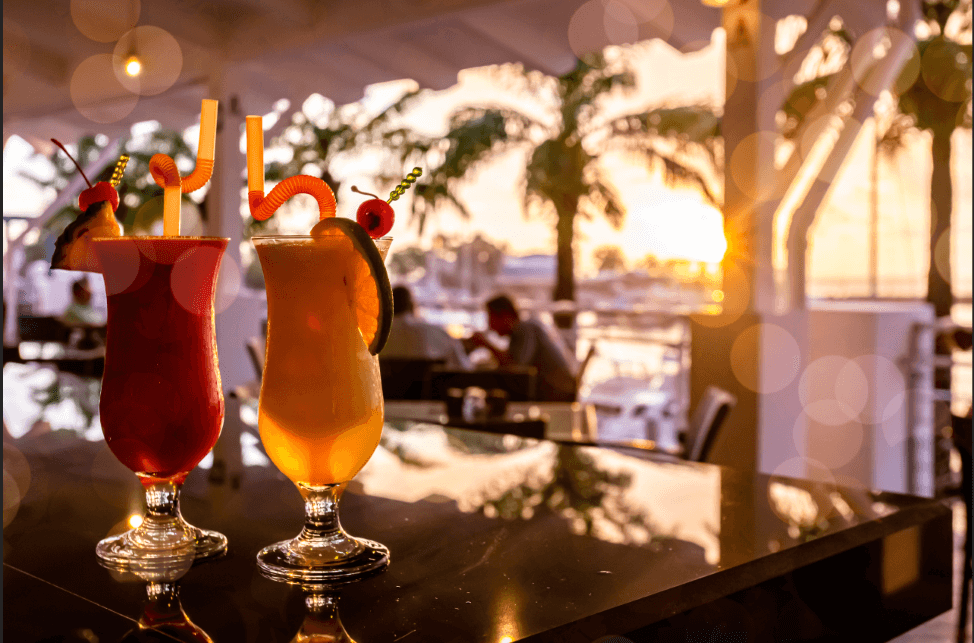
Now, look at that!
Curious about other ways to add bokeh in Photoshop? Check out how to add an overlay here!
About Cara Koch