
Putting an X-ray-looking filter over your image in Photoshop has many different uses. For one, you could be using the X-Ray filter to enhance something you can’t quite see in your regular image. However, it does not function on any image you choose.
Selecting an image that will push the effect even further is crucial for the effect to look good. Images that are flat will not capture the effect. Pick images with good lighting, flares from the camera, and glass in them.
My name is Aly, I have been working with Photoshop for over five years now, and I am also Adobe certified. In this article, I will be showing you how to apply an X-ray filter to your image.
Table of Contents
How to Create an X-ray Filter in Photoshop
Adding an X-ray filter is a great way to make your image pop or bring more detail forward to your image.
Step 1: Invert the image from positive to negative. About 70% of the effect comes from this.
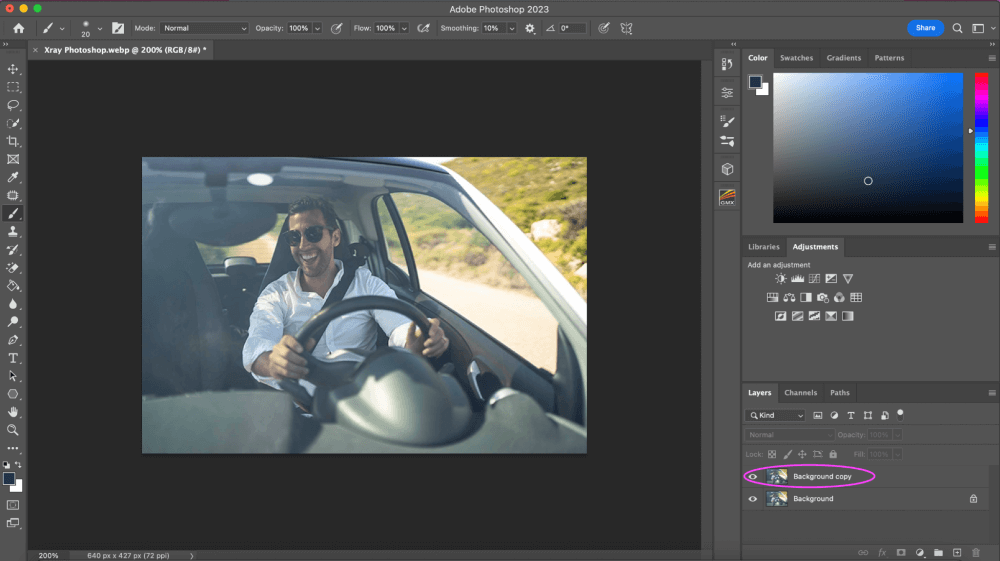
To achieve this, right-click on the mouse on the Background layer in the Layers Panel located in the bottom right corner of the screen. Select Duplicate Layer from the menu that appears.

Step 2: Now that you have duplicated the background layer, you will see a new layer named Background Copy.
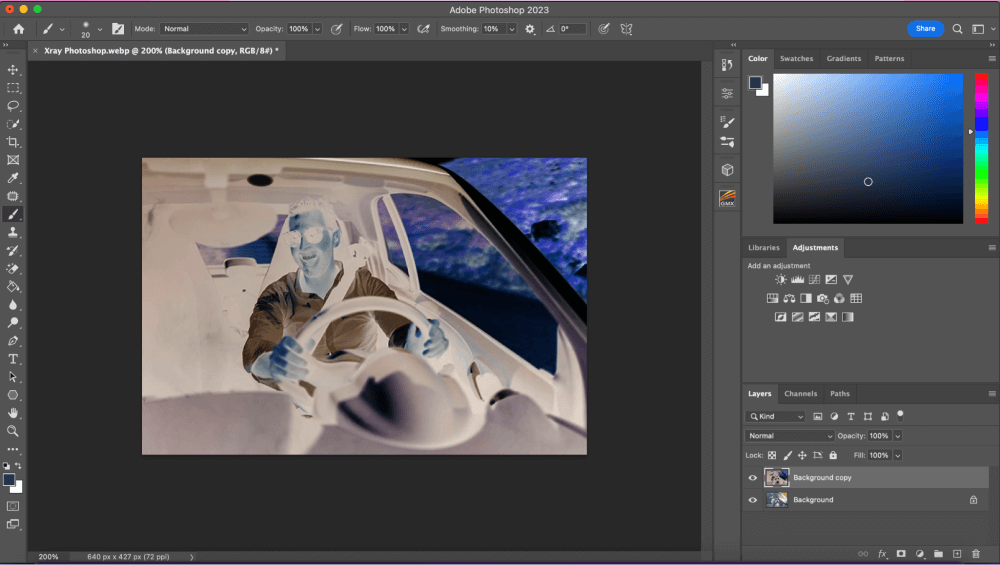
Press Ctrl + I (Windows) or Command + I (Mac) while the duplicate layer is still chosen to invert the layer. Your image should look something similar to my photo below.
Step 3: Now that your image is inverted, we still have a few more steps to get it to look like an X-ray. We need to achieve the X-Ray Effect by converting your image to black and white.
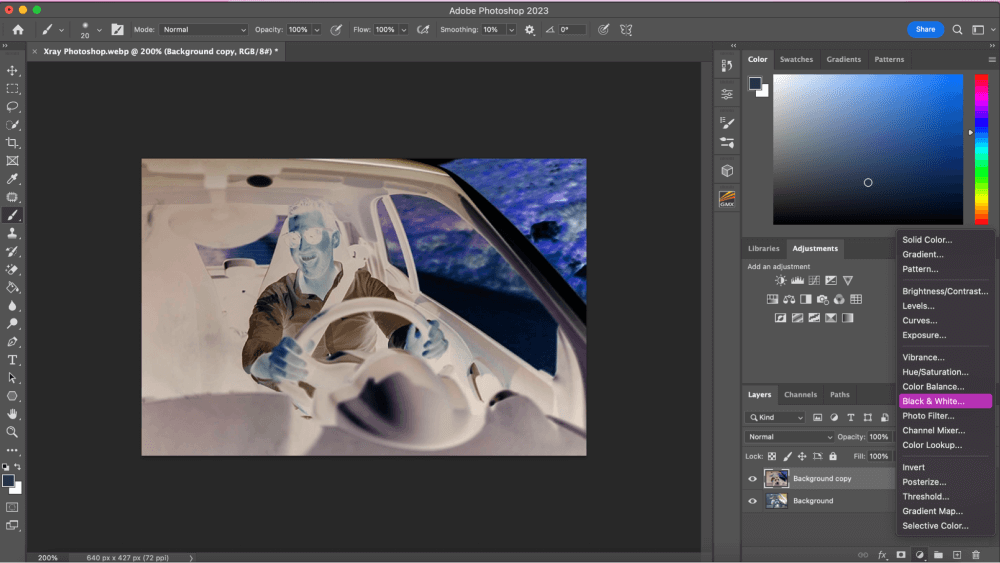
Despite being inverted, the image is still in color. We’ll have to change it to black and white to make it appear more like an x-ray. To achieve this, click the Adjustments icon in the Layers Panel’s bottom right corner.

Step 4: By doing so, the Adjustments menu will appear. Go to the menu and choose Black & White.
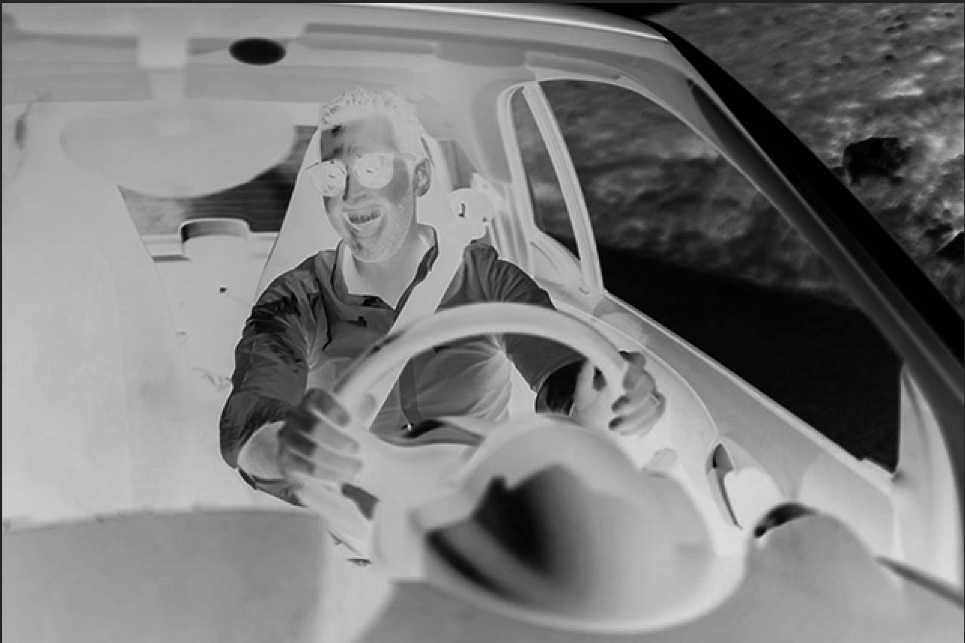
Step 5: Your image will now appear like my image below after the Black & White adjustments layer appears in the Layers Panel.
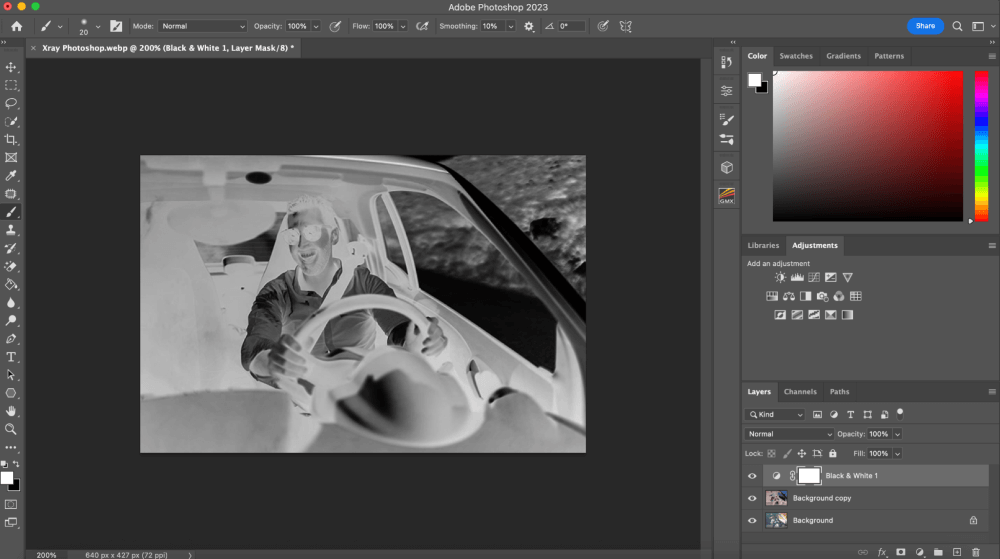
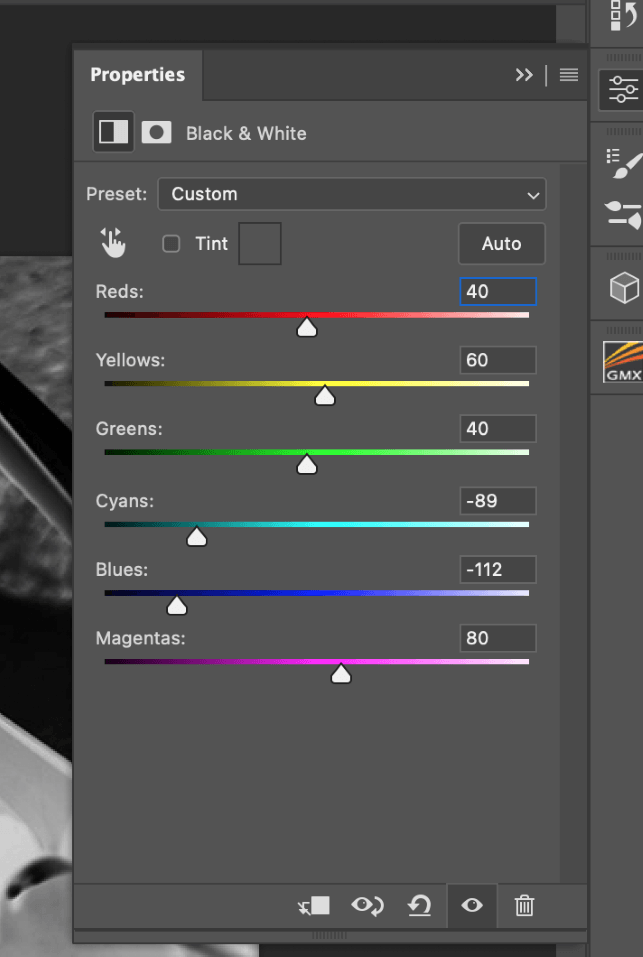
X-Ray film has some distinct characteristics. It is less sensitive to blue light than other films, making any blue spots in the image seem darker on X-rays.
If you need to darken the skin tones, open the Black & White adjustments panel, which is above the Layers Panel, and reduce the Blues saturation.
Step 6: The image is coming together, but now it looks more like a negative image than an X-ray. We will need to follow a few more steps.
X-rays have an uncanny appearance. We will generate and overlay a blur to do this, but we must first establish a merged layer.
Click the Background copy layer and the Black & White 1 adjustment layer while holding down the Shift key to pick both layers simultaneously.
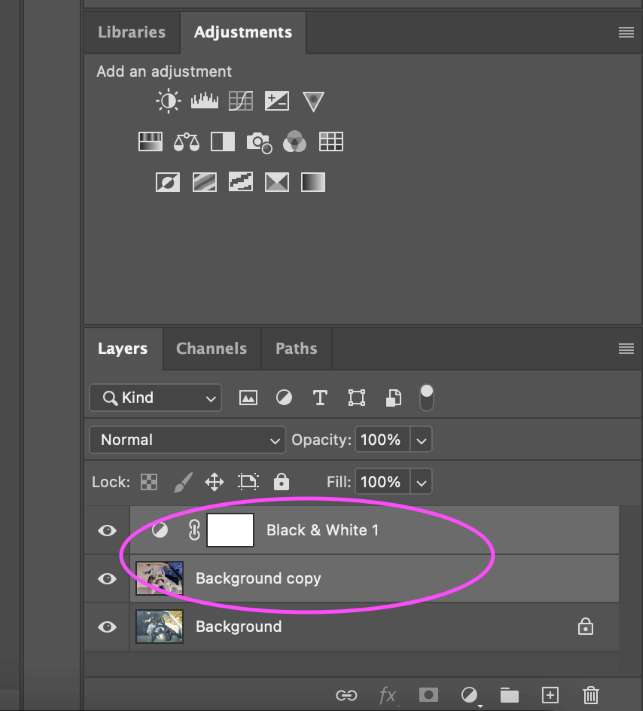
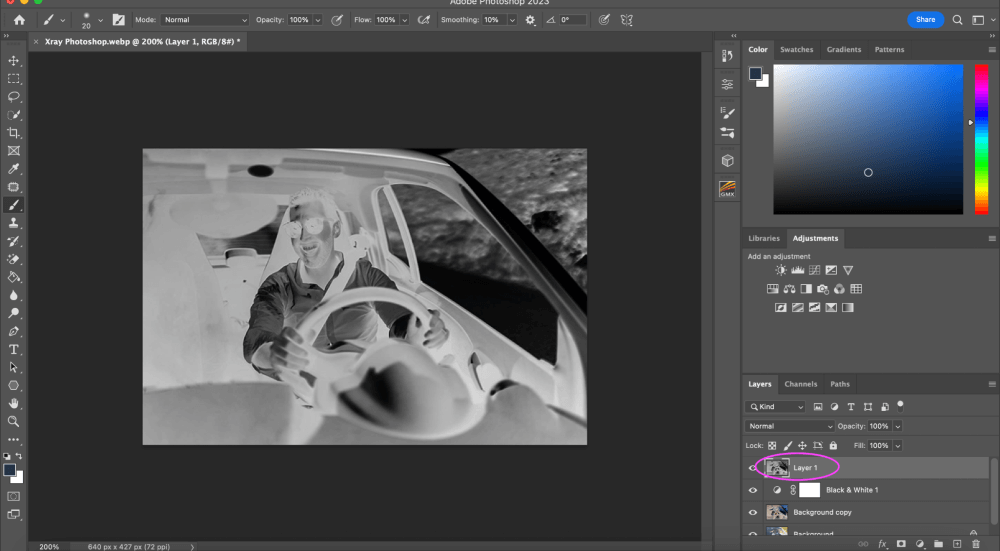
Step 7: Now, hit Ctrl + Alt + Shift + E on a Windows computer or Command + Option + Shift + E on a Mac. This will combine the previously chosen layers into a new layer. Your layers panel should look like mine.
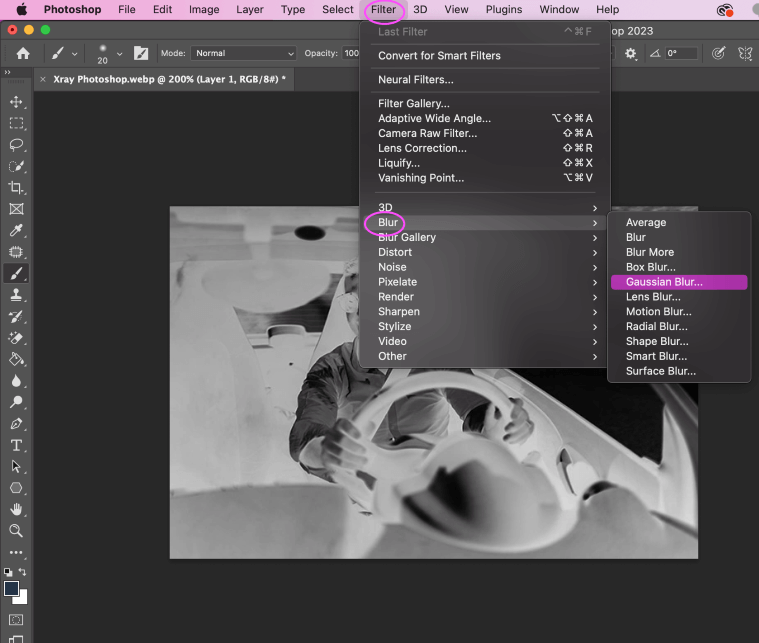
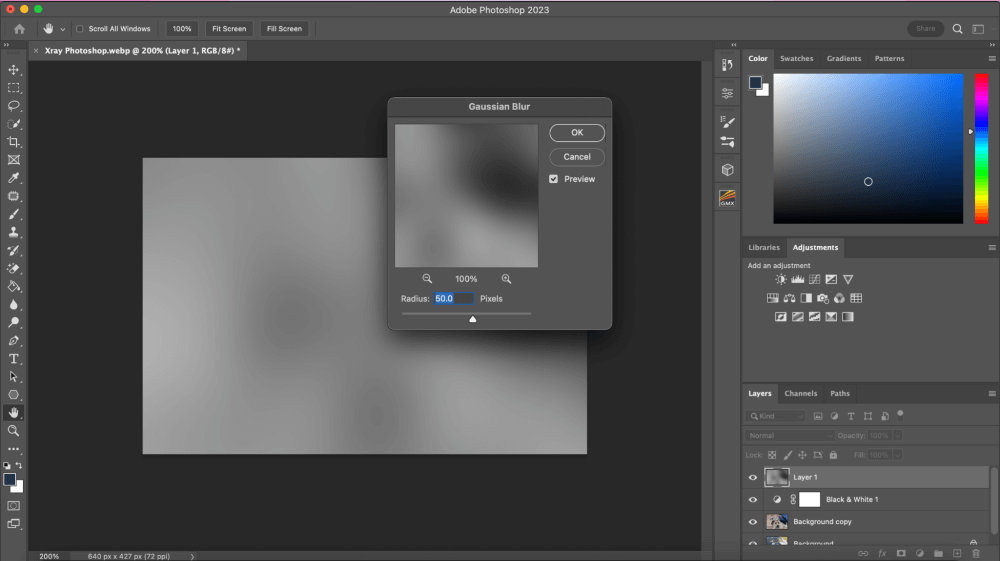
Step 8: We will now add a blur filter. In the menu at the top of the screen, go to Filter > Blur > Gaussian Blur while your new Layer 1 is still selected.
Step 9: The Gaussian Blur menu options will pop up on your screen, choose a radius of 50 pixels from the Gaussian Blur option and click OK. It will look strange at first but that is okay! This is a part of the process.
Step 10: We need to go back to the layers panel to switch the blend modes. You can find the Blend Modes option by going back to the Layers Panel and finding the dropdown menu as shown in my photo below.
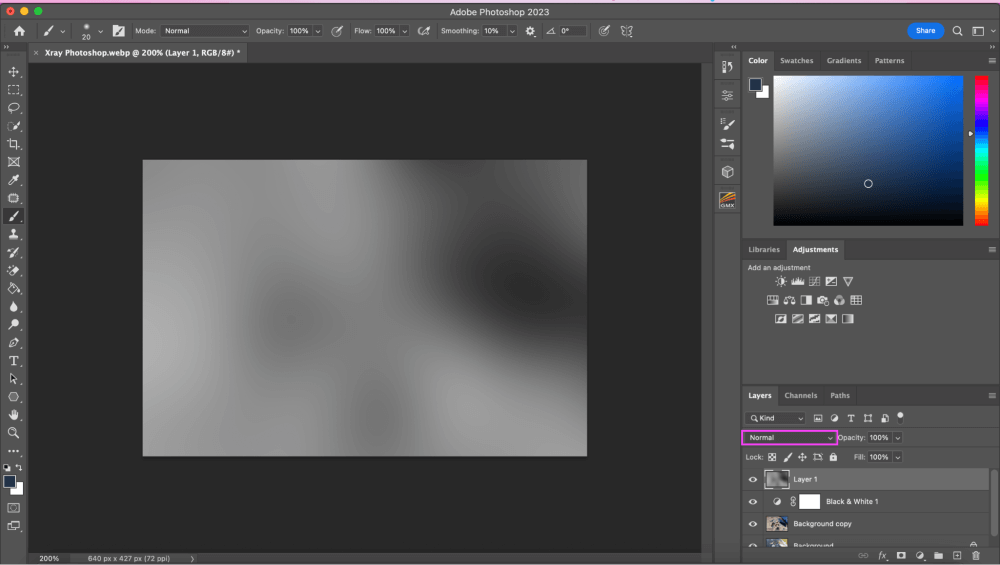
Normal is the default setting. Select it, then select Overlay for the blend mode. Change the Opacity to around 45%-50%.
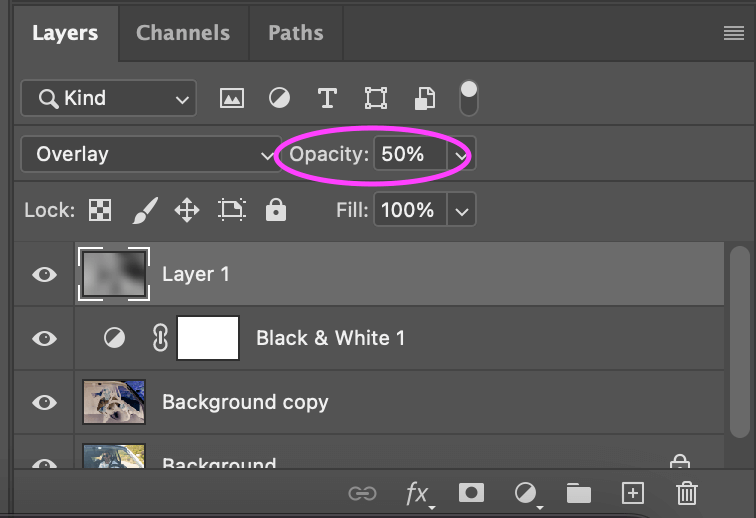
Your image should look different now. Here is mine for reference.
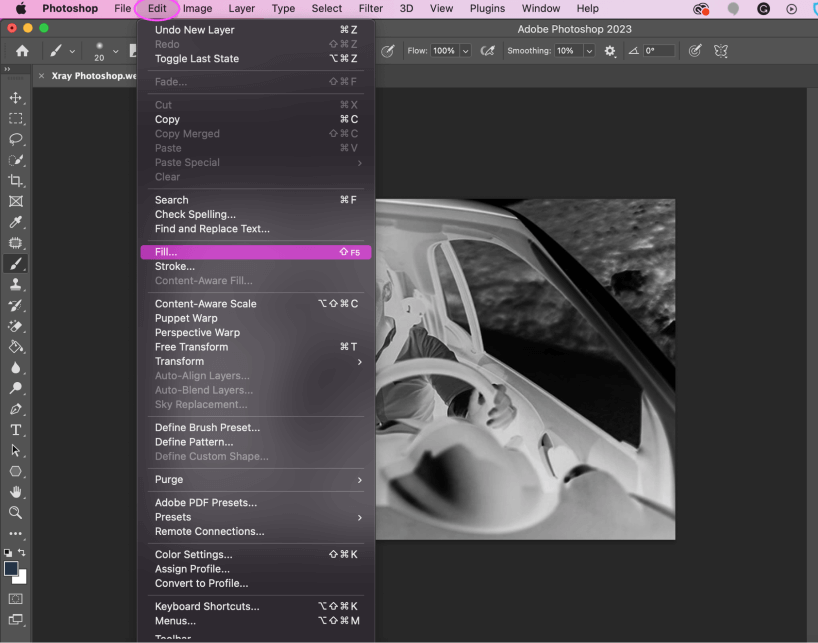
Step 11: We need to add “Noise” to our image. To do so, click on the New Layer icon in the Layers Panel’s bottom right corner. Now select Edit > Fill from the menu. The Fill menu will then appear.
Step 12: Once the fill menu appears, select “50% Gray” from the dropdown menu box.
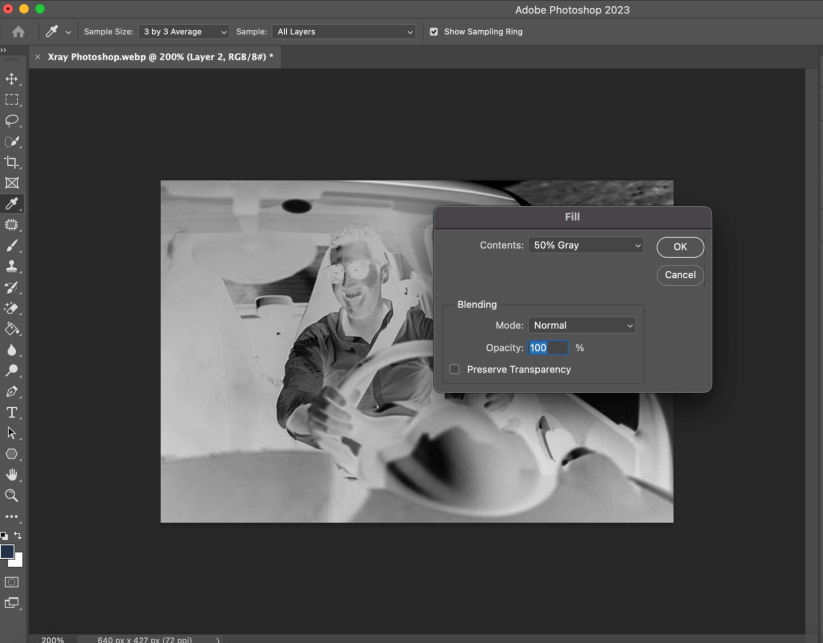
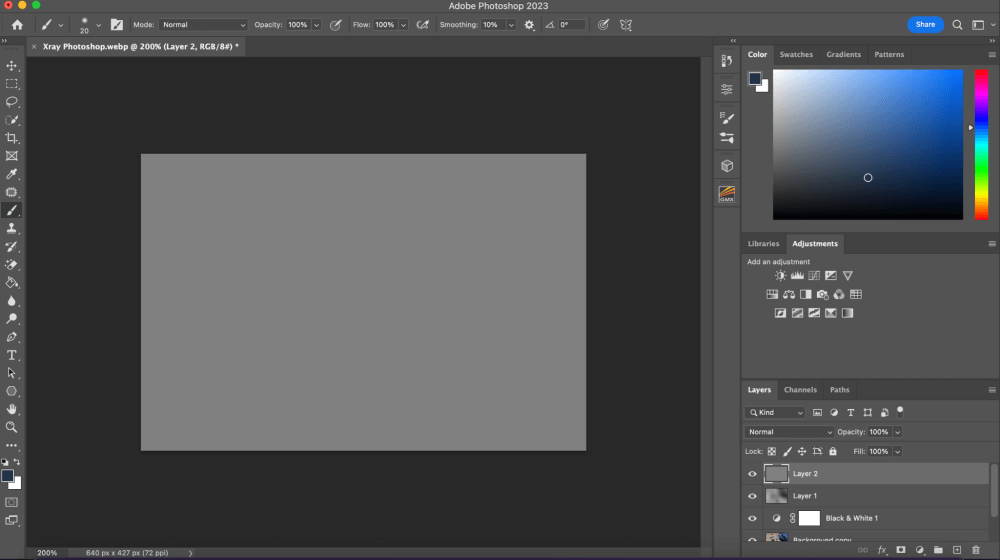
Your image will now look grayed out completely. This is okay, just part of the process.
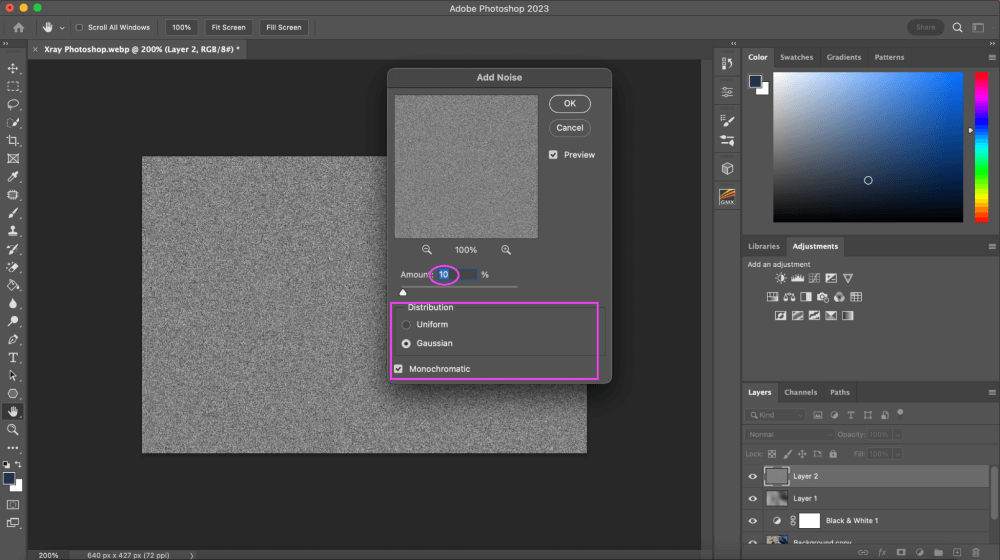
Step 13: Go back to the menu and select Filter > Noise > Add Noise.
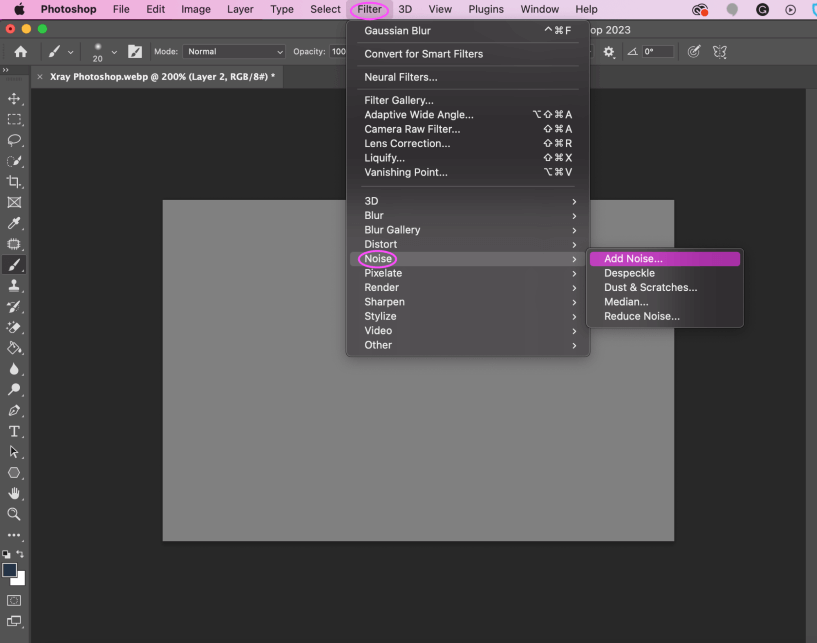
Choose a value of 10 from the Add Noise menu. Make sure “Gaussian” and “Monochromatic” options are selected as well.
The next step is to overlay this on our image. Change the blend mode of the noise layer to Overlay in the Layers Panel to do this. Change the layer’s opacity as well, preferably to under 50%. I am going to choose 20% for mine, I don’t want too much grain showing.

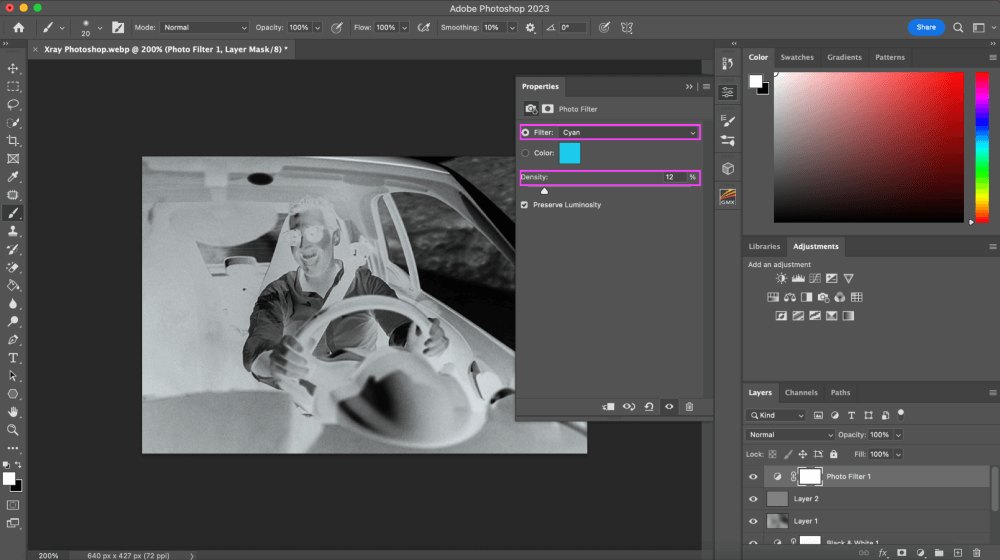
Step 14: Next, Select Photo Filter from the Adjustment Layers menu in the Layers Panel. This will create a new adjustment layer.
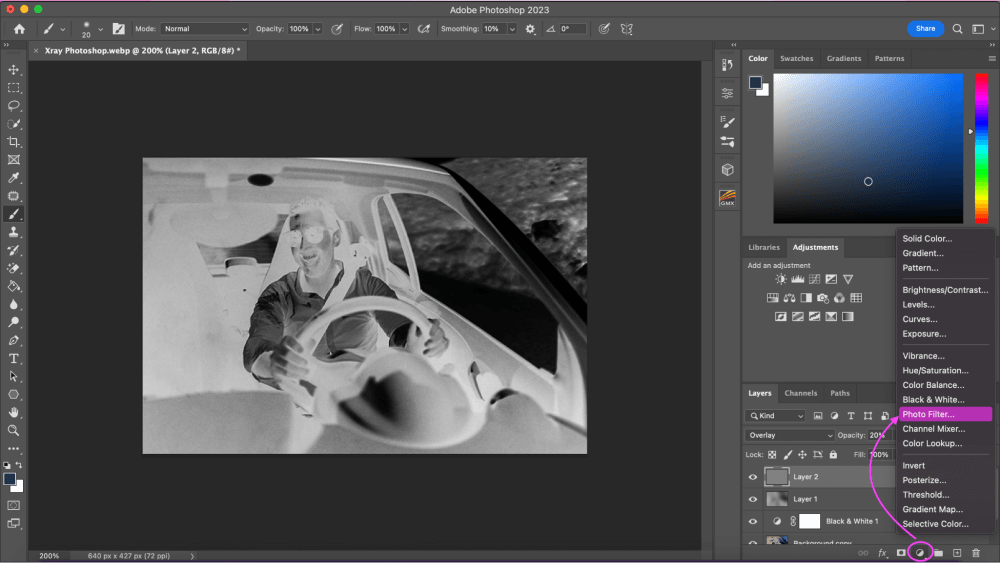
Change the Cyan filter and the Density setting in the Photo Filter menu to 10%–12%. This will produce the distinctive cyan color of X-ray images.
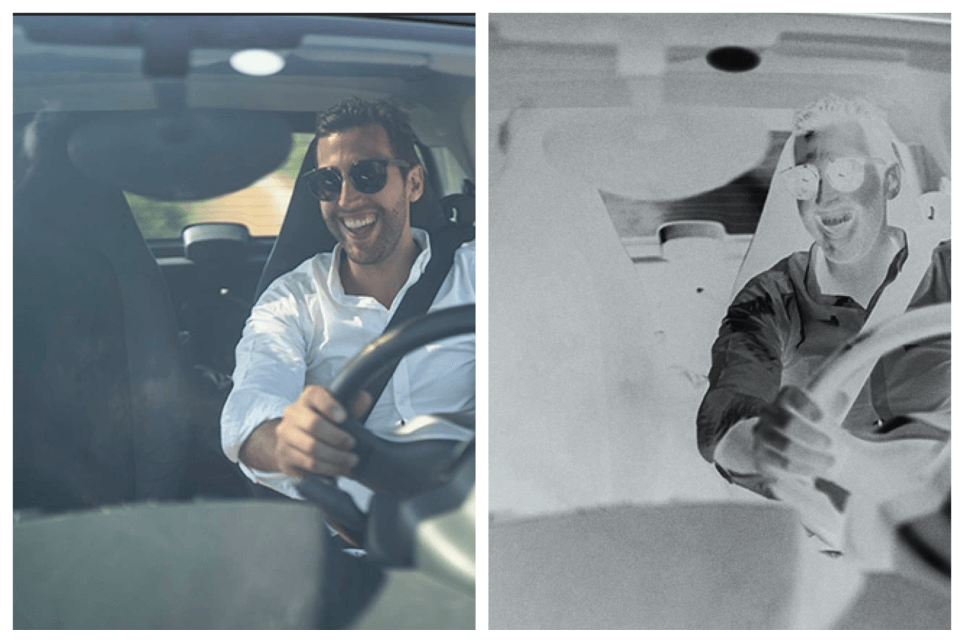
That was it! Now you have an X-Ray filter over your photo! Keep in mind that it depends on what your image is (Portrait, Landscape, Etc).
Here is a reference for my image for a before and after.
Bonus Tips
- Feel free to explore different levels of what works best for your photo. Maybe 10%-12% doesn’t fit your photo how you would necessarily like. Don’t feel that you have to keep the same levels as me. That’s just what worked for my image.
- You will need to work with the colors that work best with your image. Maybe you didn’t have much blue in your image, work with the colors you have. Play around with other filter properties other than Cyan if that’s the case for you.
Final Thoughts
Creating your image to look like an X-ray is a great tool to capture the viewer’s attention to more details that you might not see normally. It’s also just a great tool and it’s fun to see the outcome. Keep practicing with different images to see how the filter reacts.
Any questions about creating an X-ray filter in Photoshop? Leave a comment and let me know.
About Aly Walters