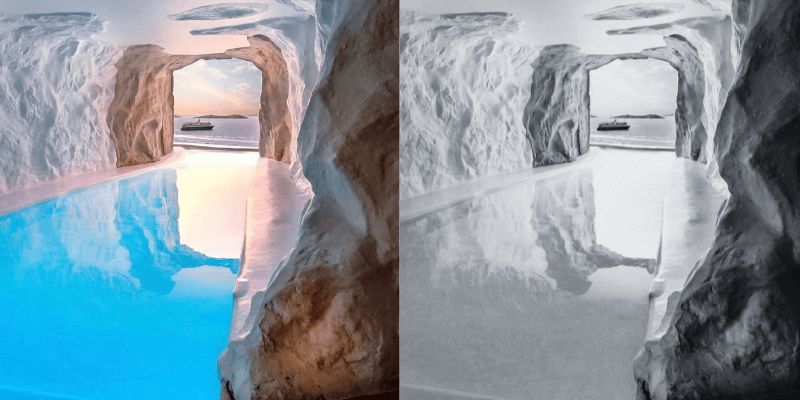
Desaturation is the removal of color or the reduction of color vibrancy in an image. Generating different effects when altering photos, might be a valuable tool in Adobe Photoshop. Use it to tone your photographs, create black-and-white images, or highlight a certain hue.
Making a color so strong that it resembles white or black is the process of saturation. On the other hand, desaturation lessens the intensity of a hue.
There are a few different ways to go about desaturating a photo in Photoshop. Whether you want to desaturate the entirety of the image or just a specific area I will show you how.
I have over five years of Adobe Photoshop experience and am Adobe Photoshop certified. In this article, I’ll teach you three ways to desaturate your photo in Adobe Photoshop.
Table of Contents
3 Ways to Desaturate an Image in Photoshop
Using this Photoshop technique carelessly could result in desaturating the incorrect color in your image. Before you start the desaturation procedure, be sure you’ve chosen the right color. Then choose one of the methods below to Desaturate your image in Photoshop.
Method 1: Using an Adjustment layer
Using an adjustment layer will work by knowing which color you are looking to desaturate.
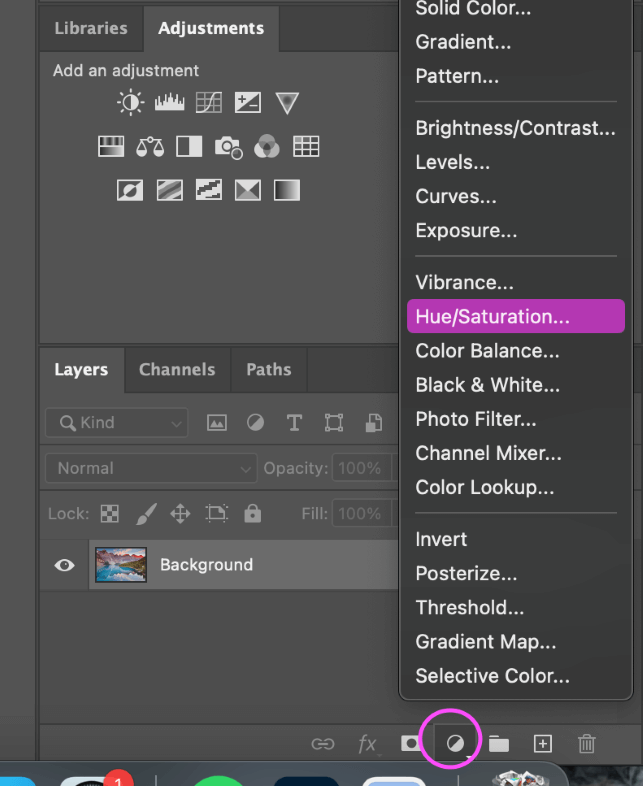
Step 1: Open your image in Photoshop first. Next, choose Hue/Saturation from the list of possibilities under New Adjustment Layer on the Layer menu.
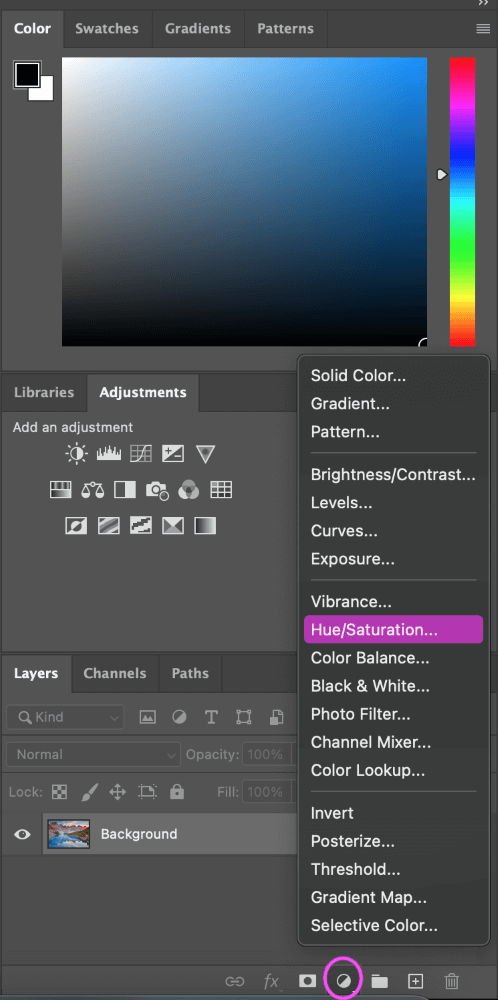
Step 2: Then, choose the color you want to desaturate from the drop-down option next to Hue. For instance, you would select Blues from the menu if you wanted to get rid of the blue hue from your image. Then, when the color is desaturated to your liking, drag the Saturation slider
to the left.
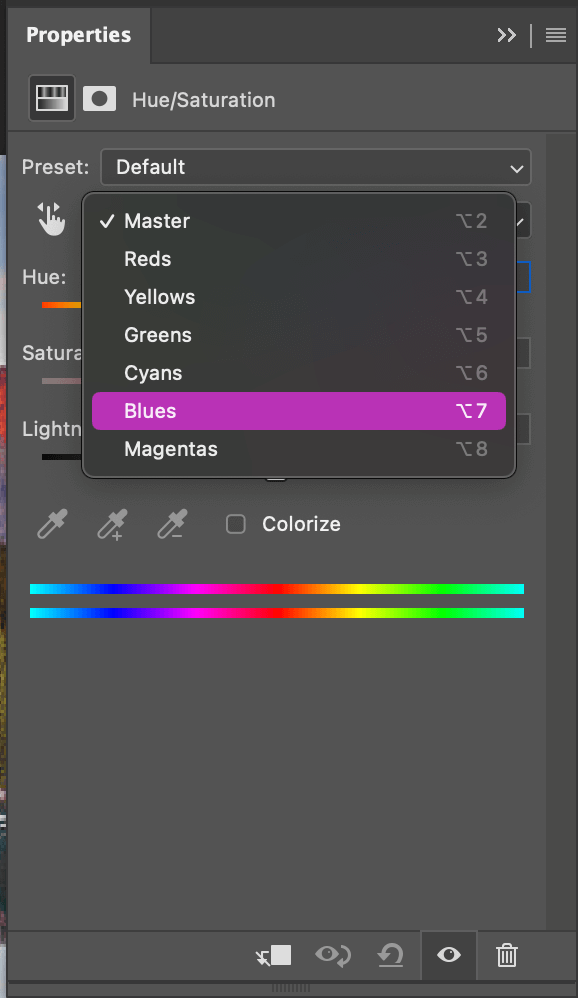
Step 3: To apply your changes, click OK at the very end.
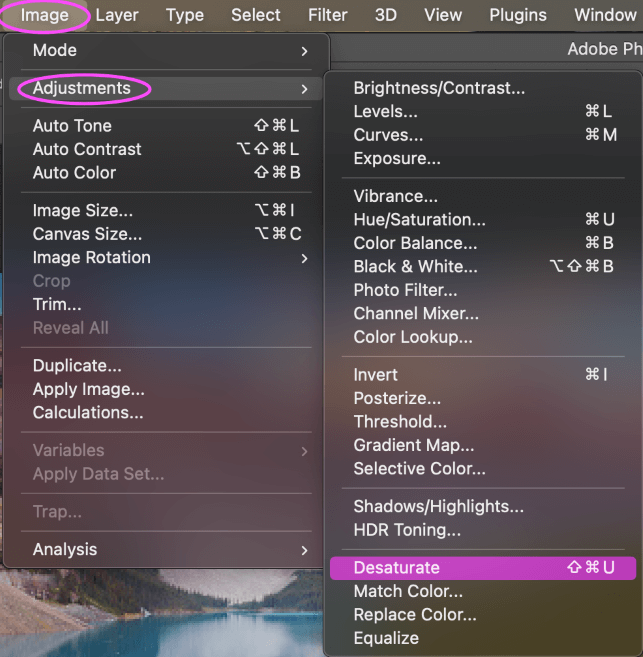
Method 2: Using The Desaturate Command In Photoshop
This method is great for having your entire image desaturated, compared to just a section.
Step 1: Have your image open in Photoshop and go to Image > Adjustments > Desaturate. Your image will be automatically desaturated as a result, thereby becoming a black-and-white photograph.
Instead of using the menus, you can also use Photoshop’s Desaturate shortcut keys. Shift + Command + U (Mac) or Shift + Ctrl + U (Windows).
Keep in mind that using this method is destructive, this implies that there is no way to return to a full-color version of your photograph. Instead, make sure to duplicate the background layer, then apply the adjustments to the copy layer.
Method 3: Selective Desaturation In Photoshop
To draw focus to a certain area of your shot, use selective desaturation. Using a layer mask, you just desaturate those areas in this approach.
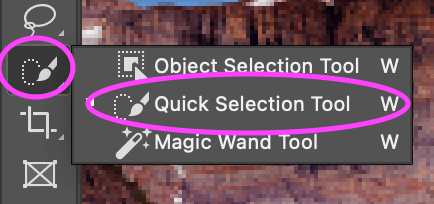
Step 1: Have your image open, and locate the Quick Selection Tool on the side menu. Once it’s selected draw around the section you wish to desaturate.
Step 2: With that selection active, add a Hue/Adjustment layer as shown. Use the slider to change the color that you are trying to desaturate. Use the information you learned in the above methods to do this.
Bonus Tips
- If one way isn’t working too well for your image, try a different method. Each method works differently on photos.
- Using an adjustment layer is the best way to get the most accurate results for an image.
Final Thoughts
It’s really that quick! Desaturating a photo is a very simple process, you will just need to decide which method will work best for your image. It’s a good idea to know how each method works along with the shortcuts so you can be quick to edit your photos in the future.
Any questions about desaturation in Photoshop? Leave a comment and let me know.
About Aly Walters