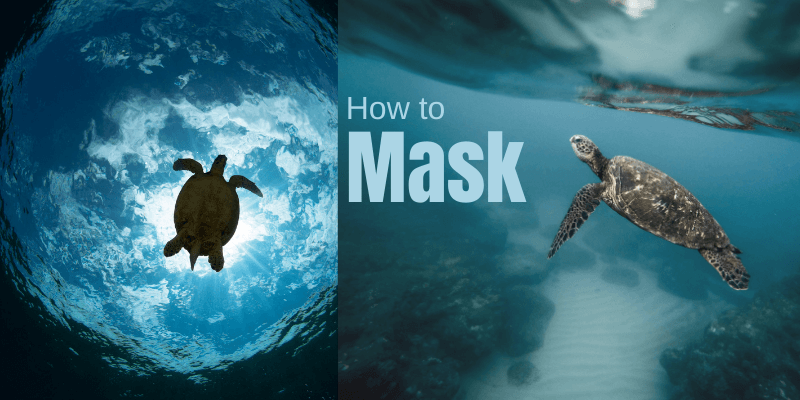
Layer masks in Photoshop are an incredibly useful tool. Unfortunately, some folks get scared off because they don’t understand how they work.
But, I get it. Masks were intimidating to me at first, too. It takes a bit to wrap your head around the concept. But, once you do, you’ll be awed by the magnificent mask as well.
Masking is one of the most essential techniques used in Photoshop, and every experienced image editor has their own favorite method of how to use it.
Masks give you the ultimate degree of control over your layer contents while still preserving all your original image data, which makes them an essential part of any non-destructive editing workflow.
For those of you who are totally new to masking and want a detailed explanation of how it all works, I’ve got you covered. First, we’ll take a quick look at how manual masking works for readers who are in a rush to get started, and then I’ll explain how masking works in much more detail, and give you some helpful tips to speed up the process.
Let me show you how they work!
Note: the screenshots below are taken from the Windows version of Adobe Photoshop, if you’re using the Mac version, the navigations may look slightly different.
Table of Contents
Why Use a Layer Mask in Photoshop?
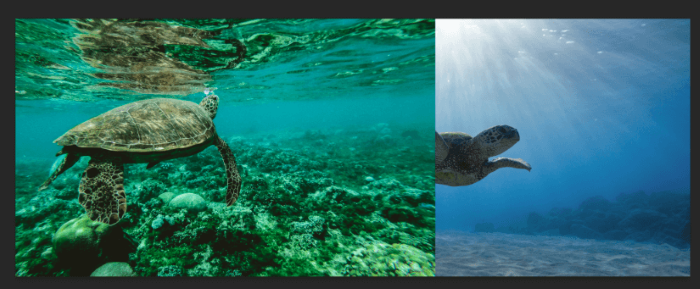
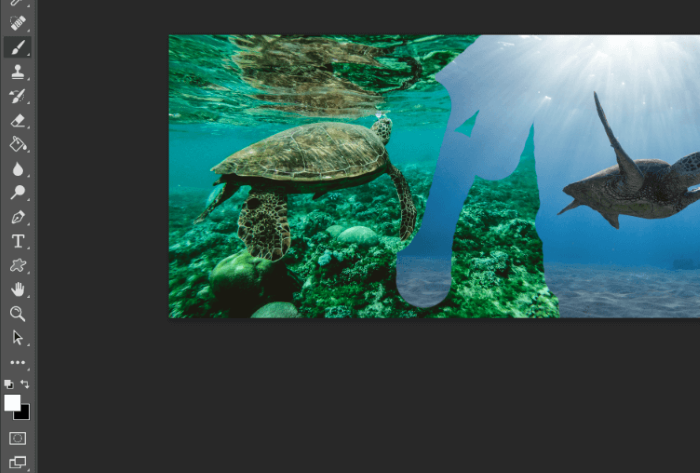
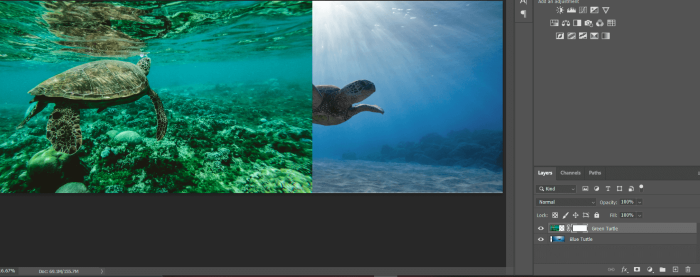
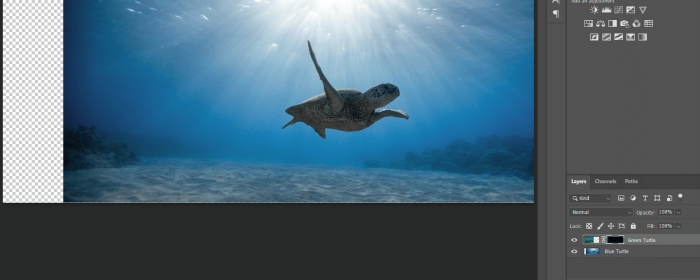
One of the best reasons to use layer masks is that they allow you to make non-destructive edits. For example. Take a look at these two turtles I have in this image. For example, let’s remove part of the image on the left so that it isn’t covering up the turtle image on the right.
You could crop the layer using the Marquee tool or another selection tool (see detailed explanation here). However, that would be a destructive edit because it irreversibly deletes the pixels. In other words, if you make a mistake, you can’t go back and adjust it later.
(I know you can undo it, but I’m talking about after you’ve made other edits, then notice the mistake. Photoshop only tracks a certain number of adjustments so you might not be able to get back to it. Plus, you would have to undo everything you did in between).
You could also use the Eraser tool, which people like because it is a simple tool to understand. It works just like a pencil eraser and we can wrap our heads around that.
But, it has the same problem. Just like a pencil eraser, the edit is destructive. Once you’ve erased the pixels, they’re gone and you can’t get them back.
Using a layer mask, however, is a non-destructive edit. Let’s look at how it works.
Understanding the Layer Mask
Let’s set up a demonstration so you can see how this works.
The term “masking” originally comes from painting, when painters would cover sections of their canvas, hiding the sections or ‘masking’ them, to control where their paint was applied.
Of course, painters originally got the term from the theatre where actors used masks to transform their identities, but we don’t need to go too far down the etymology rabbit hole.
The Photoshop concept is derived from the painting technique, except that Photoshop masks are often referred to as “layer masks” since each mask only applies to a single layer within your overall document.
A layer mask is linked to another existing layer, and the mask acts as an invisible guide that controls which parts of the layer are visible using black, white, and gray pixels.
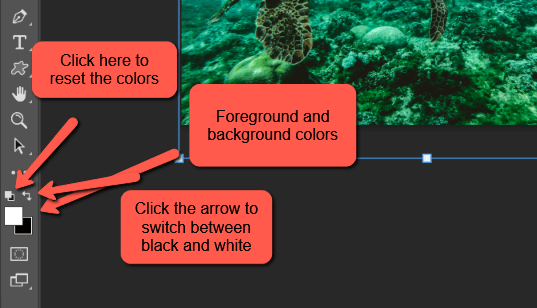
The Colors of the Layer Mask
Now, layer masks work in grayscale. White reveals, black conceals, and gray does something in between. The darker shades of gray are more opaque whereas lighter shades of gray are more transparent.
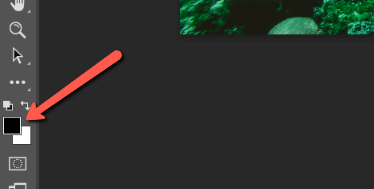
On the left side of Photoshop, you’ll see two colored boxes. By default, they should be black and white. If they’re not black and white, click the smaller black and white boxes directly above them to reset.
Remember, white reveals and black conceals. So when the white box is in front, you’ll reveal the image as you paint. When the black box is in front, you’ll conceal it.
Don’t worry if you’re lost, this will make sense in a minute.
To switch between the two colors you can press X on the keyboard or click the 90-degree arrow above the boxes.
Here’s an example.
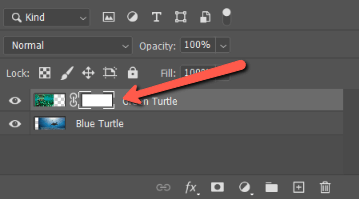
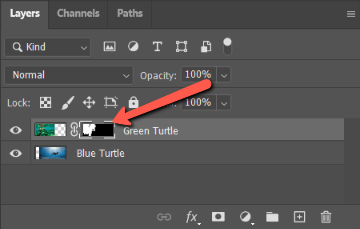
With the top image layer selected, in this case, the green turtle, click the layer mask button at the bottom of the Layers panel. It looks like a rectangle with a circular hole in the center.
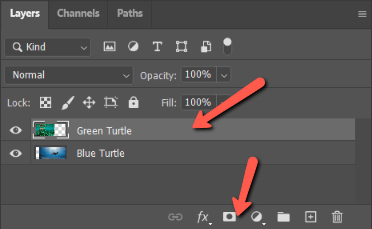
A white layer mask appears linked to the green turtle layer. In a minute we’ll talk about how a black layer mask works.
If you add pure white pixels on a layer mask, the corresponding section of your layer becomes opaque and visible. If you add pure black pixels, the corresponding section of your layer becomes transparent. You can also get partial opacity by using grayscale tones, which allows you to create soft transitions.
This means that you can show and hide parts of your layers without actually deleting any of the pixel data!
If you decide that you’ve hidden too much of the layer, you can just tweak the layer mask to refine your edit instead of going back to the beginning and starting the entire editing process all over again.
Things get really exciting when you add layer masks to adjustment layers since this allows you to completely alter the contents of specific parts of your image without destroying the original image data – but we’ll get to that later!
Terminology Tip: Protected Vs Unprotected
The “protected” area of a mask is the part that is hidden or preserved in its current state, while the “unprotected” area of a mask is visible and affected by any adjustments that you make.
Painting with the Layer Mask
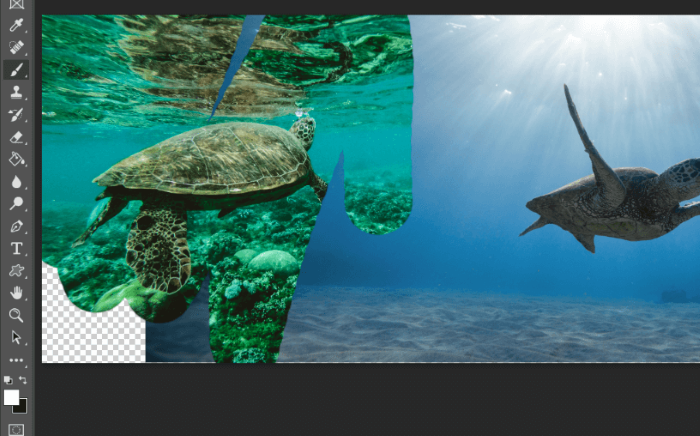
So we’re working with a white layer mask. Let’s start painting to understand what happens.
Hit B on the keyboard to switch to the Brush tool.
White reveals and black conceals. We want to remove parts of the green turtle image so we need to conceal them. Make sure the foreground color is set to black (the black square needs to be in front).
Now, start painting your image with a brush. Everywhere you pass the brush, the image is erased.

Let’s say you make a mistake and remove part of the image that you don’t want to remove.

No problem! Simply hit X to switch the foreground color to white. White reveals, so when you start to paint you’ll be bringing back the image.
You can do this at any point, even after you’ve made dozens of other edits and can no longer undo your moves. It even works if you’ve closed the image as a PSD and reopened it later. There’s no information to undo, but you can still bring back the image with the layer mask.
Inverting the Layer Mask
Layer masks also work in reverse, which is helpful in some cases.
Remember I pointed out earlier that we were working with a white layer mask? Now it’s time to see what happens with a black one.
Here’s what we’re looking at with a white layer mask on the green turtle. White reveals, so the green turtle image is visible.
Hit Ctrl + I (Command + I on a Mac) to invert the layer mask and turn it to black.
Black conceals, so the green turtle image disappears. You can make it reappear by painting the layer mask white.
Notice the white appears on the layer mask thumbnail in the layers panel.
Painting with Gray
Remember what I said about how masks work in grayscale? White reveals and black conceals and gray does something in between.
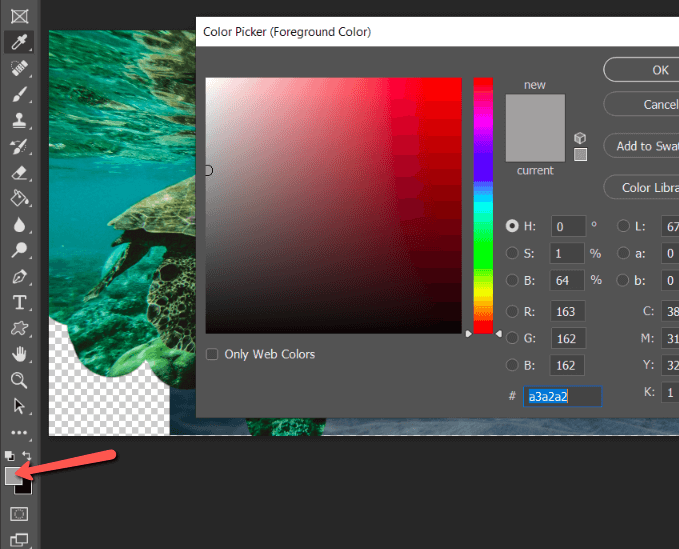
Try it out. Click right on the colored squares so the color picker appears and choose a shade of gray. Darker shades will be more opaque and lighter shades will be more transparent.
For this example, we’ve chosen a lighter shade of gray. Check out what happens when we paint the image with a black layer mask.

See how the effect is more transparent?
Creating Masks With Selections
If you’ve got a part of your image selected using one of the selection tools and you want to convert it into a mask, click the Add a mask button at the bottom of the Layers panel. When the layer mask is created, Photoshop will use your active selection as the visible unprotected area.
As you’ll see in the next section, Photoshop treats masks and selections very similarly, since from a technical standpoint they’re almost identical. This makes it easy to switch back and forth between the two (see the Manual Masking Quick Tips section below for more!)
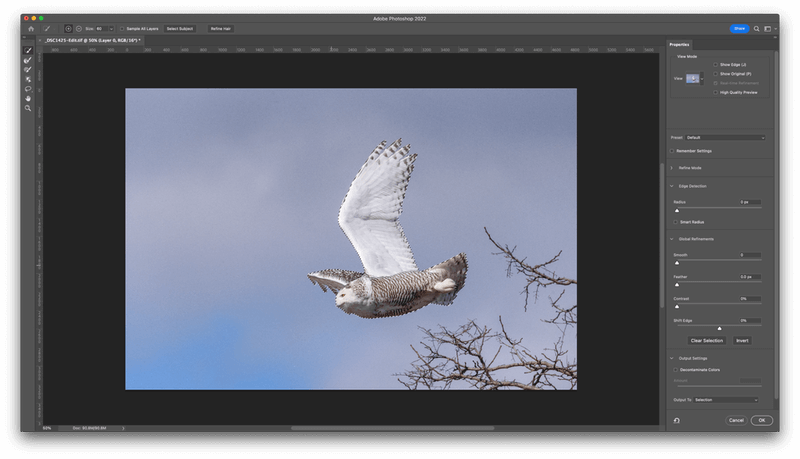
Advanced Masking Using The Select And Mask Workspace
Since masking plays such a large part in Photoshop editing processes, Adobe developed a specialized workspace just for creating selections and masks: the imaginatively-named Select and Mask workspace. This workspace is complex enough that it deserves its own article, but I’ll give you a quick overview of how it works here.
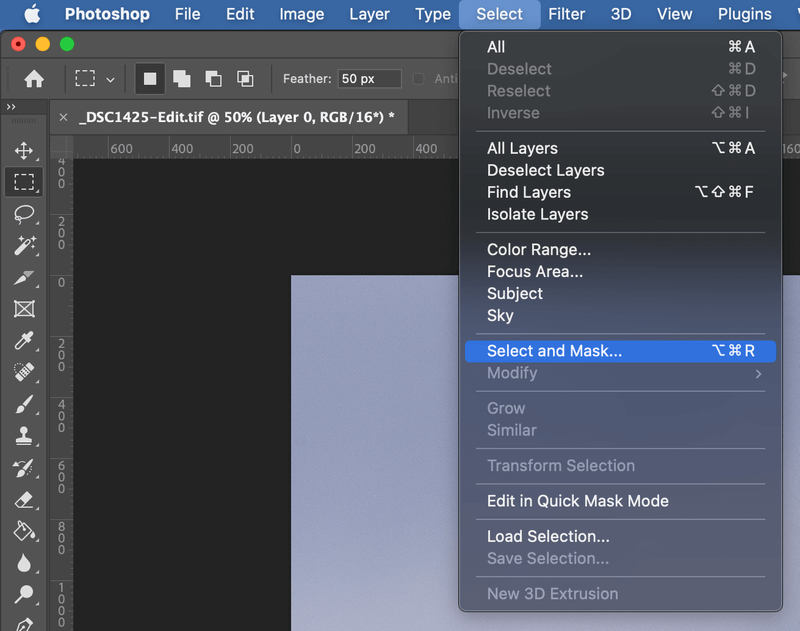
To launch the Select and Mask workspace, open the Select menu and click Select and Mask. You’ll also see a Select and Mask button in the tool options bar at the top of the document window when using any of Photoshop’s selection tools such as the Rectangular Marquee, Magic Wand, and so on.
The Select and Mask workspace is a streamlined interface that allows you to focus on the task at hand while maintaining the same general Photoshop interface layout that you’ve come to know and love: tools on the left side, tool options along the top of your main document window, and document-wide settings on the right side.
While using Select and Mask, it looks like you’ll be creating a selection around your object, but don’t worry – when it’s time to output the result, you can tell Photoshop to create a new layer mask instead of keeping the result as a selection. Once again, masks and selections are very closely related in Photoshop!
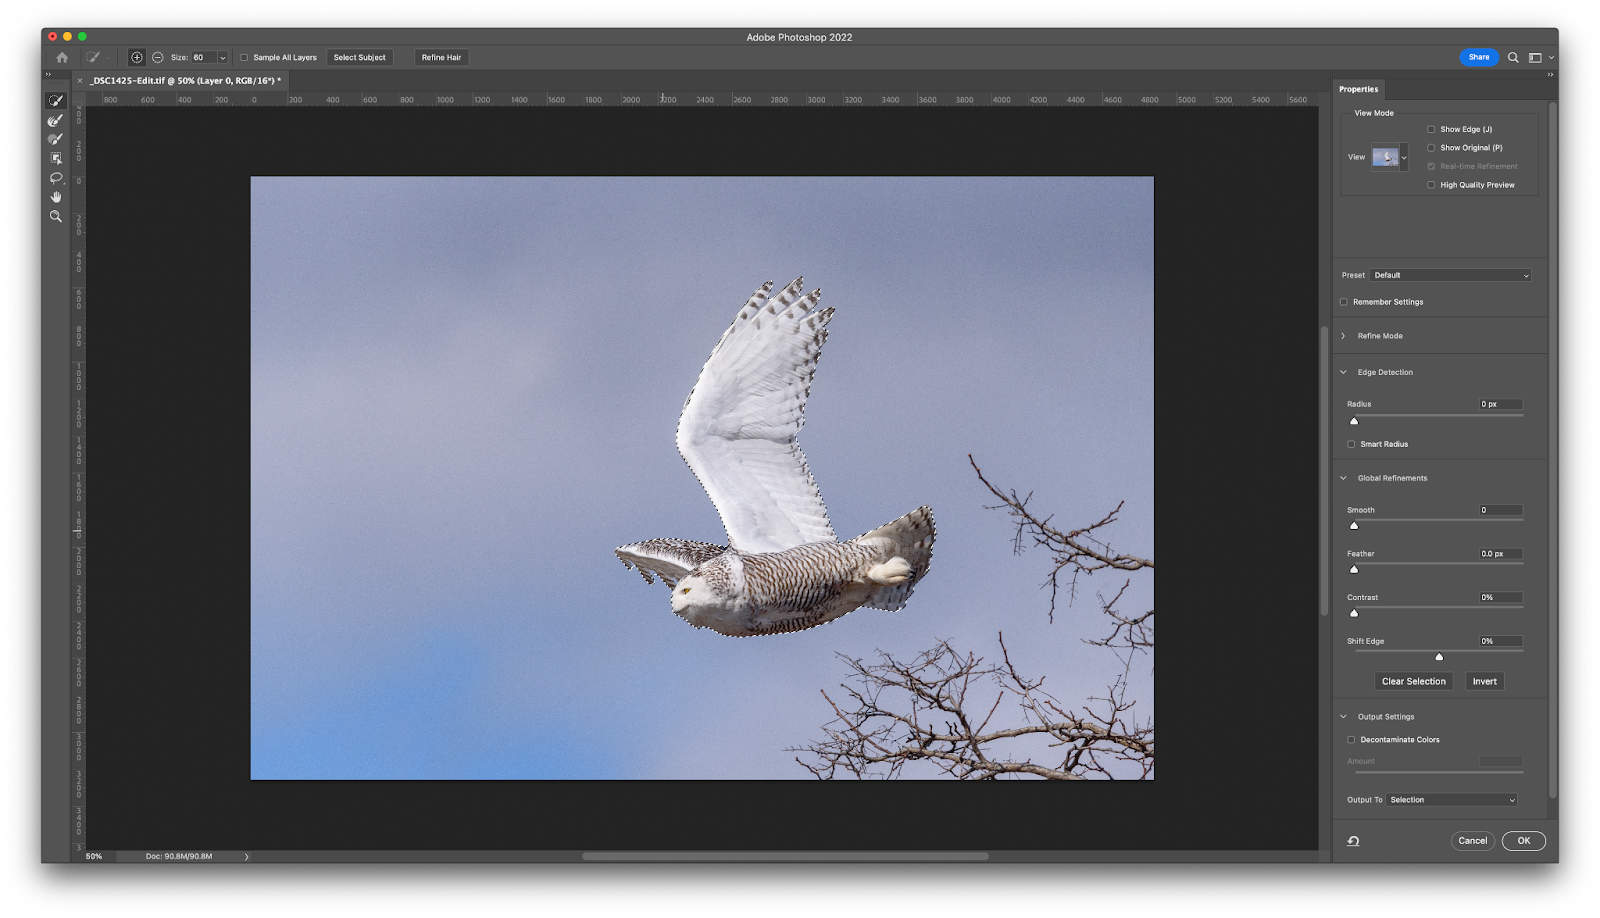
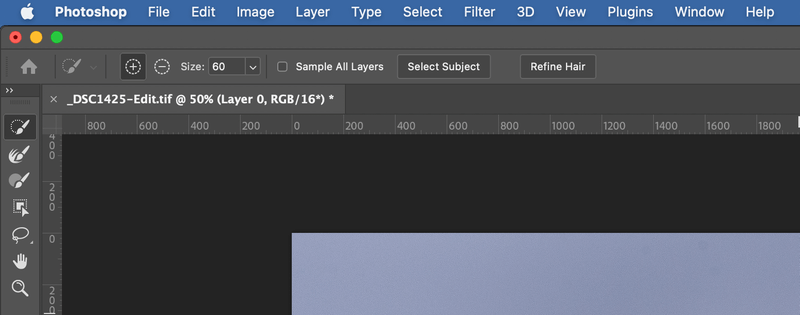
To create your selection/mask, it’s often a good idea to try using the Select Subject button at the top of the workspace. This doesn’t always work perfectly, especially with complex scenes full of details, but it can be a huge timesaver by automating the more basic masking sections and giving you a good place to start working from.
Use a combination of the Quick Selection tool and the Brush tool to create your selection. By default, using those tools will add to your already selected area, but you can hold down the Option key (use the Alt key on PC) to subtract from your selected area.
You can also use the Refine Edge tool to help overcome tricky object edges such as hair, fur, branches, and other fine details that are difficult to mask by hand.
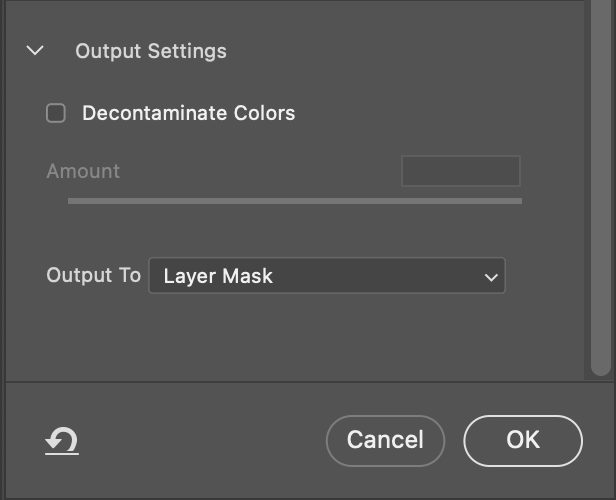
To finalize your mask and exit the Select and Mask workspace, find the Output Settings section on the right side of the interface. Change the Output To setting to Layer Mask and click the OK button.
Vector Masking
Up until now, I’ve only discussed pixel-based layer masks. Pixel masks are by far the most common type of mask in Photoshop, but it is possible to add a mask that uses a vector shape instead. I tend to avoid them because Photoshop’s vector tools are extremely basic, but they do have their uses.
To add a vector mask to your layer, there are a couple of options:
- If you’ve already got a pixel mask attached to your layer, simply click the Add a mask button at the bottom of the Layers panel for a second time, and Photoshop will add a vector mask.
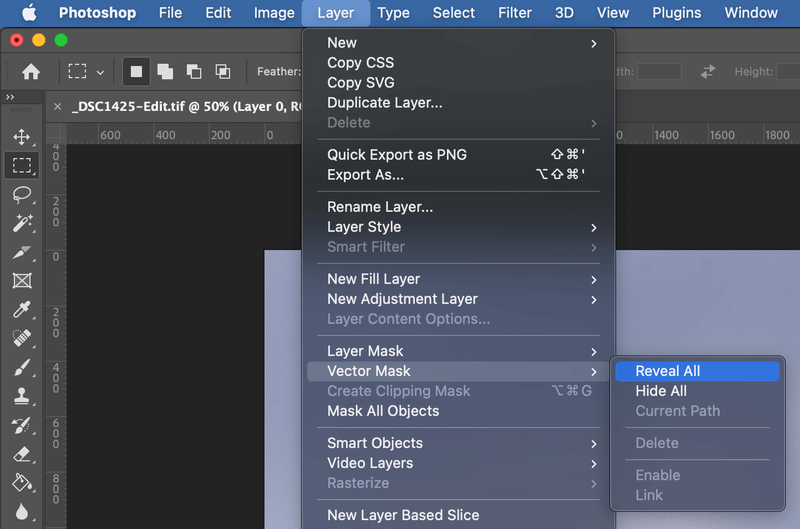
- You can also add a vector mask without adding a pixel mask. Select your layer in the Layers panel, then open the Layer menu, select the Vector Mask submenu, and click Reveal All.
I’m not sure why Photoshop switches back and forth between the “add” and “reveal” terminology for layer masks, but it seems unnecessarily confusing from a user experience perspective, and I bet that Adobe will adjust this at some point.
Instead of using the Brush tool the way you did with a standard layer mask, use the Pen tool to place anchor points to create shapes within your vector mask.
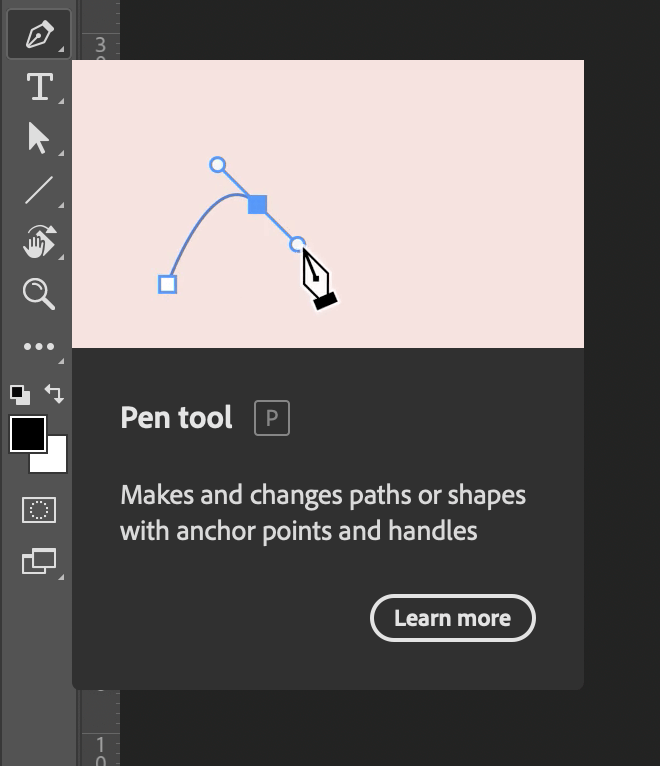
Switch to the Pen tool using the toolbox or the keyboard shortcut P. With your vector mask selected in the Layers panel, click to set the first anchor point on your outline, and then continue clicking to add additional anchor points until you’re satisfied with your mask.
You can click and drag while placing a new anchor point to create a curve, and you can hold down the Command key (use the Ctrl key on PC) to temporarily convert the Pen tool into the Direct Selection tool which lets you reposition each anchor point and adjust the curve handles.
You’ll see the Pen tool cursor change when you hold down the Command / Ctrl key for visual confirmation.
Manual Masking Quick Tips:
- Option + Click (use Alt + Click on PC) on your layer mask thumbnail to see your mask in the main document window
- Shift + Option + Click (use Shift + Alt + Click on PC) on your layer mask to see your mask in a 50% transparent red overlay, or use the \ key
- Command + Click (use Ctrl + Click on PC) on your layer mask thumbnail to create a selection around the unprotected areas of your mask
Bonus Method: Quick Mask Mode
Before the Select and Mask workspace was introduced, and even before there were object-based automatic selection tools, there was Quick Mask mode. Quick Mask does more or less what it says on the tin: use one keyboard shortcut and you can use brush-based tools to draw a mask with a temporarily-visible overlay.
A bit confusingly, Quick Mask actually creates a selection, but those of you who took the time to read this post carefully will already know that Photoshop handles masks and selections almost identically. Once you’ve created your selection, there’s only one more step to turn it into a permanent layer mask.
To enter Quick Mask mode, use the keyboard shortcut Q. You’ll see that your selected layer turns red in the Layers panel, and a new History state is created.
You can also launch Quick Mask mode by opening the Select menu and clicking Edit In Quick Mask Mode, or by using the toolbox icon located just below the color swatches (see below).

Set your foreground and background colors to the default with the keyboard shortcut D, and then switch to the Brush tool using the toolbox or the keyboard shortcut B.
In Quick Mask mode, protected areas are shown with a red overlay. Painting an area with black pixels tells Photoshop to protect that part of the image, and it can be a bit disorienting at first to know that you’ve got black selected as your foreground color and have it come out as 50% transparent red, but you’ll quickly get used to it.
If you want to tweak your mask, you can paint using white to reverse the effect and designate an area as unprotected.
Remember, you can use the keyboard shortcut X to quickly switch your foreground and background colors, which is a real timesaver when masking!
A Final Word
As you might have begun to realize, masking plays a huge part in any good Photoshop workflow. The basic idea is simple, but it will take a lot of practice for you to get comfortable working with masks, so the best advice I have is to load up your copy of Photoshop and start using the tools!
I hope this explanation has helped you wrap your mind around how layer masks work. But, you might not fully understand the implications until you put layer masks into practice.
Grab some images and start playing around. I promise, play with them long enough and you’ll hit an aha! moment where your mind will be blown by the awesomeness of layer masks.
About Cara Koch
Patrick Cosgrave
Hi Cara Thanks for a wonderful tutorial on PS.Your jargon free simple approach to this complex subject is genius itself I came upon your tutorials today and found them an answer to prayer.Why did Adobe in their early PS manuals do so much to alienate the potential users of their product and consequently limit demand? Teachers like you are needed to make photography accessible to all who have an interest in the subject
PFC
Omar Faruk
Photoshop Buzz has truly created a valuable resource for anyone who wants to elevate their design game. Whether you’re retouching photos, compositing images, or creating stunning digital art, mastering masks will undoubtedly amplify your creative possibilities.
I highly recommend this tutorial to both aspiring and seasoned designers. Take the time to delve into the world of masks in Photoshop, and you’ll unlock a powerful toolset that can drastically enhance your design workflow.
Kudos to Photoshop Buzz for providing such informative content, and I eagerly look forward to exploring more of their tutorials in the future.
Gascon
Thank you Cara. Your article was very on-point and useful without too much detail. Excellent work.