
What do you do if you can’t find the shape you want in Photoshop? Why not make your own? If you know how to draw or trace an object, you can make a custom shape.
Hey there! I’m Cara, the photographer who gets excited about sharing the secrets of Photoshop with you!
Today we’ll look at how to make shapes in Photoshop so you’ll always have the one you need on hand!
The screenshots in the tutorial below are based on Photoshop CC for Windows. If you are using Photoshop for Mac or other versions, they will look slightly different.
Table of Contents
The Basics of Making a Shape
Photoshop allows you to define a custom shape from a path. This is typically done with the Pen Tool in Photoshop.
However, the pen tool is a double-edged sword. It is beloved because no other Selection Tool allows you to be so careful and precise when making selections. But for the very reason, that it is so precise, it is also time-consuming to use.
Thus, if you need the precision of the pen tool to draw the shape, you can make your path with the Pen tool, then follow along from Step 3 of this tutorial. But when you want to speed things up and don’t need such pinpoint accuracy, start at Step 1.
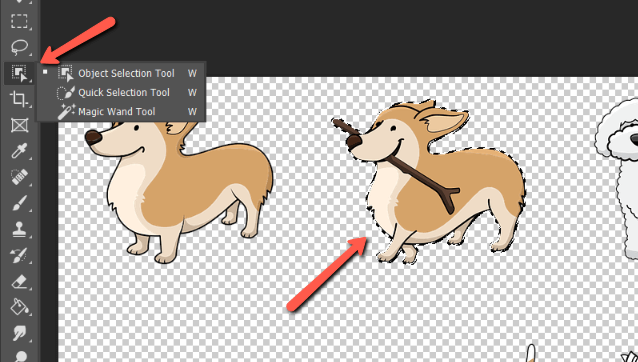
Step 1: Create a Selection
You need a path to make a custom shape. You can’t make a shape from a simple selection. However, you can make a path from a selection, which will be our workaround.
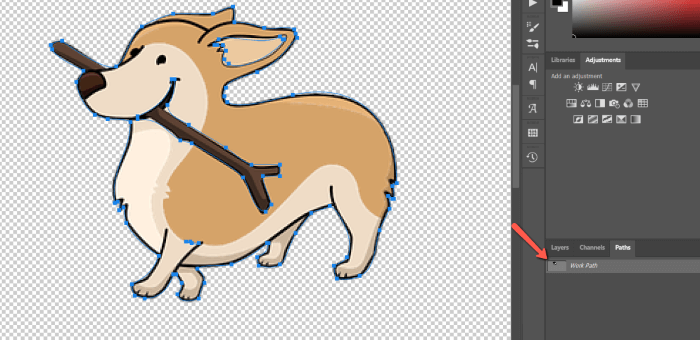
Let’s look at this PNG image. With the Object Selection Tool, all it took was one click to select this little puppy and his stick. Much more efficient than the pen tool in this case.
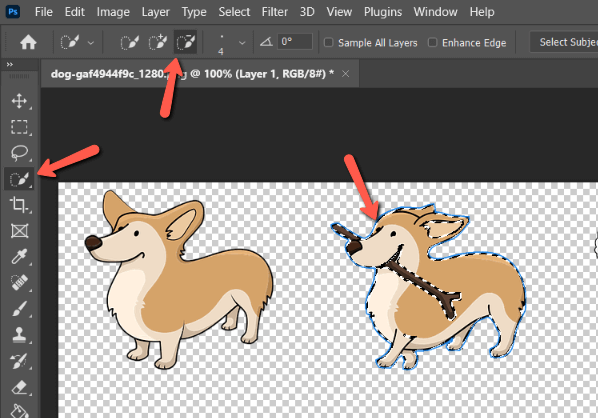
Refine the selection to make your shape more recognizable. For example, in this image, we want to cut out the eyes, the stick, and maybe the inside of his ear to give the puppy a more recognizable shape.
For this, you can use the Quick Selection Tool and use the subtraction setting to remove parts of the selection.
Step 2: Convert to a Path
To convert the selection to a path, go to Window in the menu bar and choose Paths. The checkmark next to the name indicates that the panel is active.
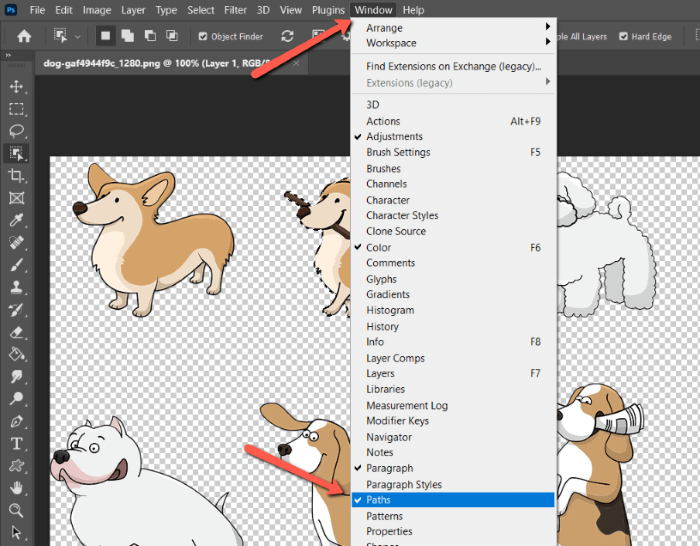
The Paths panel appears behind the Layers panel. Since there are no paths yet in the document, the panel is empty. Click on the three horizontal bars in the upper right corner.

Choose Make Work Path from the menu that appears.
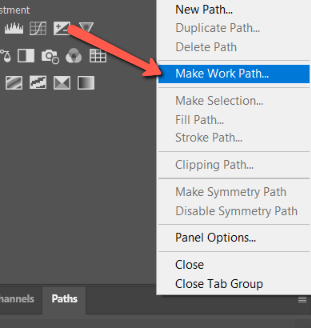
Photoshop will then ask you to choose the tolerance. Keep it low, around 1-2 pixels. When you click OK the selection will turn into a path and you’ll see it appear in the Paths panel.
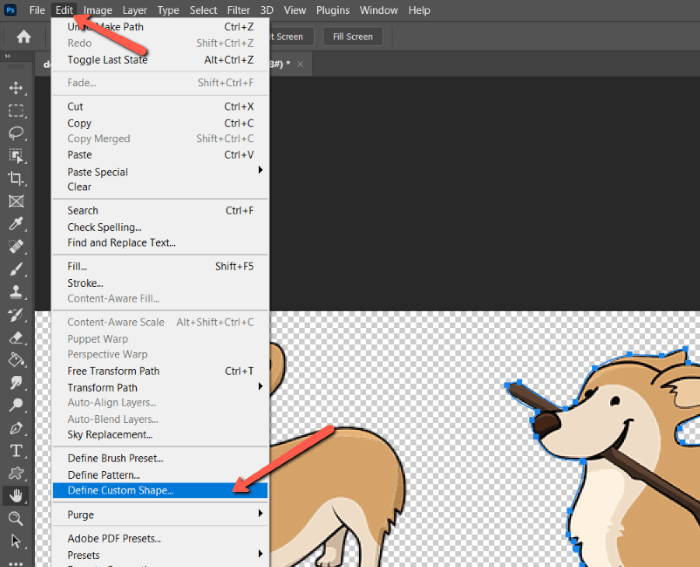
Step 3: Define Custom Shape
To turn the path into a custom shape, go to Edit in the menu bar and choose Define Custom Shape.
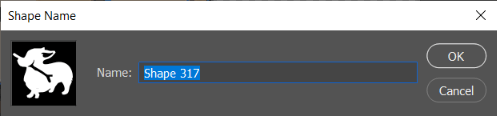
From there, give your custom shape a name and press OK.
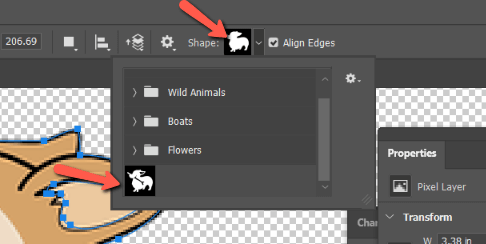
Now you can access this new shape in the Options bar when the custom shape tool is active.
And just like that, you’ve got a custom shape – even if you can’t draw to save your life like me!
Have fun with this newfound skill, there’s a lot you can do with it!
Interested to learn more cool tricks in Photoshop? Check out how to make a metallic text effect here!
About Cara Koch