Photoshop comes with a handy Crop tool that allows you to quickly crop the canvas you’re working with. But you can only crop the entire canvas, not a single layer of your project.
Hi! I’m Cara, as a product photographer, I use Photoshop to put images together all the time. Sometimes, I need to be able to crop an individual layer. Though the Crop tool won’t work for this, there are other methods I can use.
Tag along to see how I do it and you’ll be trimming away the excess in your layers in no time!
Note: the screenshots below are taken from the Windows version of Adobe Photoshop, if you’re using the Mac version, the navigations may look slightly different.
There are a few methods we can use to crop individual layers in Photoshop. The one you’ll use depends on what you’re trying to accomplish with the crop. I’ll show you three methods here and you can decide which one works best for you.
Table of Contents
Method 1: Marquee Tool
The simplest method is to use the marquee tool. It’s almost like using the crop tool when you think about it. You just have to make sure a couple of things are set correctly so the tool behaves as you want it to.
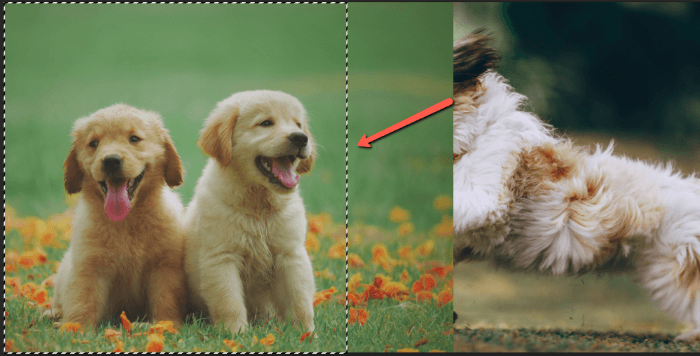
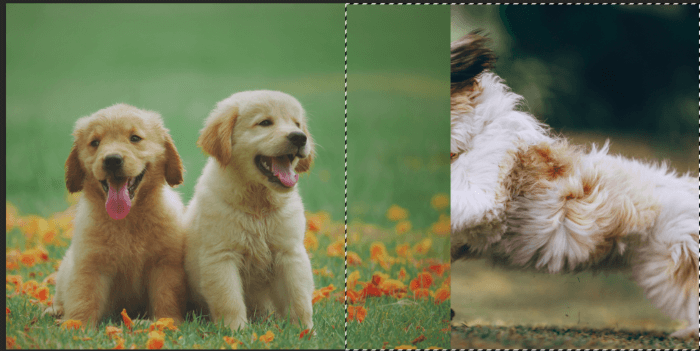
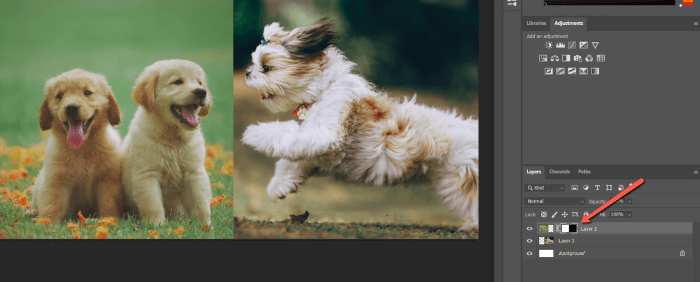
As an example, I’m going to work with these two images.

The right side of the puppy’s image is covering the other dog’s face. Resizing the puppy image won’t work because I want the dogs to stay the same size. I actually need to cut off the right edge of the image.
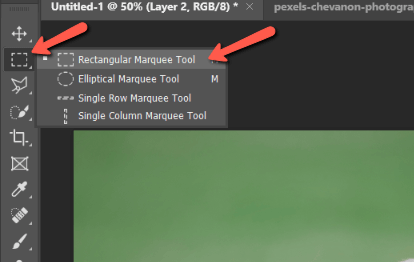
Step 1: Select the Marquee Tool
Select the Marquee tool from the toolbox on the left side of the screen. You can also hit M on the keyboard to access this tool quickly. You have the option of a rectangular or elliptical shape. I’ll choose the rectangular shape for this image.
Step 2: Make a Selection and Invert
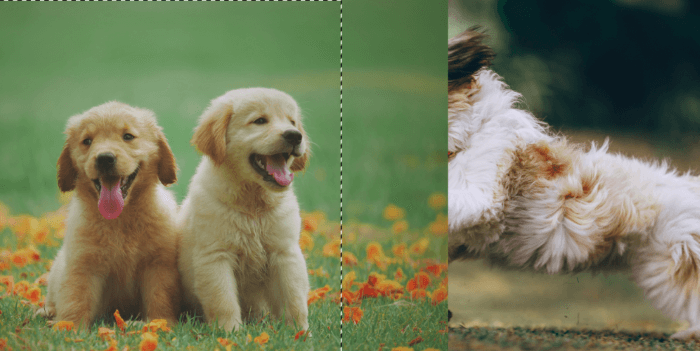
Click and drag to make a selection around the part of the layer you want to keep.
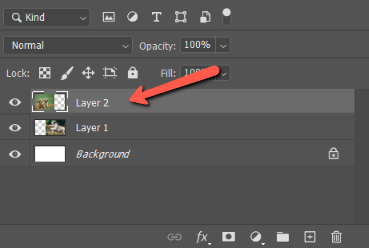
Make sure you’ve selected the correct layer in the layers panel as well.
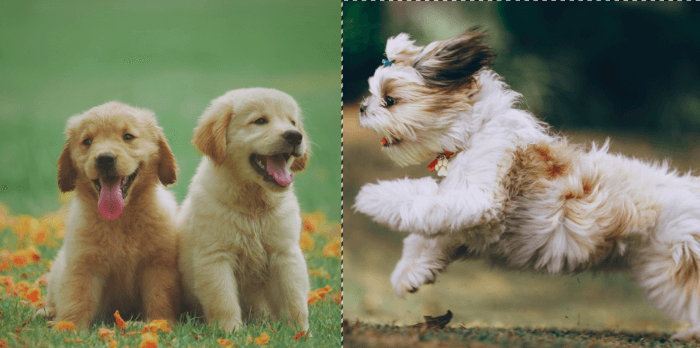
Now, the selected portion is inside the box, so if I hit delete now it’ll delete the puppies. Hit Ctrl + Shift + I (Command + Shift + I on a Mac) to invert the selection. Now everything outside the box is selected.
Step 3: Make the Cut (Destructively)
Even though the selection goes around the running dog, don’t worry, it won’t affect that image because I’ve selected the puppy layer.
Hit the Backspace or Delete and the Shih Tzu’s face appears!
Alternative Step 3: Make the Cut (Non-destructively)
Deleting the excess is a destructive edit, which means you can’t undo it later. If you want to give yourself more flexibility to correct mistakes later, you may choose to use a layer mask instead.
Make your selection with the Marquee, but don’t invert it. Stick with the puppies being selected.
Now, hit the layer mask icon at the bottom of the Layers panel.
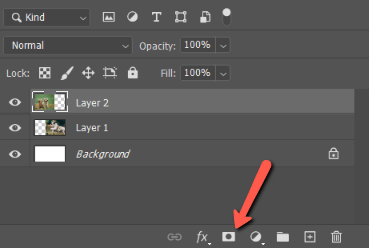
This creates a layer mask that hides everything outside your selection. You can make adjustments to this whenever you like.
If you don’t want a hard line between the two images, check out our tutorial on feathering a layer.
Cropping with the Marquee tool is quick and easy. The only problem is that you’re limited to elliptical or rectangular shapes. If you need a custom-shaped crop, read on!
Method 2: Custom-Shaped Cropping
This method follows the same rules as what I just explained with the Marquee tool. However, you need to use a different selection method to get the shape you want.
The Pen Tool and the Lasso or Polygonal Lasso Tool are both good options. Choose whatever method works for your image and create your selection.
Then, follow the same steps detailed above. Either invert the selection and delete it or create a layer mask for a non-destructive crop.
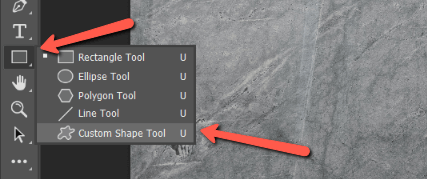
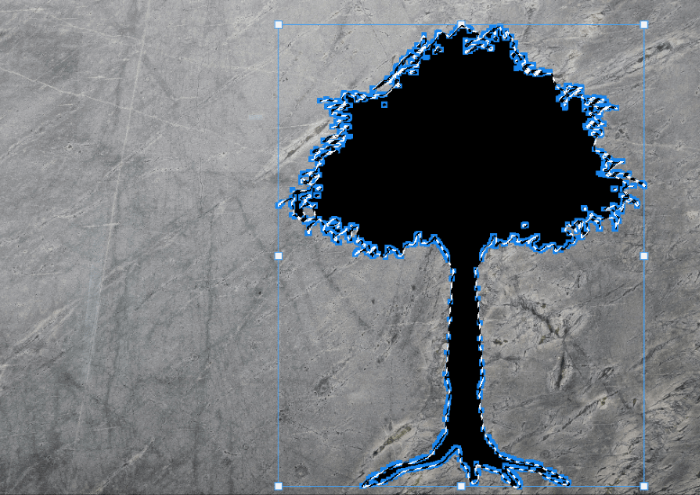
Method 3: Cropping in Cool Shapes
This last method is a creative take on cropping. Photoshop allows you to crop images into creative shapes using the shape tool. Check this out.
Select the Shape Tool from the toolbox on the left of your screen. There are several options available including Rectangle, Ellipse, Polygon, Line, and Custom Shape tools. Let’s grab the Custom Shape Tool.
In the options bar, you’ll see Photoshop’s default shape options. You can also download other shapes from the Internet if you’re looking for something specific.
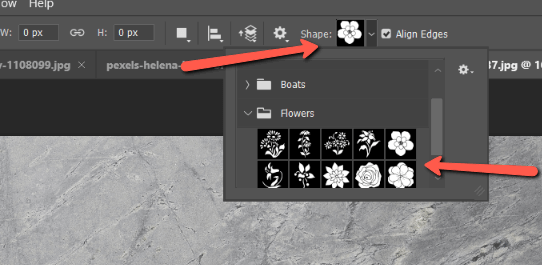
Once you’ve picked your chosen shape, click and drag to position and resize the shape on your image. You’ll notice it is placed as a new layer on top of your image.
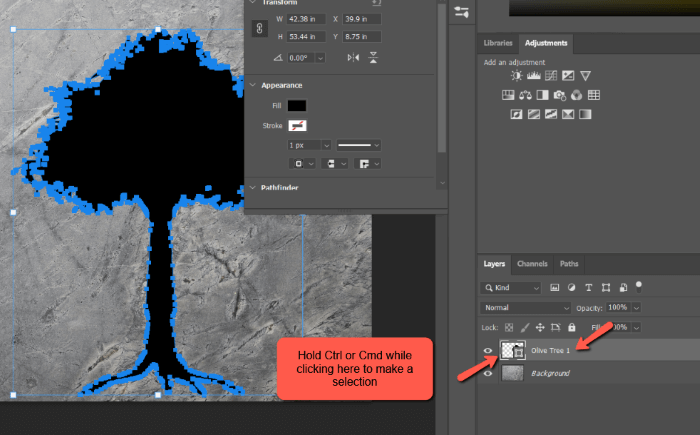
Hold Ctrl or Command and click the thumbnail for your shape’s layer. This will create a selection.
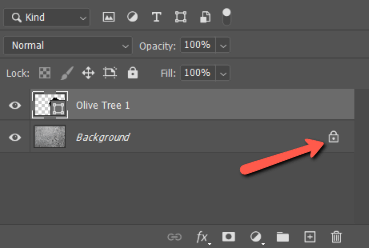
Before you delete the background, remember to unlock the background layer. If you don’t, you won’t be able to make the background transparent.
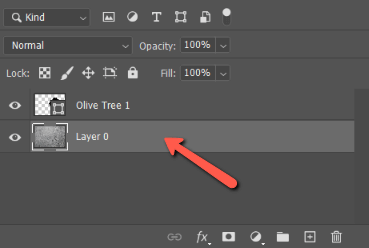
With the image layer highlighted, hit Backspace to delete the rest of the image. Then, click the eye icon next to the shape layer to turn it off.
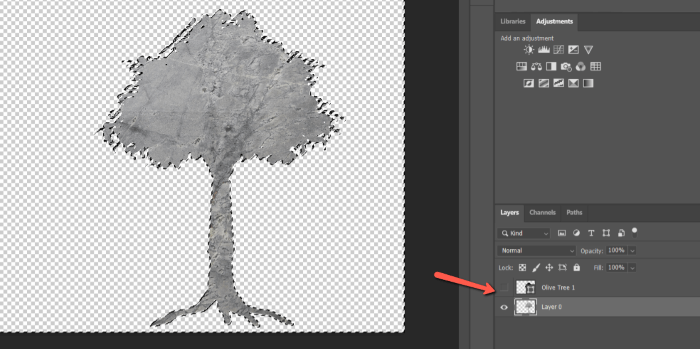
Now you have an interesting-shaped crop that you can use for image manipulation or other designs. Have fun and let us know what you come up with!
Curious about how to do more stuff in Photoshop? We’ve got all sorts of great content. Learn more about working with layers and check out our piece on moving multiple layers at once in Photoshop!
About Cara Koch