
Curious about what would the zombie version of yourself look like? Or want to make a joke and make your friend’s portrait look like a zombie? Well, today you are going to have so much fun with this tutorial because you can get really creative and dramatic with your zombie look!
There’s so much you can do to turn a portrait into a zombie. in this tutorial, I’m going over the very basic techniques and you can continue to explore from there.
If you’re not super familiar with working with layers in Photoshop, I highly recommend you take a few minutes to study how to use the Layers panel before you start zombifying yourself or your friend, because it’s a more advanced tutorial.
Turning a Portrait into Zombie in Photoshop
You’ll need to download some stock images to help the zombifying process and finding images with the right angles that align with your portrait is one of the most important steps.
Note: All screenshots are taken from Adobe Photoshop CC Mac version. Windows or other versions can look different.
Step 1: Open a portrait photo in Photoshop. I highly recommend using a photo in that the person looks tired or with no facial expression. No, definitely not a smiling face lol
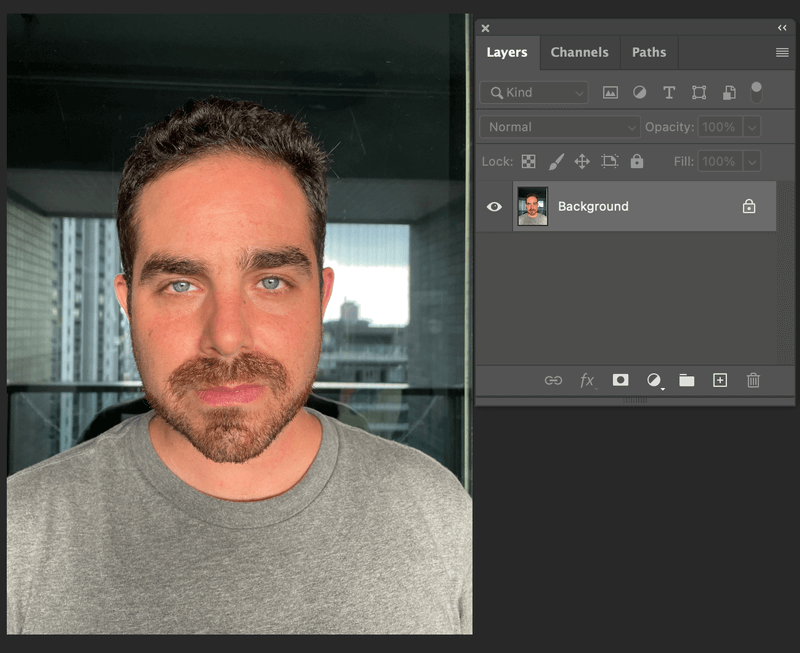
Step 2: Unlock the background layer, and remove the image background. If you’re using the same Photoshop version as me, you can quickly remove the background from the Properties panel > Quick Actions > Remove Background. The background layer should automatically become Layer 0.

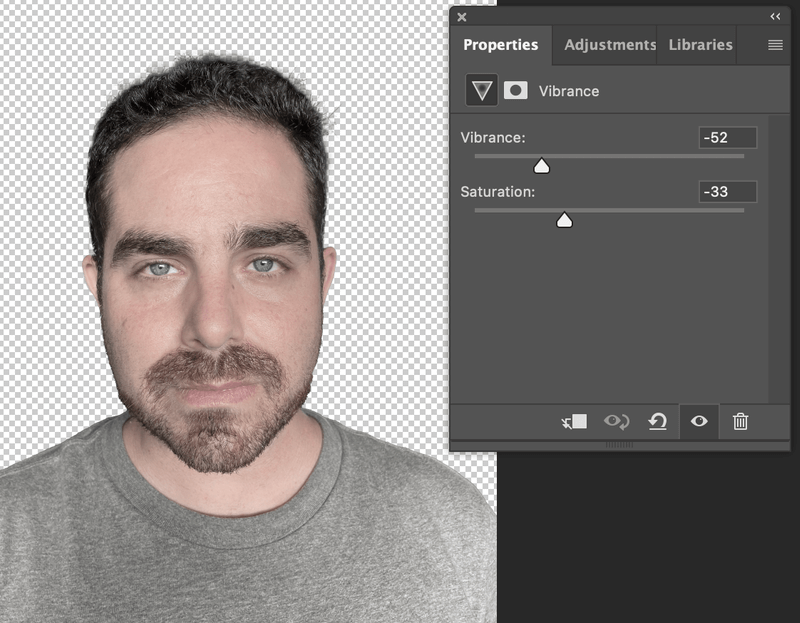
As you can see that his skin looks very alive, so the next step is to adjust the skin tone.
Step 3: Add an adjustment layer and select Vibrance. Move both the Vibrance and Saturation sliders to the left side to reduce the liveliness of the portrait.
Step 4: Go back to the Layers panel, add another adjustment layer, and select Hue/Saturation.
Now it’s up to you what color you want the skin tone to be. I’m going to make it green-ish.
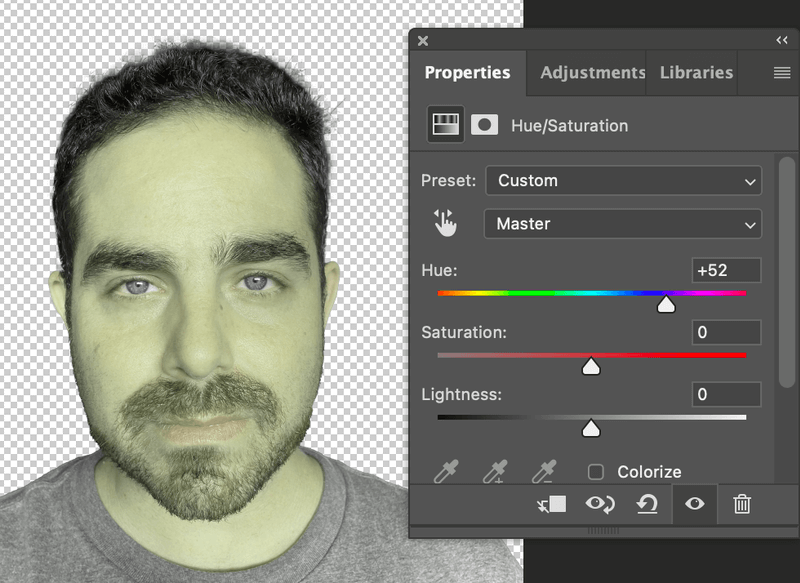
Tip: You can add a solid color layer underneath the image as a background, it will help you show the effect better. I chose a dark grey color.
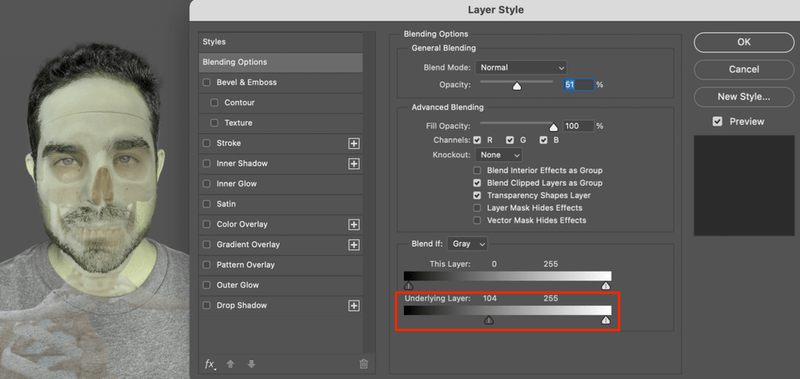
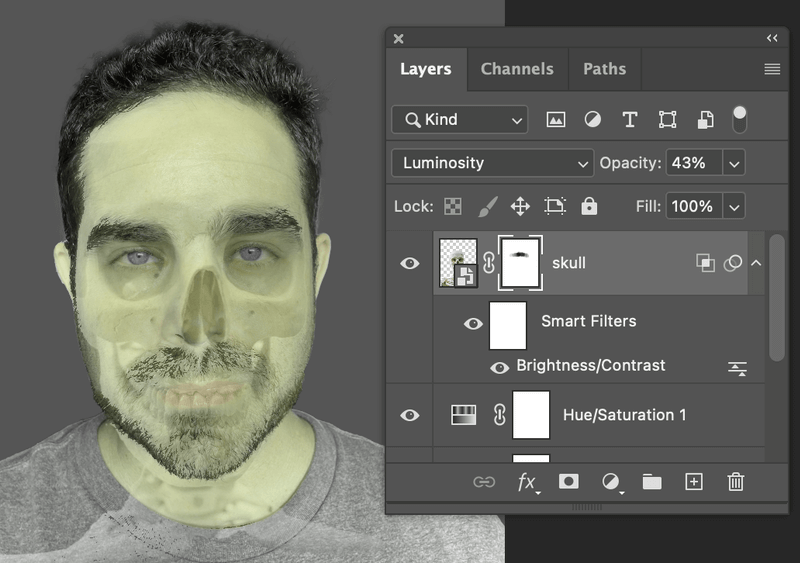
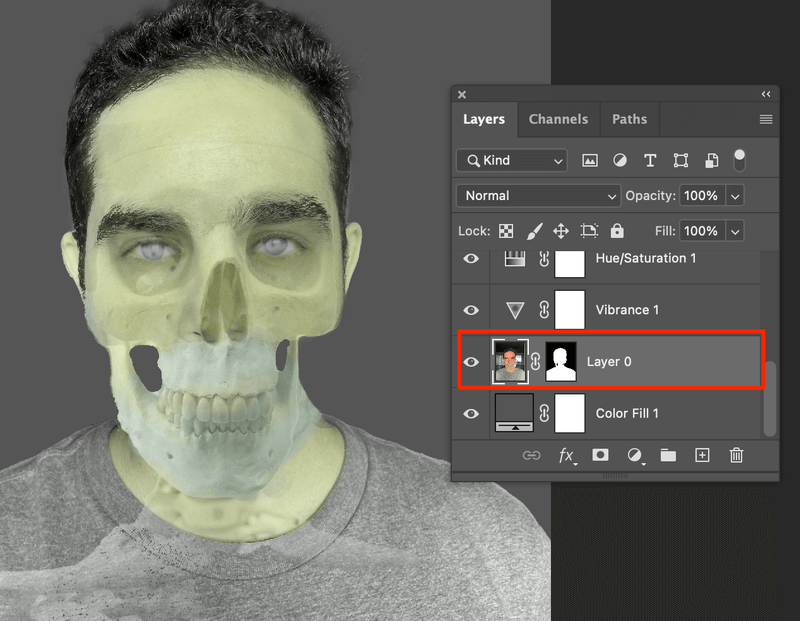
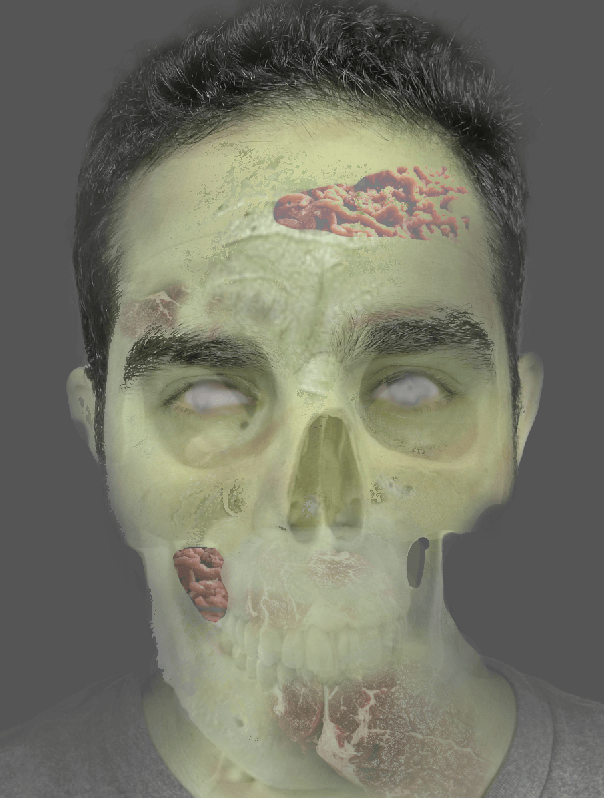
Step 5: Find a skull image, remove the background, and drag it into the current document. You can lower the opacity to align the skull to the portrait, especially the eyes, nose, and mouth.

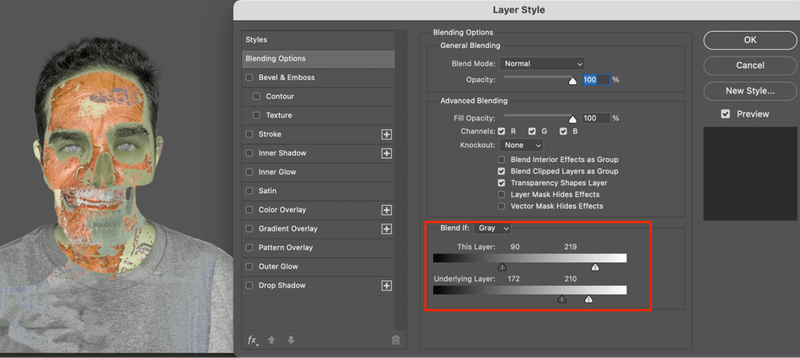
Once you align the skull in a good position, double-click on the skull you can change the value of the Underlying Layer. You can see the skull now blends in better with the original image.
You can add a layer mask to remove areas that you don’t to show from the skull. I’ll remove the line on his forehead.
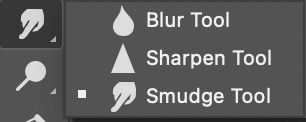
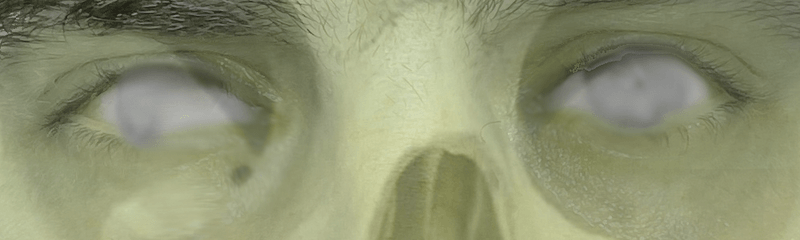
Step 6: Let’s work on the eyes! Select the Smudge Tool from the toolbar. Usually, it’s in the same menu as the blur tool.
Smudge on the eyeball area to create the typical zombie white eyes effect. It’s up to you how dramatic you want the eyes to look.
The eyes look fine for now, let’s start working on the face.
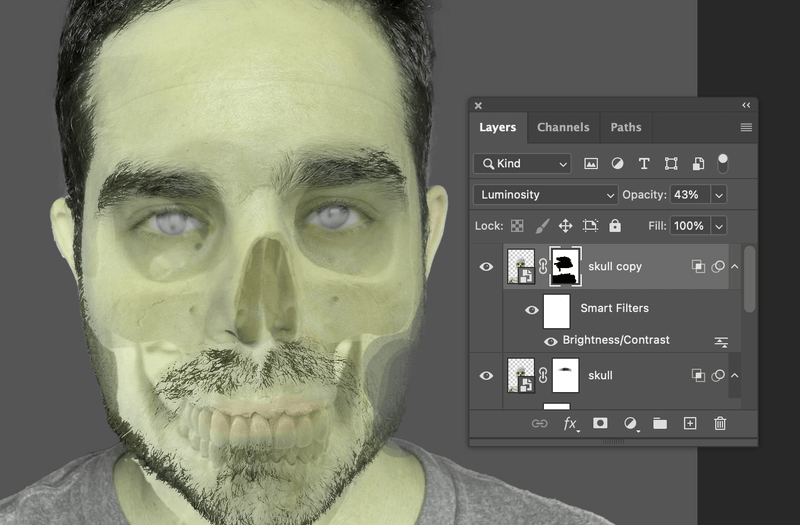
Step 7: Duplicate the skull layer and add a layer mask. You can see that the skull around his jaw area now is starting to look more obvious. Use the Eraser tool to remove the image on the mask layer, only leaving the area around the mouth and jaw.
Step 8: Go back to the portrait photo and add a layer mask. Select the Eraser Tool to eliminate the face, leaving the skull.
I’m going to do an extra step to remove his beard with the Brush Tool.
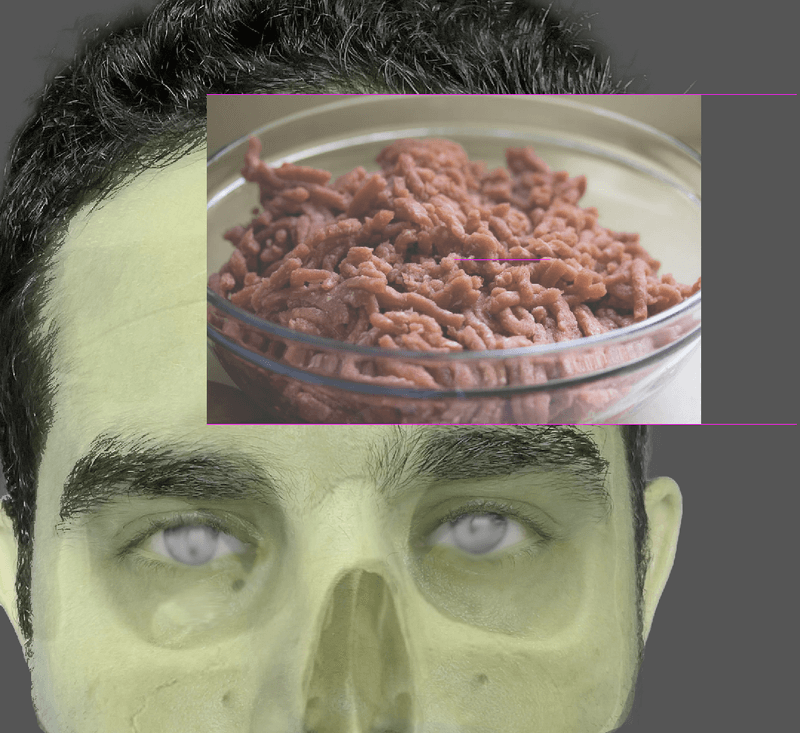
The next step is to add some “freshness” to the zombie. So I’m going to use a couple of meat photos and make the zombie-looking effects.
Step 9: Drag the meat photo into the current document, add a layer mask, and use the Eraser Tool to remove areas on the layer mask, leaving the part you want to show.
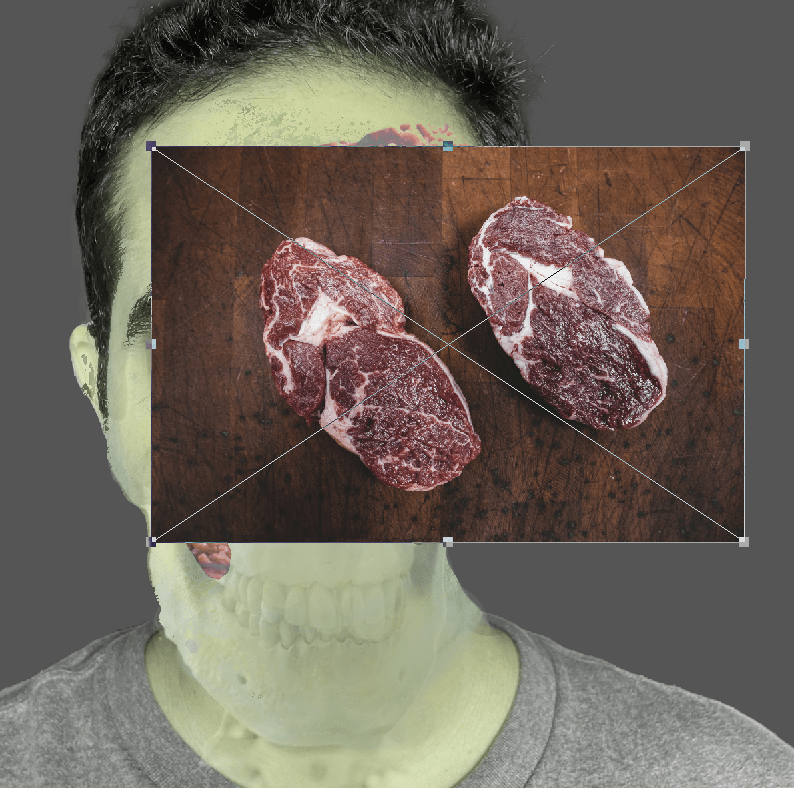
It would look something like this. You can adjust the levels and saturation to make it fit in more to your image color tone.

You can use different meat images to create different effects. Steaks! Yum!
This time let’s use a different method using the layer mask. Hold the Option key and click on the add a layer mask icon to add an invert layer mask. Then use the Brush tool to paint the area you want to show the image.
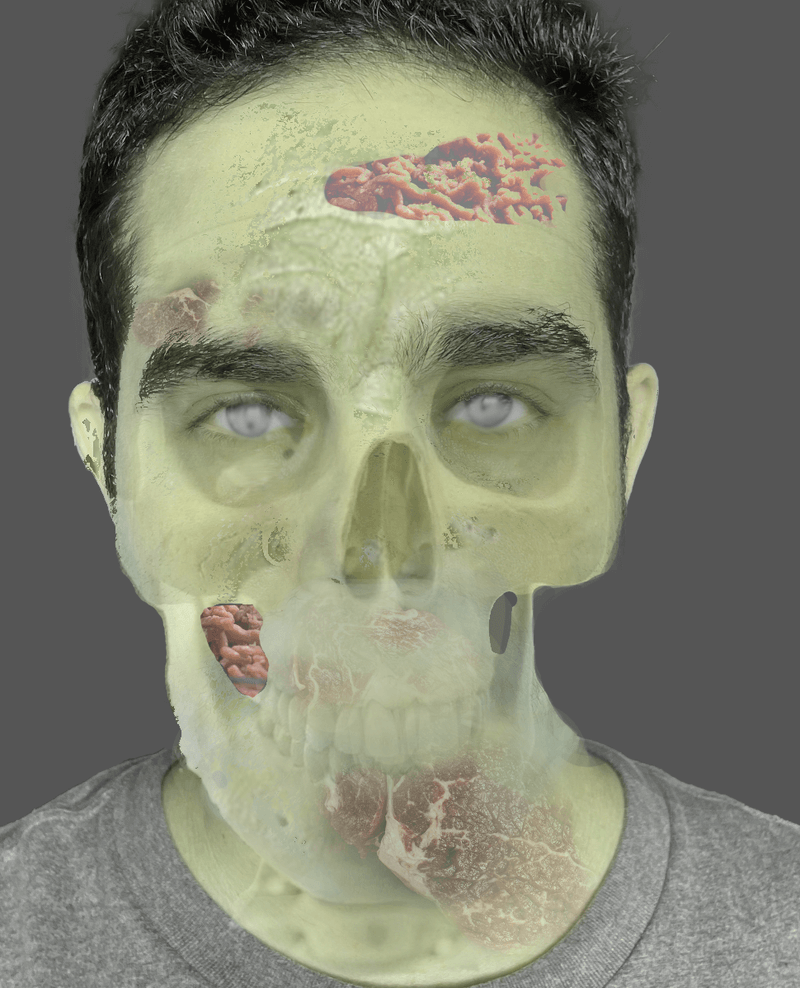
How about this look? If you want to add some wrinkle effects as I did. You can find an old-person portrait and adjust the Layer style to blend in with the image. Then, erase the unwanted parts on the layer mask.
Step 10: Let’s add some blood and bruises to the zombie. Add a solid color layer (choose a red that looks like blood) and add an invert layer mask.

Use the Brush Tool to paint the areas on the face where you want to show blood and bruises. I’ve added some red to his eyes and slightly touched up his face.
Actually, we are pretty much done.
It’s Up to You
If you feel like adding more dramatic effects to the zombie, sure! Now you already know the tricks. Masking is the secret. Well, finding nice images to apply the effect is important as well.
Have fun!
About June