
Have you ever wished you could just nudge a small part of your photo over just a tiny bit? Or maybe you want to soften a harsh line or give a mouth a more cupid bow shape?
Hello, I’m Cara! Even after using Photoshop for years, I am amazed by the incredible things this software can accomplish. For example, everything I just mentioned is possible with the Smudge tool.
What is this magic and how do you smudge in Photoshop? Come with me to find out!
Table of Contents
What is the Smudge Tool in Photoshop
Finger painting in Photoshop? Yes, please!
Simplistically speaking, this is a good way to think of how the Smudge tool works. Imagine running your finger through daubs of wet paint, that’s basically what happens when you pass your Smudge brush over an image. The pixels stretch and smear.
You can use this tool to beautify portraits. For example, you can make lips appear fuller or add a cupid bow to the top lip. You can also nudge the nose inward to make it appear more slender. You can even enlarge the iris slightly to make the eyes more impactful.
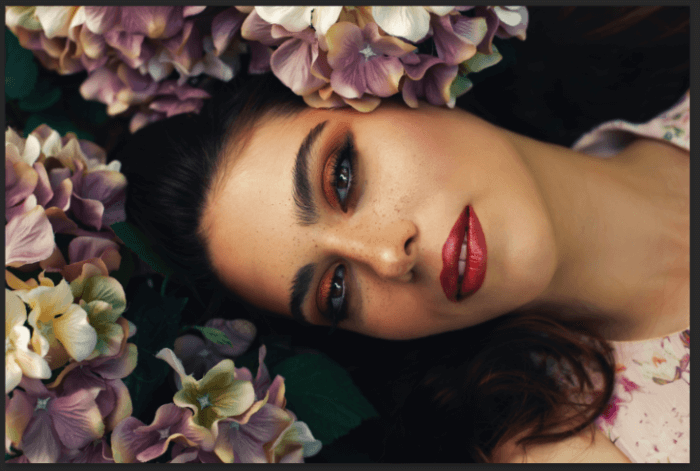
Of course, some detail is lost so this tool is best used with low settings and moving slowly and carefully. Let’s see what we can do with this image.
How to Use the Smudge Tool
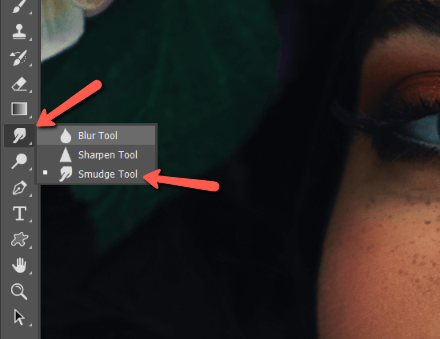
Now that we have the basic idea, let’s get the Smudge tool out and play with it a bit. You’ll find it about? of the way down the toolbar on the left. It may be hidden behind the Blur or Sharpen tool. Right-click on the tool on top to reveal the hidden ones.
Adjust the Settings
Before you do anything, head up to the Options bar to adjust your settings.
You’ll want to adjust the brush size to fit your image. My image is fairly large so I have a large brush at 125 pixels. Remember, smaller is generally better to work more slowly, but too small will make the task mind-numbingly frustrating.

Choose a low strength to start out. As you get a feel for the tool, you may be able to bump it up a bit, but generally lower is better. You can always build up paint strokes if you need a stronger effect. I set mine at 15%, but again it will depend on the image.
Check the Sample All Layers box if you’re working with multiple layers and want to sample pixels from all of them.
The Finger Painting box will add a bit of the foreground color at the beginning of each stroke. Leave it unchecked if you want the program to use only colors from the image.
Start Painting
Once you have the settings where you want them, click and drag over the parts of the image you would like to adjust.
Move slowly and don’t get too impatient. A heavy hand will make changes far too quickly and the end result will not look natural.
What Can You Do with the Smudge Tool?
Now let’s look at a few examples of this tool in action!
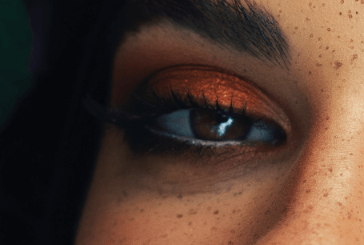
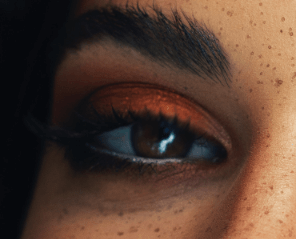
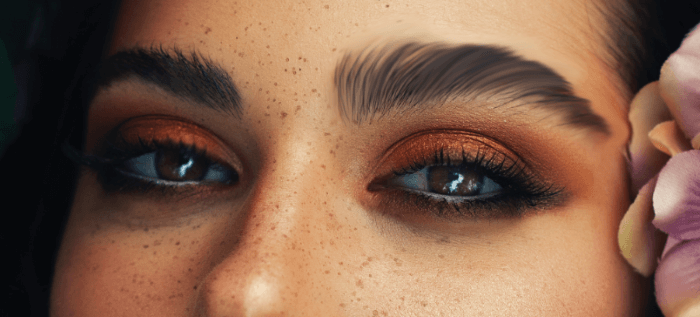
Notice that the model’s eyelid is drooping slightly? We can nudge it with the Smudge tool. We lose a tiny bit of detail in the eyelashes, which will always happen. It’s simply a matter of meeting in the middle and finding what works for your image.
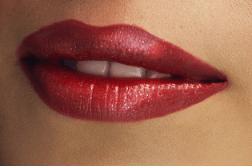
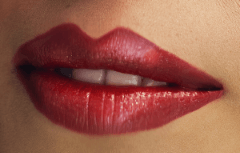
How about reshaping her lips a touch and giving her a fuller lower lip?
Because the tool smears the image, details get lost quickly. Thus, it’s easy to get a little crazy with this tool. Here, I smudged over her eyebrow rather aggressively and the result is too much.
However, you can also get creative with it and use it to create an oil painting-like effect on your images. It’s up to you!
As with everything in Photoshop, have fun experimenting with what you can do with this intriguing tool. Ready to learn more cool stuff that you can do in Photoshop? Check out how to fade an image here!
About Cara Koch