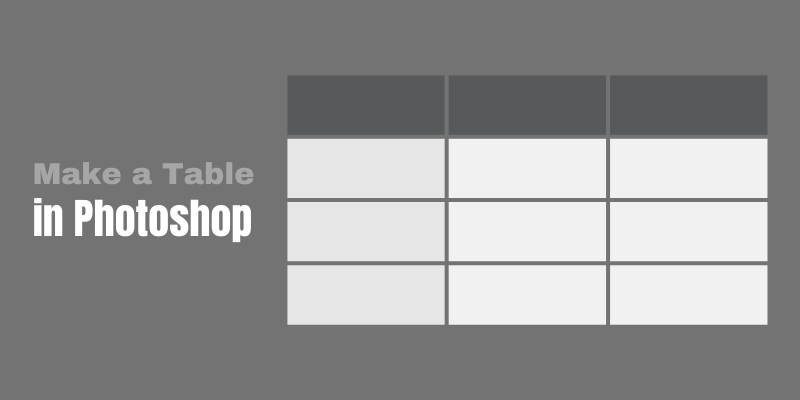
Have you ever tried to make a table in Photoshop? You might be wondering where the handy Table menu is? Like the one in Word that lets you pick the number of rows and columns and boom, you’re done! Table created.
Hey there! I’m Cara and I love Photoshop for all the amazing things it can do. However, table creation is not one of them. It’s possible to create a table in Photoshop, but it’s not very easy to work with.
If you need a simple table for a project you are creating in Photoshop, read on to learn how to make and insert a table in Photoshop. However, if your purpose is to create an elaborate table, another program like Word or Excel would be a better choice.
Still with me? Then let’s get to it!
Table of Contents
Step 1: Enable Gridlines
Photoshop doesn’t have a dedicated table creation tool like that found in Word or Excel. Instead, you have to literally draw out the table in your Photoshop document.
To make it easier to see what you’re doing, Photoshop has some gridlines that are quite useful for this purpose. Let’s make those visible. Go to View and choose New Guide Layout.
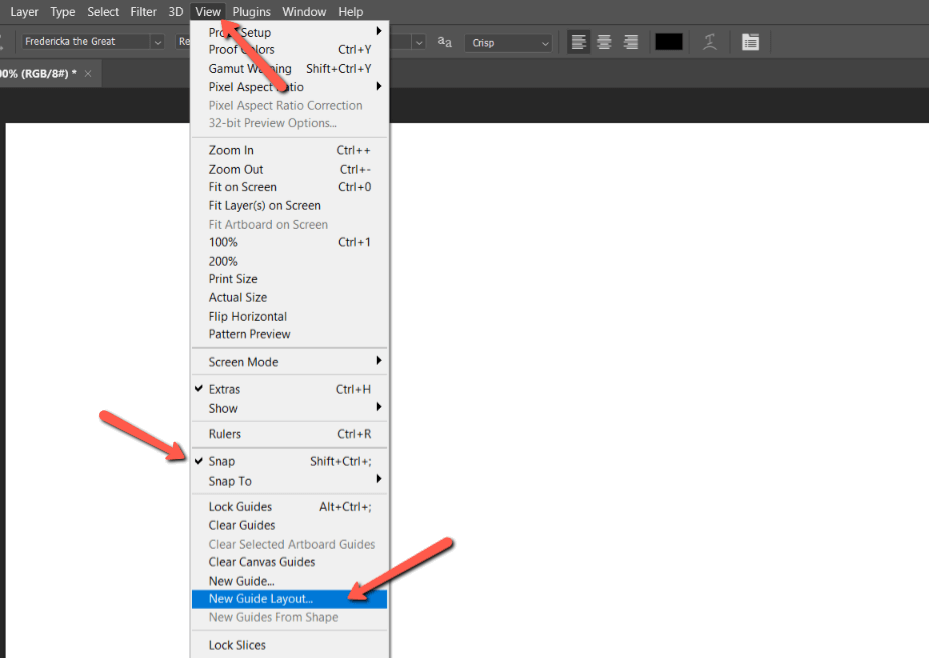
While you’re here, make sure the Snap feature is enabled (it should have a checkmark next to it).
In the box that opens, you can choose the number of columns and rows that the layout will show. It’s difficult to make changes later, so you should already know how many columns and rows you need along with the size of the cells.
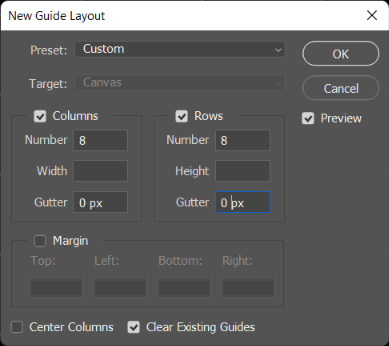
The Gutter box refers to the space between the cells. For a traditional table, the gutter will be 0 pixels.
Step 2: Draw a Rectangle
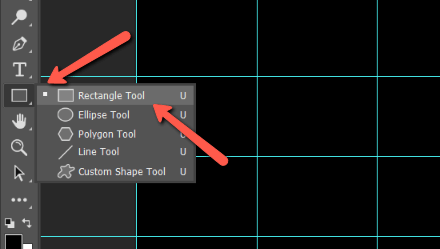
We could draw out each line individually but to speed up the process, the Rectangle tool comes in handy. Choose it from the toolbar on the left.
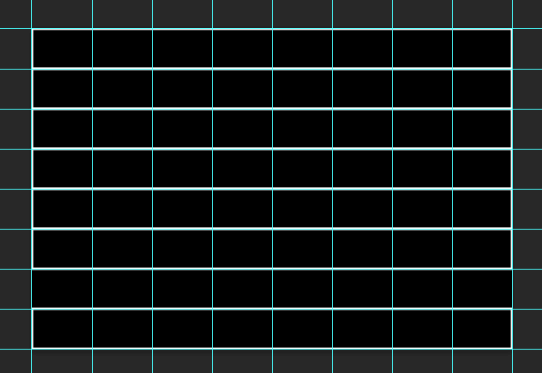
Click and drag to draw a rectangle as the first row of your table. The Snap feature that we ensured was on earlier will automatically snap your lines to the nearest grid line. This makes it faster and easier to build a table.

If the line is too thick or too thin, you can change the size in the Options bar. I’ve set mine to 3 pixels. Change the color of the line by clicking in the Stroke box and choosing a color. Change the background color of the table by clicking on the Fill box and picking a color.

Step 3: Copy the Rectangle
To quickly fill in the rest of your table press Ctrl + J or Command + J to duplicate the rectangle. Then press Ctrl + T or Command + T to activate the Transform tool.
Now, click and drag the copied rectangle down to the next row. Hit the checkmark in the Options bar to confirm the placement. Repeat until you fill-up the table.
Step 4: Add the Vertical Lines
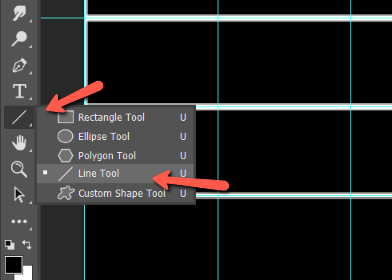
At this point, we’ve got all our rows but no columns. Let’s use the Line tool to fill them in.
Right-click on the Rectangle tool on the toolbar to bring out the menu and choose the line tool.
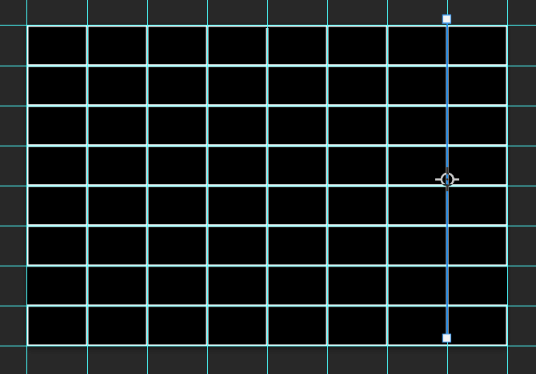
Using the guides for placement, click at the top and drag down to create a straight line. Choose the color and size of the stroke in the Properties panel or up in the Options bar.

You can also check out this tutorial on creating straight lines for more information on how to use the line tool.
Use Ctrl + J or Command + J to copy the line. Then press Ctrl + T or Command + T, click and drag the copied line to the next guide, and press the checkmark. Keep going until you fill-up the table.
Step 5: Remove the Guides
This step technically isn’t necessary. The guides are only visible in Photoshop anyway. If you save the document or print it, the guidelines will not appear.
But if you want to see your project better, go to View, hover over Show, and pick Guides to remove the checkmark.

This will make it easier to see if you missed any part of the table. With the guidelines in the way, it’s easy to not notice a missed section.

When I took off my guides, I noticed two mistakes. One of the rectangles is missing and one of the lines didn’t quite touch the bottom. I’ll clean those up real quick and we’re all set!
By this time, you may have realized how frustrating building a table like this can be. It is rigid and won’t automatically accommodate changes. If you need to adjust anything, you have to adjust the whole table by hand.
This is why making a table in Photoshop is not the most effective method. However, if you need to add a table to your Photoshop project, at least there is an option.
Curious to learn about some of the more efficient wonders of Photoshop? Check out our tutorial on creating a perfect circle here!
About Cara Koch
Oscar Lagrosen
Thank you for this guide Cara! It was truly helpful ?