
Line art is super fun for decorating posters, flyers, and other graphic arts applications. However, sometimes the drawing you get isn’t exactly the way you want it.
For example, when lines in a design have uneven strokes, sometimes it can be disturbing to look at. Or you might want thicker lines to bolden the look.
Luckily, Photoshop makes it easy to do this.
Hey there! I’m Cara and I like things to look exactly how I want. Thankfully, I have Photoshop to help me create or modify design elements to my liking.
Today, let’s look at how to make lines thicker in Photoshop so that you can make designs exactly how you want them. Follow the steps below!
Note that the tutorial and screenshots below are from the Windows version of Photoshop CC. If you are on a Mac, they can be different.
Table of Contents
Step 1: Make a Selection
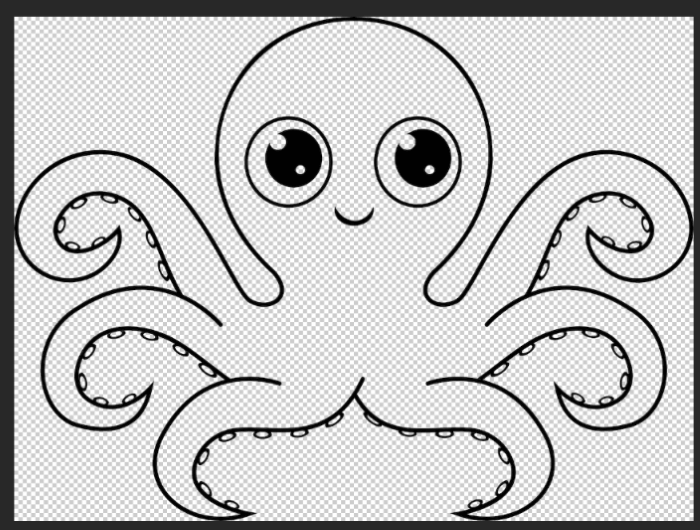
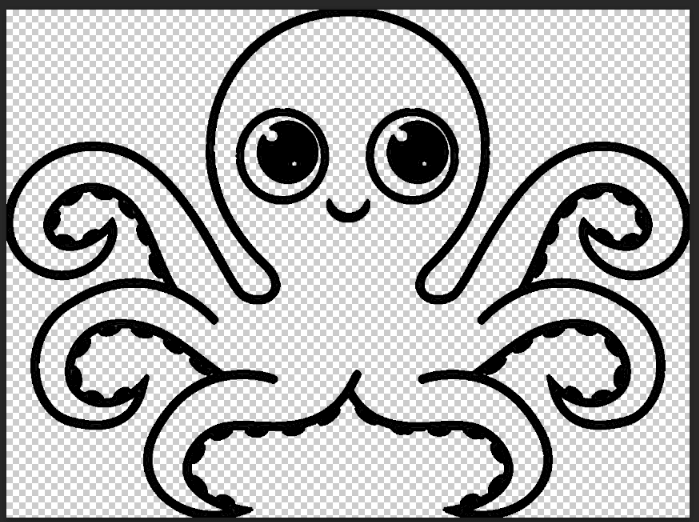
First, we need to make a selection. For this example, we’ll use this line drawing I downloaded from Pixabay.com.
It’s all one color so this is a perfect time to use the Magic Wand tool. Select it from the toolbar on the left. You may have to right-click on the quick selection tool to make the magic wand tool appear.

Click on the line you want to select. The magic wand will select anything else in the image that is the same color. One click gives me this selection when the Contiguous box is unchecked. If you have no idea what contiguous means check out this article to learn more about this tool.
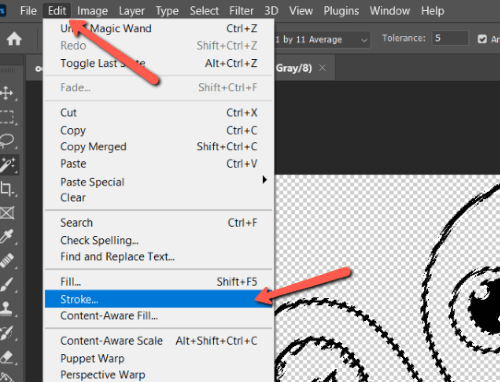
Step 2: Set the Stroke
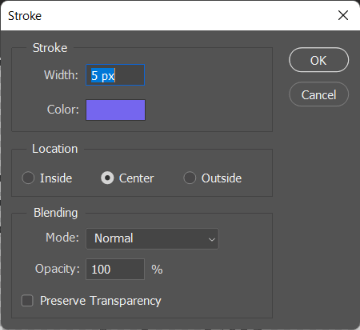
With the selection active, we’ll select the Stroke command to easily thicken the lines. Go to Edit and choose Stroke from the menu.
The panel that opens allows you to choose how you would like to thicken the lines. Choose the width of the lines in pixels. I’ll go with 5 pixels for this image.
Click on the color swatch to open the color picker. For this image, we can leave it black. If you want to match the color of a colored line drawing, use the Eyedropper to click on the drawing and immediately match the correct color.
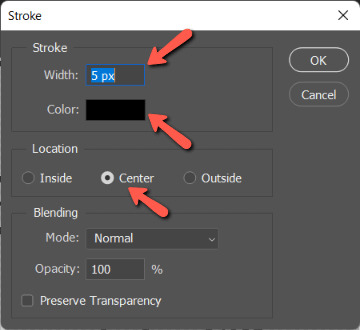
The Location is where the new line will go. Inside means the added thickness will rest inside the original line. Outside means the thickness will be added to the outside. And Center indicates the new line will straddle the existing one.
Press OK when you’re happy with the settings.
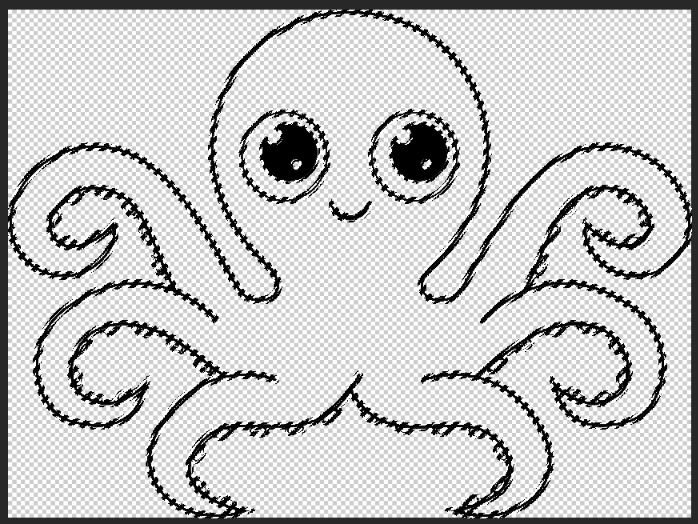
Now, this cute little octopus has thicker, bolder lines and it took all of 2 minutes to do it!
A Note About Colors
What if you want to add color to a black line drawing as I have here? You might run into the following problem. Let’s say you pick a nice bluish-purple color and hit OK.
But you end up with an image like this. What happened?
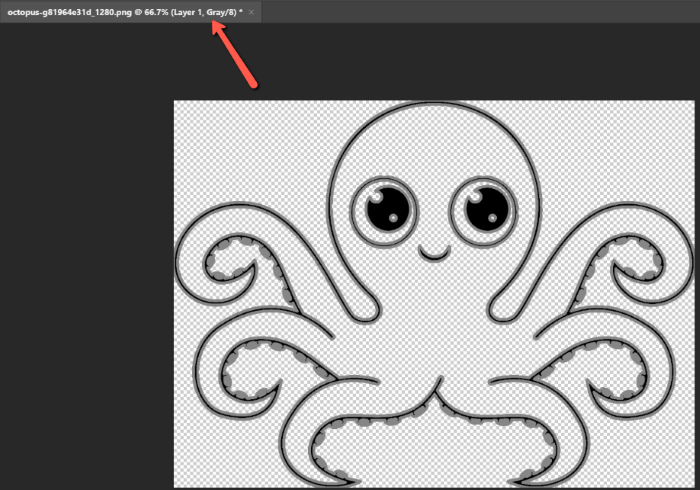
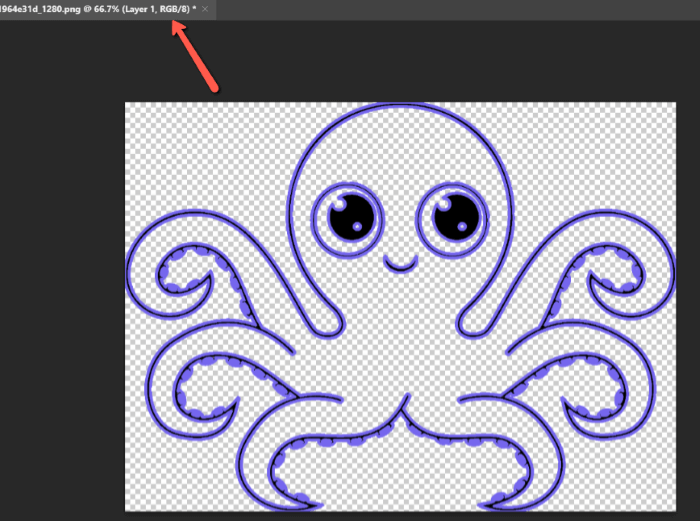
If you downloaded your image from the Internet, it may have come in grayscale. This will be indicated by the word gray in the tab with the file name just under the Options bar.
To put it in color, go to Image, hover over Mode, and choose RGB Color.
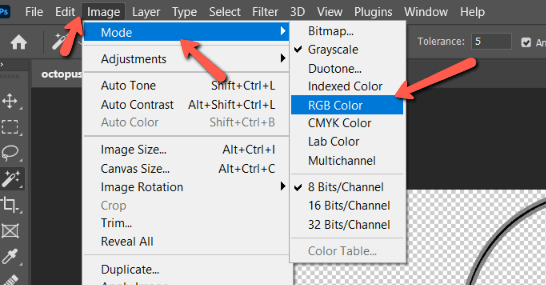
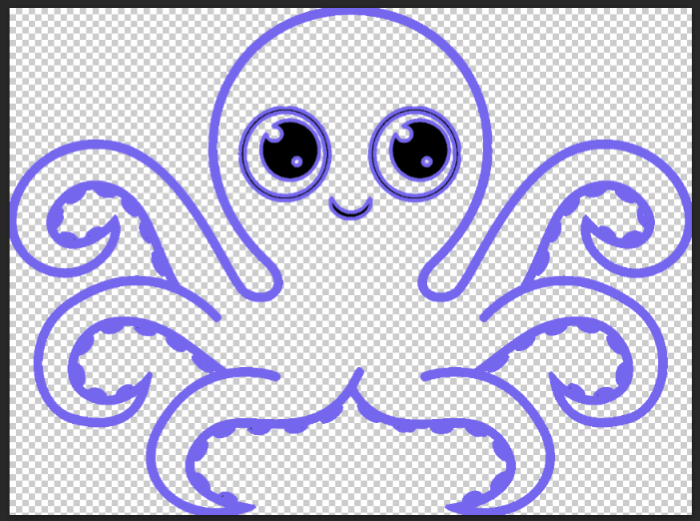
Now when we add the colored line, it appears in color. Notice that instead of gray in the tab, it says RGB.
If you want to get rid of the black line, you can do that with the Paint Bucket tool. Make a selection of the black lines with the Magic Wand tool as we did earlier.
Then select the Paint Bucket tool from the toolbar on the left. You might have to right-click on the Gradient tool to find it.
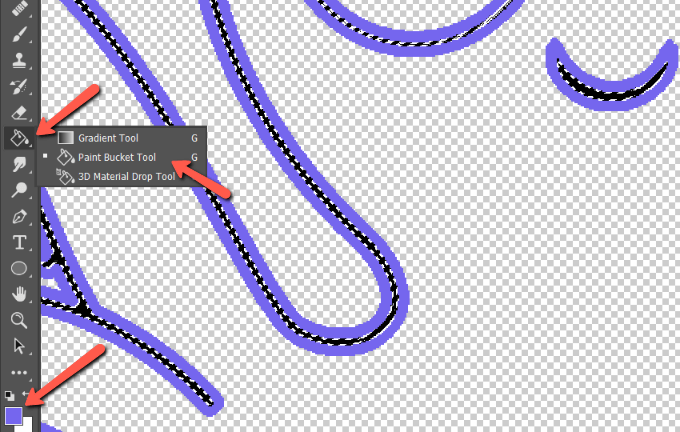
Make sure the foreground color is the color you want to use then click on the black line. It will fill in with your selected color.
Curious about other awesome tricks in Photoshop? Check out our tutorial on how to create text in a circle!
About Cara Koch