Have you ever tried to wrap a texture around a 3D object or enlarge it by creating a pattern from it? What do you always end up with? Those big ugly seams where the edges come together!
Hello! I’m Cara and I’ve shared your frustration with textures that won’t look right. However, once I learned this trick that I’m about to show you, all that frustration flew out the window.
Check out how to make a seamless texture in Photoshop here!
Note: The screenshots below are taken from Photoshop CC for Windows, Mac or other versions can look slightly different.
Step 1: Open Your Image
Let’s take a look at this image of paper texture. I’m going to show you how to make a paper texture in Photoshop.

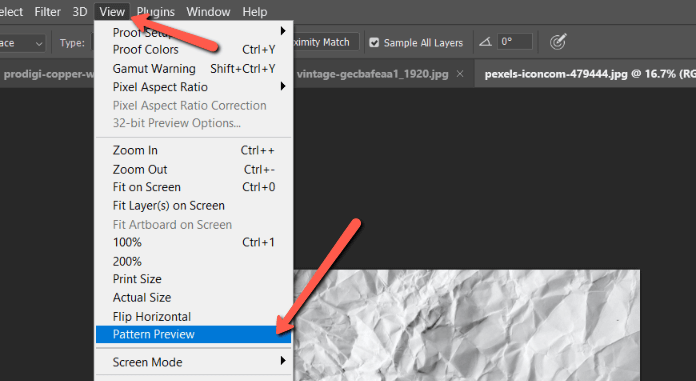
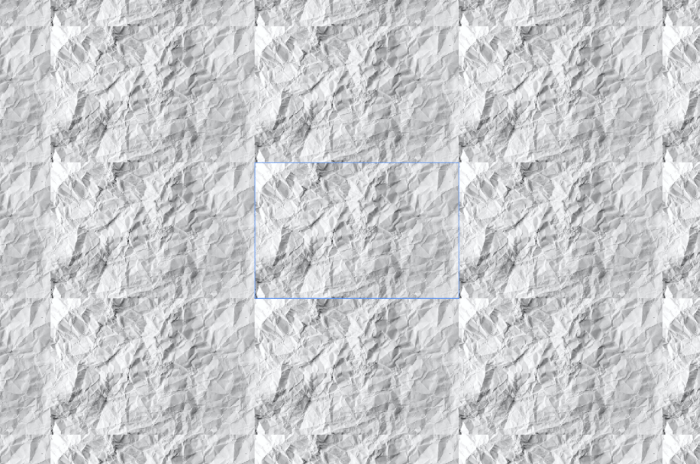
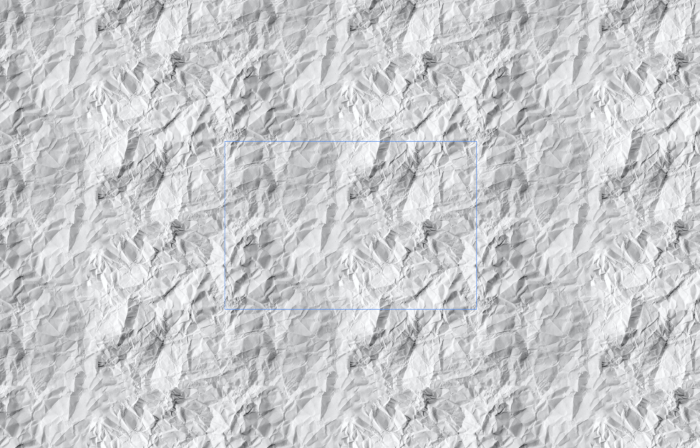
Watch what happens when I put the edges together. A simple way to see this is by using the Pattern Preview feature. Go to View and choose Pattern Preview.
As you can see, there is a very obvious seam that appears around the edges of the images.
Press Ctrl + Z or Command + Z to undo the action and step back out of the Pattern Preview.
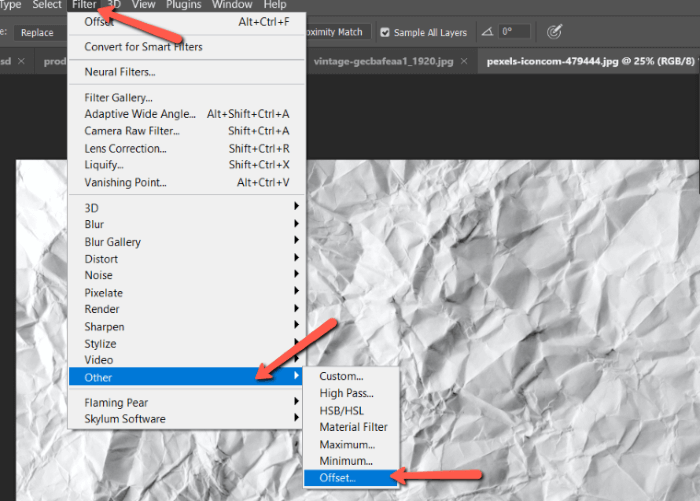
Step 2: Reveal the Edges
To fix the edges, we need to see them. You can reveal the edges easily using an offset filter. Go to Filter in the menu bar, hover over Other, and choose Offset.
In the box that appears, move the values from zero to an amount that will work for your image. My image is rather large so I had to move it considerably to reveal the edges comfortably.
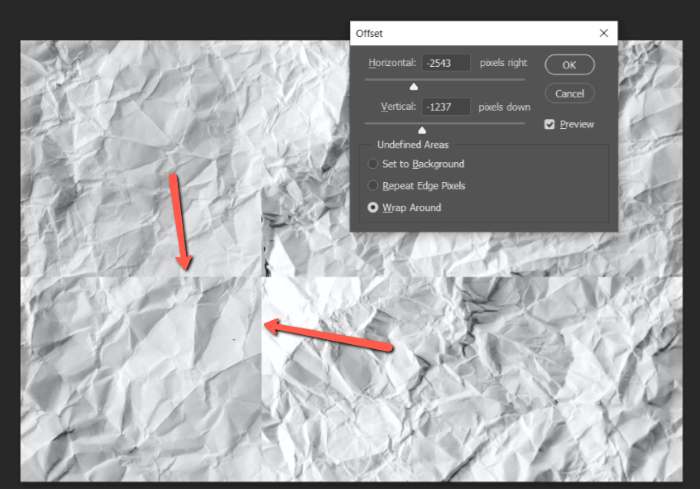
Don’t worry, you won’t have to guess. Your changes will automatically preview in the workspace behind the box.
Press OK when you’re ready.
Step 3: Remove the Seams
There are a few ways that you can remove the seams. Which method will work best depends on the image you’re working with.
I suggest starting with the rather automatic Spot Healing Brush tool.
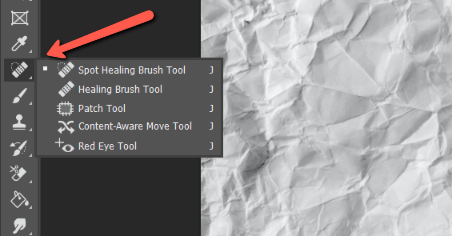
Just paint across the area you want to fix and Photoshop does its best to remove the blemishes. Remember that to paint in a straight line you can click and one end of the line and hold Shift while clicking on the other end.

Another option is the Clone Stamp tool. This is great for cleaning up what the spot-healing tool leaves behind.
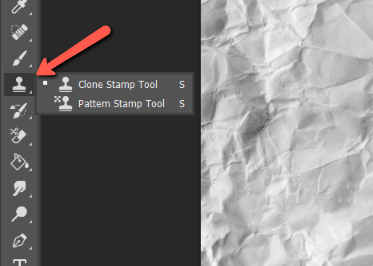
Hold Alt or Option while clicking to select a source point. Then you can paint over any section you would like to touch up.
Keep going until you can’t see the defined seam/edges anymore. Try moving the offset again to make sure you get every part of the seams.
Now when you hit the Pattern Preview, you’ll see a much more seamless result. Depending on the image, you might have to spend some time to get a truly seamless look. But it’s totally possible and the results are worth it!
Now, you can use this texture for wrapping around something without a glaring ugly seam on one side!
Excited to learn more about Photoshop? There’s a lot to explore on our website! You can start by learning how to overlay images here!
About Cara Koch
M Garza
Thannkssss so easy!! thanks to you!!!
June
Awesome! That’s our goal! To make design simple and fun!