
Smart objects are super useful when you want to edit non-destructively in Photoshop. They allow you to resize images multiple times without losing image quality. Plus, they activate smart filters which allow you to come back and adjust filters after applying them.
Hey there! I’m Cara, and I’ve found smart objects to be useful countless times whether I’m editing for clients or for personal projects. They are helpful for making quick edits to a project as well as creating templates that can be used with other projects.
If you haven’t worked with smart objects much, you might not be aware of some of the handy tricks this feature offers. Let’s take a look at how to edit a smart object in Photoshop to learn all about them!
Note: the screenshots in the tutorial below are based on Photoshop CC for Windows. If you are using Photoshop for Mac or other versions, they will look slightly different.
Table of Contents
Converting to a Smart Object
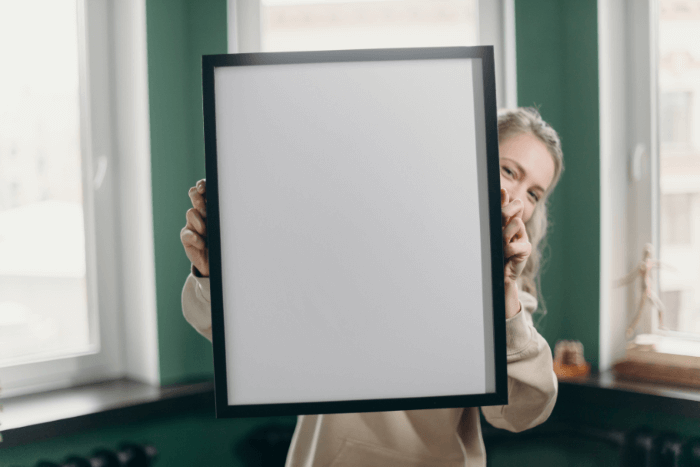
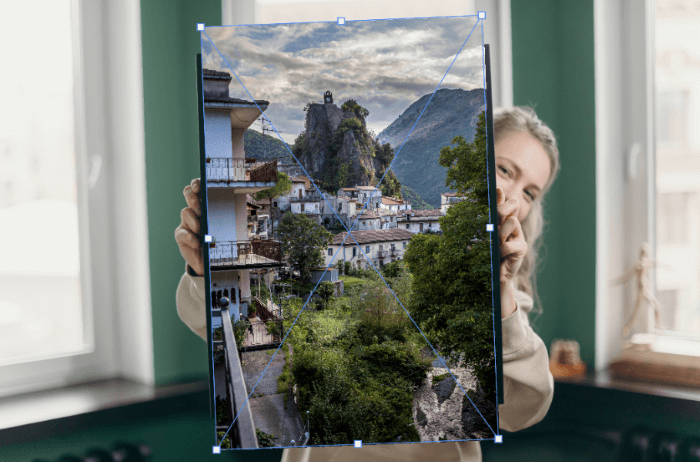
To show you how this works, I’m going to place an image inside the frame in this image.
Open your second image in Photoshop and choose the Move tool.
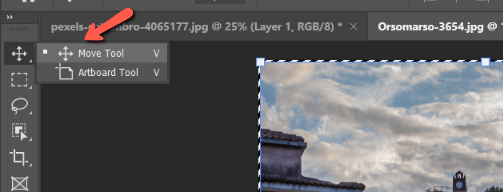
Click in the second image and drag up to the tab where your bottom image is open. Drop the image on top.

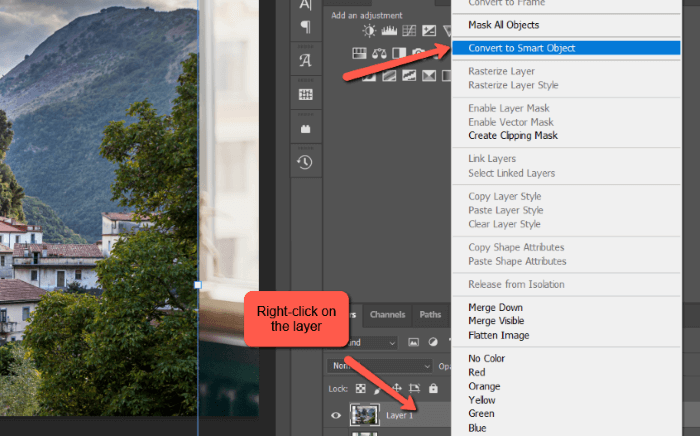
This image is too large but before we do anything, let’s convert it to a smart object. That way, as we resize and make adjustments we won’t lose any image quality.
Right-click on the layer you want to convert and choose Convert to Smart Object from the menu.
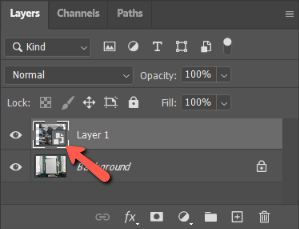
Notice the little icon that appears on the layer thumbnail, indicating it is now a smart object.
Resizing a Smart Object
The technique to resize a smart object in Photoshop is the same as any normal object. Open the Transform tool by pressing Ctrl + T or Command + T on the keyboard. Grab the handles to resize and drag to reposition. Press Enter/Return to accept the changes.
Check out my post on what smart objects are in Photoshop to learn more about how smart objects help you keep the correct image resolution.
Placing a Smart Object
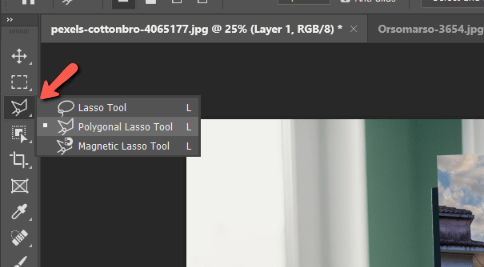
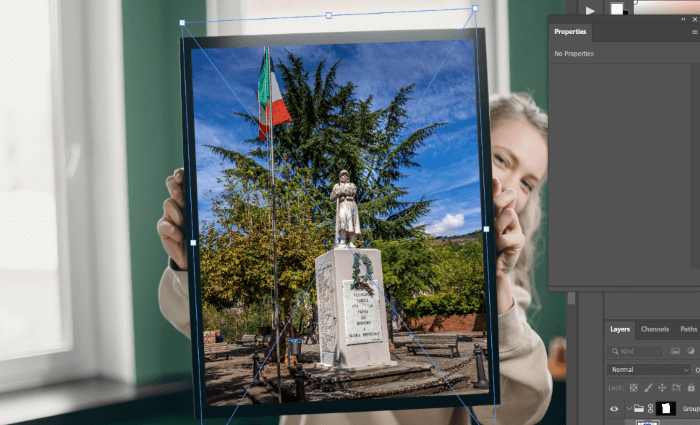
Now, we need to tell Photoshop how we want these two images to fit together. Because this is a rectangle, choose the Polygonal Lasso Tool from the toolbar on the left.
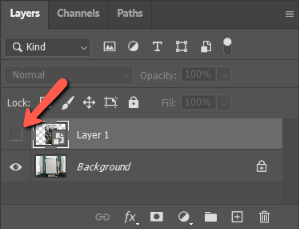
To be able to see what we’re doing, make the top layer invisible by pressing the eye icon to the left of the layer thumbnail.
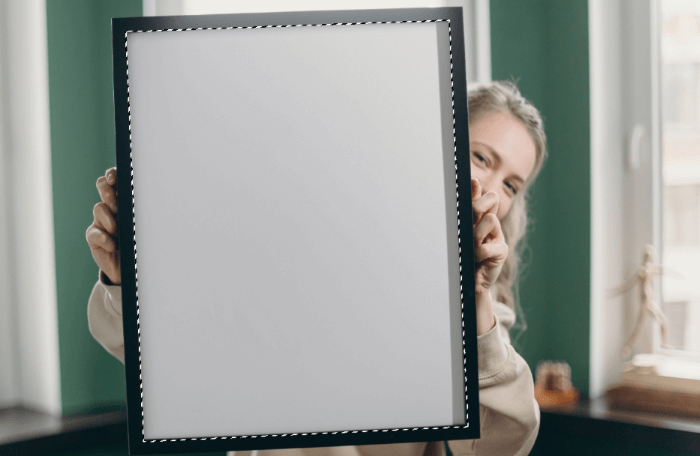
Click on each of the four corners of the frame to make a rectangular selection.
Make the top layer visible again. Press Ctrl + G or Command + G to group the layers. This allows you to apply a layer mask to restrict the photo to the frame but still be able to resize or move the photo within the frame. If you apply the mask directly to the smart object, it will cut the image.
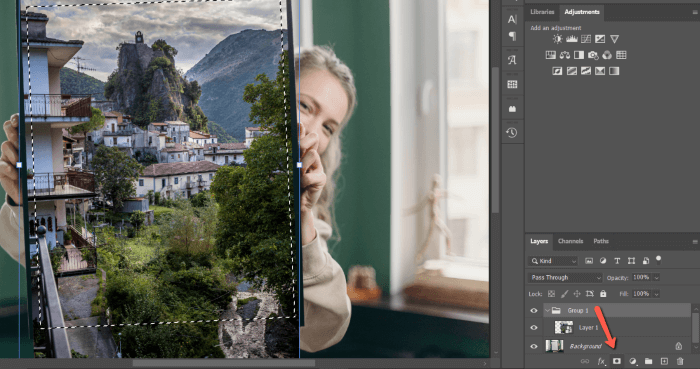
Then press the mask button at the bottom of the Layer’s panel to turn the selection into a mask.

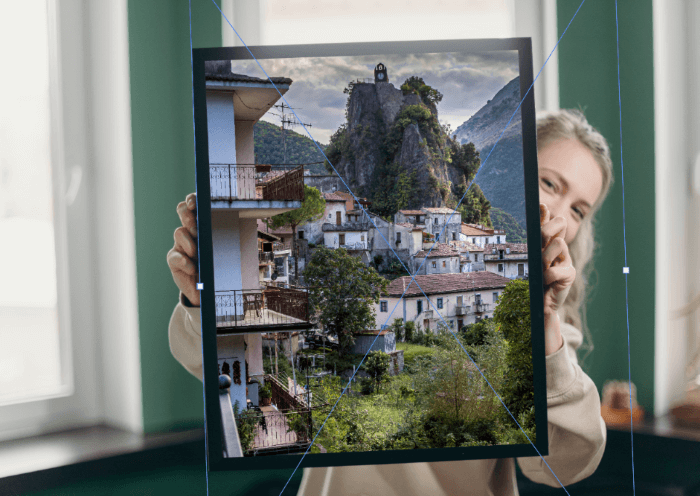
Notice you can grab the image with the move tool and move the picture around but it stays inside the frame? You can also resize the image however you please.
Editing the Smart Object
What if you realize you want to make some changes to the image inside the frame? You could use adjustment layers and clip them to the smart object layer as normal. Or you can edit the smart object independently and keep things tidier.
For example, right-click on the smart object layer and choose Edit Contents from the menu.

The layer will open up in a new document. Make whatever changes you like and close the document. When Photoshop asks you if you want to save the changes, say yes. When you go back to your working document, the changes will be reflected on the smart object.
You can do this as many times as you like. All your previous changes will appear every time you reopen the image with the Edit Contents command so you can adjust to your heart’s content.
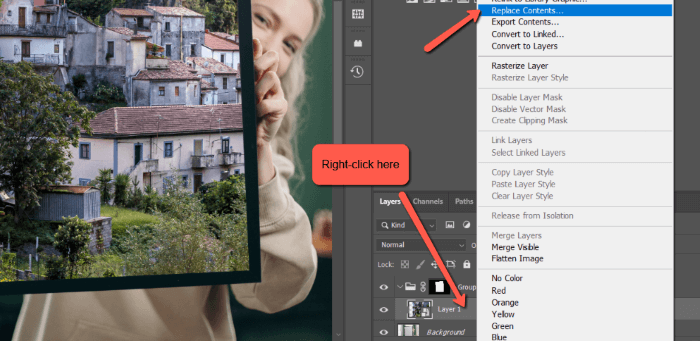
Replacing the Contents of a Smart Object
What if you decide that you want to put a different picture in the frame? Do you have to go through everything all over again? You could if you like to waste time or you can simply replace the contents of your smart object.
Right-click on the smart object layer in the Layer’s panel and this time choose Replace Contents.
Browse to the image you would like to use as a replacement and click Place. The image will appear in the space and it may be larger or smaller depending on the actual image size.
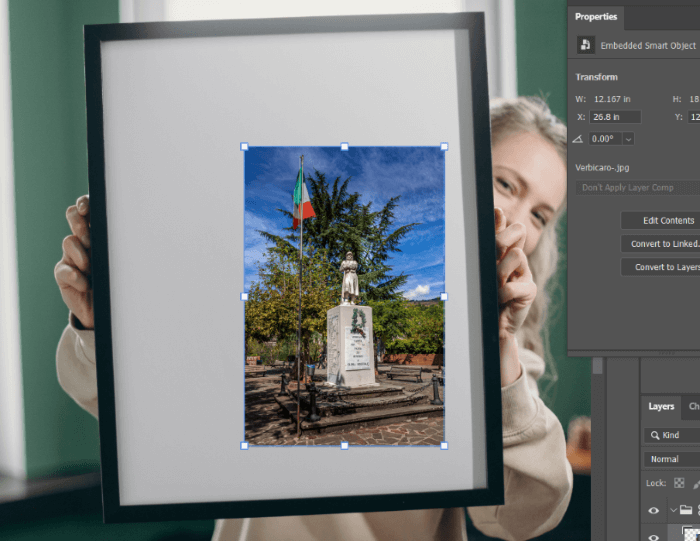
Simply use Ctrl + T or Command + T to resize the image to fit. There’s no need to redo the mask or anything. The new image will stay inside the previously defined one.
Smart Filters
Another advantage of turning a layer into a smart object is the ability to add filters and adjust them later. When you apply a filter to a normal layer, it is a destructive edit. You can’t go back later and adjust the filter or even remove it.
The only way to edit the filter is to undo your changes, which is impractical or impossible after you’ve gone on and made other edits.
But, look what happens when you add a filter to a smart object. Go to Filter and choose whatever filter you would like to apply. Let’s go to Stylize and choose Oil Paint for this image.
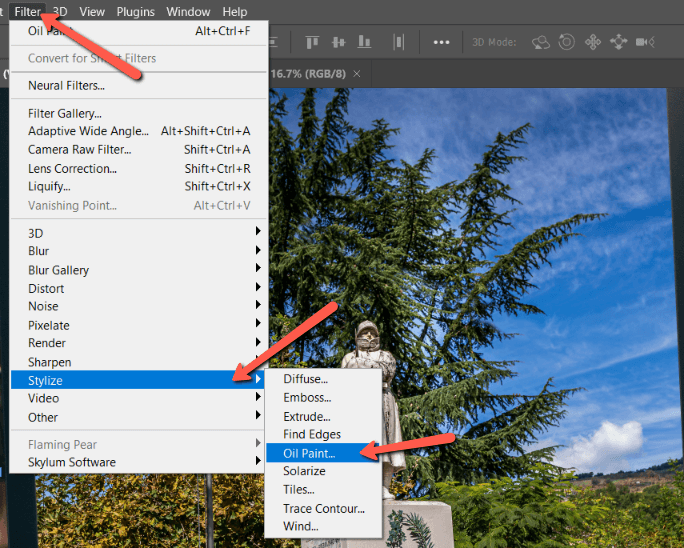
The filter will appear like a smart filter under the smart object layer in the Layer’s panel.

You can double-click on the Oil Paint filter to reopen the options and make adjustments to the strength and style of the filter. You can toggle the filter visibility on and off using the eye icon or you can delete it by dragging it down to the trash can at the bottom of the Layer’s panel.
Filters suddenly become way more flexible!
The Power of Smart Objects
Smart objects can be a little confusing at first but once you understand their usefulness, you’ll realize how powerful this feature can be. They can save you tons of time by using them to create templates or by allowing you to adjust filters after applying them.
How much did you know about the hidden gem we call smart objects? Let us know in the comments below! And if you want to learn more about Photoshop be sure to check out more tutorials such as how to curve or bend an image in Photoshop.
About Cara Koch