It might seem obvious, but color is one of the most important aspects of an image. Color can have a huge impact on the tone and mood of an image, and Photoshop is the perfect tool for adjusting the color of an image with only a few simple clicks.
This guide is intended for image editors who want to change the colors across their entire image. You can also change the color of part of your image, such as changing the color of an object.
Table of Contents
Quick Guide: Changing the Color in Photoshop
Just like with everything in Photoshop, there are a lot of ways that you can change the color of an image, but the simplest method is to use a Hue/Saturation adjustment layer.
- Step 1: Open your image or select an object in Photoshop.
- Step 2: Open the Layer menu, select the New Adjustment Layer submenu, and click Hue/Saturation.
- Step 3: Adjust the Hue slider in the Properties panel.
Congratulations, you’ve just changed the color of an image in Photoshop in just three short steps!
If you want to learn more about how to use the Hue/Saturation adjustment layer or you want to explore some of the other ways to change the color of an image with Photoshop, read on!
The Detailed Guide to Changing Colors in Photoshop
For the purposes of this detailed guide, I’m going to assume that you’ve already got your image open in Photoshop.
Step 1: Creating an Adjustment Layer
To get started with your color change, create a Hue/Saturation adjustment layer. It’s possible to use the Hue/Saturation command without creating an adjustment layer, but it’s not the recommended method.
Adjustment layers allow you to apply your edits non-destructively, a process that gives you the greatest degree of flexibility if you need to go back and change your adjustment at a later date.
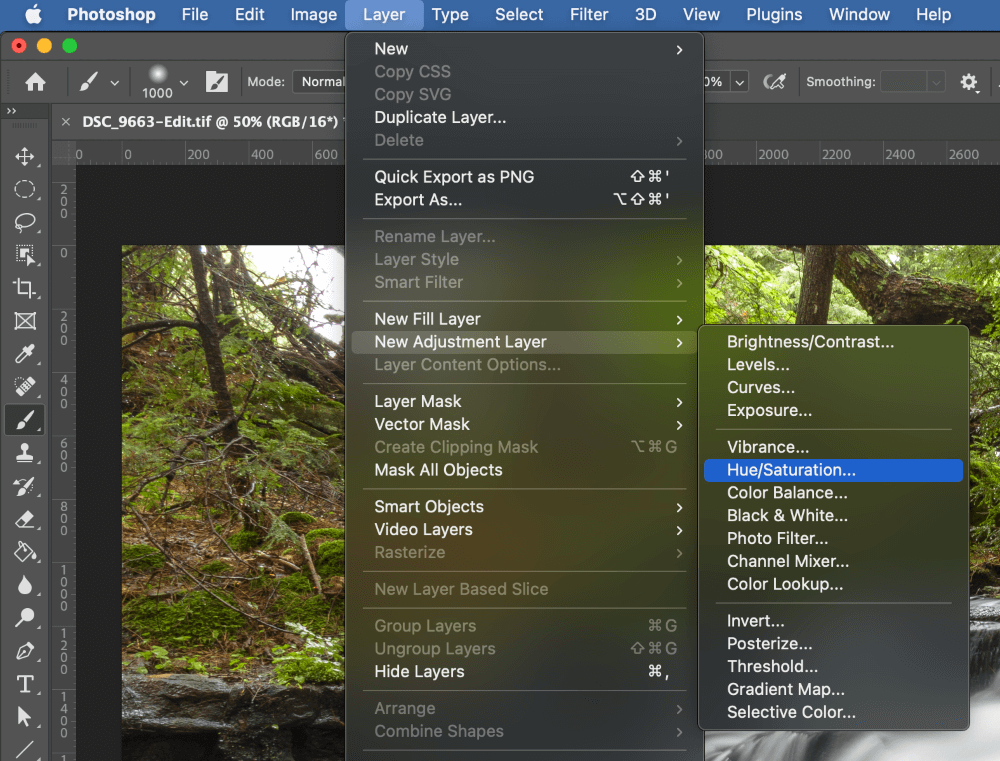
Open the Layer menu, select the New Adjustment Layer submenu, and click Hue/Saturation. In the New Layer dialog box, give it a descriptive name and click the OK button.
If you want to create a Hue/Saturation adjustment layer more quickly, you can click the Hue/Saturation button in the Adjustments panel.
In the Layers panel in the bottom right corner of the Photoshop interface, you’ll see that there is a new entry in the list. If you don’t name your adjustment layer, it will be called Hue/Saturation 1.
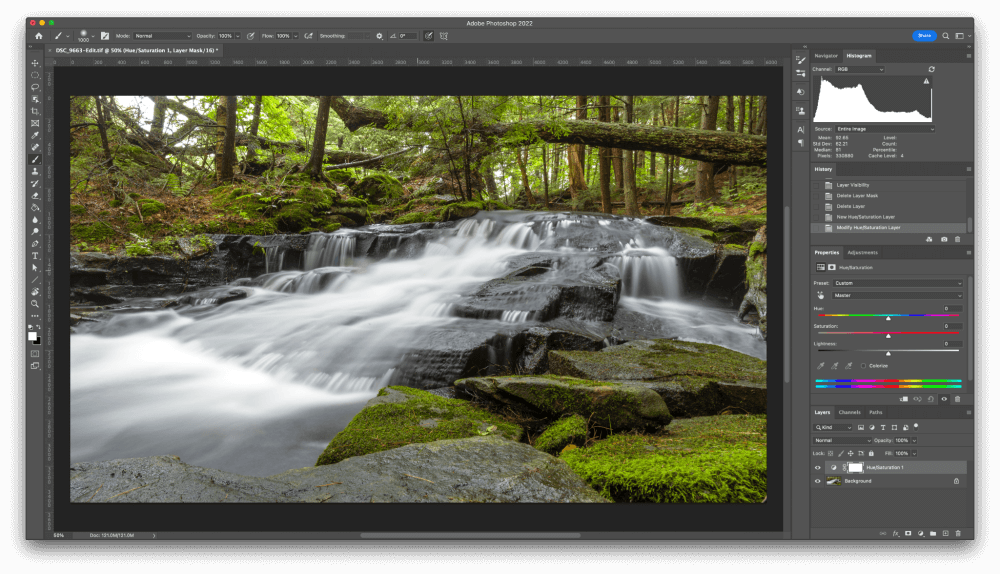
Photoshop will also select the new layer and activate the Properties panel so that you can choose the type and amount of color change that you want to apply.
(If you can’t find the Adjustments panel or the Layers panel, you can bring either or both of them back by opening the Window menu and selecting the appropriate entry from the list.)
Step 2: Changing Colors Using Hue/Saturation
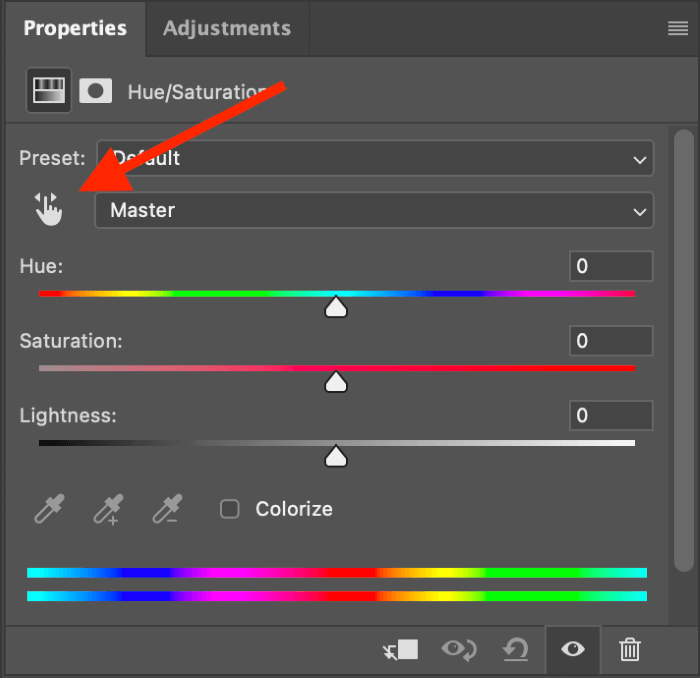
The Properties panel allows you to customize the color change of your image in several different ways.
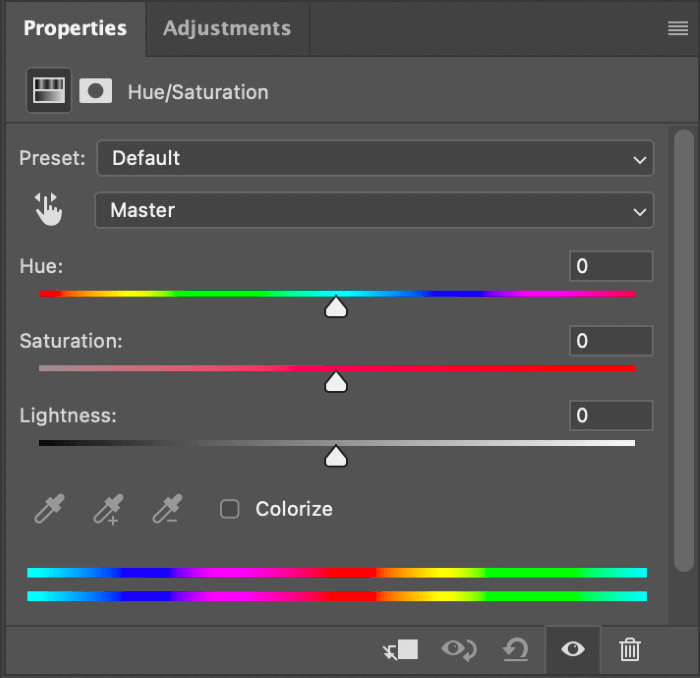
Adjusting the Hue slider is the simplest way to change the color of an image in Photoshop without changing any of the brightness values in the image. When it’s done delicately, it can be helpful, but it’s also extremely easy to create an unrealistic and overpowering effect.
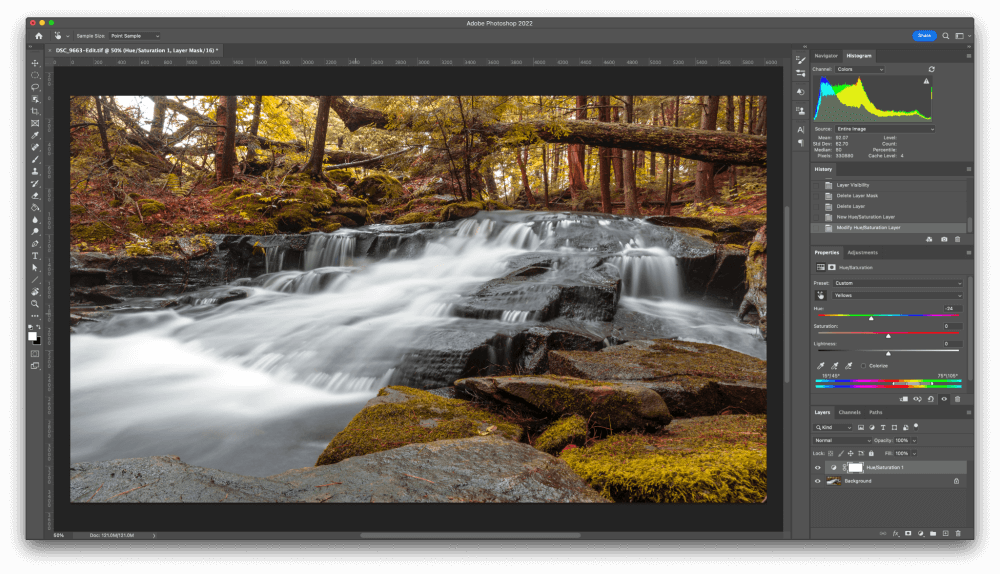
In most situations, it’s better to focus on a specific color range that you want to adjust. You can do this by activating the Targeted Adjustment Tool (see below) and clicking on the color you want to change in the main document window.
You’ll see that the current color selection dropdown changes from Master to the color range you selected with the tool – in this case, Yellows. With this specific color range selected, adjusting the Hue, Saturation, and Brightness sliders will only affect pixels in that color range.
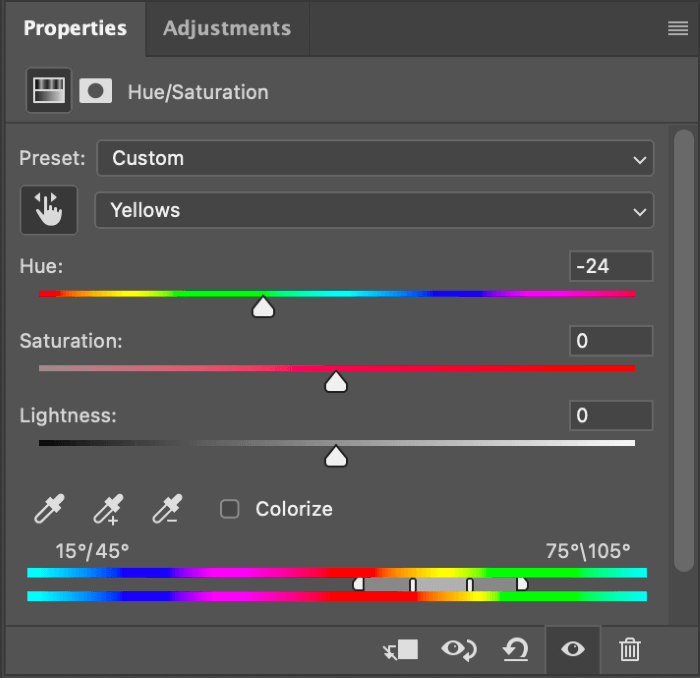
It’s possible to change color ranges manually by opening the dropdown menu and selecting from Photoshop’s preset color ranges, but this example is a perfect demonstration of the fact that it’s not always easy to pinpoint exact colors in a photo.
My brain saw trees and expected to use the Greens color range, but the pixels are actually largely in the Yellows range.
Once you’ve selected a color range, you can use the Eyedropper tool to adjust the scope or play around with the sliders yourself in the color gradient section.
The Saturation and Brightness sliders are fairly self-explanatory, but I’d never be able to live with myself if I didn’t caution you against overusing the Saturation slider.
Bumping up the saturation of your image can often turn an interesting photo into a great one, but make sure that you don’t take it too far.
You can also use the Hue/Saturation adjustment layer to change the entire image to a single color by checking the Colorize box. With this setting enabled, the Hue slider determines the color that is used to tint the image.
If you don’t want to bother setting a custom color change, you might want to explore the options in the Presets dropdown menu. Sepia and Cyanotype are interesting, although the other presets may not be as helpful, and you’re probably better off making custom adjustments.
A Note About Masking
Like every adjustment layer, your Hue/Saturation adjustment layer has a layer mask. If you’re not familiar with layer masks, they allow you to limit the adjustment effect to certain parts of the image.
Click the layer mask in the Layers panel to select it, and then paint it with black, white, or gray pixels.
The total value of each grayscale pixel in the layer mask determines how much of the adjustment effect is visible in the corresponding part of your image, giving you complete control over the results.
Layer masks are used for adjusting specific parts of an image instead of the entire thing.
A Final Word
If you’ve worked your way through this entire tutorial, you’re well on your way to becoming an expert at changing the color of an image in Photoshop! As you practice working with the Hue/Saturation adjustment, you’ll also get better at spotting opportunities to use it in your work.
Color is a powerful part of any image, so make sure that it’s saying exactly what you want it to!
About Thomas Boldt