E-commerce shops do this a lot, it’s impossible to take photos of all colors of a product when you have so many options. Lie, it is possible, but in order to save time and money, you don’t have to. Because Photoshop can do the job.
I worked for that makes laptop cases and we had products with more than ten colors to choose from. Sure, taking product photos is not the hardest thing in the world but if you could save time and keep the images consistent, why not?
Instead of taking photos one by one, I selected the best product image and use Photoshop to apply colors to all. In this way, I could keep the product photos all looking at the same angle, and lighting, just in different colors.
In this article, you’ll learn how to use two easy tools to recolor a specific part of your image in Photoshop.
Keep reading.
Table of Contents
2 Quick Ways to Change the Color of Part of an Image in Photoshop
Three are multiple ways you can use to change the color of an image in Photoshop. But if you want to change the color of only a part of an image, the two methods below will get you to it.
Note: Screenshots are taken from Adobe Photoshop CC Mac version. Windows and other versions might look slightly different. Windows users change the Command key to Ctrl and the Option key to Alt.
Method 1: Quick Selection Tool
This is a quick and my favorite method when the area you want to change the color of has smooth edges.
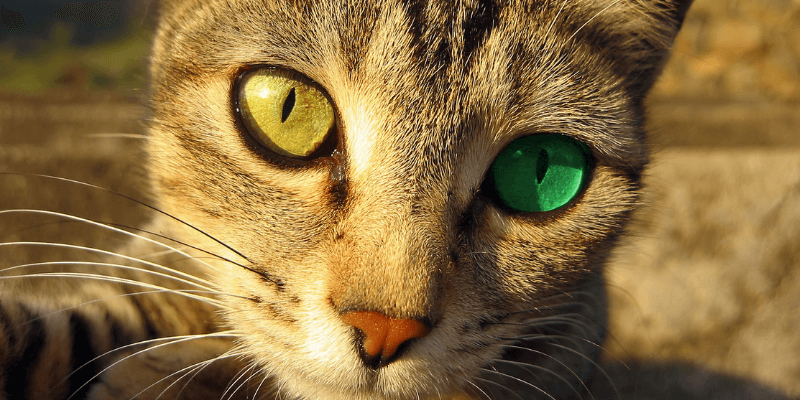
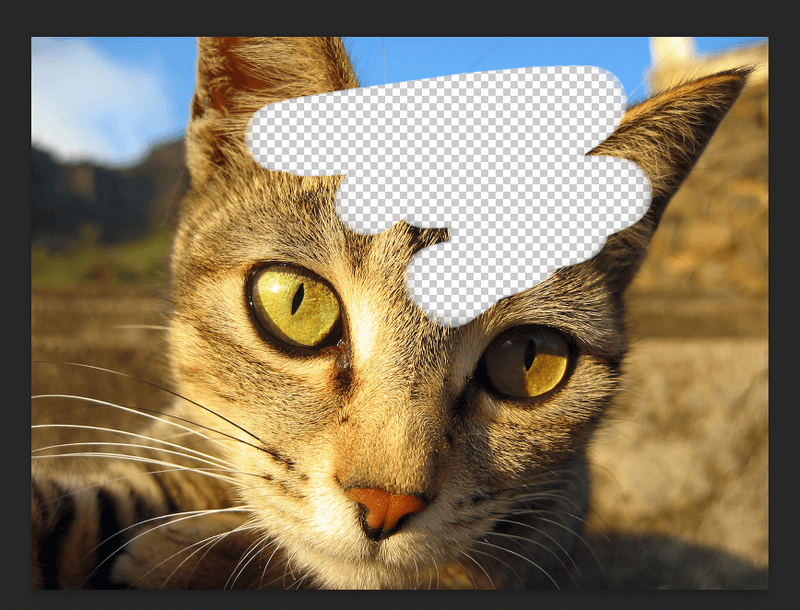
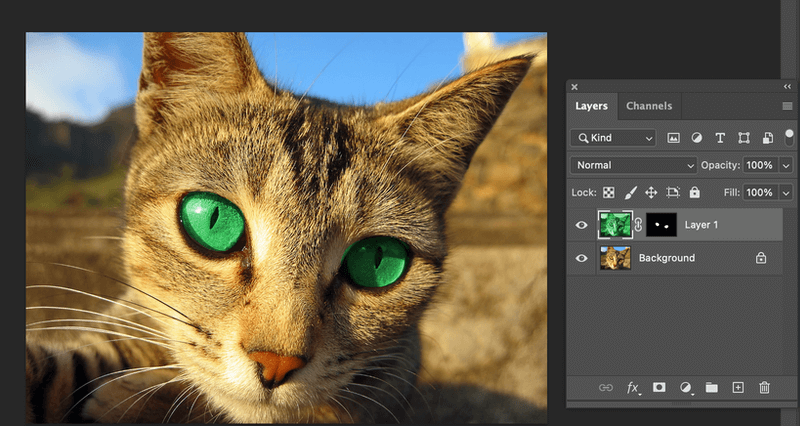
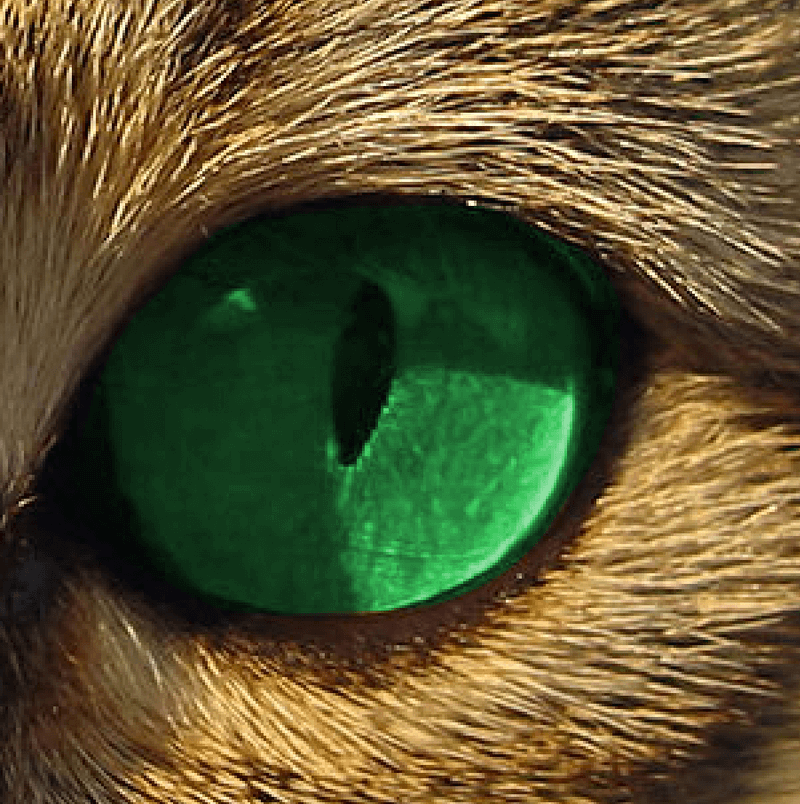
For example, let’s see how we can change the eye color of the cat.
Step 1: Open the image in Photoshop.
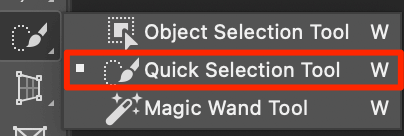
Step 2: Choose the Quick Selection Tool from the toolbar.
Step 3: Click and draw to select the area you want to change the color.
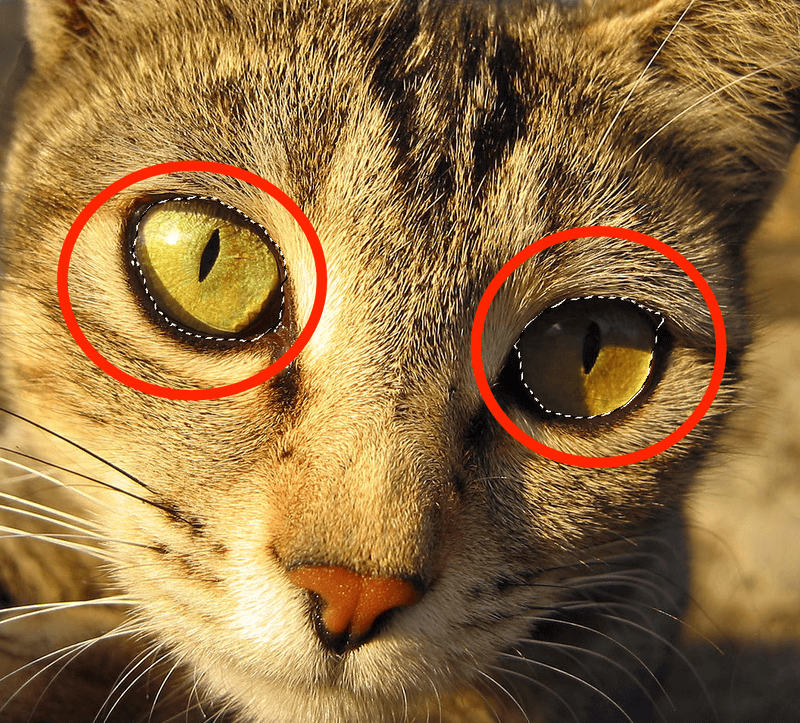
Tips: You can deselect unwanted areas by pressing the Option key and drawing over the unwanted area or selecting the Subtract from selection button from the top menu.

Step 4: Go to the Layers panel and add a solid color layer when you’re happy with the selection.
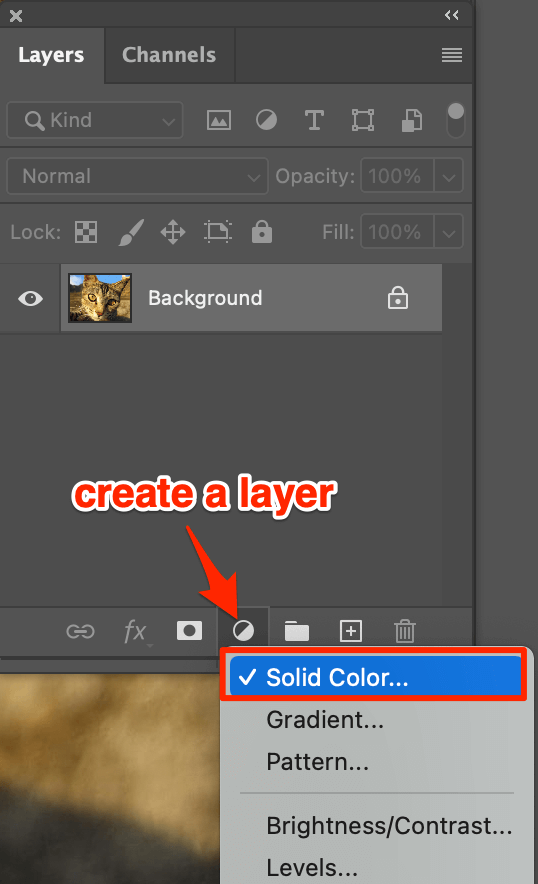
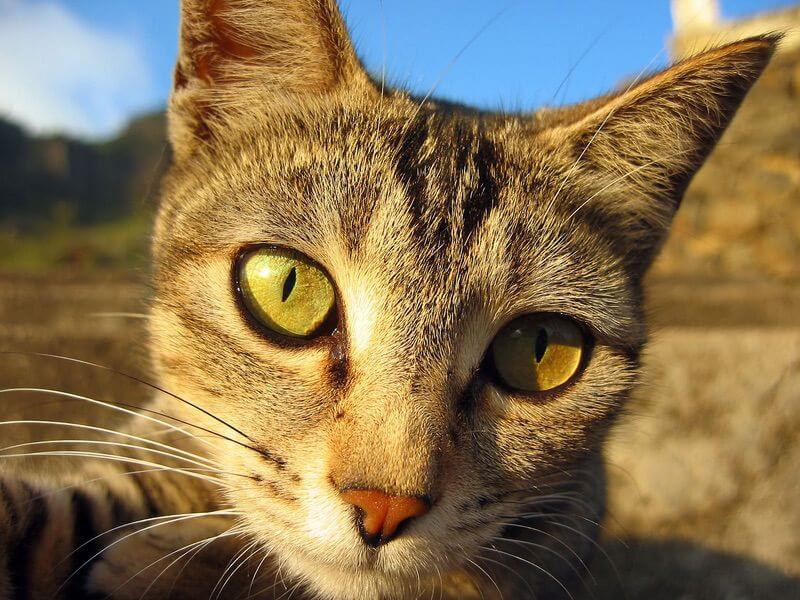
Select a color and click OK. You’ll see the cat’s eyes changed to the solid color you select. Don’t freak out, wait for the next step.

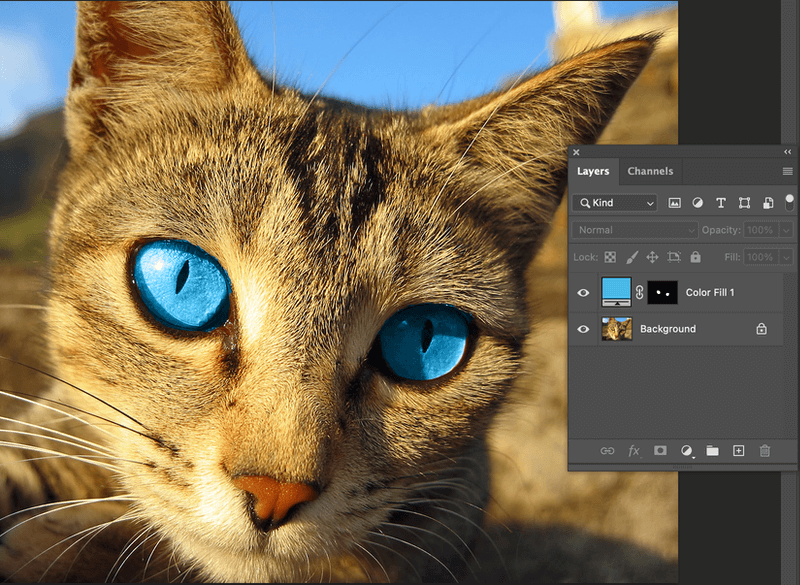
Step 5: Go back to Layer 1 and change the blending mode to Color.

That’s it! New look.
Method 2: Layering Mask
This is the classic way that many designers use to change the color of part of an image in Photoshop because it offers the flexibility to adjust the color change area.
Step 1: Open your image in Photoshop.
Step 2: Duplicate the layer. Hit Command + J on your keyboard or right-click on the background image to duplicate the layer.
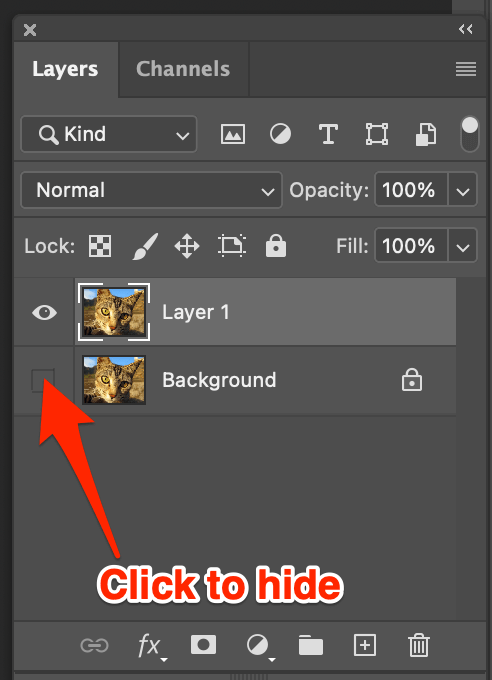
Once you created the layer, hide the background layer.
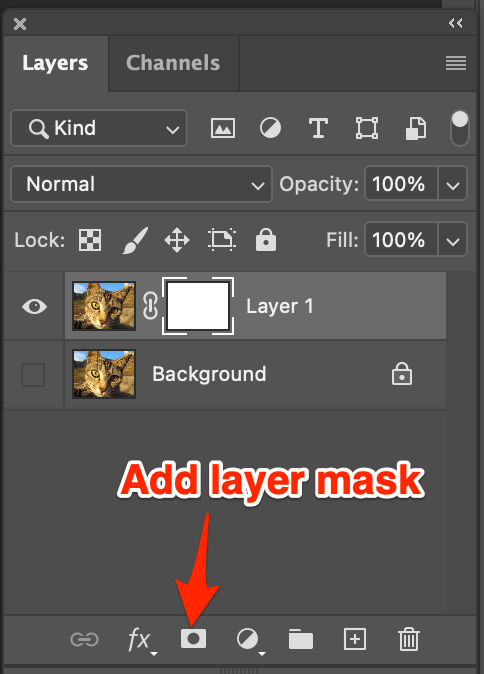
Step 3: Add a layer mask to the new layer (Layer 1).
Step 4: With the mask selected, select the Brush Tool (keyboard shortcut B).
You’ll see the foreground and background colors change to black and white.
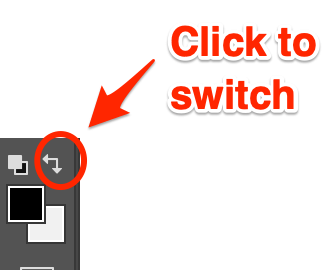
Click on the switch button to make the foreground color black. When you’re working on the mask, black hides the area you paint over, and white shows the visible area.
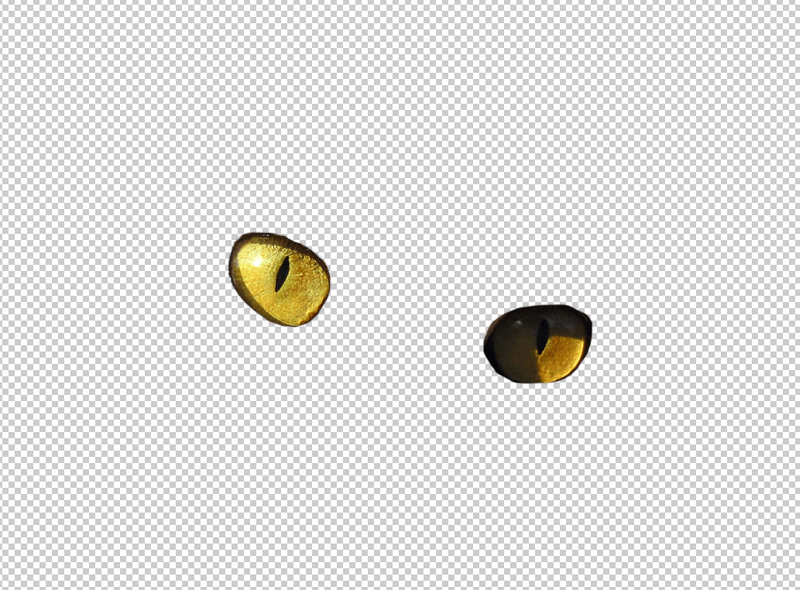
Step 5: Use the brush tool to draw on the areas that you DON’T want to change the color of.
If you want to change the color of the eyes, paint all over the image leaving the eyes untouched.
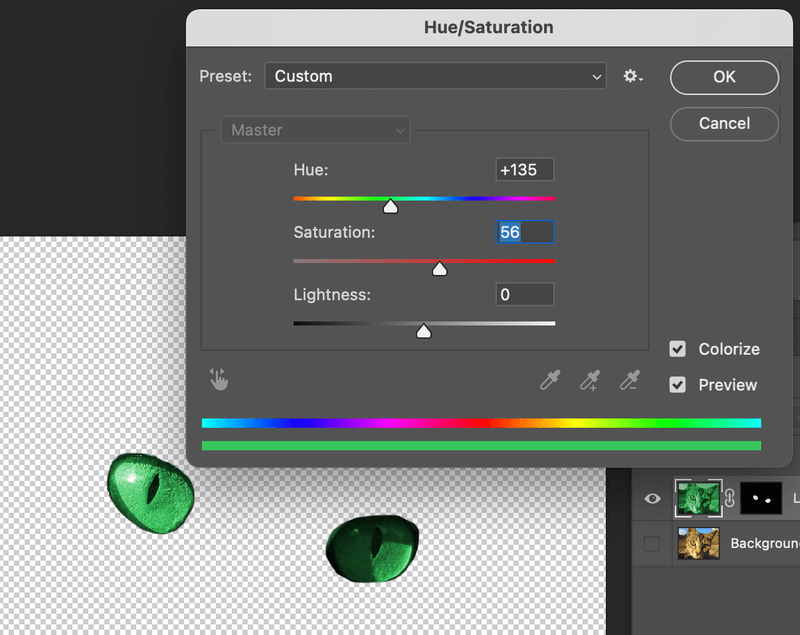
Step 6: Select the layer (not the mask), go to the overhead menu Image > Adjustments > Hue/Saturation and explore to find the colors you want to change to.
Step 7: Turn your background color back on, and you’ll see your final image like this.
Zoom in to check if the color area is ok. If you see some excess color like this, simply select the Brush Tool and draw on the layer mask to clean it up.

Conclusion
You can use either option above to recolor part of your image. The first method works best when your section has smooth edges like geometric shapes for example. The second method gives you more flexibility to edit the image.
About June
Mununa
Thanks for the tutorial, so very nice effect, interesting results.
June
Thank you for your comments Mununa, much appreciated 🙂
Roger
Hi,
I am trying to colourize a car. It has many reflections and varying intensities of colour.
My attempts to use your method result in solid colour, not gradations over the areas painted. I therefore loose perspective and shape.
What am I doing wrong?
Thanks for this.
Roger
June
Hi Roger,
I have tried to replicate this issue myself and haven’t been able to re-create it. All I can say is to try the tutorial again just incase you missed one of the steps. If anyone else can spot the issue here please post an answer. Thanks
Raymond Chua
Solution to the problem is
1) Open the image
2) Click Adjustment layer (half black half white icon) under layer palette
3) Select “solid color”
4) Click the down arrow under layer and select blend mode to “color”
5) Add a mask by clicking on square with circle inside icon under layer
6) Click on thumbnail of the adjustment layer (not the mask)
7) Pick the color you want to replace with
8) Click on thumbnail of the mask, and fill the mask with lack.
9) Select brush tool and make sure the foreground is white
10) Start painting the subject that you want to change color
11) If make a mistake, just change colour of brush to black and paint over to restore.
Hope that help!
Raymond Chua from Singapore
Myda
Awesome! Thank you so much!
Shane
Works great! The simplest layer mask tutorial I’ve seen.
Gary Gemmell
Excellent thanks!
Gary Gemmell
I used to use a simpler method just using the magic wand – select the area then shift key and use the magic wand to expand until ive got the area i want then just use the hue and saturation but your method is more in depth – thanks its always a good day when ive learned something new!
June
Thanks Gary, yes I have also used that method before. I think whichever method you use it is good to try and do it via a layer mask as if you ever want to go back and edit anything you can. Thanks for you comment.
Govindaraju
simply a wonder to change colour of a part of an image or a photo!
so nice!! thangs a lot!! I take you as my best teacher!!!!
from: Govindaraju D.L.
Govindaraju
An excellent presentation! Thanks so much!!
Govindaraju
An excellent tutorial! Thanks so much!!
June
You’re welcome!