
You’re proud of your images and you want the world to know that you took them. It’s also heartbreaking (or flattering depending on your point of view) to see other people steal your work and try to pass it off as theirs.
Though there’s no way to 100% ensure that no one will steal your work online, it helps to watermark your photos.
Hey there! I’m Cara and I love getting creative with a camera. Adding a watermark to my photos adds a little extra layer of security. At least it makes it harder for people to steal my images and use them.
It’s really simple to add a watermark in Photoshop. Plus, you can link your watermark to the original file so if you ever make changes, it will automatically update the watermark on all linked files!
Note: the screenshots below are taken from the Windows version of Adobe Photoshop, if you’re using the Mac version, the navigations may look slightly different.
Table of Contents
How to Make a Text Watermark
If you’re just starting out or are still in the amateur photography stage, you might not have your own logo. However, you can still put a simple text watermark on your images to mark them as your own.
Step 1: Open the Text Tool
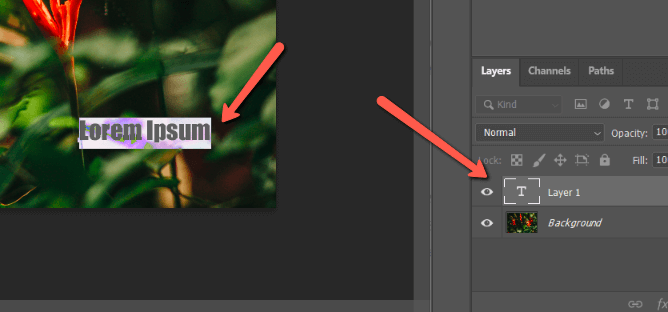
Open your image in Photoshop and choose the Type Tool from the toolbar on the left. Most watermarks are horizontal, but feel free to grab the vertical tool if you want to get a little crazy.

Click anywhere in the image and the famous “Loren Ipsum” text will appear. Notice that the text is automatically placed on a new layer.
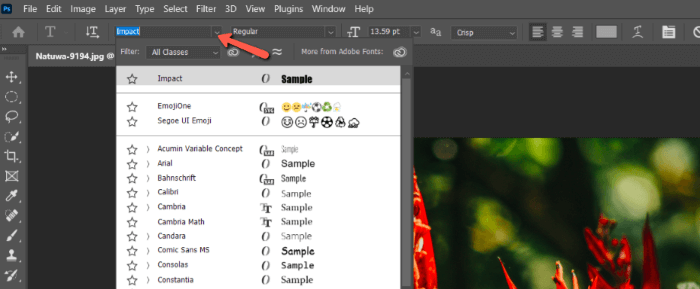
Step 2: Add Your Text
Type in the text you want to use. If you want to add special characters, such as the copyright symbol, you’ll have to use the character map on your computer. In Windows 10, I found it by going to Start > Windows Accessories > Character Map.
On a Mac, you should find the Character Pallette by going to Edit > Special Characters. You can also use the search function to find it on either type of computer.

Step 3: Refine the Design
Now let’s choose the color, size, and placement of the watermark.
With the text layer highlighted, pick the font you want to use from the dropdown menu up in the Options bar.
Choose the color by double-clicking on the color swatch in the Options bar.
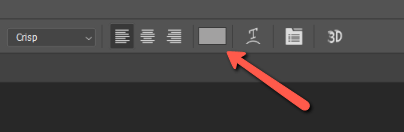
The color picker will appear and you can choose whatever color you like, though it’s best to stick with neutral colors.
To resize and reposition, hit Ctrl + T or Command + T to activate the Transform tool. A blue box will appear around the text. You can grab the entire thing and move it around and pull the little box “handles” to resize and rotate.

To make the watermark less distracting, bring down the opacity of the layer. Here’s the final result.

How to Make a Logo Watermark
What if you want to get fancy and watermark your images with your logo? It’s just as easy!
Step 1: Open the Logo Onto Your Image
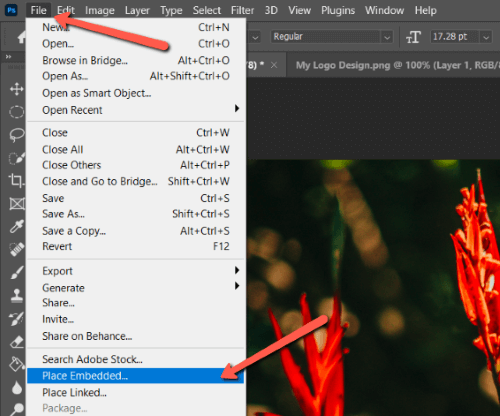
If your logo is set up in a PNG file with a transparent background, all you have to do is add it to the image. Go to File, choose Place Embedded, and choose your logo file. You can also navigate to your file outside of Photoshop, then drag and drop it onto the image.
Photoshop will drop the file on top of your image with the Transform tool active.

Step 2: Refine the Watermark
Grab the handles to resize and reposition as you need.

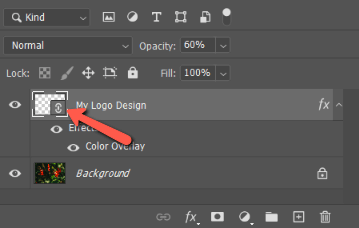
We don’t want watermarks to be distracting, but black is really hard to see in this image. Let’s change the color.
Double-click in an empty space somewhere on your logo layer.

The Layer Style panel will appear. Choose Color Overlay.
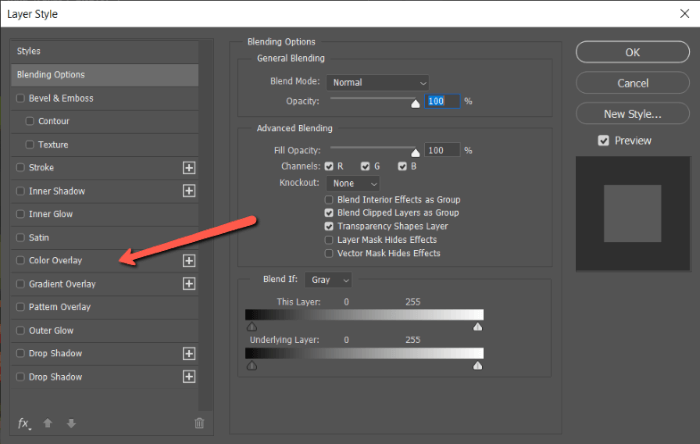
Double-click on the color swatch to open the color picker and choose the color you want.
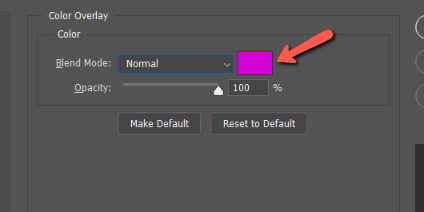
I went with white and dropped the layer opacity to 60%.

It doesn’t take much to create a watermark, but you might place it on hundreds of images. Create a Photoshop action so you can do everything in one click to save time.
How to Link Your Watermarks
What if, after you’ve placed your watermark on a few dozen (or hundred) of your images, you want to change it? If you link your watermarks back to the original file as you go, you can make one change and update all the linked watermarks in one fell swoop. That’s a huge time saver!
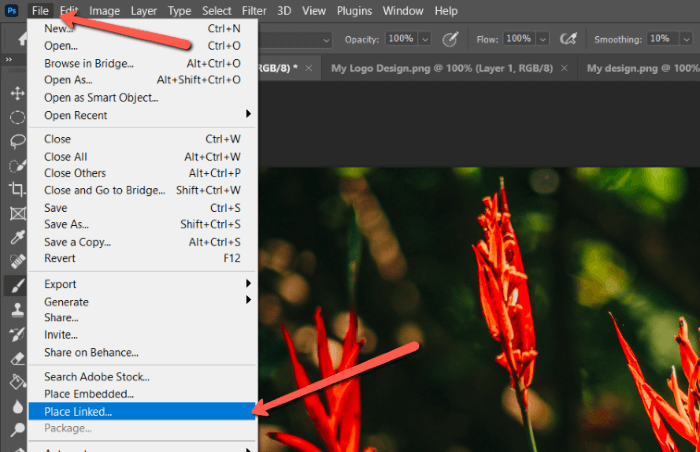
Let’s look at how to do that. There are a couple of ways to link the logo. First, when you place the logo onto your image go to File and choose Place Linked, instead of Place Embedded. This will add the logo as a linked smart object instead of an embedded one.
If your watermark is already added to the image, make sure that it is a smart object. Smart objects will have this little icon in the corner of the layer thumbnail.
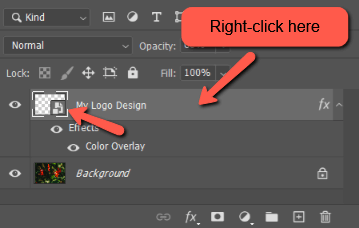
If it’s not a smart object, turn it into one by right-clicking on an empty part of the layer. Choose Convert to Smart Object.

Once it’s a smart object, right-click on the layer, and choose Convert to Linked instead.
A dialog box will pop open asking you to save the logo file. Click Save. The icon on the thumbnail will change to a link.
After this, use the Place Linked command to use the same logo file as a watermark on multiple images. When you make changes to that logo file and save it, it will update across all the linked images.
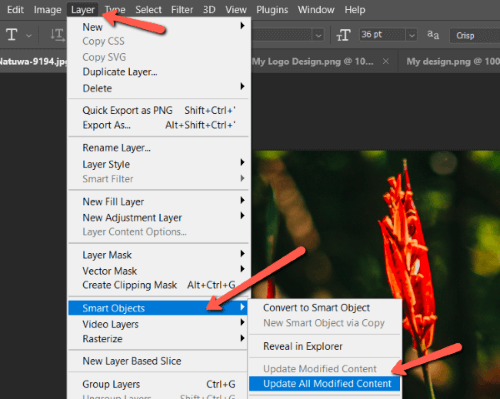
Keep in mind that linked images must be open in Photoshop for the changes to take place. If the images are not open in Photoshop, the next time you open them they will appear with a little warning sign on top of the link icon.
When you see that, select the smart object and go to Layer in the menu bar. Hover over Smart Objects then choose Update Modified Content to update one or Update All Modified Content to update multiple images.
Pretty cool, right? Now you can easily make sure everyone knows without a doubt that these images are yours!
Happy watermarking! And be sure to check out more of our informative tutorials such as how to resize an image without quality loss.
About Cara Koch