Photoshop is a great tool for working on very large images. It’s pretty well-optimized and feels responsive even when working on a high-resolution 16-bit image with multiple layers, but there’s one area where it falls a bit short: tile printing.
This is probably intentional on Adobe’s part since Photoshop is typically used as part of a pre-press workflow rather than for home desktop publishing, but Illustrator and Indesign both offer more tools for direct printing than you’ll find in Photoshop, such as tile printing.
Tile printing allows you to print a very large document over multiple smaller pages so that it can be reassembled to form a larger image like a jigsaw puzzle.
Typically this process is only used for testing purposes before sending files off to a larger press, a process known as ‘proofing’, but it has plenty of other uses as well – especially if you don’t have access to a professional printer.
Photoshop does not allow you to tile print automatically, but there are a couple of simple ways around this limitation: you can manually slice your image into individual sections that match your printer’s paper size, or you can export your document as a Photoshop PDF and then tile print it automatically using the free Adobe Acrobat Reader app.
Since most people want to tile print for quick testing purposes, let’s start with the easier automatic method.
Table of Contents
Method 1: Tile Printing With Photoshop PDFs
This technically doesn’t just require Photoshop, but since Adobe Reader is free and many of you will already have it installed, I think it’s worth including here.
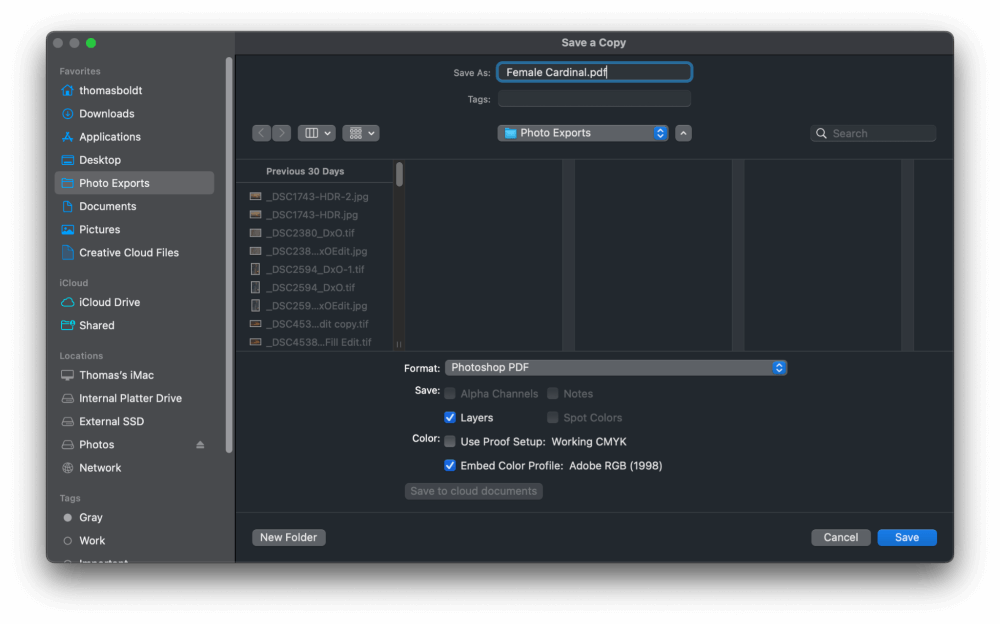
To get started, load your large document in Photoshop. Open the File menu and select Save A Copy. In the dialog box, make sure to set the file format to Photoshop PDF. Name your file something descriptive, and click Save. Remember where you saved the file!
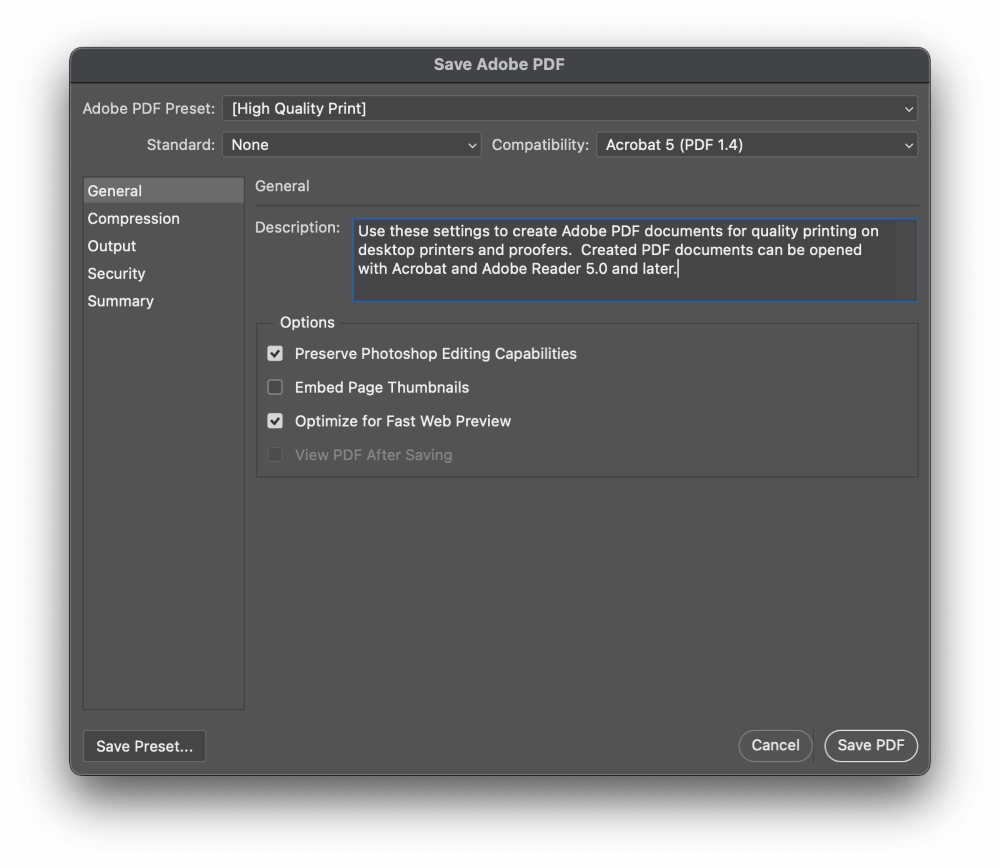
Photoshop will bring up the PDF Export options, which can be a bit confusing if you’ve never used them before. If you’re not feeling confident enough to customize the settings, you can simply use the High-Quality Print preset from the dropdown menu.
Next, we’ll move the party over to Adobe Acrobat Reader. Adobe uses that website as a marketing channel, though, so make sure you click the link for the free Acrobat Reader, not the paid Acrobat DC version.
Once the download is finished, run the installer file and follow the on-screen prompts.
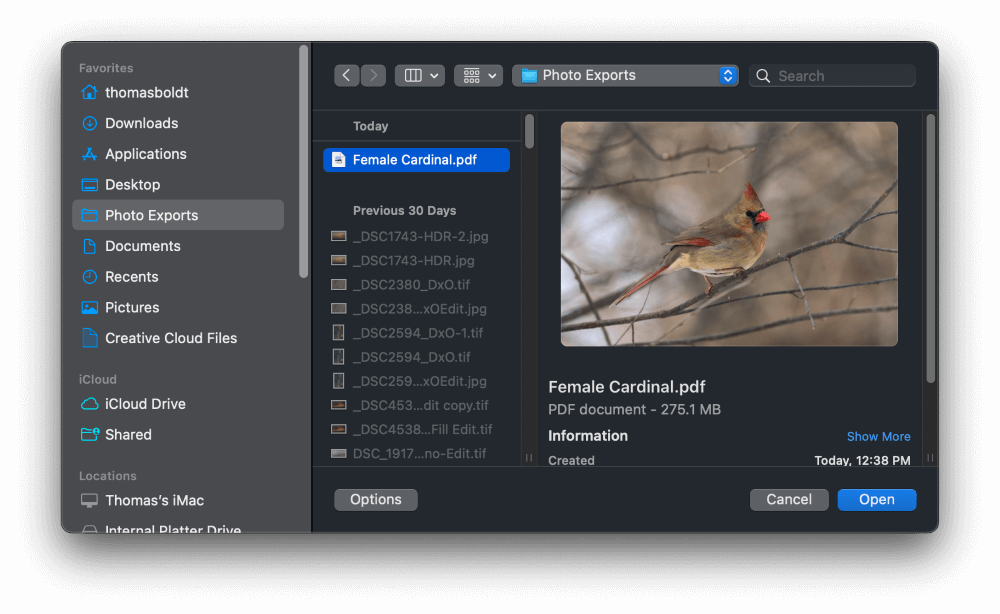
Once the installation is complete, open the newly installed Acrobat Reader app. Once it loads and you follow (or skip) the introductory tour, open the File menu, and click Open. Browse to find the Photoshop PDF file that you saved earlier, and click Open.
Your large Photoshop document should open in Acrobat Reader with no issues. To set it up for tile printing, open the File menu, and click Print.
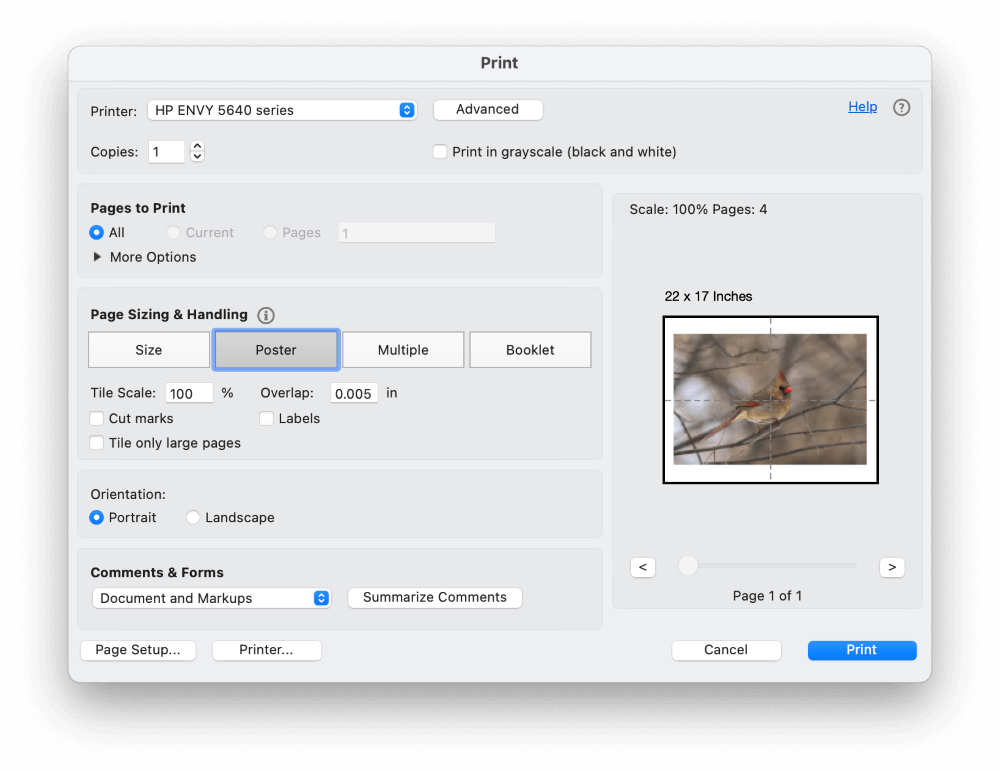
In the Print dialog box, locate the Page Sizing & Handling section, and click the Poster button. As you’ll see immediately in the preview pane, your large document has been automatically divided among as many pages as needed.
Above the preview image, you’ll find some info about the number of pages required to complete the tiled print.
To increase the size of your overall image, increase the Tile Size setting. You can also set up an overlap around the edges of each tile, although this can make reconstructing the final image a bit more difficult since you’ll have to place each tile more precisely instead of just matching the edges.
Customize any additional settings specific to your printer, and click the Print button. It will take a while to complete, but by the end, you’ll have a perfectly tiled print of your Photoshop document.
Method 2: Manually Slicing Your Image
It’s also possible to slice your image manually in Photoshop to produce a tiled print, although this method is definitely a lot more time-consuming and prone to human error.
For most situations, Method 1 should be used, but if you’re determined to do this by hand, the best thing you can do is figure out the maximum printable area for your printer.
The dimensions will vary a lot depending on the printer model, paper size, and several other factors, so you’ll have to figure this out on your own for your specific situation. Check your printer manufacturer’s support website for more information.
If you can’t get that information (or you’re feeling lazy and don’t want to try, no judgments), you’ll have to settle for an estimate of the tile size you can use.
Modern printers don’t usually need more than 0.5 inches of margin space, so if you’re printing on a standard 8.5” x 11” sheet of paper, estimate that you can print 7.5” x 10” for every tile.
Once you’ve got your tile dimensions, open your image in Photoshop. You could manually use the Slice tool to draw out each tile, but that’s way too time-consuming, and there’s a great workaround that uses guides.
Open the View menu and select New Guide Layout. Photoshop will open a dialog box that allows you to create a regular grid pattern using guides, although it’s a bit finicky.
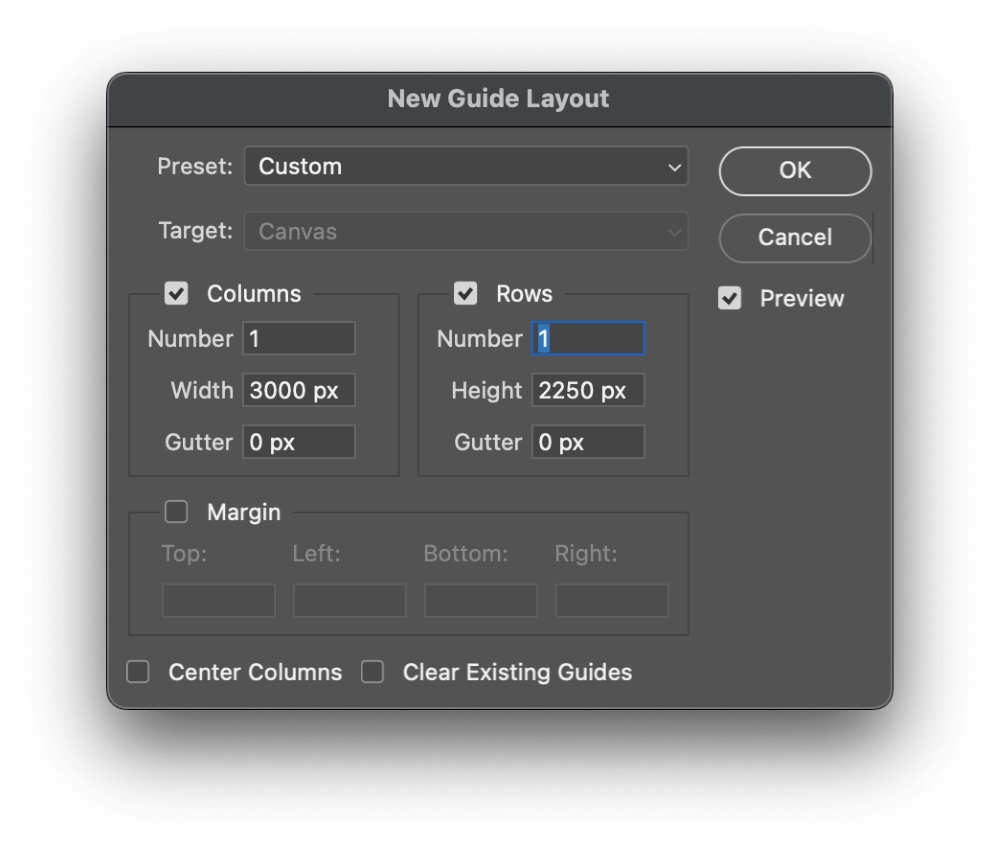
Enable Columns and Rows, and change the Gutter setting to 0 pixels for both of them.
Calculate the tile size in pixels to place your guides in the correct spots. Print resolution should be 300 pixels per inch, so take your maximum printable tile size (eg 7.5 x 10) and multiply each dimension by 300 to get the pixel sizes to input for the Width and Height settings.
In this example, that makes for tiles that are 2250 x 3000.
Enter the appropriate dimensions in the Width and Height fields, and double-check in the live preview to make sure that you didn’t flip the two values by accident.
If the dialog box is showing an error, reduce the Number setting for Columns until the number of guides you create fits into the picture, then repeat the same process for Rows. Click the OK button to finalize and create the grid, although you can edit it later if needed.
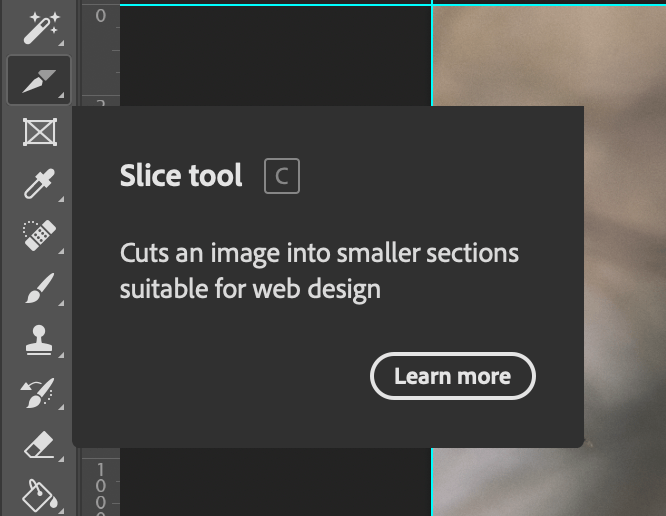
Switch to the Slice tool using the toolbox or the keyboard shortcut C. The Slice tool is nested with the Crop tool, but you can use Shift + C if necessary to cycle through the tools that share the same shortcut.
(The Shift key trick works with any shortcut that’s shared by multiple tools, so remember it!)
In the options bar at the top of the main document window, click the button labeled Slices from Guides, and Photoshop will do exactly what it says on the tin: it will slice the image into sections based on the guides you just created.
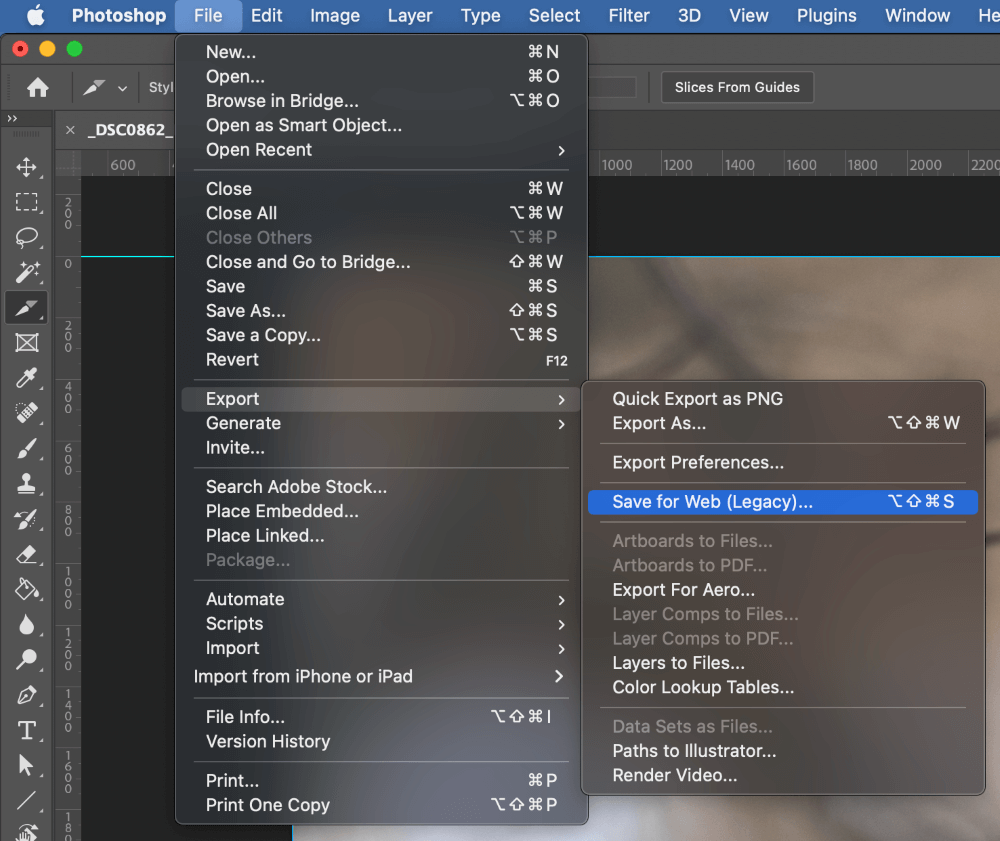
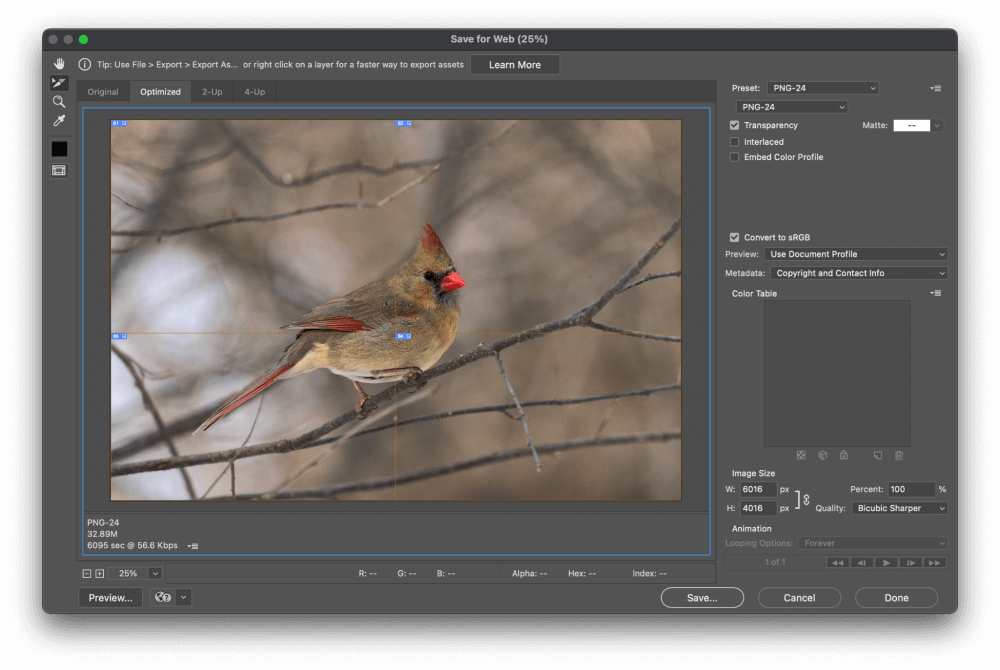
Next, open the File menu, select the Export submenu, and click Save for Web (Legacy)… Photoshop will open the old-style Save for Web export dialog, which seems to be the only method of exporting multiple slices to different files automatically.
Zoom the preview window out until you can see your entire document, and then click and drag to select all the slices in the preview window. On the right side of the window, select PNG-24 from the dropdown menu, and click Save.
Photoshop will open one final Save dialog that allows you to choose where your files will be created. Leave the rest of the settings at their default, but make sure that All Slices is selected in the Slices dropdown menu.
Click Save, and Photoshop will automatically generate PNG files for each tile slice that you’ve created.
Now you can open each file and print as normal, then reassemble them into a large poster-sized print!
A Final Word
Those are the two simplest ways to tile print in Photoshop – well, I say simplest, but they’re not exactly easy.
Hopefully, in a future version of Photoshop, Adobe will add the straightforward built-in method of tile printing found in Illustrator, but it’s often hard to guess what they will do from one minute to the next. At least you won’t have to wait around for them to deal with it!
Happy printing!
About Thomas Boldt