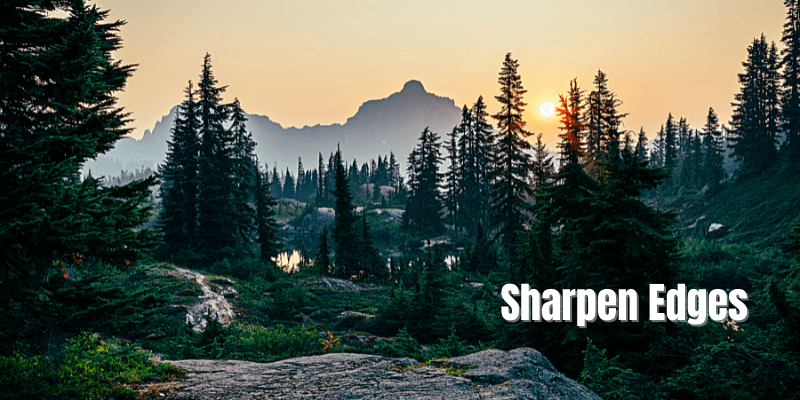
Do you like tack sharp images? Though there’s room for creative deviation, most of the time we photographers are aiming for a tack sharp subject in our photos.
Sometimes in order to get the best result, we need to add a bit of sharpening in post-processing. However, globally sharpening an image doesn’t always produce the effect you want.
Hello! I’m Cara and I have a penchant for sharp images. I do my best to get my images perfectly in focus but some photos can use a little help. However, I don’t want the unnatural look that globally sharpening an image can create. Instead, I only sharpen the edges.
Curious how to do this? It’s super simple, let me show you!
Please note that the tutorials and screenshots below are based on Photoshop CC for Windows. If you are on a Mac version, they can look slightly different.
Table of Contents
Step 1: Prepare the Image
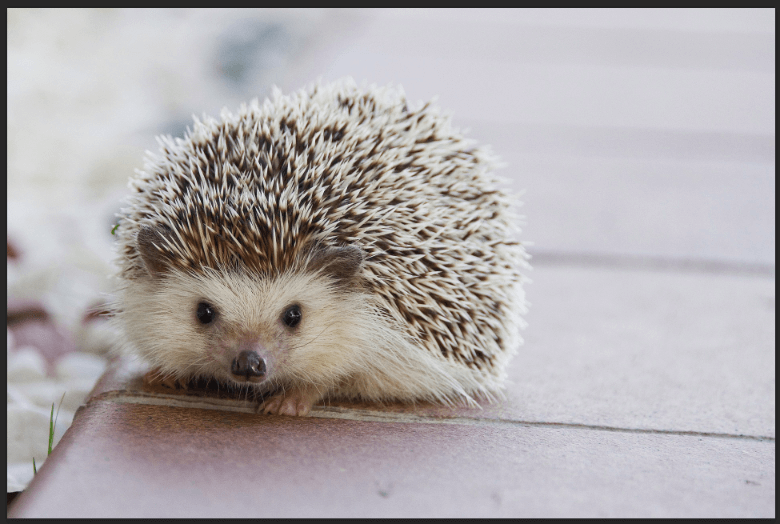
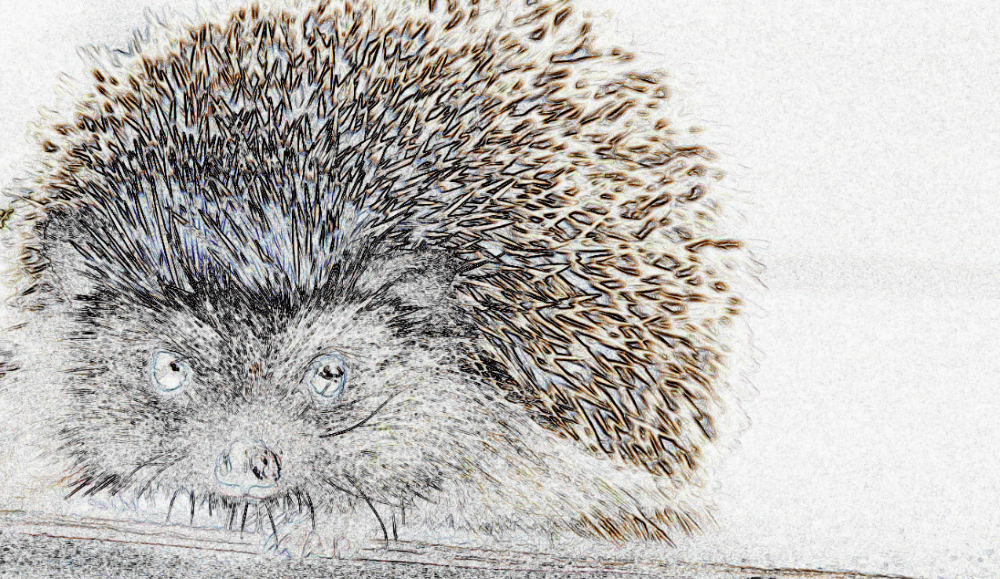
I’m going to demonstrate this technique with the help of this image from Pixabay.com. This little guy is already a little spiky, but let’s see if we can’t sharpen him up a touch more.
If you were already editing your image and have several layers open, you need to flatten the image before applying this technique. If you still want the option to make adjustments later, create a flattened version of the image on a new layer on top of everything.
Creating a new layer and press Ctrl + Alt + Shift + E or Command + Opt + Shift + E.
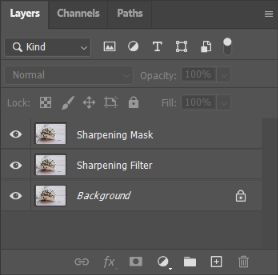
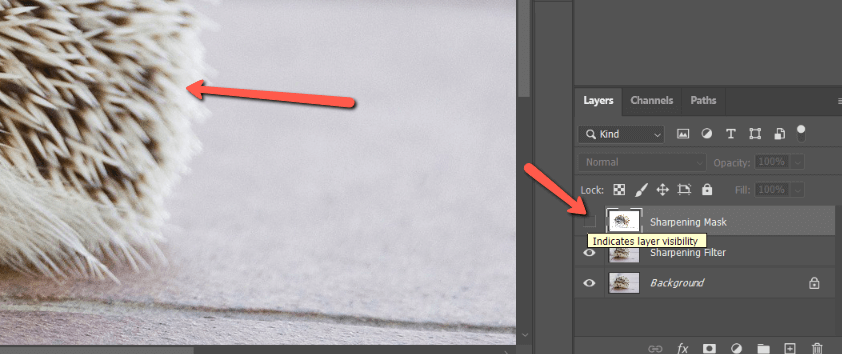
Once you’ve got your flattened layer, make two copies of it by pressing Ctrl + J or Command + J twice. To keep track of them, I named the first copied layer Sharpening Filter and the second one Sharpening Mask.
Step 2: Create the Sharpening Mask
On this layer, we’re going to create a sharpening mask. This will tell Photoshop which parts of the image we want the sharpening filter to affect.
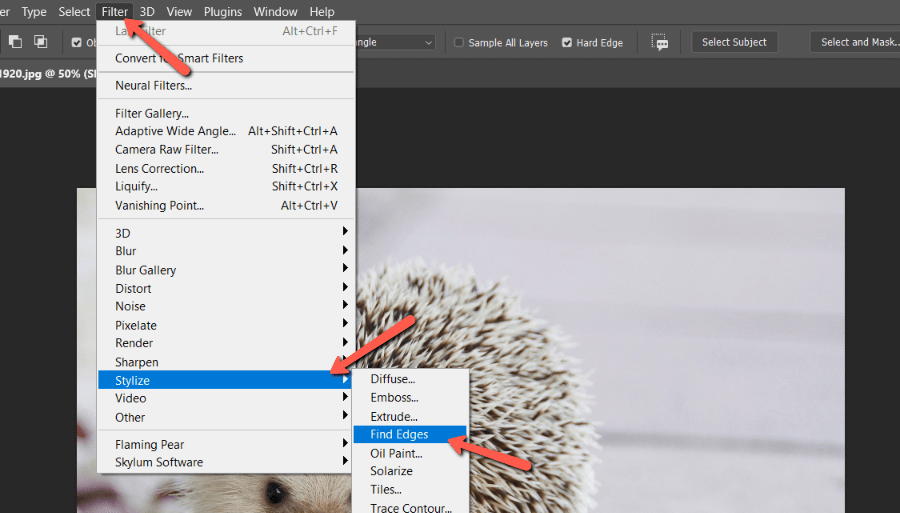
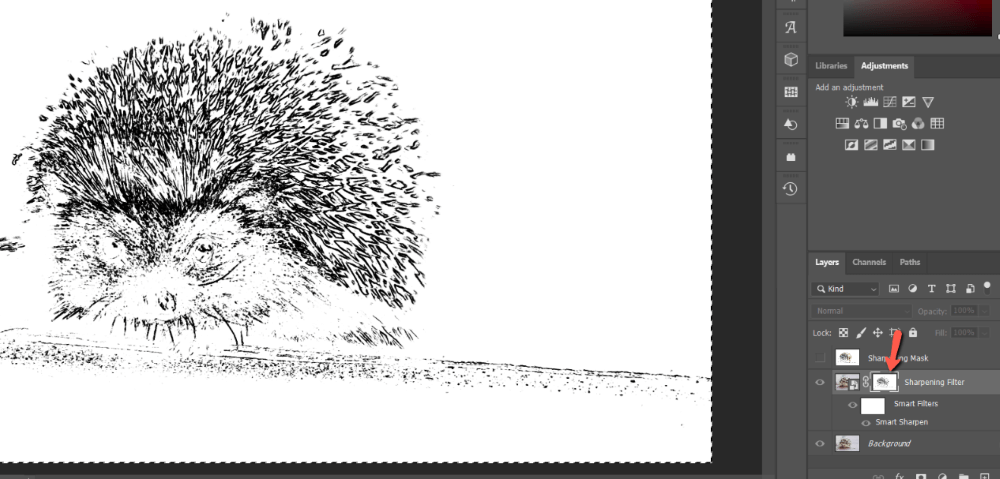
Find Edges Filter
To do this go to Filter, hover over Stylize, then choose Find Edges.
You’ll get an image like this where Photoshop is highlighting the edges. However, you’ll notice some of the finer details got picked up as well. We’ll need to remedy that. Zoom in to 100% on the image so you can better see what you’re doing.
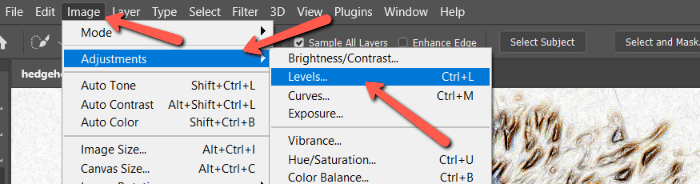
Adjust the Levels
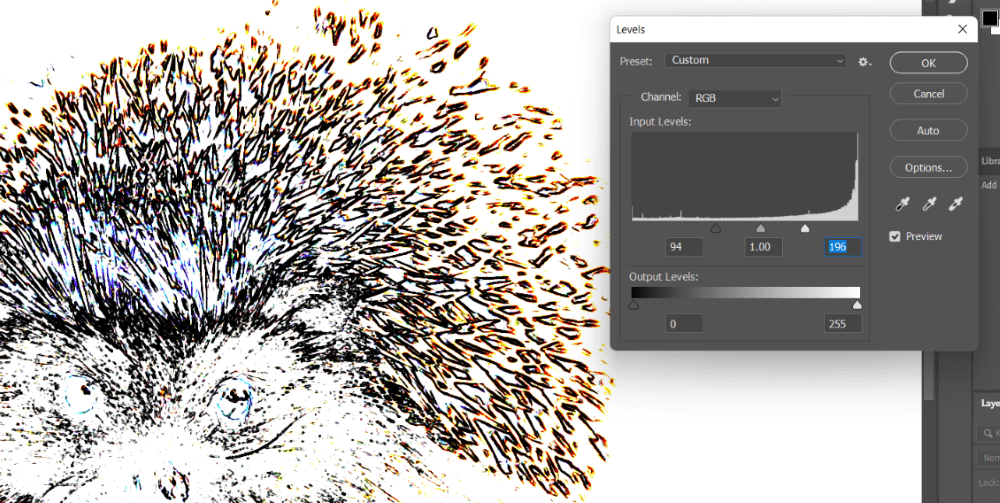
To open a Levels adjustment layer, go to Image, Adjustments, and choose Levels. Alternatively, you can press Ctrl + L or Command + L on the keyboard.
Bring the highlight and shadows tabs closer to the middle until you see something like this. Dark areas will be affected, white areas will be left alone.
The finer details are being picked up less and the bold lines are showing up on the main edges of the hedgehog’s quills.

Almost there, but the lines need to be a touch thicker.
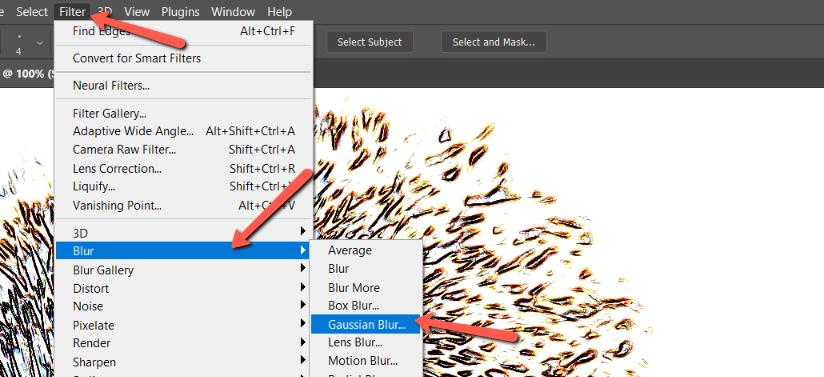
Add Gaussian Blur
It sounds backward but to thicken the lines for proper sharpening we need to add a Gaussian Blur filter.
Go to Filter, hover over Blur, and choose Gaussian Blur.
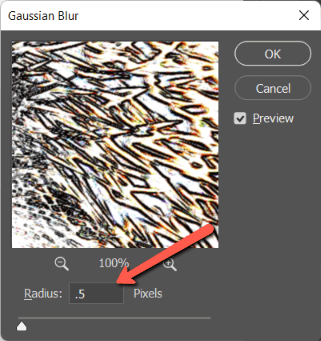
Set the Radius to a small number. A smaller number will thicken the lines, without making the image too blurry. Feel free to play around with the number until you get something you like for your image. I have chosen .5 pixels for mine.
Apply the Levels adjustment once more and you’ll see that there is now some strong contrast between the edges of the quills and the other parts of the image.
Once you’ve got the mask how you want it, click the eye icon on the left side of the layer in the Layer’s panel to hide the layer.
Step 3: Apply the Sharpening Filter
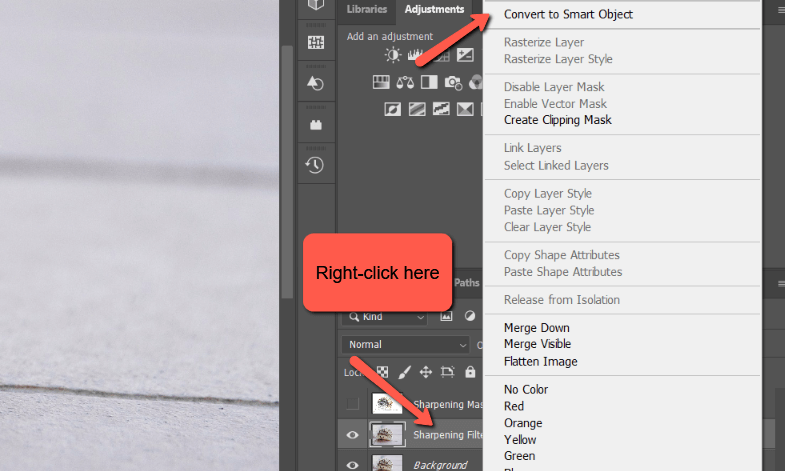
Remember that we made two copies of our image in the beginning? On the first layer, we’re going to apply a sharpening filter. We’re also going to apply the mask we’ve just created to limit the sharpening effect to only the edges we defined.
Let’s go ahead and add the sharpening filter first. Turn the layer into a Smart Object so that you can come back and make adjustments layer. Right-click on the layer and choose Convert to Smart Object from the menu.
Go to Filter, hover over Sharpen, and choose Smart Sharpen.
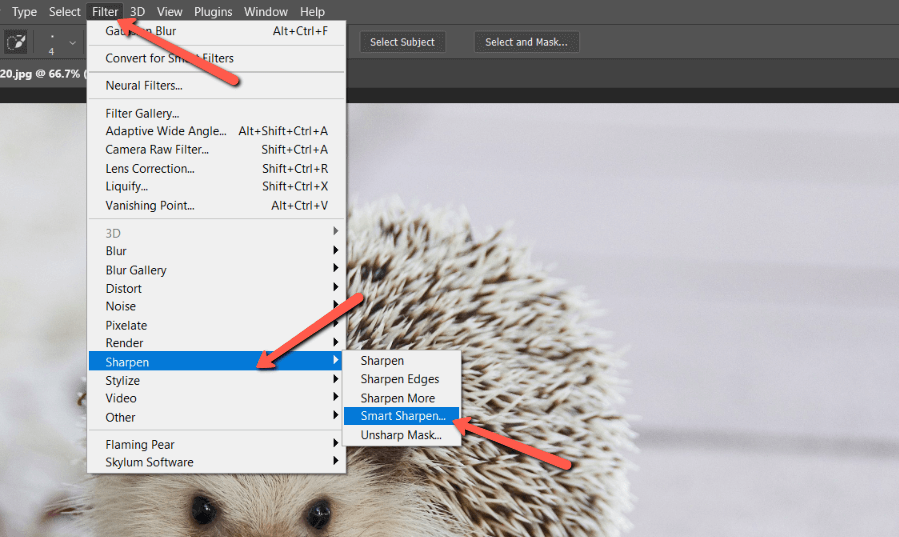
You can make adjustments here and preview the changes on your image. Don’t be afraid to go strong with the sharpening effect. We’ll be dialing it back to just the edges in a moment.
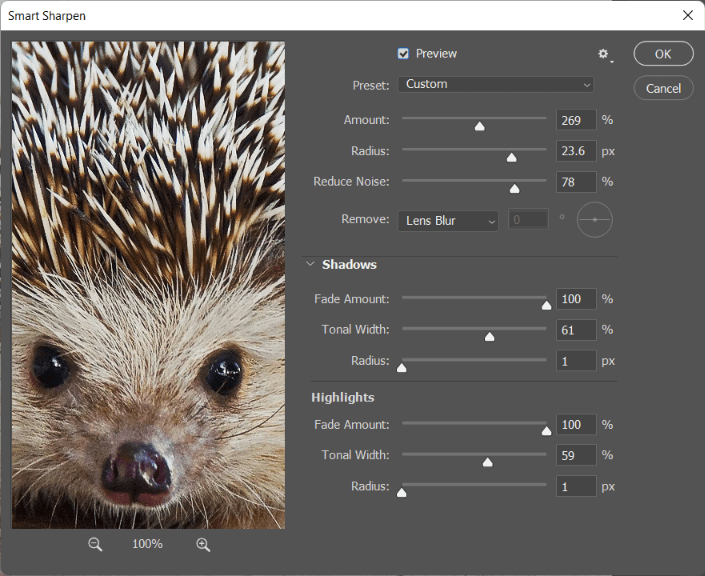
Click OK when you’re happy with the results.
Step 4: Apply the Mask to the Filter Layer
Applying a layer as a mask to another layer is easy but it’s not overtly obvious how to do it.
Click on the sharpening mask layer that we created earlier. It’s still hidden and that’s fine, you don’t have to see it to select it. Press Ctrl + A or Command + A to select all. See the marching ants appear around the edges of the image?
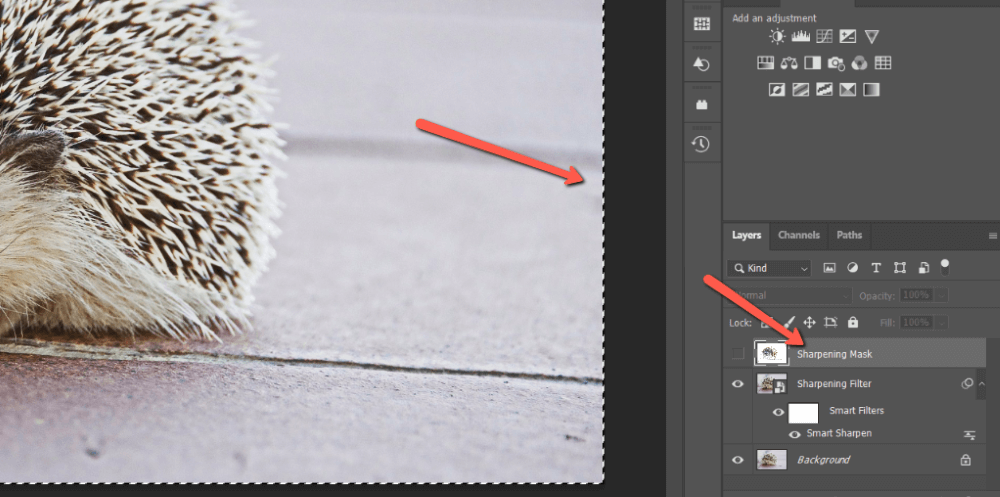
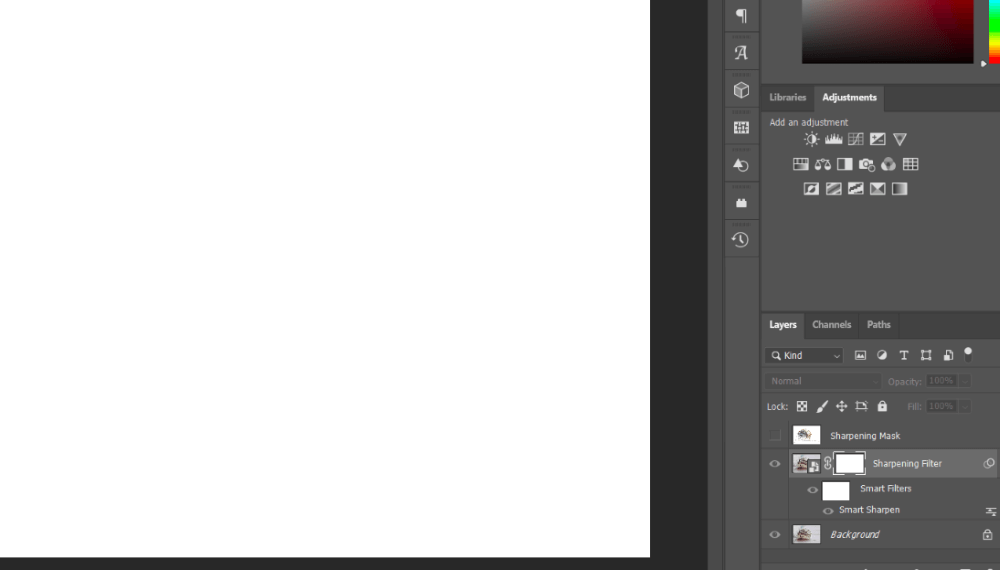
Now, go back to the Sharpening Filter layer and press the layer mask button at the bottom of the Layer’s panel. A layer mask will appear on the layer. Now hold Alt or Option and click on the layer mask thumbnail.

The image will turn white because you have made the mask visible.
Now press Ctrl + V or Command + V to paste the copied layer onto the layer mask. Notice that it appears in the layer mask thumbnail.
Click on the image thumbnail to switch back to the main image.
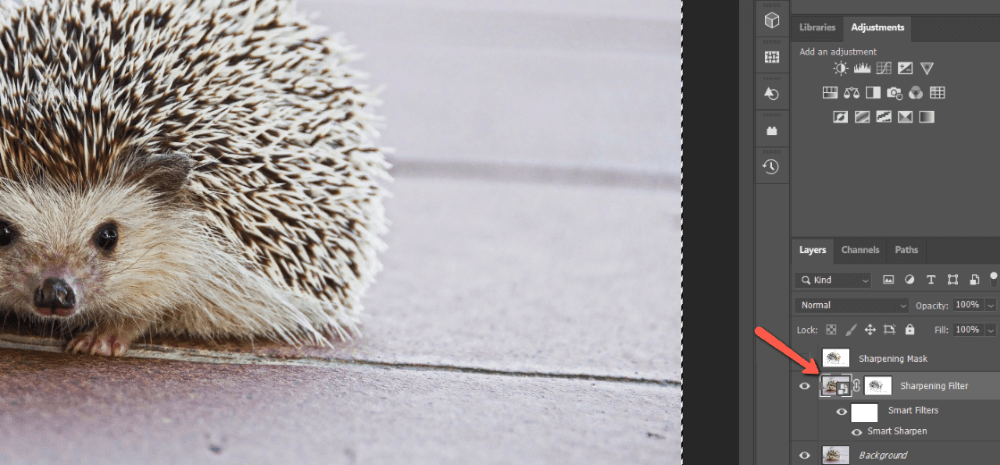
Voila! Your sharpening filter is now being applied only to the edges we defined with the sharpening mask. To see the difference between the two, hold Shift while clicking on the mask thumbnail to deactivate the mask. Click again (hold Shift) to reactivate.

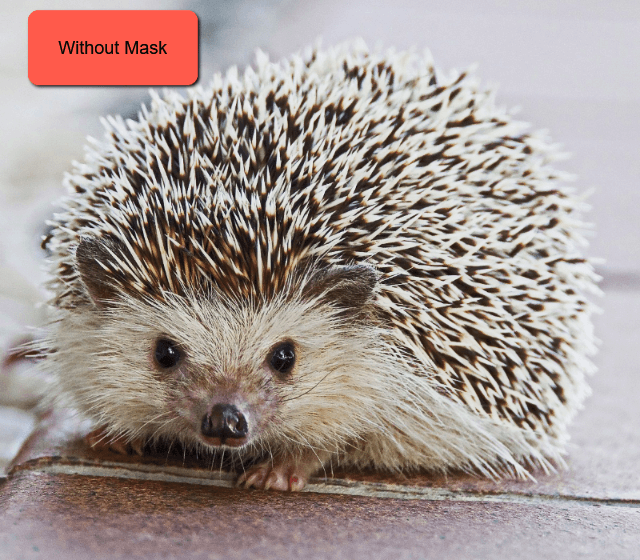
Notice how his face is oversharpened in the second but looks more natural in the first? And his quills have been nicely sharpened in comparison to the original image.
Happy sharpening!
Eager to learn more? Check out 3 ways to sharpen images in Photoshop here!
About Cara Koch