Flattening an image in Photoshop seems like an odd concept. After all, it’s already a flat image on your screen, right?
But remember, when working on images in Photoshop, you’re adding layers on top of one another as you work. Thus, it’s becoming a stack of layers and not just one flat image as you see on the screen.
Hey there, I’m Cara! I use Photoshop to create designs and images for clients and my own eCommerce store. It’s important in some situations to flatten images. It’s super easy to do, but you need to know both why and how to flatten an image in Photoshop. Let me show you!
Why Flatten Images?
It’s easier to understand the why behind flattening images when you understand what’s happening. Flattening an image will compress all the layers in your image and leave you with one background layer.
This is helpful in a couple of circumstances. First, if you’re sending the image to the printer, it’s better to flatten the file. This reduces the file size and makes the image faster to print. Otherwise, the printer has to deal with each separate layer when printing.
Second, if you’re planning to post images online, it’s best to post a flattened file. While people can still pirate your image, without the image layers they can’t as easily make small changes to your work and resell it.
Of course, there comes the obvious downside of flattening image layers in Photoshop. You can’t access the individual layers to make changes later either. For this reason, I recommend saving your PSD file first with the layers intact before making and saving a flattened version.
By the way, many file formats, such as JPG or PNG, do not support image layers. Images are automatically converted into flattened files when you save them as one of these file formats.
Okay, now that we’re all on the same page, let’s look at how to flatten an image in Photoshop.
Method 1: Flatten Image Command
There are a couple of different ways to flatten files in Photoshop. Let’s use the Flatten Image command.
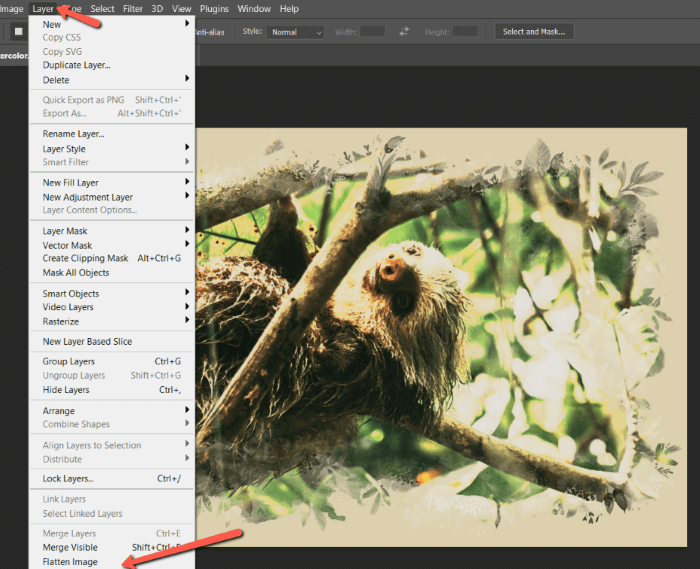
Go to Layer in the menu bar. Scroll down to the bottom and choose Flatten Image.
You’ll get the following warning:
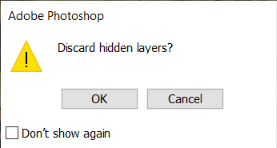
This means that any layers with the visibility turned off will be discarded completely. Only the visible layers will have an effect on the final image.
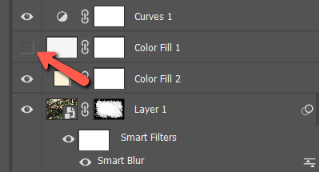
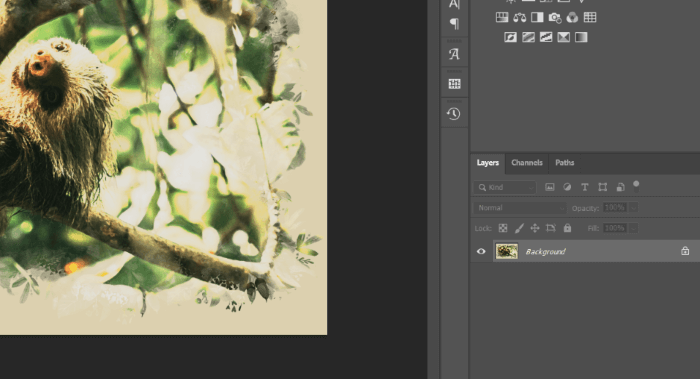
For example, in this image, the layer Color Fill 1 is not visible. The absence of the eye icon on the left side of the layer indicates this. Color Fill 1 will be discarded when I flatten this file.
Here’s what we see when we flatten the image. All the layers disappear and I’m left with a single Background layer.
Method 2: Merge Layers
If you know anything about merging layers, you might be wondering how flattening is different. For one, the flattened image command automatically merges all the layers in an image. When you merge layers, you can pick and choose the layers you want to merge.
There’s one other key difference that is useful for saving files. Flattening an image doesn’t preserve transparency, but merging layers does.
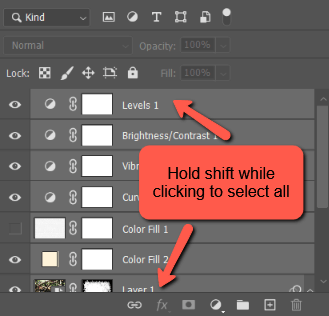
To merge layers, select all the layers by clicking on the first layer, holding the Shift key, and clicking on the last layer.
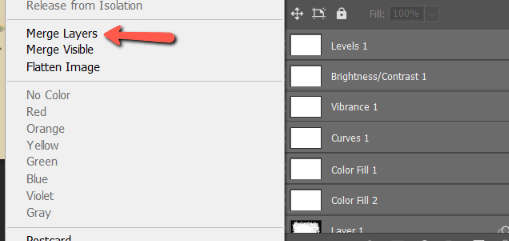
Now right-click on the layers. Select Merge Layers from the menu that appears. Notice that the Flatten Image command is available here as well. Both commands are available in both locations.
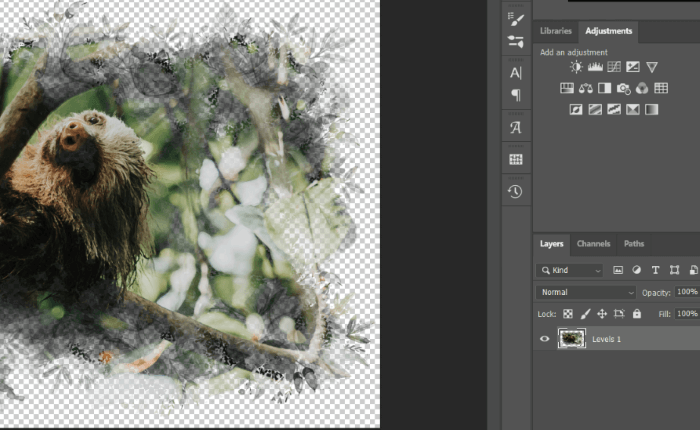
In this case, if I wanted to preserve the transparency around the edge of my image, I could turn off the fill layer and merge layers. Here’s what I get.
Easy peasy. Now you can save your images without all the excess data and considerably reduce the file size.
Eager to learn more about what you can do in Photoshop? Check out our tutorial for saving as a PNG here!
About Cara Koch