What is a food photographer’s least favorite thing to photograph?
Spoons!
Because of their curved shape, spoons throw reflections all over the place. Eliminating the reflections by angling the camera just right in relation to the spoon is not always possible (or it’s extremely frustrating).
Hey there! I’m Cara. I know this because I’ve personally suffered this frustration. Of course, reflections aren’t always bad, they can be really cool. In many images, however, the reflections are distracting and detract from the image.
So we turned to Photoshop to make it all better. As usual, this amazing editing software doesn’t disappoint. Let’s look at several methods for how to remove light or window reflections in Photoshop here!
Please note that the tutorials and screenshots below are based on Photoshop CC for Windows. If you are on a Mac version, they can look slightly different.
Table of Contents
3 Methods for Removing Reflections in Photoshop
There are several methods you can use to remove reflections in Photoshop. Which one you use will depend on the reflection and how much detail you need to preserve or recreate.
Let’s go through a few that you can add to your Photoshop arsenal!
Method 1: Spot Healing Brush Tool
This is a mostly automatic tool that works for simple fixes that Photoshop can read easily. Even so, the tool is incredibly powerful so I would suggest starting with it to see how well it works.
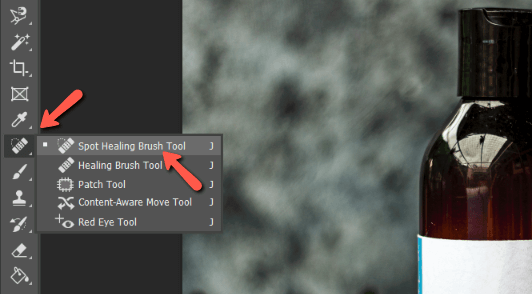
Choose the Spot Healing Brush Tool from the toolbar on the left or press J on the keyboard.
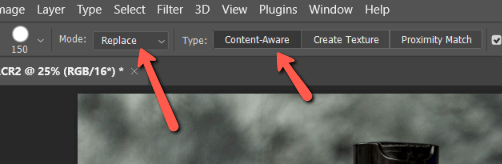
Make sure that you’re using Replace mode and that the Content-Aware option is checked.
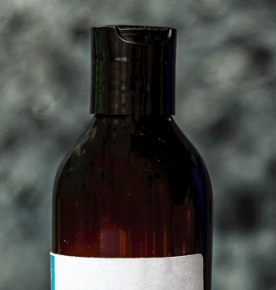
Adjust the size of the brush with the left and right bracket keys [ ], or pick the size from the Options bar. Then paint over the reflection that you would like to remove.
Here’s the before and after.

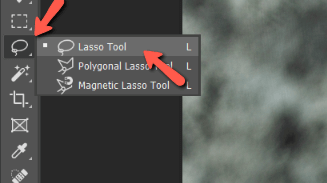
Method 2: Lasso + Content-Aware Fill
Another method is to use the content-aware fill option. Define a selection first, then apply the fill.
You can use any selection tool that allows you to draw around the selection. For example, any of the lasso tools or marquee tools. I’ll grab the regular Lasso tool for this example.
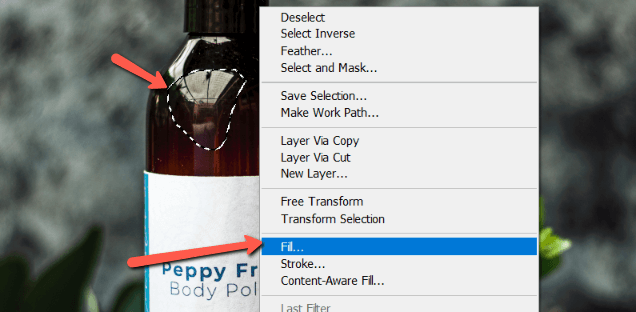
Draw around the section you would like to remove, then right-click anywhere on your image. Choose Fill from the menu that appears.
When the box opens, make sure it says Content-Aware in the Contents box.
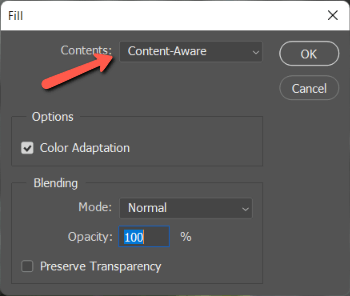
Hit OK and let the program do its thing. This example is filling just one selection. I could keep drawing selections and filling them in to further clean it up as I did with the spot healing brush.

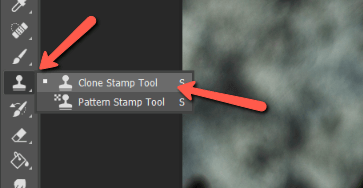
Method 3: Clone Stamp Tool
These first two methods allow Photoshop to decide which pixels to use for the fill. If you need more control over the correction, you’ll want to use the Clone Stamp Tool. This tool allows you to tell Photoshop which pixels you want it to use for the fill.
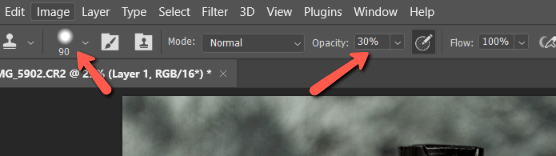
Choose the Clone Stamp Tool from the toolbar.
Set the size and hardness of the brush in the Options bar. It’s also a good idea to bring down the Opacity to more slowly blend the changes.
You also might leave part of the reflection there, but tone it down so it isn’t so distracting. This is useful when removing the reflection entirely would look unnatural.
If you need to flip the cloning horizontally or vertically, click the folder in the Options bar with an icon of the stamp tool.
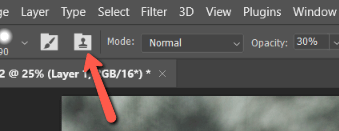
This will open the Clone Source control panel. Change the direction of the source by clicking the buttons with the blocks and arrows.
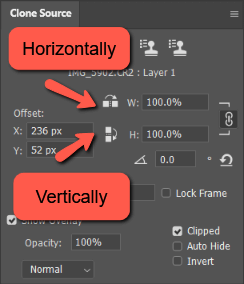
This is useful when you want to avoid a repeating pattern that makes your cloning obvious. Also, if your image has a flipped object on the other side you can use it to paint over the reflection. For example, the opposite side of a window, etc.
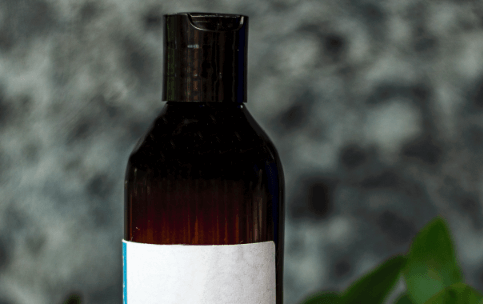
I didn’t spend a ton of time on this to make it perfect, but you get the idea.
There you have it! A few simple methods for removing reflections from your images.
You should still aim to minimize reflections as much as possible when you’re shooting. However, it’s always nice to know you have a backup method if you end up with a hugely distracting reflection in your image.
Curious about other cool stuff you can do in Photoshop? Check out how to remove wrinkles here!
About Cara Koch