
If you’ve ever had to get rid of facial hair from a portrait, you are aware of how challenging it can be.
In this tutorial, You’ll learn how to remove facial hair using the Brush Tool, restore skin texture using a second reference image, and then blend everything together using some expert tools and techniques, regardless of whether your subject has a full beard or just a 5 o’clock shadow.
My name is Aly, I am a graphic designer and have been using Adobe Photoshop for over five years and I am Adobe certified in Photoshop. In this article today, I will be showing you how you can remove facial hair in Photoshop.
10 Detailed Steps to Remove Hair in Photoshop
Follow the steps below to remove facial hair using the Brush Tool.
Step 1: Open the image that you need the facial hair removed in Photoshop by going to File > Open.
Step 2: Find and select the Brush Tool from the left-hand menu options.
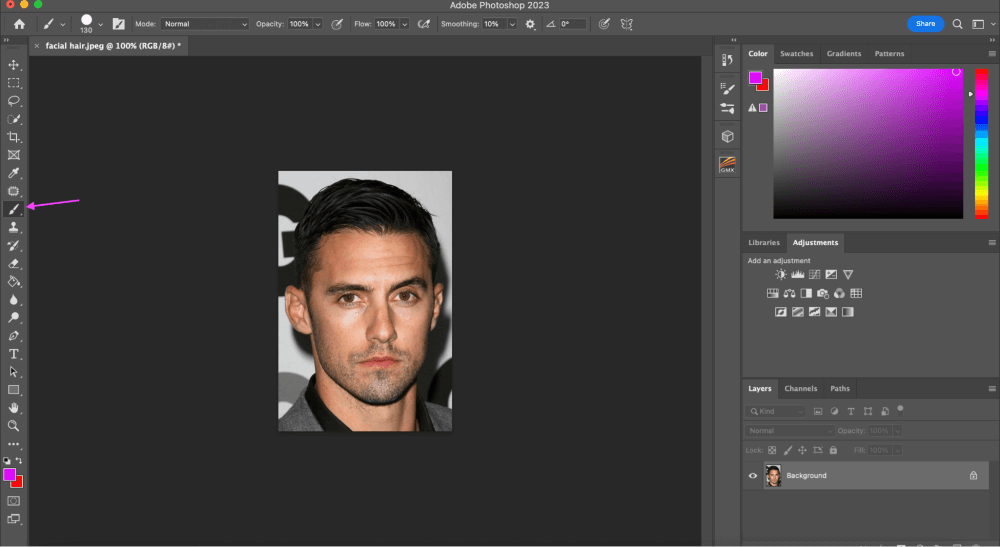
Step 3: With your brush tool selected, make sure the sizing is correct for painting over your facial hair. You can change the brush size by selecting the [ or ] brackets.
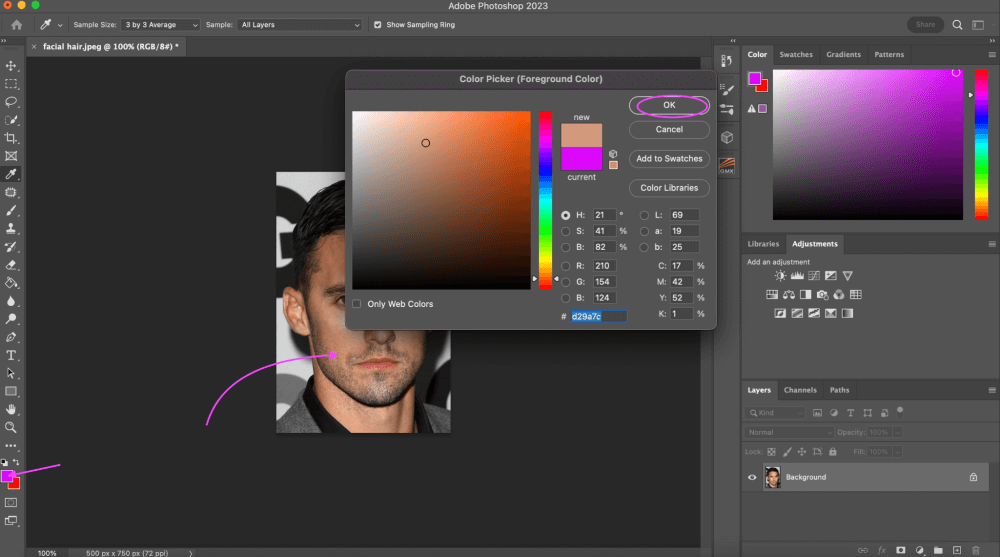
Step 4: With your brush tool still active, select your foreground color and click on a part of the subject’s face where you can just see their skin. Clicking will give your brush their skin color so we can match the rest of their face. Once you are done, click OK.
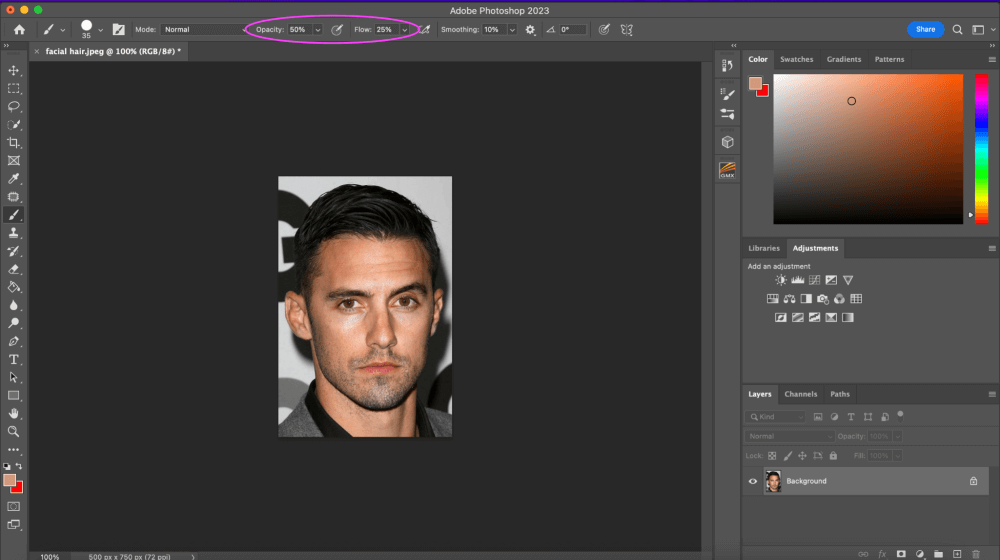
Step 5: At the top of your screen you will see the brush’s settings. Click on Flow and change that from 100% to around 25%. Change the Opacity from 100% to 50%.
Step 6: Start dragging your brush around your subject’s facial hair, you will see that you are essentially painting over the hair. Keep doing this until you no longer see facial hair on your subject.
Spend some time on this. To assist with covering up the hair, it would also be helpful to have a replica of the original area you’re painting over off to the side. By doing so, you can ensure that the skin tones, highlights, and shadows are as similar as feasible.
You will notice that sometimes the color looks off on certain parts of their skin, just go ahead and click your foreground color box again and resample the new area where you are having trouble.
Step 7: Next, we will want to make the subject’s face more realistic and give texture. We can overlay the skin texture from another image that depicts an individual with similar skin and facial traits over the region we just painted.
Step 8: Once you have found an image that you want to use the texture from go ahead and open it in photoshop by going to File > Open.
Step 9: You are going to want to sample the skin texture from the new image to place onto your subject. Find the Clone Stamp Tool in the left-hand menu icons.

Step 10: Once the Clone Stamp Tool is selected, hold down the Alt/Option key and click on the area in your new image that you want to sample from.
Once you do this go back to your subject and click on the areas where you would like the sample to be placed. Continue this until you’re satisfied with your image.
Bonus Tips
- Be extra careful when brushing over your subject’s facial hair since too much can make it look very edited. Be sure to zoom in on your subject.
- The subject’s face will wind up looking flat and unnatural if you only use one skin tone. You’ll need to continuously sample different skin-related areas, paying great attention to highlights and shadows. Remember that there will be a large range of tones in skin, even within a small area.
Final Thoughts
Removing facial hair from a subject in Photoshop can be tricky and time-consuming, but knowing these tools and practicing them only makes you better at doing so.
Any questions about removing facial hair in Photoshop? Leave a comment and let me know.
About Aly Walters