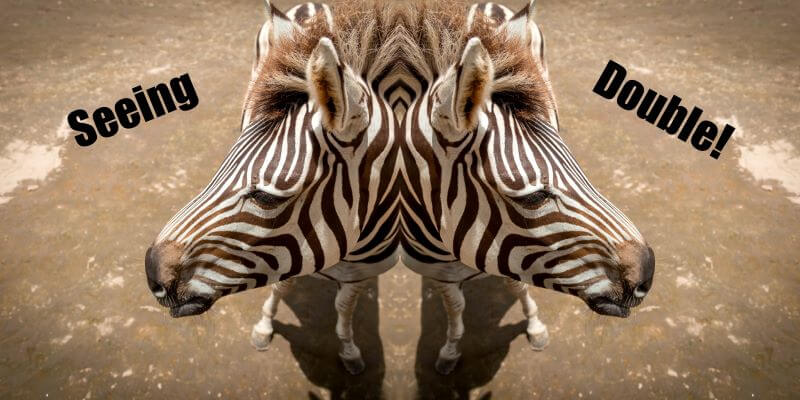
Ever wondered how to get a cool effect like this mirror image zebra? It’s surprisingly easy to do in Photoshop.
Hi, I’m Cara! As a professional photographer, I find that sometimes it’s fun to get creative with my images. Photoshop allows me to do this in a number of ways. Today we’ll look at how to create a mirror image photo for a funky, but intriguing effect.
Check out how easy it is to create your own mirror images here!
Note: the screenshots below are taken from the Windows version of Adobe Photoshop CC. If you are on a Mac or use other versions, screenshots may look slightly different.
Table of Contents
How to Create a Mirror Image
In order to create a mirror image, you need to learn how to flip an image in Photoshop. We’ll cover what you need to know for this effect in the step-by-step guide below.
Today, we’re going to work with an image of a zebra I took at the Ponderosa Adventure Park in Costa Rica.
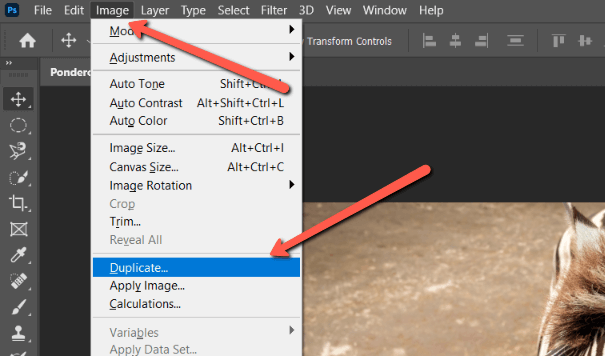
Step 1: Open and Copy Your Image
Before we start doing anything crazy, let’s make a copy of the image. Open your image in Photoshop, go to Image in the Menu bar, and select Duplicate.
This gives you a backup in case you totally mess up, as well as preserves the original image if you want to keep it.
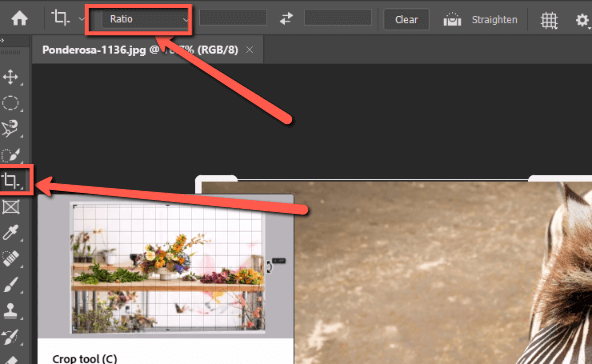
Step 2: Crop the Image
Select the Crop tool from the toolbox on the left side of the screen. We want to crop the image without the restriction of maintaining the aspect ratio so make sure that Ratio is selected in the box in the Options bar.
Now you can grab the edges of the cropping border to crop the image. We’ll bring them in and create a flip point right alongside the zebra’s neck and mohawk.
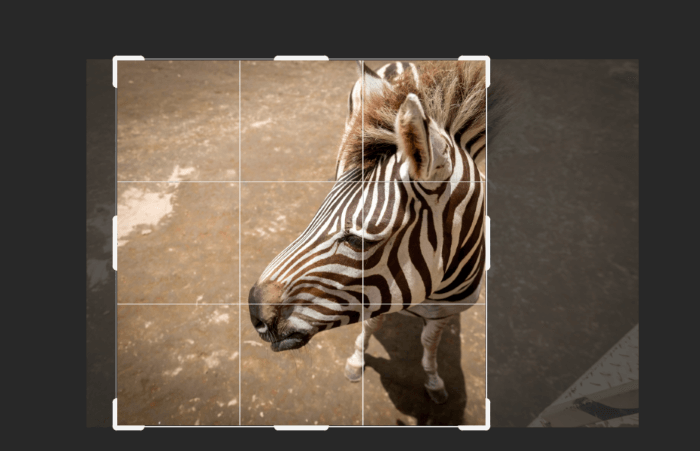
You can also decide how much space you want on the other side of your image. In my case, I’m leaving a bit of space in front of the zebra’s nose, but you can crop in tighter for your image if you like.
Step 3: Delete Cropped Pixels
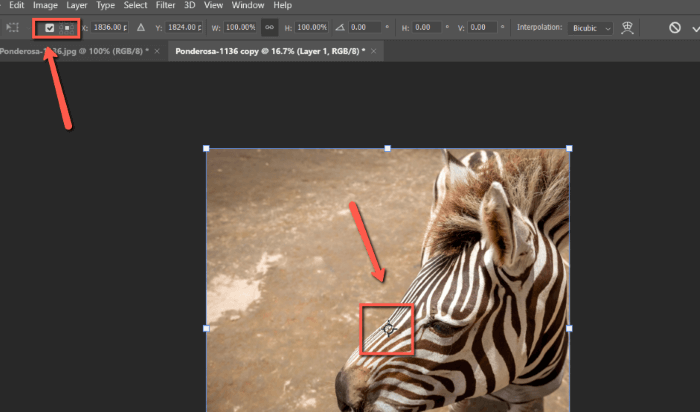
Before completing the crop, make sure that the Delete Cropped Pixels box is checked in the options bar. This is why we made a copy because we’re getting destructive here.
Click the check mark to the right to complete the crop.

Step 4: Duplicate the Layer
Now we need to create a duplicate layer that we can flip to create the mirrored half of the image. Hit Ctrl + J (Command + J if you’re on a Mac) to do this.
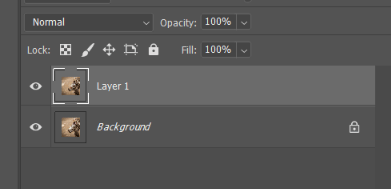
With the top layer highlighted in the layers panel, you need to select it with the Free Transform tool. Do this by hitting Ctrl + T (Command + T) or going to Edit in the Menu bar and selecting Free Transform.
Step 5: Move the Reference Point
If you just flip the image here, it will flip the layer directly on top of the background layer. In other words, we’ll still only see one zebra, he’ll just be facing the other direction.
To get him to pop over to the right, we need to move the Free Transform tool’s reference point.
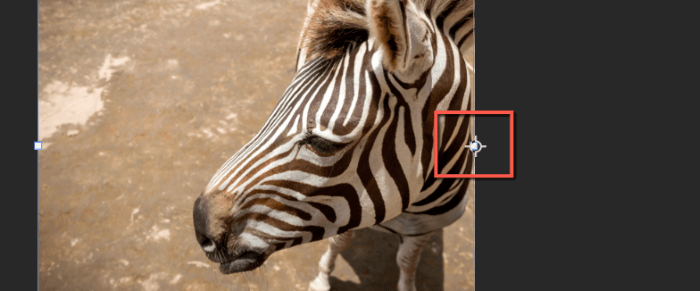
You may have noticed when you selected the layer with the Free Transform tool, a selection box appeared around the image with a reference point in the center.
Note: The reference point might not be visible. To make it appear, check the Toggle Reference Point box in the Options bar.
Click on the reference point and drag it to where you want the middle of the final image. I want it to the right of the zebra’s neck so I’ve moved it to the right side of the image.
Step 6: Flip the Image
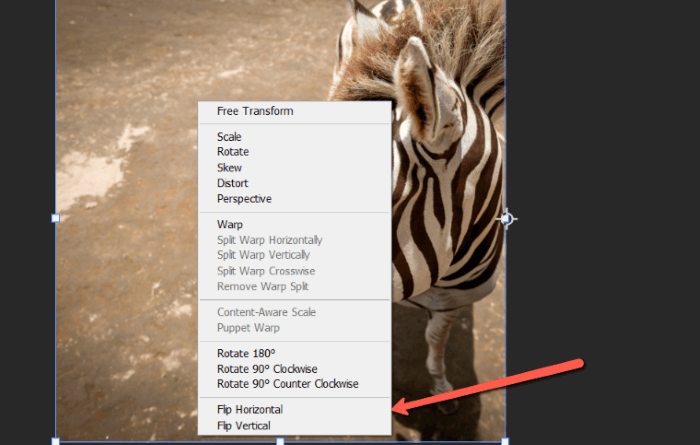
Here comes the big flip! Make sure the Free Transform tool is still active, then right-click in the image (ctrl-click for Mac) and choose your flip command. I want to flip from left to right, so I’m choosing Flip Horizontal. If you want to flip up and down, select Flip Vertical.
Step 7: Reveal All
You might feel somewhat underwhelmed when your mirrored image doesn’t appear like you’re expecting. Instead, you’ll see an empty selection box appear on the other side of your reference point. In my case, it appears on the right side of the zebra.
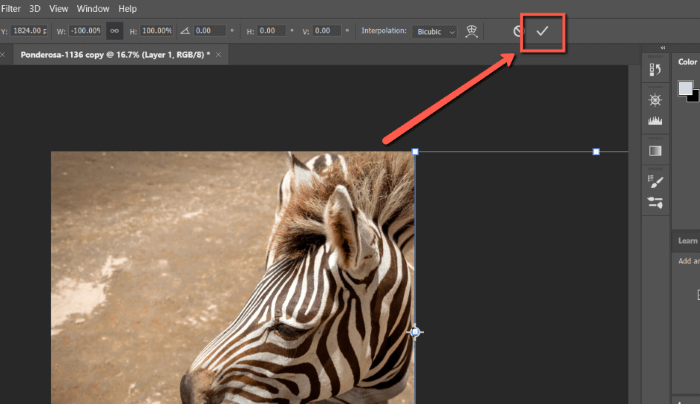
Click the checkmark up in the Options bar or hit Enter to accept the transformation. The zebra still won’t appear but don’t panic just yet. The magic is about to happen.
The cropping border will probably appear around the image at this point. Just hit M on the keyboard to switch to the Marquee tool and make it disappear.
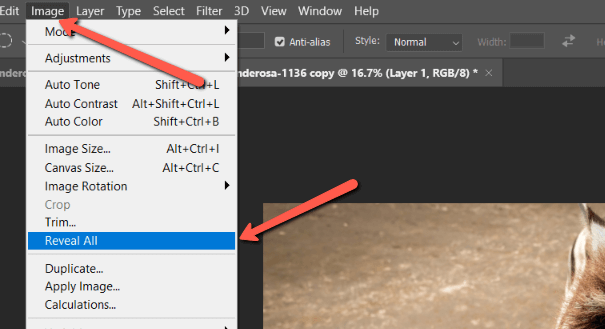
Now, head up to Image in the Menu bar and select Reveal All. As you might imagine, the mirrored zebra will now be revealed!
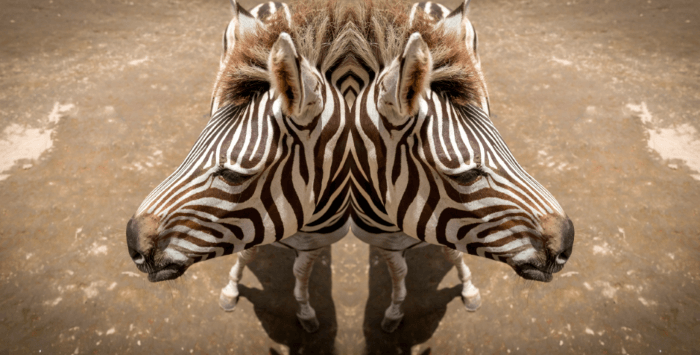
Boom! Now you have two zebras back to back doing their little stripy thing!
Mirror Image Fun
Now that you understand the basics, you can have fun with this technique. It’s an easy way to get creative with images and create an interesting look without spending a ton of time in Photoshop.
Interested in learning more fun Photoshop techniques? Be sure to check out more of our articles!
About Cara Koch