
Have you ever run into this? That image would be absolutely perfect for your needs if only it were the other way! The good news is that learning how to flip an image in Photoshop is a cinch.
I’m Cara, and as a professional photographer, I’ve run into the need to flip images in Photoshop. The good news is that it’s super easy to do and will only take you a few seconds.
Once you get the basic flip down, you can learn a more advanced technique (spoiler: it’s super easy too!) to create an image like this zebra.
Read on to learn how to easily flip an image in Photoshop!
Note: the screenshots below are taken from the Windows version of Adobe Photoshop CC. If you are on a Mac or use other versions, screenshots may look slightly different.
Table of Contents
How to Flip an Image in Photoshop: Quick Guide
Unlike other actions in Photoshop, The basic flip takes only a couple of clicks and you’re on your way.
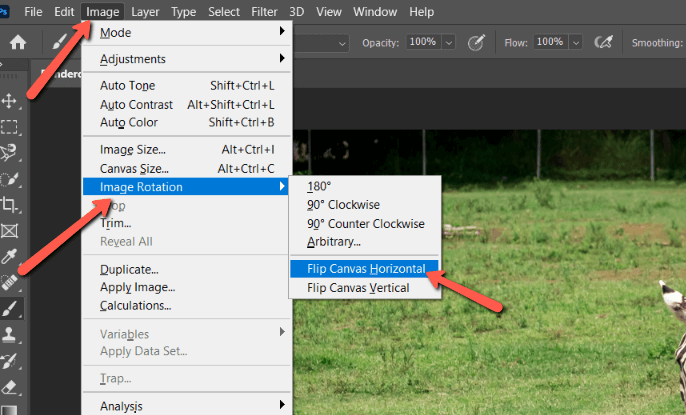
Open Photoshop, go up to Image on the menu bar, hover over Image Rotation, and click Flip Canvas Horizontal. Your image will now flip.
You can also choose Flip Canvas Vertical if you want to flip up and down instead of side to side.
How to Create a Mirror Image
Oh, but here comes the fun part. What if you want to flip an image to mirror it and create something like the double zebra above? Then you need to learn how to flip a single layer.
Step 1: Duplicate the Background Layer
Before you go straight to the flip for this one, you’ll need to prepare your canvas. Hit Ctrl + J (Command + J if you’re on a Mac) to duplicate the background layer.
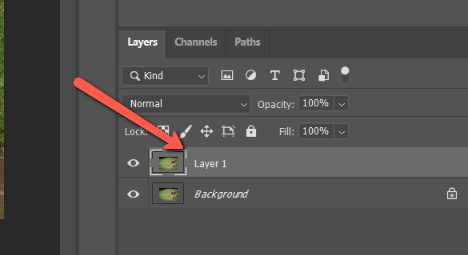
Make sure to select the layer you want to flip. The grayish highlight indicates that the layer is selected.
Step 2: Free Transform
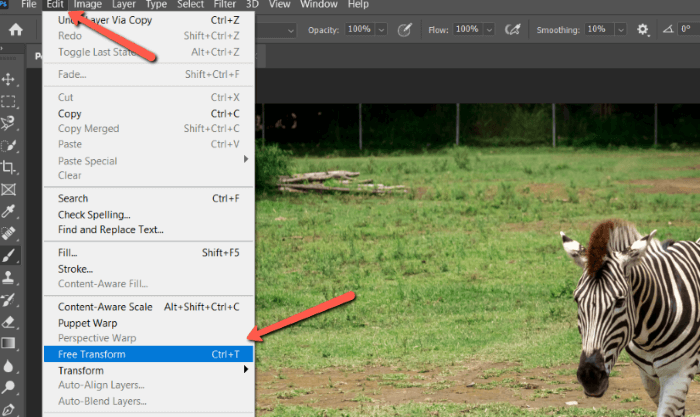
Now you need to select the layer instead of the whole canvas. Do this with the Free Transform Tool.
Hit Ctrl + T (Command + T) or go to Edit in the Menu bar and select Free Transform. You’ll see a box appear around the selected section.
Step 3: Flip the Image
The method to flip the image changes a bit here because we’re not flipping the entire canvas, we’re only flipping one layer. With the free transform tool active, you’ll notice that the Image tab we used earlier is grayed out and you can’t use the options.
This time, go to Edit, Transform, and select Flip Horizontal or Flip Vertical.
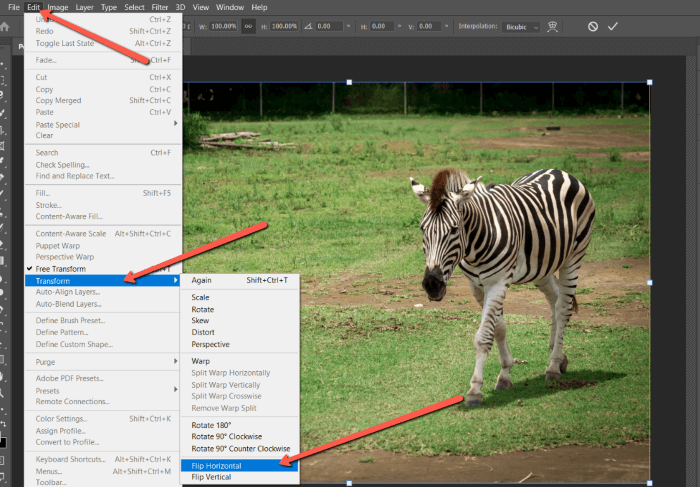
And your layer flips!
If you hit the little eye icon next to the new layer you created, you’ll see that the flipped image “disappears.” Hit the eye again to reveal the layer and your flipped image pops right back.
How to Flip Part of an Image in Photoshop
What if you only want to flip part of the image? It’s also super easy, you just have to select the part of the image you want to flip.
Using the Marquee tool (or whatever tool you need to make the selection you want), select the part of the image you want to flip.
Once you have your selection, use the free transform and transform tools as we just described to flip that portion of the image.
Keep in mind that when you flip an image, everything will be backward. This means that logos, words, and other parts of the image can look strange.
You can select parts of the image and flip them back using this technique so that these odd-looking parts will face the correct direction.
Putting on the Finishing Touches
If all you needed was a flipped image, you’re all set. If you’re trying to create a mirror image, you’ll need to create a layer mask and blend the two layers together.
If you have no idea what that means, check out our article on how to create a mirror image. We’ll go through all the steps one at a time. It’s so easy you’ll be creating mirror images all over the place!
About Cara Koch