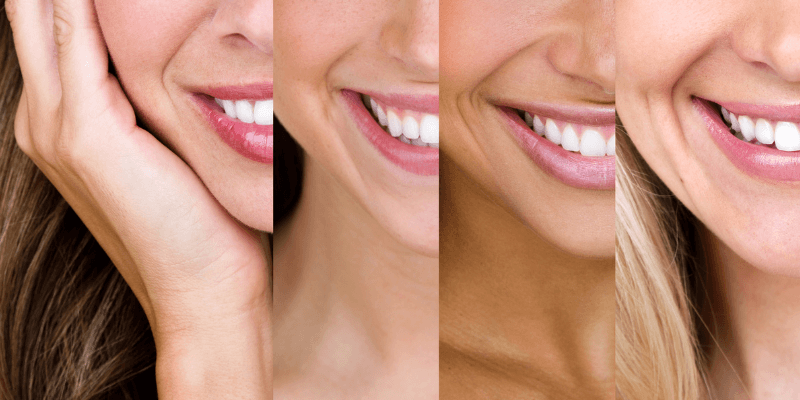
Group images occasionally include inconsistent lighting from both natural and even studio sources. Sometimes it makes sense to match the skin tones of two or more persons in a picture, especially when taking family pictures.
Additionally, the variations in skin tones can expand the gap between exposures on each face. Nobody should be singled out or excluded in a good portrait because of poor lighting, technical difficulties, or even because their complexion is more tan or brown from exposure to the sun.
My name is Aly, I have been working in Photoshop for over five years and this topic is something that I wish I knew how to fix sooner in my career. In this article, I will be showing you how you can match skin tone in Photoshop.
Table of Contents
How to Match Skin Tone Using Hue
The lighter facial tones can also be matched to the hue of the rest of the body using this technique.
Step 1: If you are trying to color match with two separate images, go ahead and open both of them in Photoshop. Open one image first, then drag and drop the second image into the same Photoshop workspace. It should come up as another separate layer.
Click the “Eyeball” to the left of the new layer, we want to turn that off for now. The eyeball will disappear when you turn it off.
If you just have one single group image open just that one. You can do this by going to File > Open.
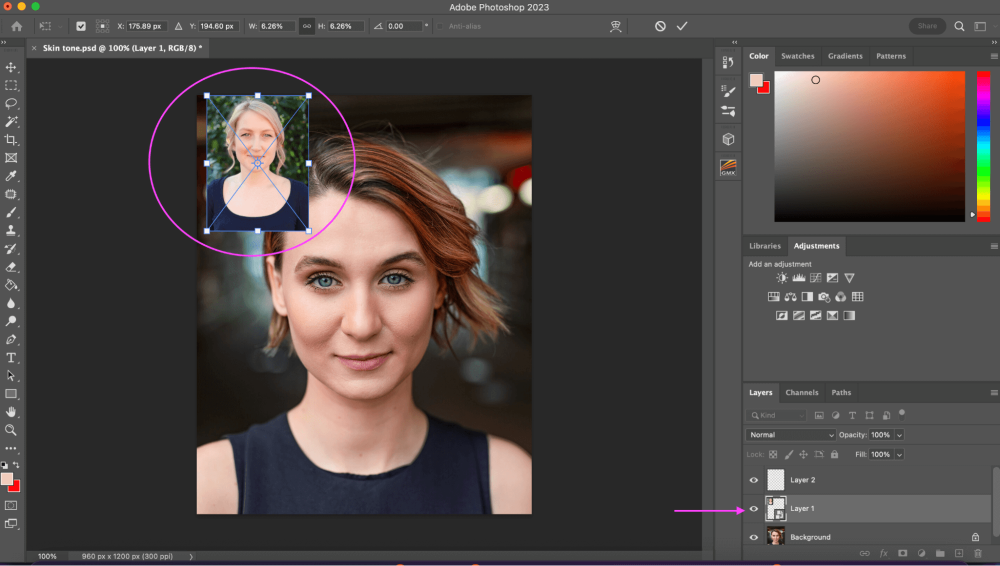
Our objective is to match the skin tones now that we have both photos and skin tone swatches in one location. To do this, we’ll take the darker skin tone’s RGB values and paint them onto our primary subject on the right.
Step 2: Make sure you are working in the image layer that you are wanting to take the skin tone.
In the lower-right portion of the Photoshop window, click the Create a New Layer (+) icon. It’s directly next to the icon for a garbage can. As soon as you click it, a brand-new, empty layer will show up in the right pane, as displayed.

Step 3: Using the dropdown menu below the menu bar, select the Eyedropper tool (keyboard shortcut I) and modify the Sample Size to 5 by 5 Average.

Step 4: Sample the midtones from the source image using the Eyedropper tool (avoid the highlights and shadows). You can do this by clicking on the image that you need the tones from, and Photoshop will automatically grab the color tone.

Step 5: Uncheck the eyeball icon from layer 2, this will now reveal the other image you are wanting to match the skin tone to.
This will put the entire image over the original image. Go ahead and click the image and you will see 4 dots in each corner. You can shrink the sizing into the corner of the image so you can still see each image.
Step 6: Choose the Brush tool (keyboard shortcut B). Make sure Hardness is set to 100% in the Brush settings dropdown by opening it.

Step 7: Brush the color selected onto the blank area of your image as shown. To sample the skin’s midtones from the target image, click and hold the Alt key while using the Eyedropper tool.

Step 8: Trace around the target image on the right’s face and skin by pressing L to activate the Lasso tool. For my example, I will be leaving out the subject’s shoulders as I am just working on her face. Feel free to carry it down to the shoulders if applicable in your image.

Step 9: From the menu at the bottom of Photoshop, create a Curves adjustment layer.

Our objective is to match the skin tones now that we have both photos and skin tone swatches in one location. To do this, we’ll take the darker skin tone’s RGB values and paint them onto our primary subject on the right.
Step 10: Next, select the Color Sampler Tool from the left-hand menu. Toggle your mouse over the leftmost color patch. The color will be covered with a #1. Additionally, the RGB values for the color should appear in the Info tab.

Step 11: Click on the second color patch after that. The color will have a #2 placed over it, and the Info panel will once more list the relevant RGB values.
Step 12: Double-click the layer with the curves (not the layer mask). Activate the On Image Adjustment tool in the Properties panel (the hand icon).

Step 13: Click the second color patch after holding down Ctrl and Shift. The Red, Green, and Blue channels on the Curves panel will each show a point next to them.
Step 14: Change the #1 RGB values in the Info panel’s Output value for the Red channel to the correct value. My value for my image would be 241.
Once you’re done, press Enter. Note: This value will vary based on your image, to find the correct value, go back to step 10, and look in the RGB values for your correct number value.

As you can see, my subject’s skin tone has changed quite a bit to match the subject in the corner’s tone. Once you enter the output value it will disappear from the bottom, but if you need to go back at any point, repeat step 13, and the box to enter values will appear again.
Although my subject’s tone has changed, you can see that the green and blue values need to be corrected, we will work on that in the next step.
Step 15: Next, we need to change the blue and green values as well. Again, to find your correct values go back up to step 10 to find them. Once you do, repeat the same steps as we did for red values, except you will change the green and blue output values.

As you can see in my example image below, my subject’s skin tone is matched my other subject’s tone.
You can play around with the RGB values if you don’t like the way it’s looking, as skin tone varies from person to person and may not look necessarily correct to the subject themselves.
Once you are done imputing your values, go ahead and click on your swatches and corner image and press Delete so you can save your new image without those on top of it.
Make sure you are completely satisfied first before deleting because you will have to start over or “undo” once they are gone.

Bonus Tips
- Another way to get the perfect color tone is to play around with the opacity which you can find in your layers panel above the Fill percentage.
- If your image is looking too dark or too light, go back to step 7, and retake the color sample, as you may have taken the wrong section of the image.
Final Thoughts
Although this may be a long process, this is the best way to match skin tones or colors for images. Remember that this method works with group photos and can be used for changing colorings as well.
Any questions about matching skin tones in Photoshop? Leave a comment and let me know.
About Aly Walters