Without any doubt, masking hair in Photoshop is one of the most difficult and time-consuming projects there is in the world of image editing.
For many years, many image editors (including me) tried their hardest to avoid getting into a situation where it was necessary to mask hair.
Manually tracing out every single stray strand of hair on a model’s head is guaranteed to stop your productivity in its tracks – but fortunately, better computers and better tools now allow us to automate a large part of the process.
They can take a bit of time to learn, but once you know how they work, you’ll save a huge amount of time compared with manually masking.
These automatic selection tools aren’t just limited to masking hair in Photoshop – you can use them for any complex masking projects involving lots of fine detail, from chain-link fences to tree branches to dog fur.
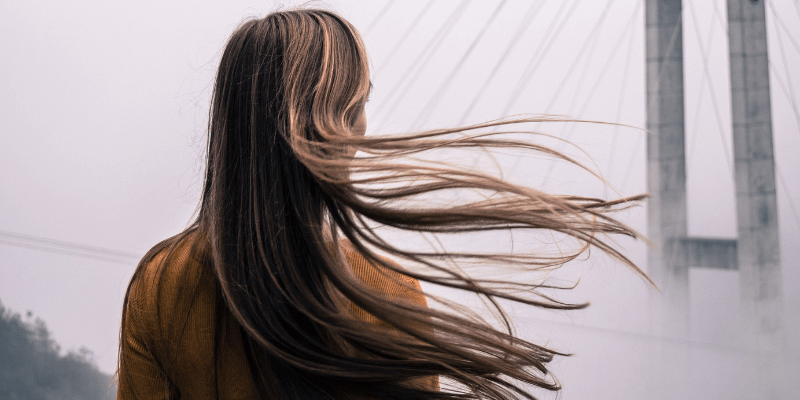
Note: Because I don’t photograph many human subjects, I’ve used a stock image for this tutorial which was provided by George Bohunicky on Unsplash. Thanks, George!
Table of Contents
The Quick Guide to Masking Hair In Photoshop
Just kidding, there isn’t really a quick guide for this project!
No, I’m kidding about that too, here’s the general process (but it is *not* quick):
- Step 1: Use the Select Subject tool to create a basic mask around your model.
- Step 2: Open the Select and Mask workspace and use the Refine Edge tool to adjust the mask.
- Step 3: Use manual masking tools to finalize any additional details.
This is just a quick outline of the steps, so if you want to dive into the project in more detail and learn some helpful tips and tricks along the way, read on!
The Detailed Guide to Masking Hair In Photoshop
It would probably be possible to write a 20,000-word post on this topic, but I’m going to try to keep things relatively simple even during this detailed guide. Let’s begin!
Step 1: Selecting Your Subject
Since we’re going to be relying on a lot of automatic selection tools in this tutorial, let’s start things off by using one of Photoshop’s lesser-known shortcuts: the Remove Background button.
I wouldn’t normally recommend using this except on the simplest of images that have a clear difference between the subject and the background, but we only need to create a general mask, so this tool is fine to use.
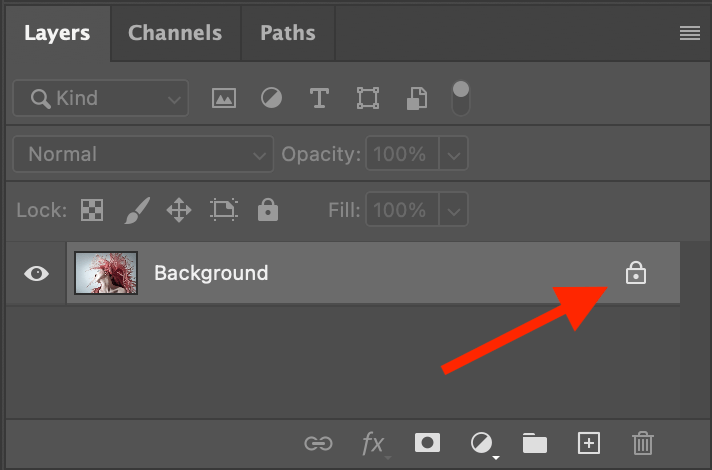
When you first open your image in Photoshop, it’s probably on a single locked layer that is automatically named Background in the Layers panel. Click the small lock icon (shown above) to unlock the layer and get it ready for editing.
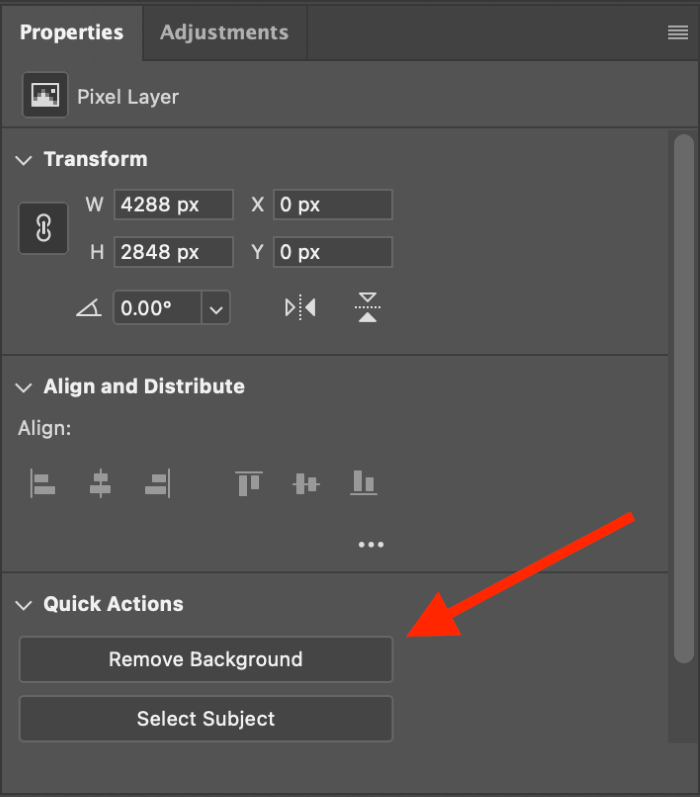
The layer will be renamed Layer 0, and the Properties panel will update to provide you with a couple of Quick Actions, one of which is Remove Background.
With one click, Photoshop will apply the Select Subject command, and then automatically create a layer mask that hides the background of your image.
Step 2: Refining Your Mask
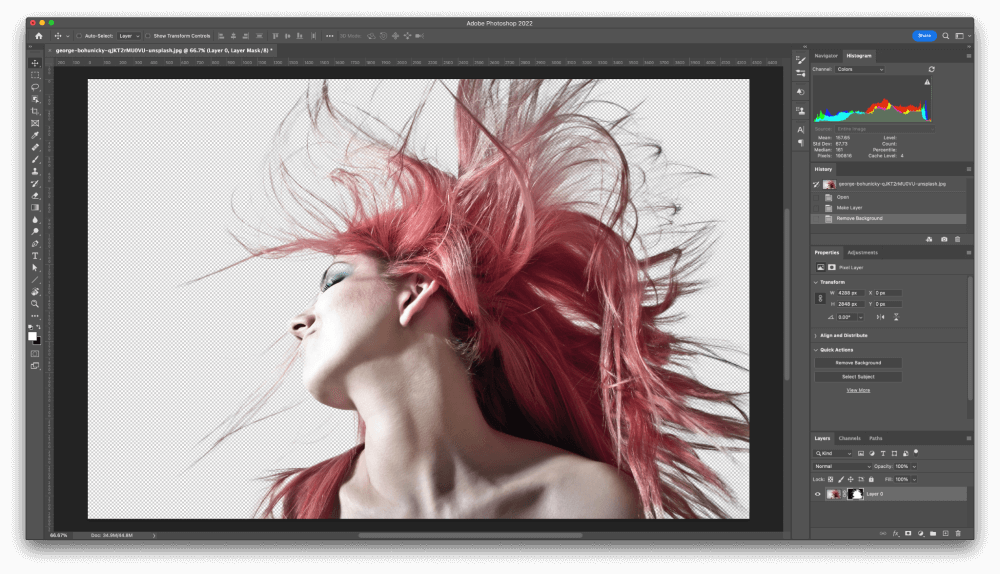
As you may notice right away, Photoshop doesn’t always do a perfect job at this task – but that’s not a problem since we only need a place to start from.
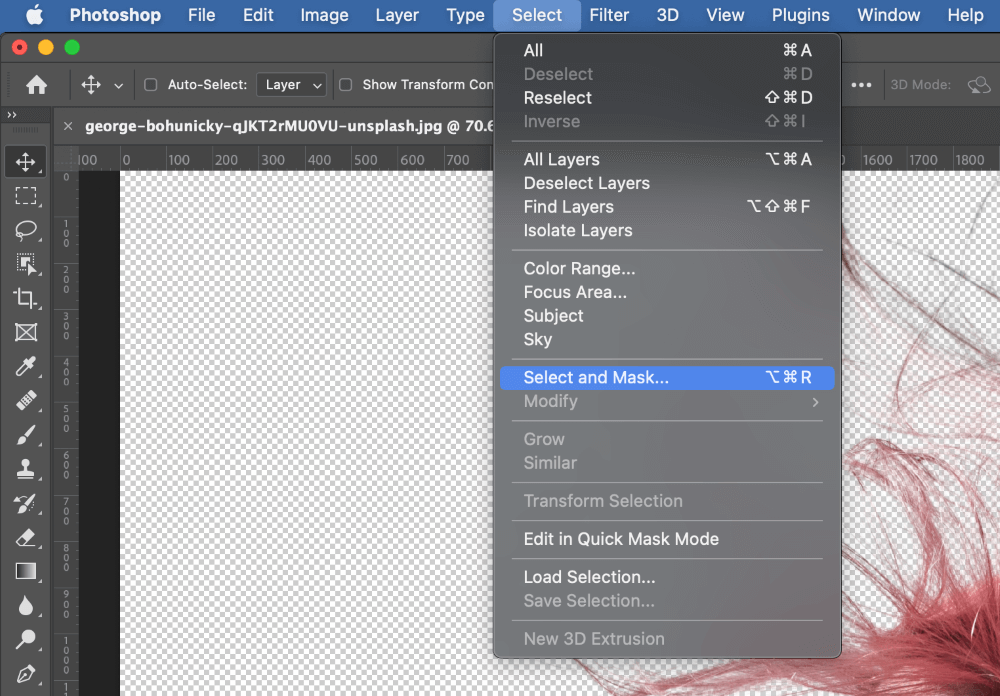
Click on the newly-created layer mask in the Layers panel to make sure it’s selected, and then open the Select menu and click Select and Mask. You can also use the keyboard shortcut Command + Option + R (use Ctrl + Alt + R if you’re using Photoshop on a PC).
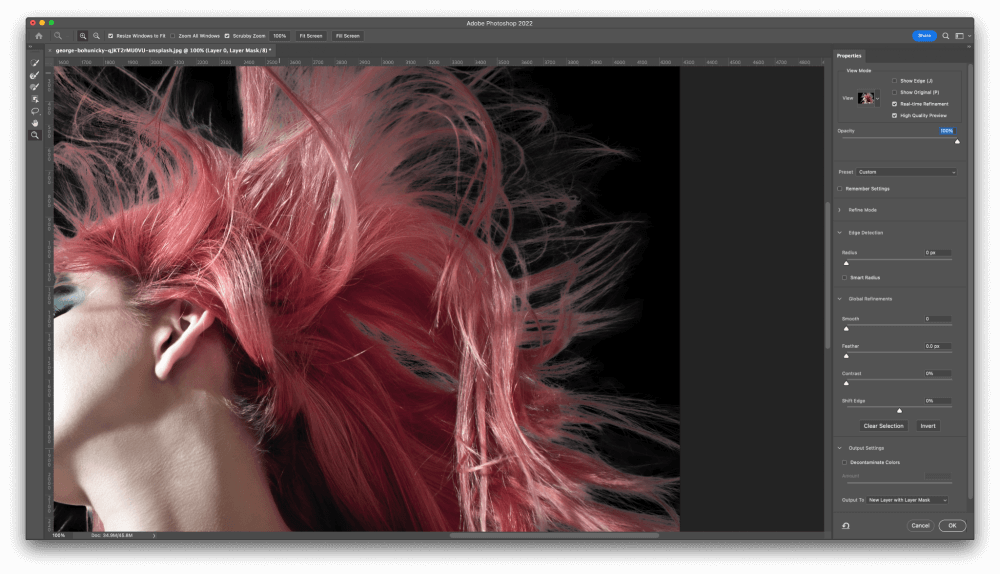
Photoshop will open the Select and Mask workspace, which is a dedicated space for fine-tuning selections and masks using some unique options.
Its layout is roughly similar to the standard Photoshop interface: surrounding the main document window showing your image, the tools are on the left, the tool options are along the top, and parameters and output settings are located on the right.
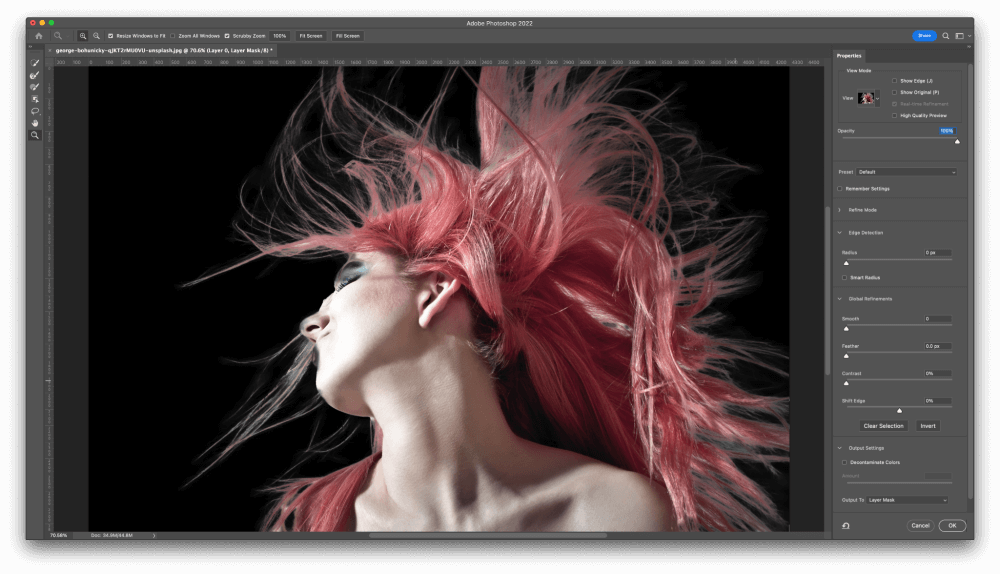
One of the most important settings to determine is what View Mode shows off your subject’s hair the most clearly.
In this example, setting the View option to On Black with the Opacity set to 100% lets me see where strands have been ignored by the initial masking that could use some additional refinement, as well as spot some larger background areas that got included when they should not have been.
Depending on the color of your subject’s hair and the color of the background that’s being removed, you may need to experiment a bit to find which option shows the hair strands most effectively.
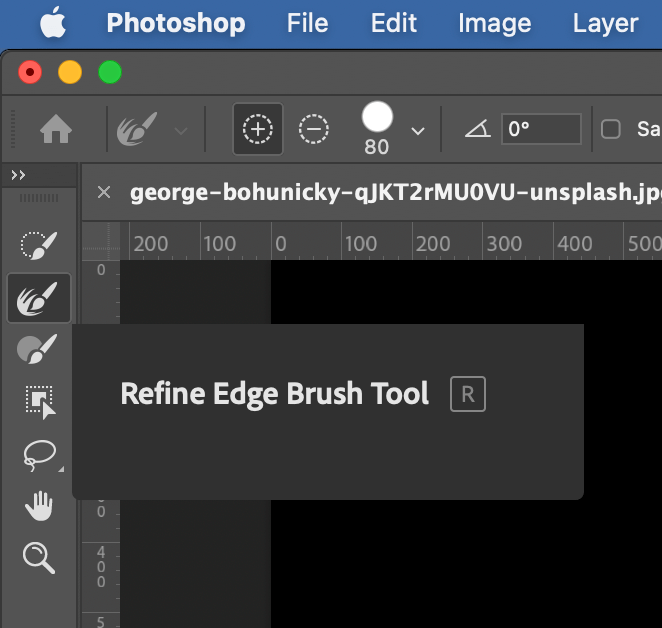
Once you can see what you’re doing, switch to the Refine Edge Brush Tool. You can adjust the brush size using the tool options panel along the top of the document window, or use the [ and ] keys to increase and decrease the size of the brush.
Look carefully over your image and use the Refine Edge Brush to paint areas that you want Photoshop to treat as edges.
This effectively tells Photoshop where to focus its efforts on automatic detection, and it can dramatically improve the results of your automatic masking without a huge time investment.
For example, note the white patch of leftover background just behind the model’s head in the center of the hair, shown below.
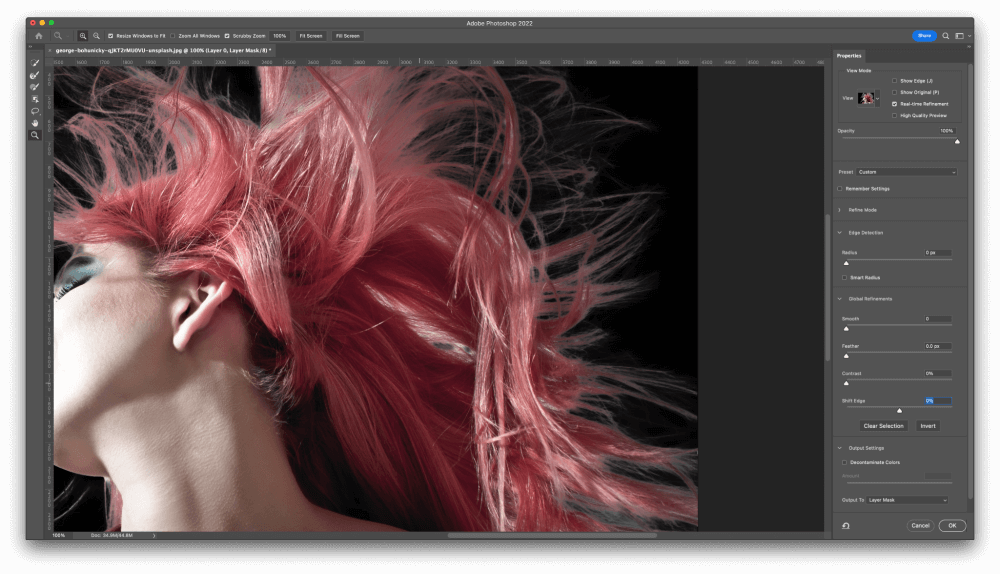
This would take forever to mask manually, but a few brush strokes with the Refine Edge tool and it’s suddenly a proper mask.
By default, the Refine Edge brush adds to your existing selection, but you can also hold down the Option key (use the Alt key on a PC) to subtract from your existing edge.
Continue painting with the Refine Edge brush until you’re happy that no part of your model’s hair has escaped, and switch to the basic Brush tool if necessary to correct any more obvious issues.
It’s important to keep in mind that it’s almost impossible to capture every single stray hair on your model, and also that you don’t actually need to mask every single one. You could spend hours on just this alone, but is that really the best use of your time?
Once you’re mostly satisfied with the results of your mask, it’s time to consider any global settings that you might want to apply.
Generally, when you’re masking hair, the Smoothing, Feather, and Contrast options aren’t helpful, but the Shift Edge tool can be useful when you find that Photoshop is a bit too generous when making its selections.
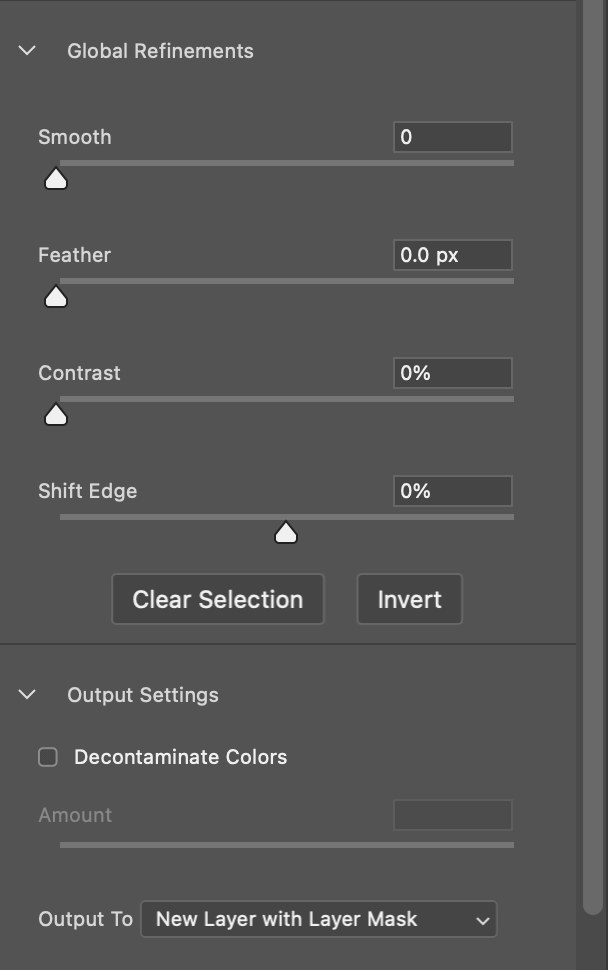
Moving the Shift Edge slider into the negative range contracts the edge selections, which can help automatically remove halos around your hair strands.
If the Shift Edge slider doesn’t do the job, then you might want to consider using the Decontaminate Colors option found in the Output Settings section, which has a similar ability to remove color halos around your hair strands.
Step 3: Manual Refinement (Optional)
Last but not least, you may want to do some additional manual refinements to your masked hair. As you’ve probably noticed, these automatic techniques are useful, but they’re still not perfect.
Many image editors have custom brushes that they use to paint in additional hair effects to disguise flaws in the masking process, but creating brushes is a bit too complex to fit into this tutorial, so you’ll have to check out our brushes tutorial for more information.
A Final Word
I’ve said it before and I’ll say it again: hair masking in Photoshop is one of the most challenging tasks for an image editor. Practice is essential for improving your skills, so make sure that you practice, practice, and practice (then some more practice) until these tools become second nature for you – or you can do what I do, and stick to landscape and wildlife photography 😉
Happy masking!
About Thomas Boldt