
Most people love a cloudless day with blue skies and sunshine. However, blue skies for a photographer are sometimes a bit boring. We love a few clouds to add some interest or drama to the image.
Hello, I’m Cara! And yep, some photographers love clouds so much they will add them to their images to create a different look. Are you one of them? Well, no worries because learning how to make clouds in Photoshop is quite easy.
Let’s take a look!
Note: I took these screenshots from the Windows version of Photoshop CC. Those working with a Mac will find that the interface looks a little different.
Table of Contents
How to Make a Cloud Brush in Photoshop
Here on Photoshop Buzz, we have a tutorial where we talk about making clouds by rendering them in Photoshop with a filter. Check that article out if you want to see how to do that.
The only trouble with the filter effect is that it creates a somewhat uniform look across the whole sky. It can work well for filling in small patches but doesn’t look as realistic in an image with a lot of skies.
Today we’re going to look at making and using a cloud brush in Photoshop. This gives you far more control over how your clouds look and where you place them.
Step 1: Open a New Document
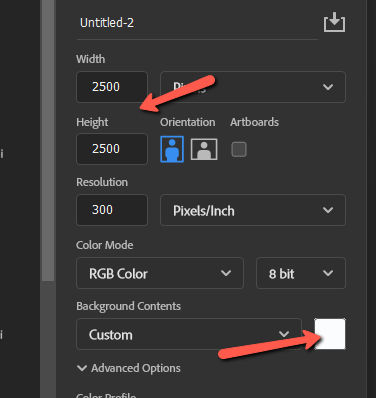
Open a new document in Photoshop. The maximum brush size allowed is 2500 x 2500 pixels, so you can choose that for your size. Or you can make it smaller if you prefer, but you may lose a bit of quality when using the brush on larger images.
You can fill the background with a solid color or just leave it white, it doesn’t really matter for our purposes. I’m going to leave mine white for this tutorial.
Step 2: Select Your Brush
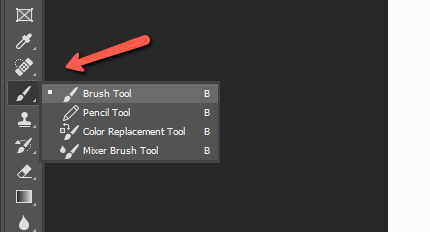
Now press B on the keyboard or choose the Brush tool from the toolbar on the left.
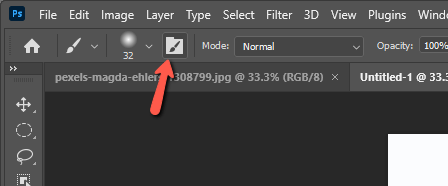
Open the Brush Settings panel by clicking the folder to the right of the brush tip preview in the Options bar.
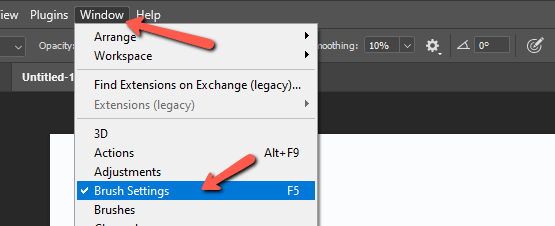
You can also get there by going to Window in the menu bar and choosing Brush Settings. Or pressing F5 on the keyboard.
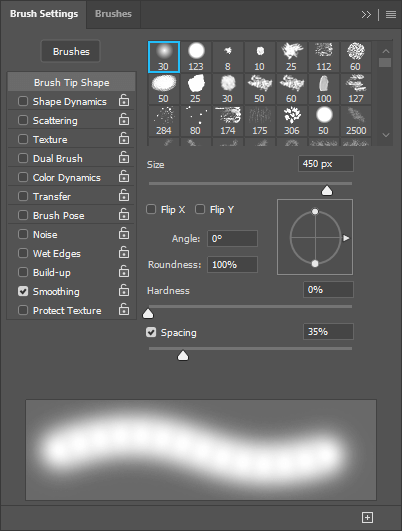
Once in the Brush Settings panel, choose a brush size of around 450 px, set the hardness to 0%, and put the spacing at about 35%.
Step 3: Adjust the Brush Tip
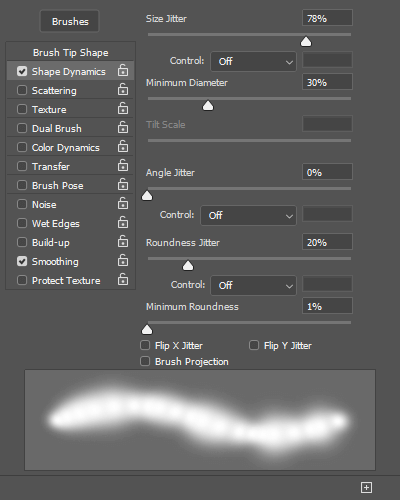
Then click the Shape Dynamics settings. We don’t want the brush to look exactly the same with every brush stroke. Our cloud will look far too uniform and very fake in that case. So let’s change up the randomness of the brush strokes by playing with these jitter settings.
You can play with what works for you. Here are the settings I used.
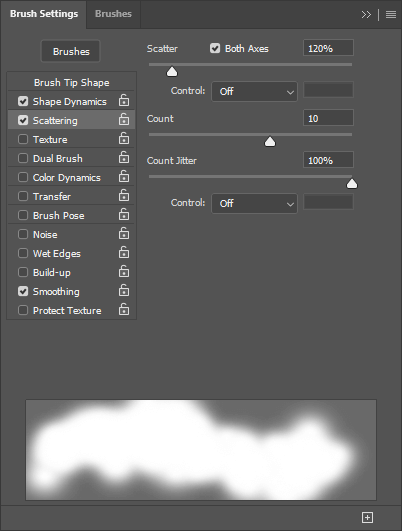
To separate the brush strokes as you paint, go to the Scattering settings. Again, play with this to find what looks good to you. Here are my settings as a guide.
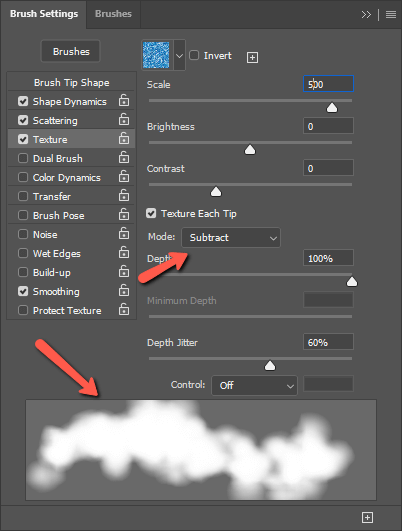
Now move down to Texture to add a cloud texture to the brush. Click the little arrow next to the texture preview window. You may wish to download a cloud texture that you find on the internet. However, to stick with what we have available in Photoshop, I’ll use one of the included water textures.
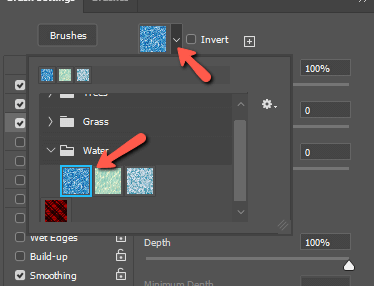
Then adjust the texture settings to something like this. Make sure to set the mode to Subtract in the dropdown. Now we can see that the brush preview at the bottom is starting to look more cloudlike.
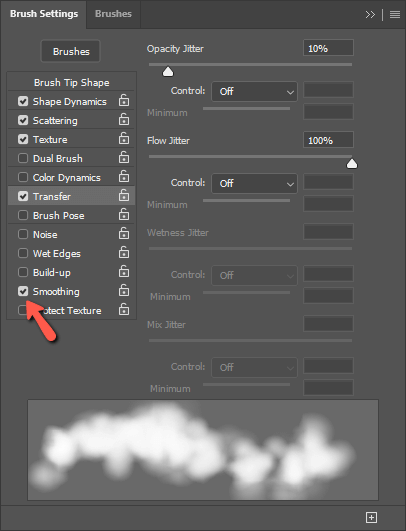
Let’s continue to the Transfer section and apply some Opacity jitter and Flow jitter settings. Make sure the Smoothing option is checked.
Step 4: Save as a Brush Preset
Let’s save these settings as a brush preset. Anytime we want to add clouds to an image, we can come back to this brush preset and use it.
Click on the 3 lines icon in the upper right corner of the Brush Settings panel. Choose New Brush Preset.
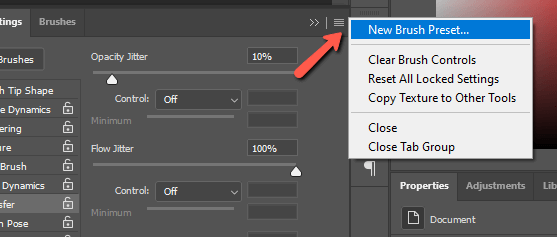
When the box opens, name your preset and press OK. It’s important to give it an obvious name so you can find it later. As you can see, the brush preview just looks like a soft round brush so it doesn’t give you much of a clue.

Now let’s see this baby in action!
Adding Realistic Clouds to Your Image in Photoshop
To show you how this works, I downloaded this image from Pexels.com.

After creating the brush, it should be active. But when you need to find it later, simply press B on the keyboard to activate the Brush tool. Then open the brush presets and select your created cloud brush. This is why it is important to give it an obvious name.

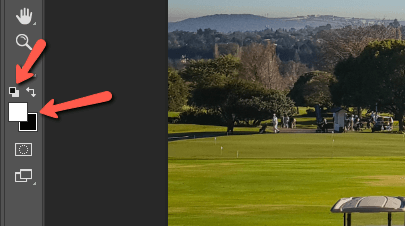
Make sure the foreground color is set to white. If there are other colors active, press the little colored squares to reset to black and white. If black is on top, click the 90-degree arrow to switch them or press X on the keyboard.
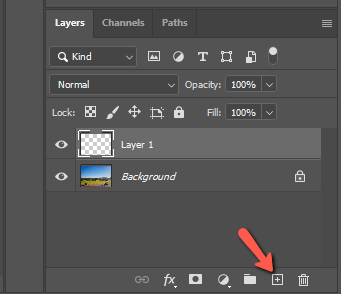
To make your cloud layer easily editable, I suggest painting it on a new layer. Click the New Layer icon at the bottom of the Layers panel.
Now, start painting the new layer where you want your clouds to be.
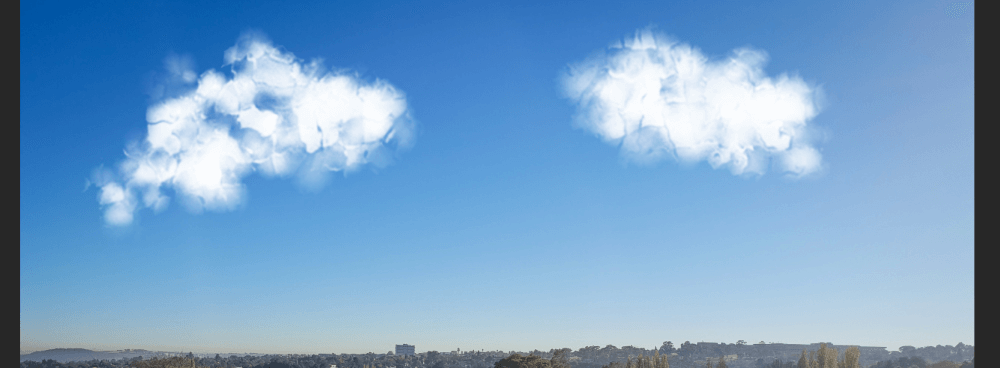
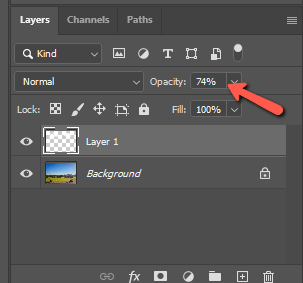
You’ll probably find that the clouds are too strong to look realistic. Just bring down the opacity on the cloud layer to give them a more wispy look. You can find the setting near the top of the Layers panel.
And now we have a couple of clouds in the sky!
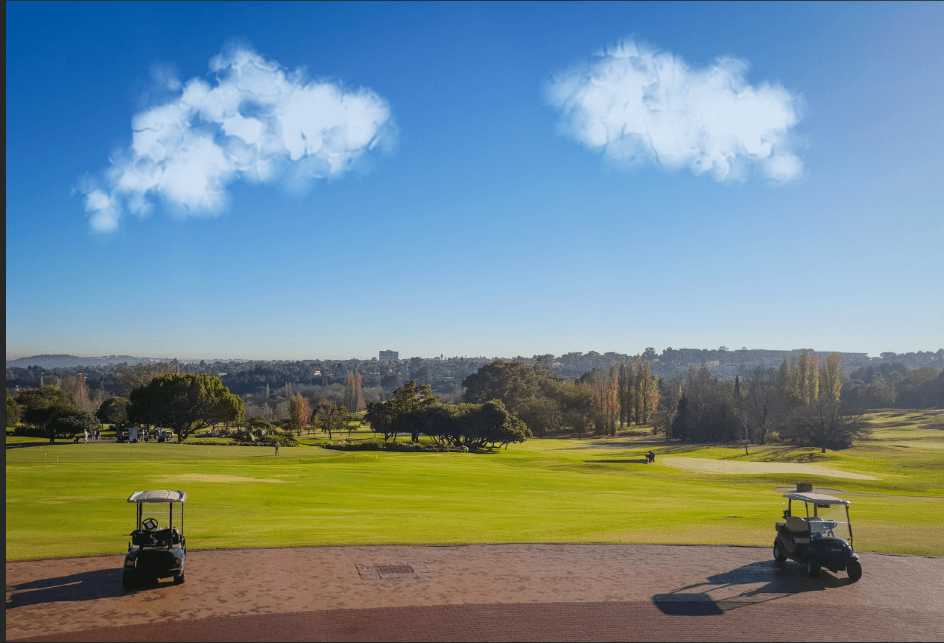
Of course, you can spend more time on it to build up the clouds and make them look more realistic but this is the idea. You can paint faint, wispy clouds with a smaller brush and by bringing down the opacity even more. Or use a larger one at a higher opacity to get fluffier clouds.
The sky is the limit! Pun intended. Curious about other weather effects you can add to images? Check out how to add fog in this tutorial!
About Cara Koch