Are you ready to play with the rainbow? Colors and how you use them have a big impact on the final result when manipulating images.
Hi! I’m Cara and I’m big on bold and beautiful colors in my images. Of course, sometimes an image in PNG format that I’m working with might not be the right color for my project. In that case, I’ll need to change the color of the PNG file.
Photoshop makes this easy so let me show you how to change PNG color in Photoshop!
Table of Contents
How to Change the Color of a Colorful PNG
Quick Note: the screenshots below are taken from the Windows version of Photoshop CC. If you are using the Mac or other versions, they will look slightly different.
Step 1: Make a Selection
The first thing to do before you start going color crazy is to select the part of the image that you want to change.
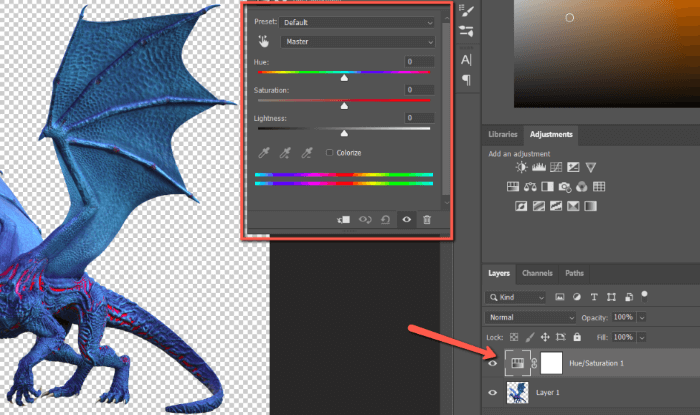
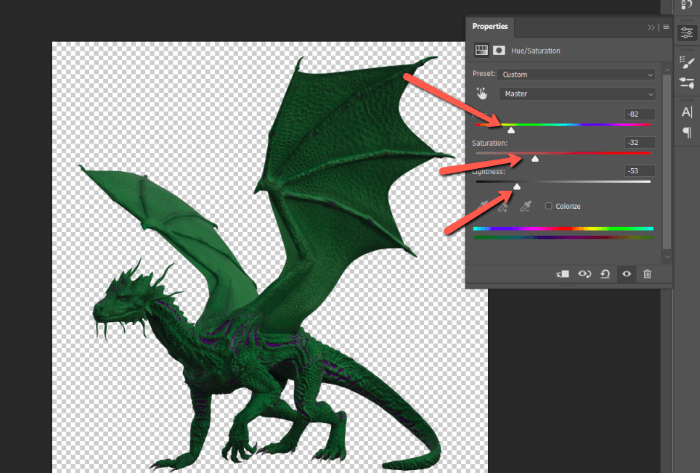
For this example, I’m changing the color of a PNG image on its own. We’ll change the whole dragon to a different color and there is no background to worry about. This is one of the benefits of working with PNGs.
If your object is part of an image, you’ll have to select it with one of the selection tools.
Step 2: Make a Hue/Saturation Layer
Click on the half-filled circle icon at the bottom of the Layers panel. Choose Hue/Saturation from the menu that appears.
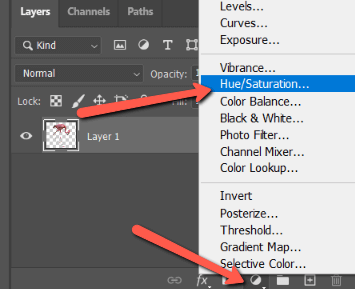
The Hue/Saturation layer will appear on top of your base layer in the Layers panel. The Hue/Saturation properties flyout also appears with its various options.
Step 3: Adjust the Color
The Properties panel is where you will make your adjustments.
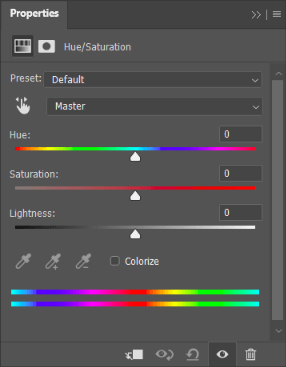
Dragging the Hue slider to the left or right will change the color according to all the colors of the rainbow.
Drag the Saturation slider to the left to desaturate the chosen color. Drag it to the right to saturate the color and make it stronger.
The Lightness slider controls how dark or how light the image is. Drag it all the way to the left and the image will turn into a silhouette/shadow. Drag it all the way to the right and it will turn completely white.
By sliding the hue slider to the green section, pulling down the saturation, and darkening the color, I get this dark green dragon.
Note: sometimes the original color will affect the final result. If that happens, tick the Colorize box under the Lightness bar.
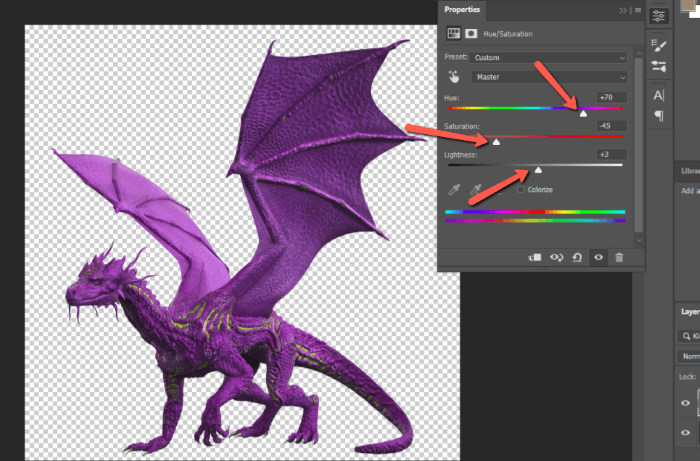
Or I can turn the dragon a pretty purple shade.
How to Change the Color of a White PNG
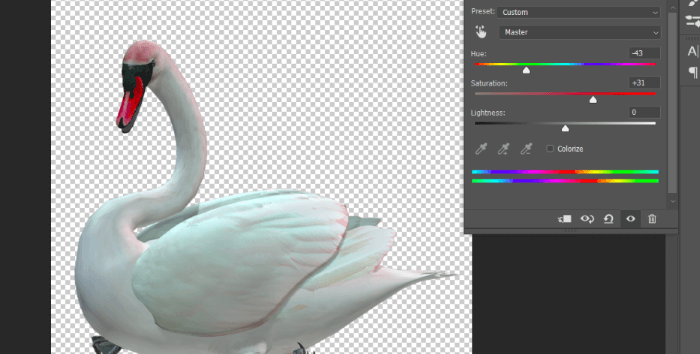
You might notice that the Hue/Saturation slider doesn’t do much if your PNG is white. Check out this white swan. I’ve slid the hue slider down into the greens and upped the saturation, but nothing much has happened. It just looks weird.
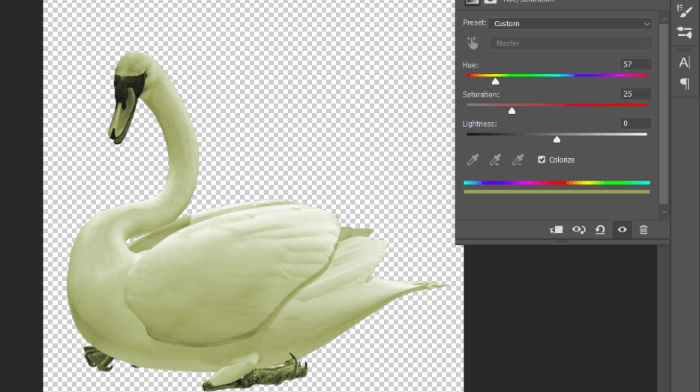
You can tick the Colorize box and it will affect the image a little more. However, the swan still isn’t green.
Let’s try a different method.
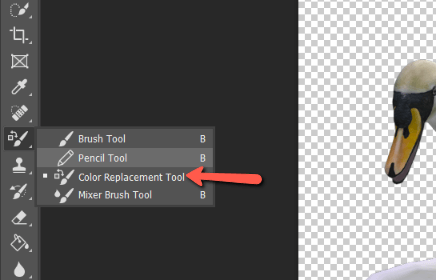
Step 1: Open the Color Replacement Tool
Choose the Color Replacement Tool from the toolbar on the left. It will probably be hidden behind the more commonly used Brush tool. Right-click on the brush tool to make the family of tools appear and choose Color Replacement Tool.
Step 2: Select Your Settings
In the Options bar at the top, you’ll need to set a few settings to get the result you want. First, change the mode to Color.
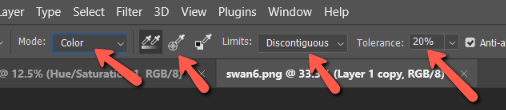
The next set of three icons controls the sampling method for changing the color. Since we want to change the color of the entire image, select the first one. This is continuous sampling.
For the limits, you can choose contiguous in which the pixels must be touching to be affected. Discontiguous changes any pixel anywhere in the image that is the same as the sampled color. We’ll choose that.
Tolerance controls how close the pixels must be to the sampled color in order to be affected. This whole image is white, so it doesn’t matter too much in this case. But a higher number will affect more pixels and a lower number will constrict the program to colors closest to the sample.
Step 3: Select the Foreground Color
Change the foreground color of your brush to the color you want to use. Do this by double-clicking on the foreground color at the bottom of the toolbar.
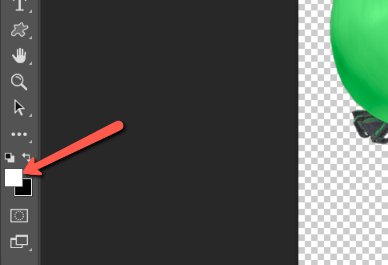
Choose the color you want from the color picker that appears.
Now you can paint over the image where you want to change the color. The crosshairs in the center of your brush represent where the program is sampling the colors. Take care not to touch any color with those crosshairs that you don’t want to change.
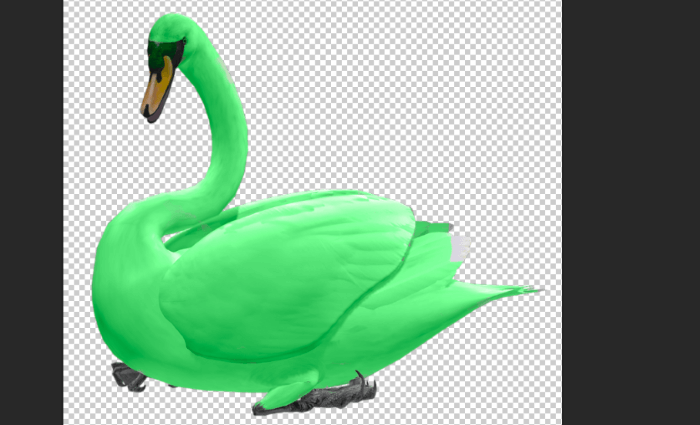
Now I have a decidedly green swan.
Play around with it and have fun! And be sure to check out more of our tutorials! Ever wondered how to fade an image in Photoshop? Find out here!
About Cara Koch