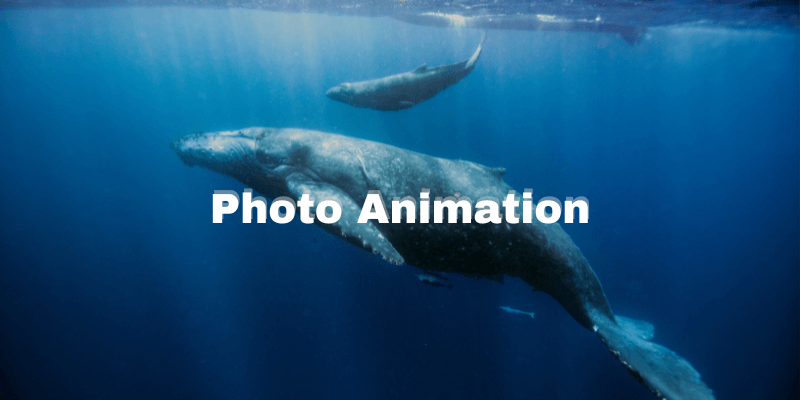
So you want to make your photos come to life? Animating your photo in Photoshop is not only easy to do, even for beginners, but also a good way to grab your audience’s attention.
Animating photos in Photoshop requires multiple steps, but easy steps! So stay with me as we follow the steps, I will make them as clear and easy as possible.
I have over five years of Adobe Photoshop experience and am Adobe Photoshop certified. In this article, I’ll teach you how to animate in Photoshop.
Table of Contents
Key Takeaways
- Animating your photos can be an appealing way to get your audience’s attention.
- You will need to manually scale your photos to match the sizing of each other.
How to Create Animation from One Photo in Photoshop (Detailed Steps)
You can create a simple animation from one photo by duplicating and alternating the original image. Follow the steps below to see how it works.
Quick heads-up: There are more than ten steps, so pay close attention to the details of each step in order to get the best result.
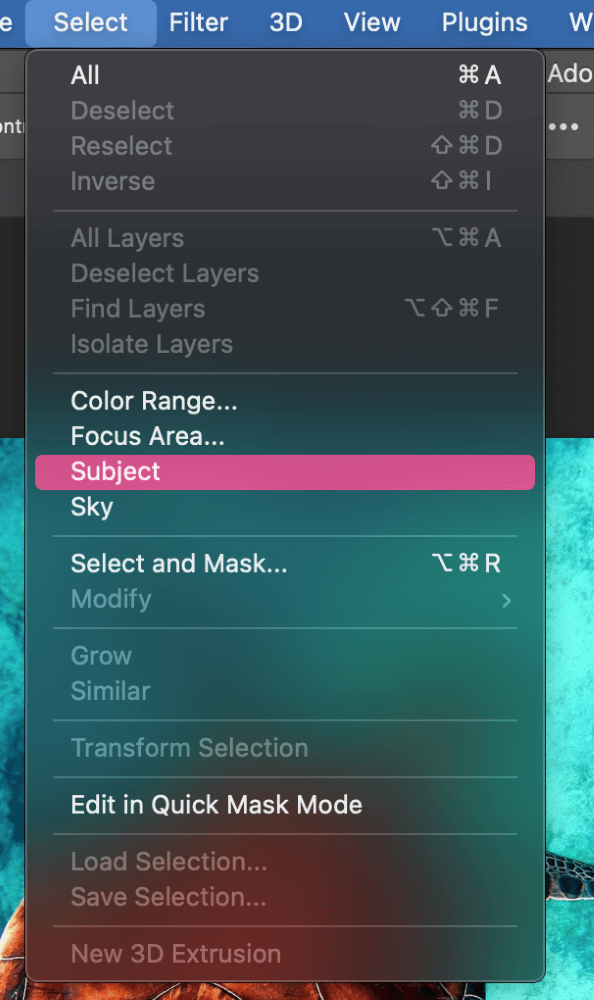
Step 1: To start, you will need to have your photo open in Photoshop. Once you have that done, you will need to start by dividing the image into two layers, the foreground, and the background, before animating anything.
To do this, select Subject from the Select menu in Photoshop and let the program analyze your photo. If you are not seeing this, you might need to check if you are running the latest update of Photoshop.
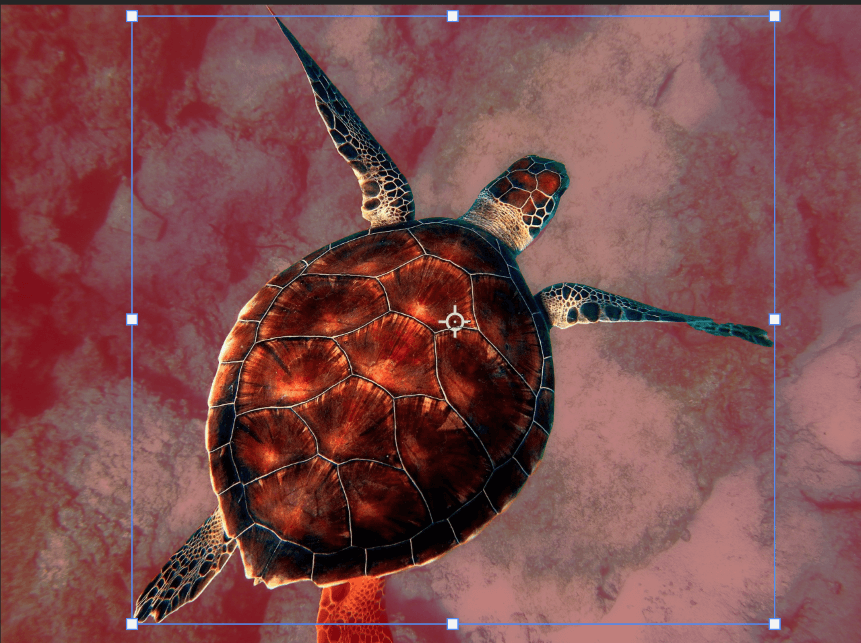
Step 2: Press the Q key on your keyboard to activate Quick Mask mode. Any area of your image outside of the current selection will have a red overlay in this mode. Your image should look like the one below.
White (#ffffff) and black (#000000) can be used as paint colors with the Brush tool to add to and delete from the selected image.
Quick Tip: Press the X key on your keyboard to swap the foreground and background colors!
To show your new selection and exit Quick Mask mode after finishing your selection, press the Q key on your keyboard.
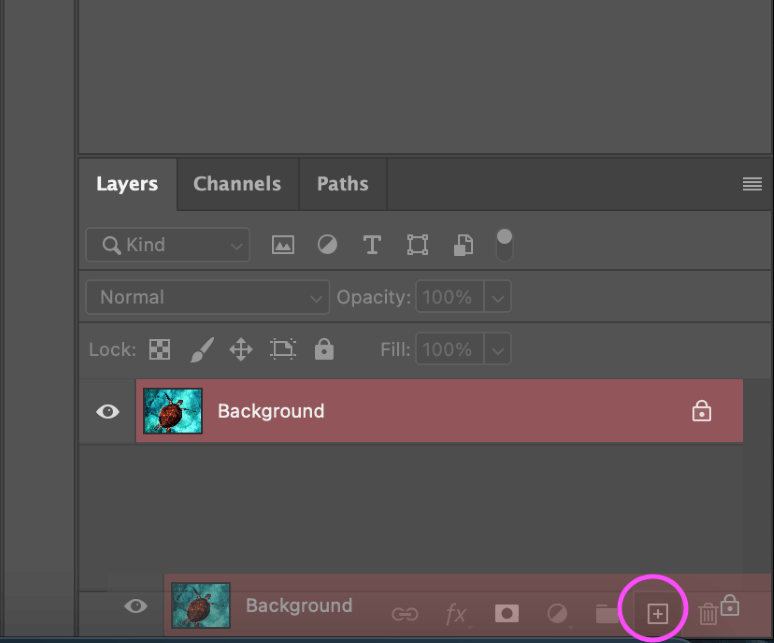
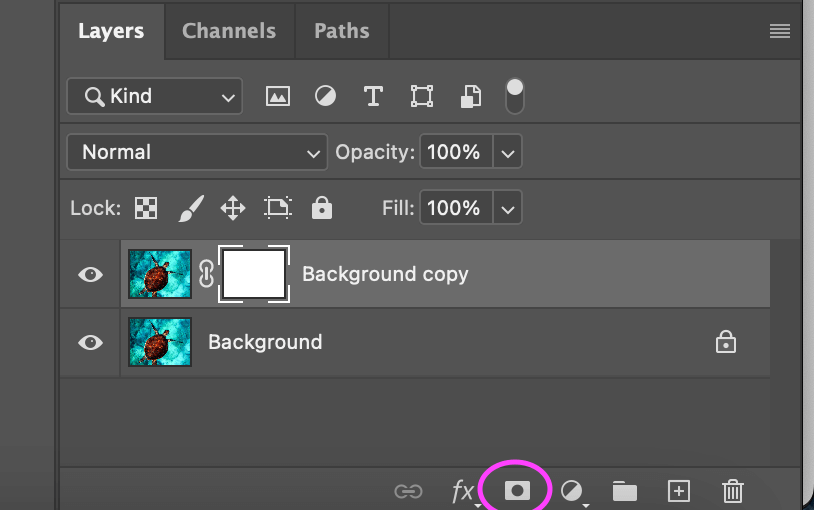
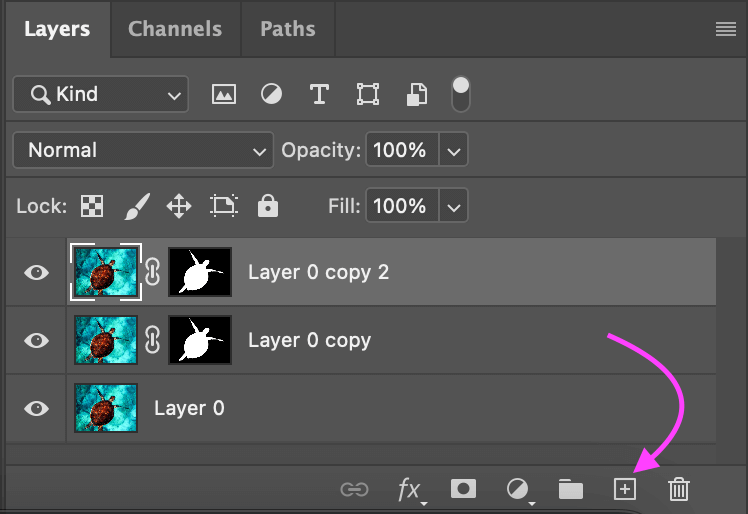
Step 3: The next step is to duplicate the current layer by clicking and dragging it to the New Layer icon located in the bottom right corner of the Layers panel.
Step 4: To show only the jumping subjects, you will need to click the Layer Mask icon and add a layer mask to the layer that is duplicated.
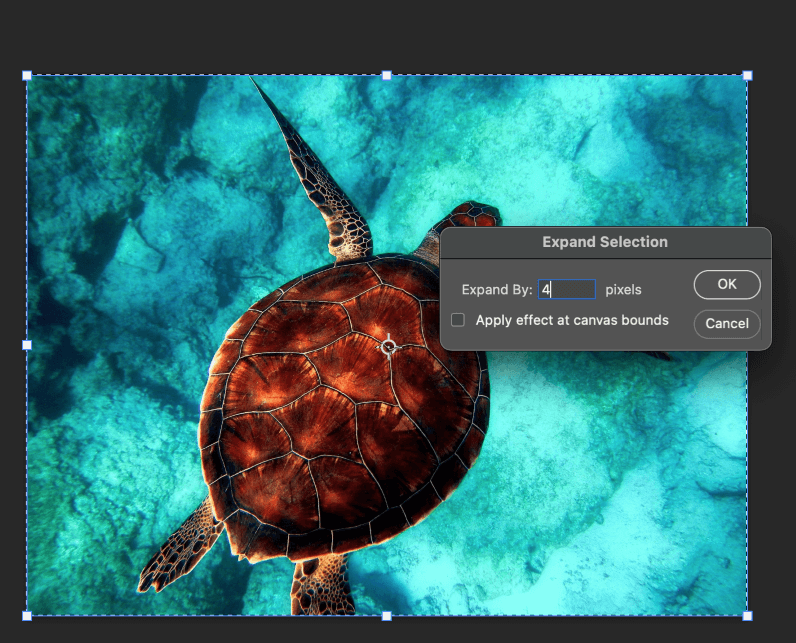
Step 5: Go to the Select menu > Modify > Expand on your image to make it bigger.
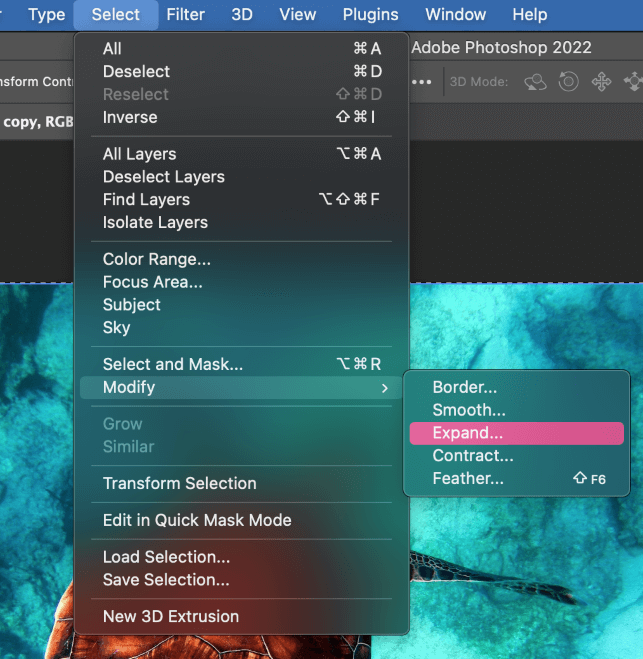
Step 6: Set the Expand By value to 4 pixels on the Expand Selection Window and press OK.
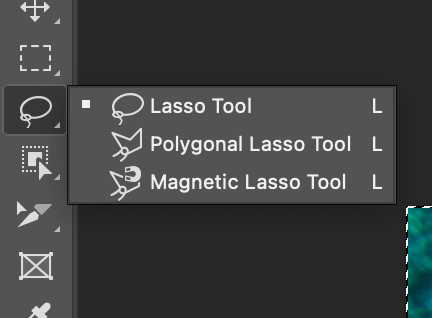
Use the Lasso tool and click-and-drag over any remaining foreground regions that are not selected to include them in your selection while holding down the Shift key.
Step 7: Click and drag the background to the New Layer icon to duplicate the layer.
Navigate to Edit > Content-Aware Fill in the cloned copy. The pixels where the subjects were will now be filled with content-aware technologies.
The area from where the Content-Aware technology is sampling pixels is indicated by a green overlay.
If you want to move on to the next section, where I’ll teach you how to repair the background pixels’ irregularities, press Ctrl + D (Windows) or Command + D (macOS).
Hold the Shift key down as you pick the bottom layer while also selecting the created pixels on the new layer.
Then, in order to combine the two selected levels into a single layer, press Ctrl + E (Windows) or Command + E (macOS).
Step 8: The background can be improved with the Clone Stamp Tool, focusing on a specific area of the image that needs to be improved.
You can copy and paste a set of chosen pixels using the Clone Stamp tool. Determine the source by pressing and holding the Alt (Windows) or Option (macOS) key on your keyboard.

You will be able to see how you are painting with the pixels collected from the source. You may always click Alt (Windows) or Option (macOS) to reset your source if you need to. Consider taking your time to perfect this region.
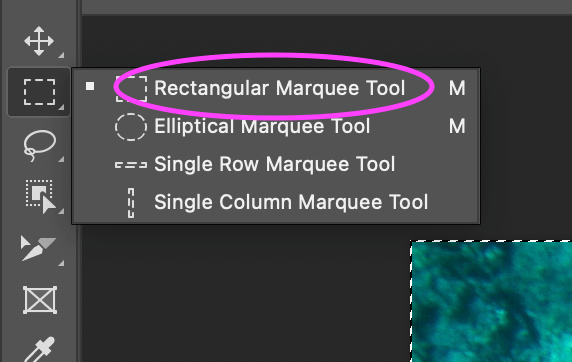
Step 9: Use the Rectangular Marquee Tool to select the refined area and press Ctrl + J (Windows) or Command + J (macOS).
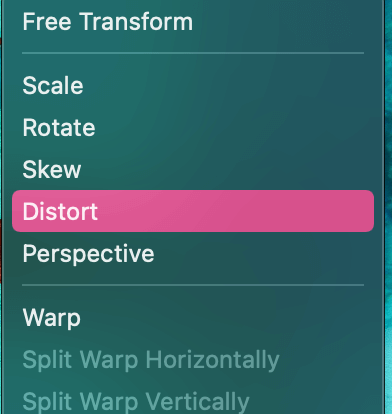
To resize and position the copied selection, press Ctrl + T (Windows) or Command + T (macOS). Then flip Horizontal can be chosen with a right-click.
Once that is set, right-click once more, choose Distort, and then make necessary adjustments to the selection so that it blends in with the background. To leave the Transform mode, press the Enter (Windows) or Return (macOS) key.
If there are any inconsistencies within your selection use the clone stamp tool again to fix your selection.
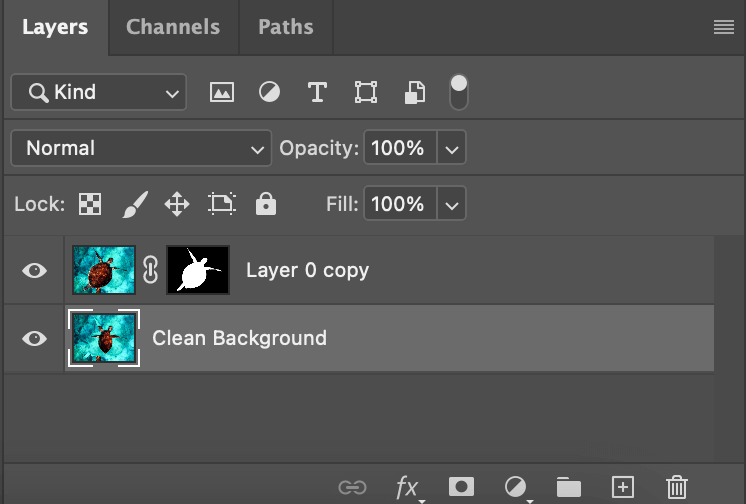
Step 10: Now, combine your images into a single layer when you’ve completed them. Holding the Shift key while selecting the current layer and the Background copy will allow you to merge the two layers together. Give this layer the new name Clean Background.
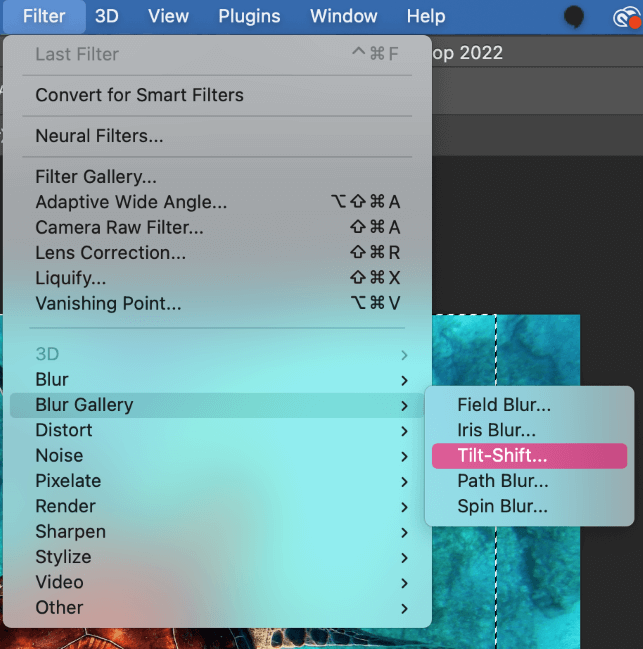
Step 11: You will need to put the background in a blur to do so go to Tilt-Shift under Filter > Blur Gallery. The reference point should then be clicked and moved downward.
To enlarge the region and have the blurring begin from the center to the top area of the image, click and drag the bottom handle as well. Set the Blur setting to 6px on the blur tools.
You will see right away that any background flaws can be easily hidden with the additional blur. To make the adjustments, click OK.
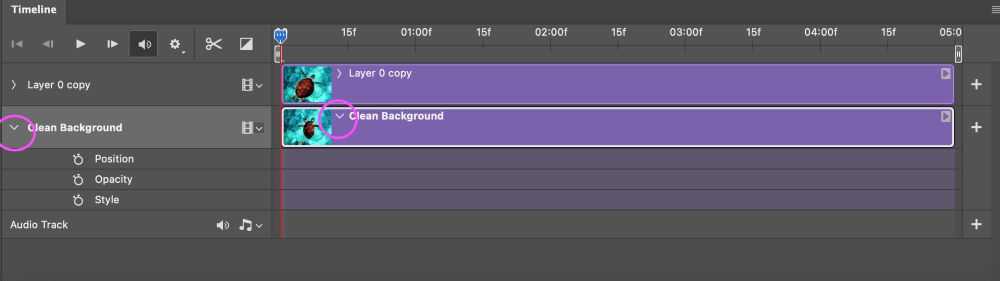
Step 12: Utilize the Timeline Panel to animate the foreground and background. Now, the actual Photoshop tip for animating any image! Open Windows and select Timeline. Using the help of this capability, we may use Photoshop to make a timeline with photos and 3D objects.

Step 13: Click the Create Video Timeline button located in the middle of the timeline window. If you can’t see it, click the downward pointing arrow and choose Create Video Timeline from the drop-down option.

Step 14: Release the components and keyframes needed for the upcoming steps by clicking on the downward pointing arrows on each of the two layers.
You can see the separation between your jumping layer and the Clean Background if you use the Orbit 3D Camera to see your 3D layers from a different angle. The 3D Camera Position keyframe is added.
After that, position the playhead anywhere along the Timeline.
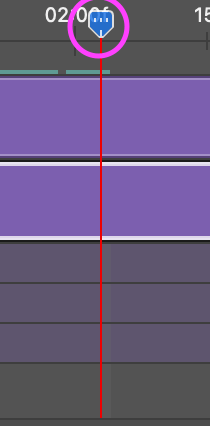
And Photoshop will add a second keyframe as soon as you start rotating the camera.
By moving the 3D camera position from the first keyframe to the second keyframe and pressing the Play button, Photoshop fills in the timeline. This is how you will animate your 3D photos.
Simply right-click on a keyframe and choose Delete to remove it. To clean my timeline, I will delete both the first keyframe and the second keyframe.
Step 15: You can see the greater separation between the Jumping Mesh and the Clean Background Mesh by using the Orbit 3D Camera.
By pressing Ctrl + Z (Windows) or Command + Z (macOS), you can go back and expand the scope of Clean Background Mesh.
Select the 3D Camera Position under the Clean Background Mesh’s parameters. Following the elements, scroll down. Turn on the Stopwatch for Jumping and the Clean Background under 3D Meshes. This will produce keyframes for these meshes’ positions.
To move the playhead, click and drag it to the 2-second mark and then utilize the 3D Orbit Camera. You can also choose the Jumping Mesh, expand it by pulling it forward, then bring it down.
The Jumping subject will move about the 3D environment once you press the Play button. When you’re prepared to save the video, all you have to do is click the Flyout menu and choose Render Video and now you have yourself an animated photo!
Final Thoughts
As you can tell there were a lot of steps in this process, but now you have an animated photo! I would suggest continuing to practice with different images to get the hang of it.
Any questions about animation in Photoshop? Leave a comment and let me know.
About Aly Walters