
Scaling an image is one of the most common image editing tasks, and you’ll find yourself doing it over and over again.
It almost feels excessive to use Photoshop for a basic resize operation, but resizing often happens as part of a larger editing process, so Photoshop also has some interesting tricks up its sleeve for more complex image scaling situations.
With that in mind, I’ve put together a list of three of the most common ways to resize an image in Photoshop, as well as a bonus look at one of Photoshop’s Neural Filters and Super Zoom.
Table of Contents
Method 1: The Image Size Command
The simplest way to scale an image in Photoshop is by using the Image Size command. With your image loaded in Photoshop, open the Image menu, and select Image Size.
Photoshop will open the Image Size dialog box (shocking, I know) allowing you to enter a new size for your image using any type of unit you want, including percentages.
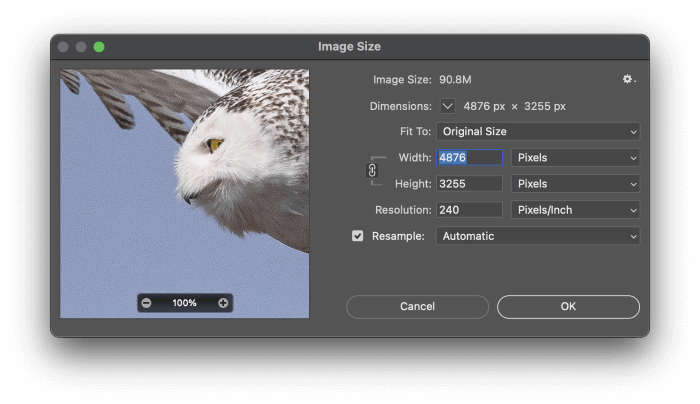
Entering a larger dimension will scale your image up and decreasing the dimensions will scale your image down.
To preserve the current width-to-height ratio (known as aspect ratio) click the small “chain-link” icon in between the Width and Height boxes to link the two values. This prevents you from accidentally distorting your image by scaling too much in one direction.
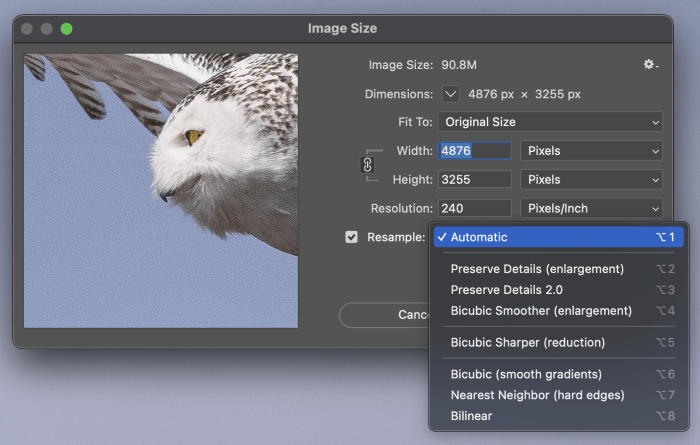
It’s important to note that the Resample method used to scale your image can have a huge impact on the quality of the results.
For most situations the Automatic setting is fine, but when you’re doing image enlargements, it’s worth comparing the results from Preserve Details, Preserve Details 2.0, and Bicubic Smoother.
The preview window will give you a good idea of how the image will look after scaling, but you’ll want to use the zoom buttons to get a look at 100% zoom to make sure.
The buttons only appear when you move your mouse cursor over the preview window so that they don’t interfere with the preview itself.
Different resample methods work best on different images, so your final choice will depend on your image and your own taste. When in doubt, leave it set to Automatic.
When you’re satisfied, click the OK button and Photoshop will scale your image to the new dimensions you provided. Keep in mind that enlarging an image too much can seriously affect image quality, so don’t push things too far.
Method 2: Scale Transformations
If you want to change the scale of the contents of your image without changing the size of the overall document, you can use the Scale transform.
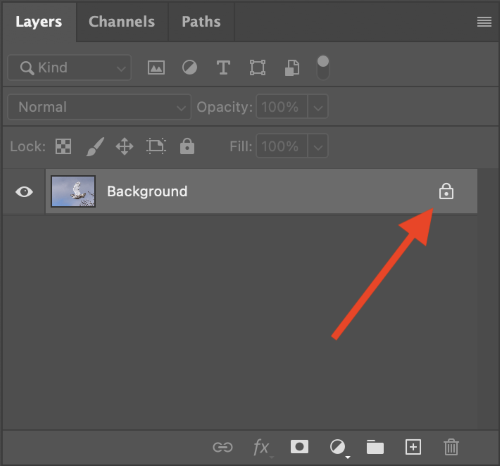
Keep in mind that if you want to scale an image with only one layer, that layer is partially locked by default, which prevents you from making any changes to its transparency or position.
To unlock the layer, simply click the small lock icon to the right of the layer name in the Layers panel (see below).
Once your layer is unlocked, there are several different ways to apply a scale transform. You can quickly enter Free Transform mode by pressing the keyboard shortcut Command + T (use Ctrl + T on a PC), or you can also start using Free Transform from the Edit menu.
If you want to make sure that you only apply a scale transform and not any other kind (which can happen sometimes in Free Transform mode) then open the Edit menu, select the Transform submenu, and click Scale.
No matter how you get there, the next step is the same. Photoshop will add a bounding box around the edges of your image, complete with eight smaller boxes at the corners and along the edges called handles.
Simply click and drag one of the handles to scale your image. You can also use the Shift and Option / Alt keys to modify the Scale results.
If you want more precision with scale transforms, you can use the Options bar at the top of the main document window to enter new scale dimensions.
Method 3: Content-Aware Scale
For most situations, one of the first two methods should be able to handle your image scaling needs, but sometimes you may need a bit more flexibility.
Content-Aware Scale attempts to fill that need, but I’ve found that it can be a bit hit-or-miss in its results. CAS scales your picture unevenly, preserving what it considers to be your subject while shrinking or enlarging the unimportant areas of your image.
If that sounds confusing, you’re not alone – it definitely is. As with many things in Photoshop, the best way to get a sense of how it works is to try it out.
Make sure that your background layer is unlocked (as described above in Method 2) and then open the Edit menu and select Content-Aware Scale.
You can also use the finger-bending keyboard shortcut Command + Option + Shift + C, although this is one situation where it might actually be faster to use the menus.
You’ll get a standard bounding box for applying scale transforms around the edges of your image, but the important stuff happens in the Options bar at the top of the main document window.
You can adjust the amount of content-aware scaling vs normal scaling and set an alpha channel that specifically protects certain areas of the image.
This tool probably deserves an entire article dedicated to how to use it, but I’m not convinced that it has enough use cases to be a part of your everyday editing workflow.
(If you’d like to see a more in-depth tutorial on the Content-Aware Scale tool, let me know in the comments!)
Bonus Method: Scaling With AI
You’d probably have to be living under a rock to have missed the recent surge in “AI-powered” editing tools that have taken the world by storm (or, at least, the software development world).
Machine learning algorithms have enabled entirely new ways of working with images, including the ability to dramatically upscale images without losing image quality.
While these tools are still only in the early stages of development, Adobe, Topaz Labs, and On1 all have variations of an AI upscaling tool that allows for improved enlargements, with some marketing blurbs claiming that even 600% enlargements still look good.
It’s certainly an exciting prospect, but I think it’s best to take all this with a giant grain of salt – they’re marketing claims, remember – at least until we see just how much the technology is capable of.
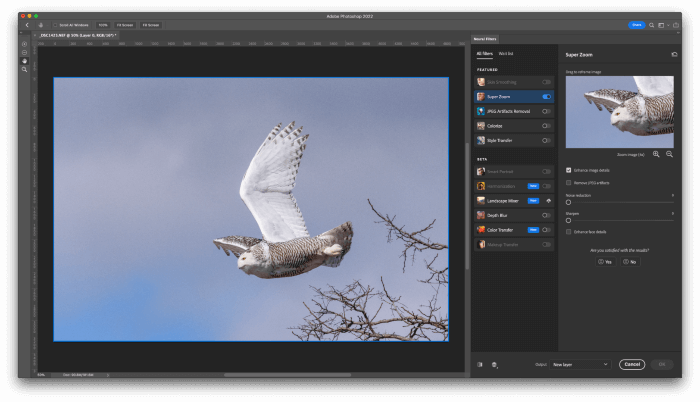
You can try Adobe’s beta scaling tool by opening the Filters menu, selecting Neural Filters, and then selecting the Super Zoom filter.
If you’ve never used them before, you may have to click the small download icon next to each filter in order to install it from the Creative Cloud servers. Fortunately, all image processing happens on your device, not on the cloud.
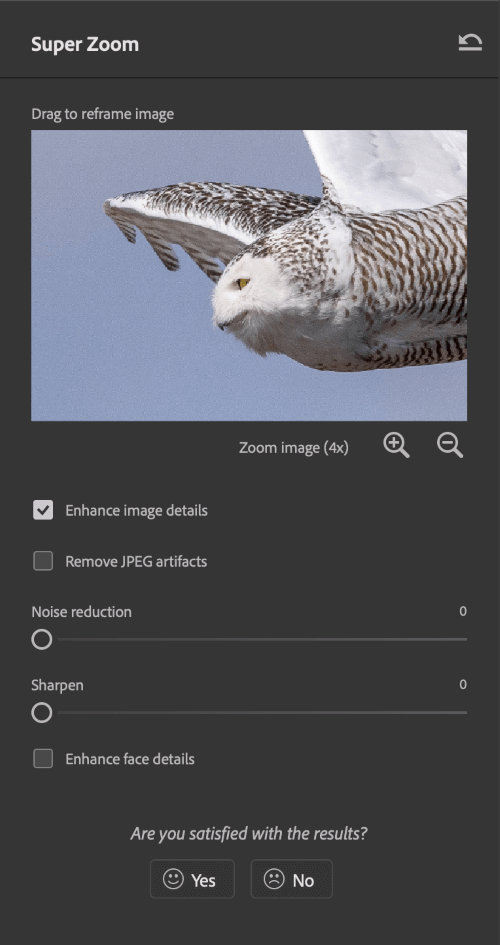
During my testing, I decided to try maxing out the zoom, but I gave up after seeing it would take over an hour to complete, and went with a 4x zoom instead.
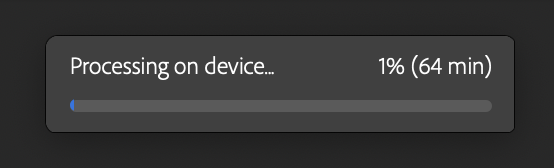
Even the 4x zoom took quite a while to calculate on my 2015 iMac, and the same process took nearly 10 minutes on my beast of a PC. Maybe I’m just a bit spoiled, but I’m not used to waiting so long for Photoshop to perform any kind of action.
The worst part is that the result on my test image wasn’t as good as the results that I got from using the Preserve Details 2.0 resampling algorithm that I discussed in Method 1.
Super Zoom did a better job on noise removal, but it also darkened some of the shadows until the owl’s wings threw off the exposure balance a bit.
I guess that’s why these tools are still treated as beta versions! Even though the results didn’t live up to my expectations in my testing, I’m still looking forward to seeing how the technology improves.
A Final Word
That’s all there is to know about how to scale an image in Photoshop! Just keep in mind that you’re always going to lose some image quality if you scale your image up too much, so try not to push things too far.
Also, if you want to learn more about the Content-Aware Scale tool, let me know in the comments and I’ll make a tutorial if there’s enough interest.
Happy image scaling!
About Thomas Boldt