
Misaligned text, unless it’s done deliberately for impact, is aggravating to look at. And if you’ve ever struggled in Photoshop to make sure your text is perfectly aligned, you know how frustrating it is to try to eyeball it. It just never looks quite right no matter how hard you try.
Hello, I’m Cara! Today I’ll help make the program a little less mysterious for you when it comes to aligning text in Photoshop.
There’s a huge learning curve to get into Photoshop (trust me, I know). But tricks like I’ll show you today demystify Photoshop and show you how the program makes many things quite simple.
Let’s get to it!
Table of Contents
Today’s trick is brought to you by the handy-dandy Move tool. With the right selections, you can make your text perfectly align itself with just a couple of clicks. Let me show you how it works.
Step 1: Write Some Text
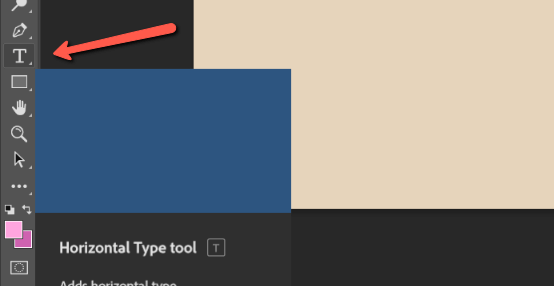
Open a document for your project and add some text with the Horizontal Text tool. Get to it by pressing T on the keyboard or choosing the tool from the toolbar on the left.
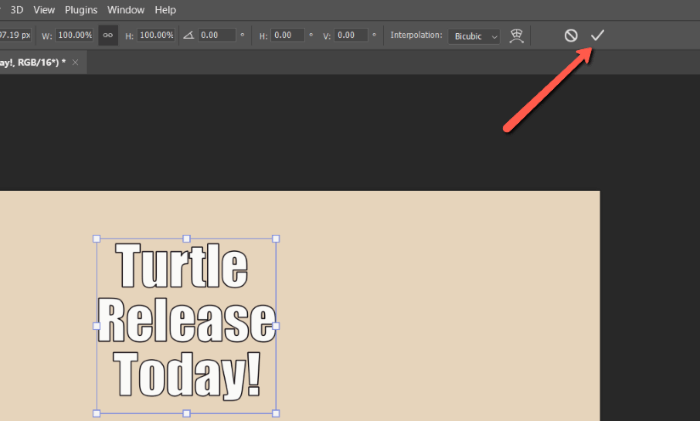
Click somewhere in your canvas and write your text. Click the checkmark in the Options bar to accept the text.
Step 2: Open the Move Tool
Press V on the keyboard or choose the Move tool from the top of the toolbar.

A blue box with little handles will appear around the text. You can use these to resize, reposition, or even rotate the text.
However, we’re interested in the Alignment buttons up in the Options bar. You may notice that they are grayed out right now. That’s because you need to define an area in which to align the text. Otherwise, Photoshop doesn’t know what it’s supposed to line up with.
Step 3: Select the Canvas
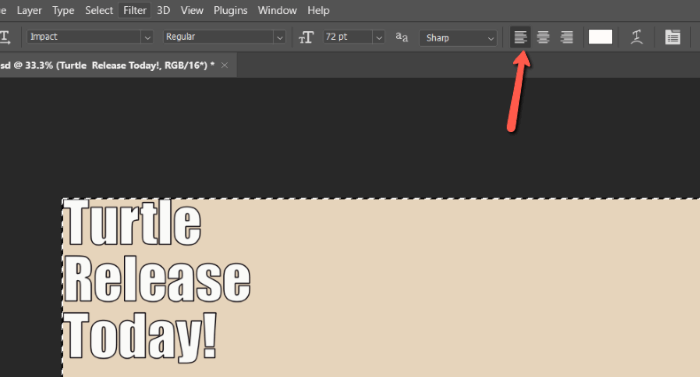
To align within the entire canvas, press Ctrl + A or Command + A to select the whole canvas. You’ll see the famous marching ants appear around the edges of the canvas. You’ll also notice that the alignment buttons become useable.
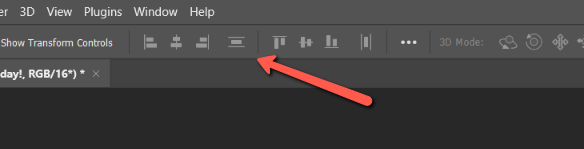
Notice that the buttons are grouped in two groups of three. The group on the left controls the horizontal alignment. The first one aligns the text to the left, the middle button aligns the text in the center, and the right one places the text on the right.

The second group of buttons aligns the text vertically. The first one puts the text to the top, the middle one jumps it to the center, and the right one places the text at the bottom.
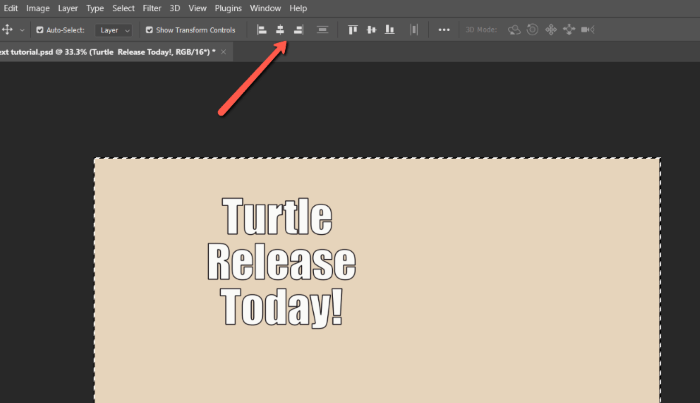
When I hit the first buttons in each group, Photoshop aligns the text in the top left corner of my canvas.

Aligning Text With Itself
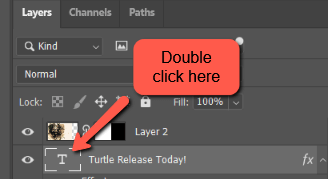
What if you want to line up all the words on the left? Double-click the thumbnail on the text layer to select it.
Up in the Options bar, you’ll have options for aligning the text. Choose the Left Align Text option to line the words up on the left. The middle one puts the text in the center and the right button lines the words up on the right.
These buttons will change the text alignment according to the midline of the text, so you may have to jump back to the Move tool to use the alignment buttons again. This will line up the entire text in relation to the selected canvas.
Aligning Text Within Part of the Canvas
What if you don’t want to align the text in relation to the whole canvas? You can use the same Alignment buttons to align the text in just a part of the canvas as well. All you have to do is define a different area.
Do this by selecting the Marquee tool. It’s located right under the Move tool at the top of the toolbar.
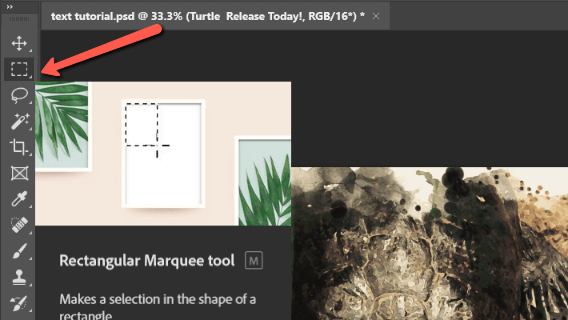
Click and drag to select the area of the canvas where you want the text to be aligned.

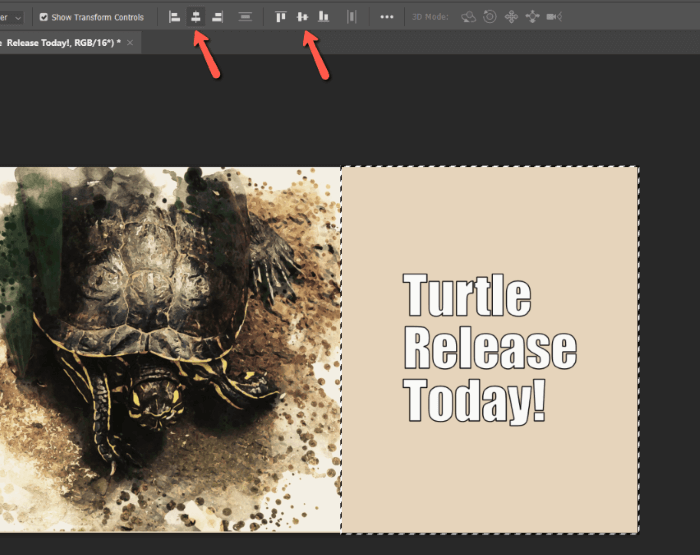
Now, when you use the alignment buttons, the text will align itself according to this rectangle on the right. Here’s what happens when I press both the Align Center buttons.
Aligning Text Within a Text Box (Text in a Square)
What if you want all your text to fit in and fill up a square? The spacing between letters and even the size of the letters for words may have to be different to make them fit in a pleasing way.
You can painstakingly line everything up manually with Photoshop’s guides and rulers. Or you can use this trick instead which will work for most projects.
Select the Horizontal Text tool. We have to start with a text box rather than just clicking and writing.
So with the text tool active, click and drag to create a text box.
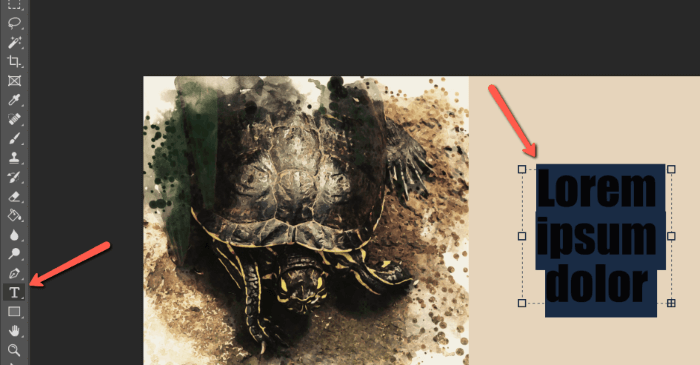
Once you’ve added your text, you can click and drag the corners of the box to resize it according to your liking.

To line all the words up with the sides of the square, we’ll use the Justify All command. Double-click the text layer thumbnail to select all the text.
Open the Paragraph menu by going to Window and clicking on Paragraph.
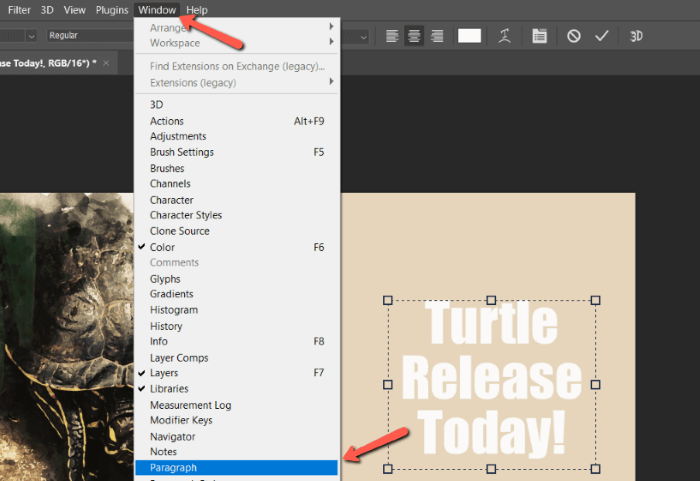
This panel will pop out. Click on the Justify All command on the right side. If you don’t make the text box, this command will be grayed out.
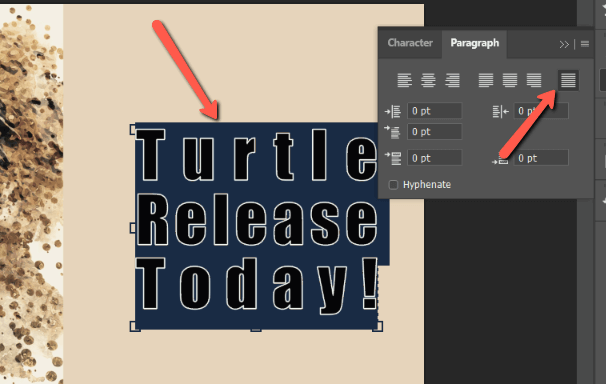
If all goes well, you’ll see the text automatically space itself properly to evenly fill the text box. Again, you can adjust the entire size of the box as needed by dragging on the box handles.

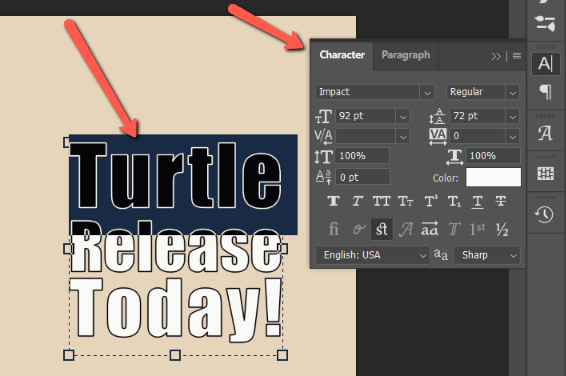
If you don’t want the letters spaced out so much, you can make some of the words bigger. Highlight the text you want to change and click the Character tab right next to the Paragraph tab.
In this example, I’ve made the word “turtle” bigger so it fills up more space than the word “release” without having to space the letters out so much. You can also change the spacing and other effects as you please. Learn more about these options in our tutorial for making a font.
Have fun with it and I hope you make some amazing artwork!
Want to learn how to do more cool stuff with text in Photoshop? Check out our tutorial on making circular text!
About Cara Koch