
Sometimes a ray of sunlight is all you need to turn your frown upside down. And sometimes a ray of sunlight can turn an okay image into an amazing one!
Hey there, I’m Cara, back again with more Photoshop goodness. If you’ve seen my other tutorials on adding effects such as stars or lightning, you’ve heard me say how easy these techniques are. But sunlight is a different story, right? It must be hard to add sunlight!
Nope. It’s really easy as well. It’s so simple, I’ve got time to show you how to add two types of sunlight to your images – a sunset and rays of sunshine. So let’s dive in and learn how to add sunlight in Photoshop!
Note: I use the Windows version of Photoshop. If you are using a Mac, the workspace will look slightly different from the screenshots displayed here.
Table of Contents
How to Add Soft Sunlight in Photoshop
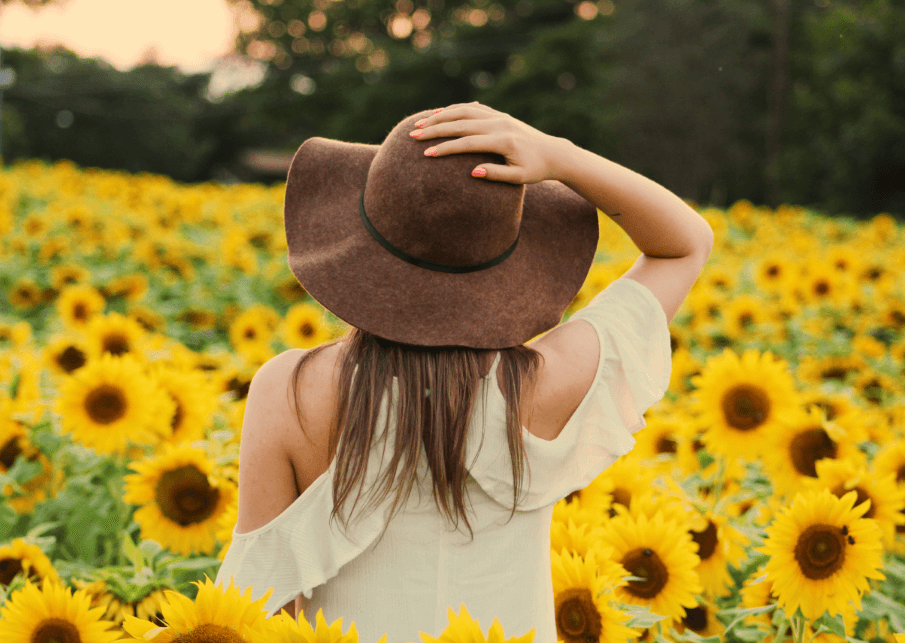
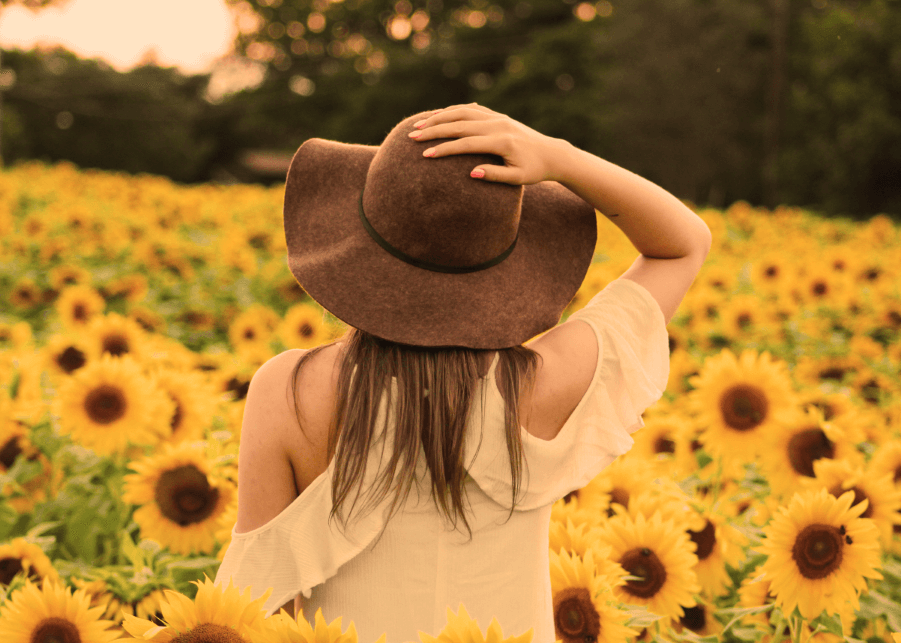
For example, let’s add a beam of sunlight to this sunset image.
Step 1: Warm the Image
Photos taken at sunset are quite warm as they are awash in the last golden rays of the sunlight as it goes down. This photo is already a little on the warm side, but we want to push it even further. So let’s add a warming filter.
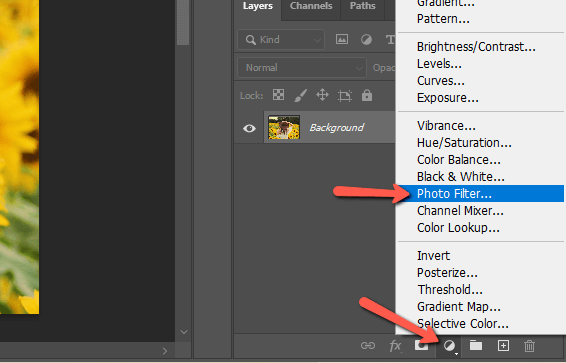
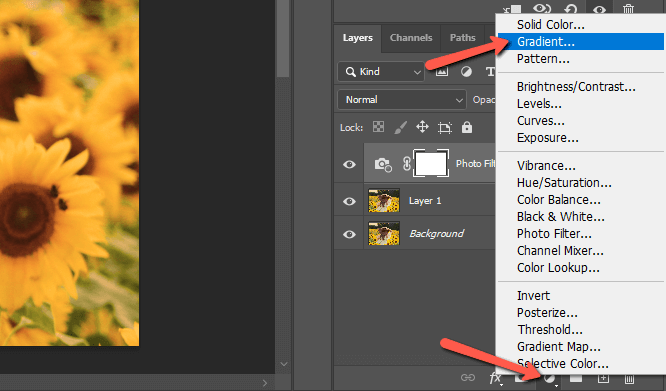
Click the half-filled circle at the bottom of the Layers panel to add an adjustment layer. Choose Photo Filter from the list.
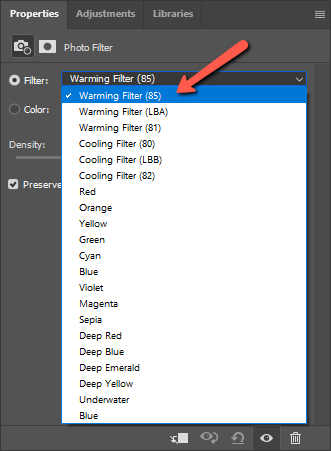
In the Properties panel, you’ll see some filter presets. Click in the box to open the menu to look at your available options. I’m going to go with the first Warming Filter (85).
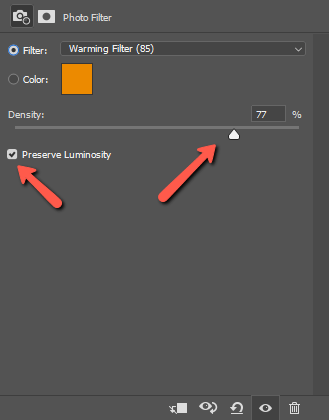
We want to deepen the orange tone so let’s push the Density slider up. This will also darken your image, so check the Preserve Luminosity box to avoid that.
If the color isn’t working for your image, you can click the radial button next to Color instead of Filter. Double-click on the color swatch to open the color picker and choose whatever color you want.
Step 2: Add a Gradient
We’re going to add the sunset itself with a gradient filter. I know that sounds strange, but stay with me.
Click on that half-filled circle at the bottom of the Layers panel to open the adjustment layers again. This time choose Gradient from the list.
You’ll get the Gradient Fill box. To open the Gradient Editor double click in the Gradient box. Set your gradient up from 100% Opacity to 0% Opacity by clicking on the little squares above the preview box.

Click the squares below the preview box to change the colors. Pick an orangeish-yellow color that works for your image on the 100% opacity side and set the other side to white. Press OK when finished.
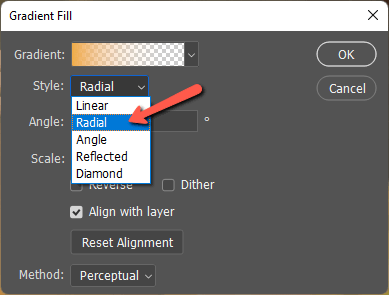
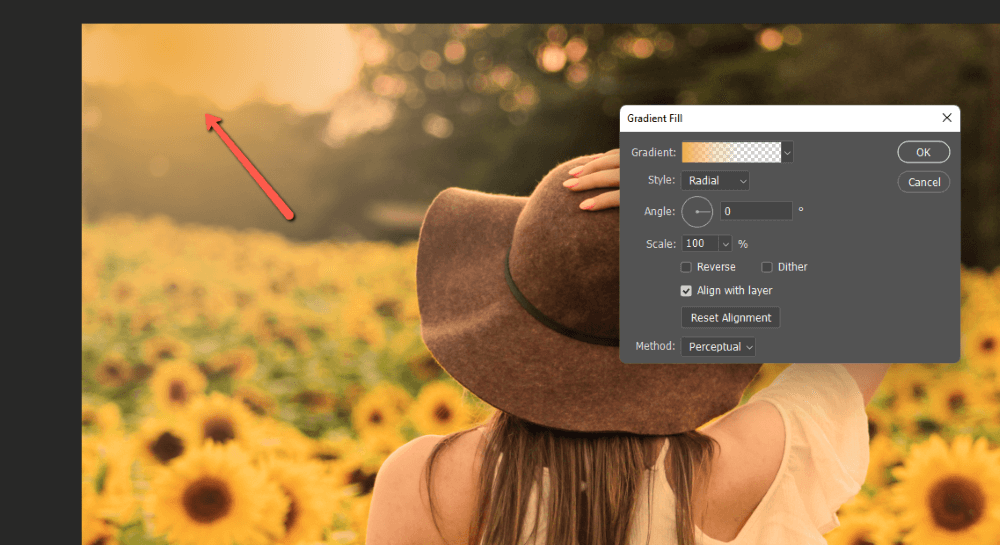
You’ll end up back in the Gradient Fill box. Here you need to change the style to Radial. You can also adjust the Angle and Method boxes to adjust the look of your “sunset”. Keep in mind that this isn’t the final look so don’t worry if it doesn’t look very real yet.
You need to position your sunset before closing out the Gradient Fill box. Once you close the box, you won’t be able to drag the gradient around. If you close it, don’t worry, just double-click on the gradient thumbnail to open the box again.
Click and drag your sunset into position.
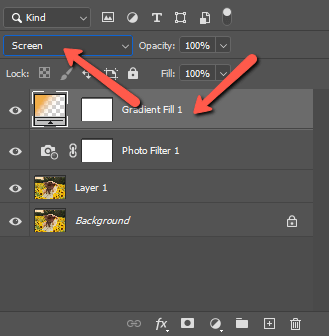
Step 3: Change the Blend Mode
Now for the final step that brings it all together. We need to change the blend mode of the gradient.
With the Gradient layer selected, click the blend mode box (which will say Normal). Change it to Screen.
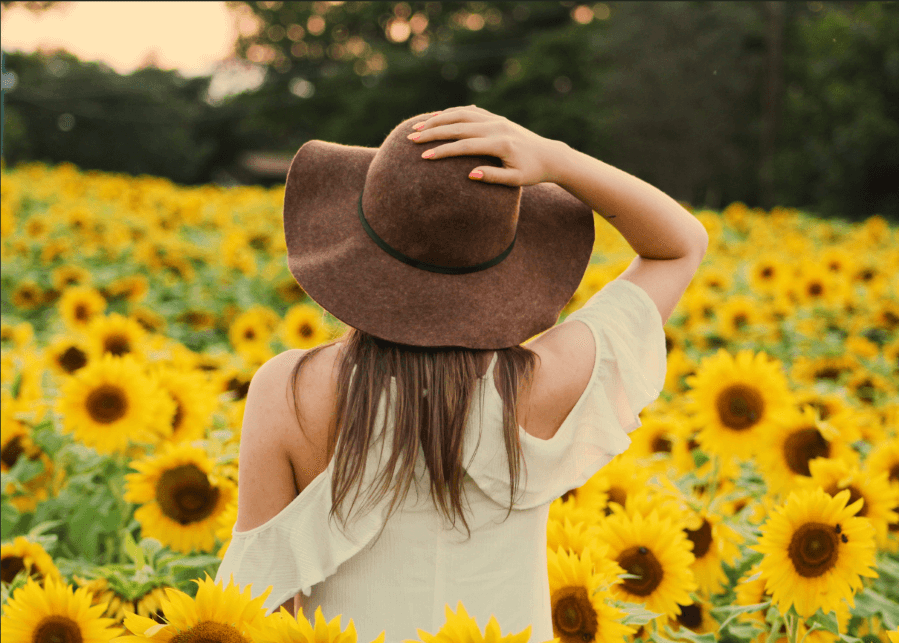
And look at how amazing your image has become!
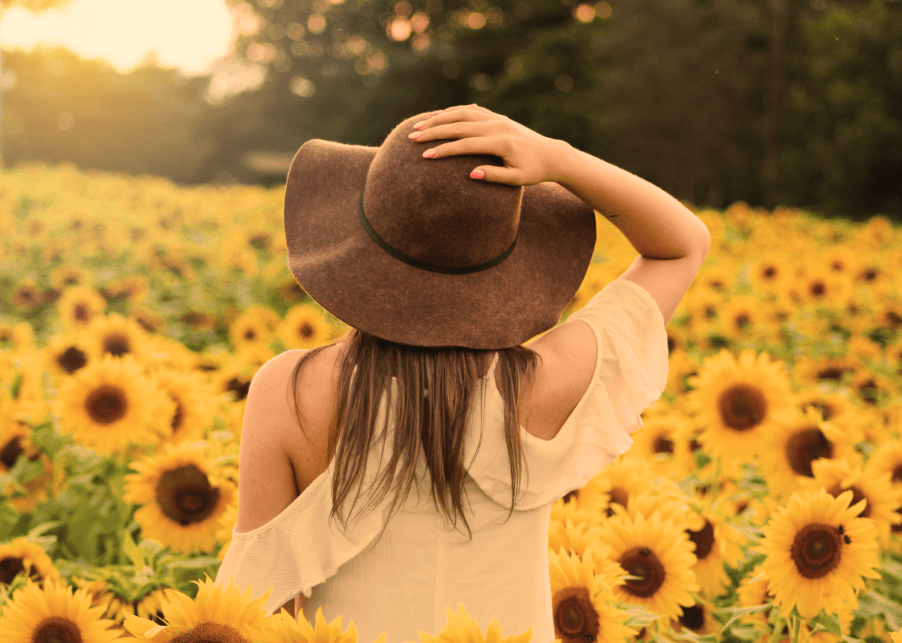
Here’s the before for reference.
How to Add Rays of Sunshine with Photoshop
Now let’s go for a different sunshine effect. Let’s see if we can add some sun rays shining down upon our subject.
Step 1: Warm the Image
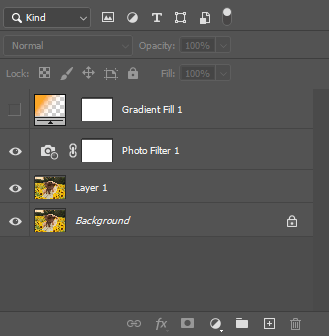
I like the warm tone that I added in the previous example, so I’m going to keep the photo filter effect and just turn off the gradient’s visibility. Here’s what your layers panel should look like if you’re following along with me.
If you’re jumping in here, please refer to the first step in the previous section for how to warm the image tone.
Step 2: Add a Gradient
We’re going to add a gradient as we did in the last example, but we’ll use it differently to get the sun rays effect.
So click the half-filled circle icon to open the adjustment layers menu. Choose Gradient from the list.

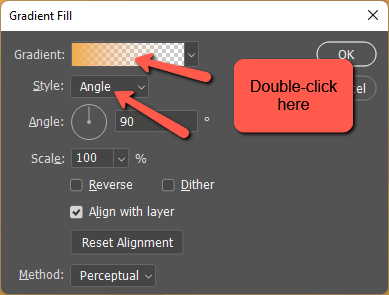
This time, we want to change the gradient style to Angle. Then double-click on the gradient box to open the Gradient Editor.
This time, we want a white gradient going from 100% Opacity to 0% Opacity. Click the little squares under the gradient preview, then double-click the color swatch below. This will open the color picker and you can choose white.
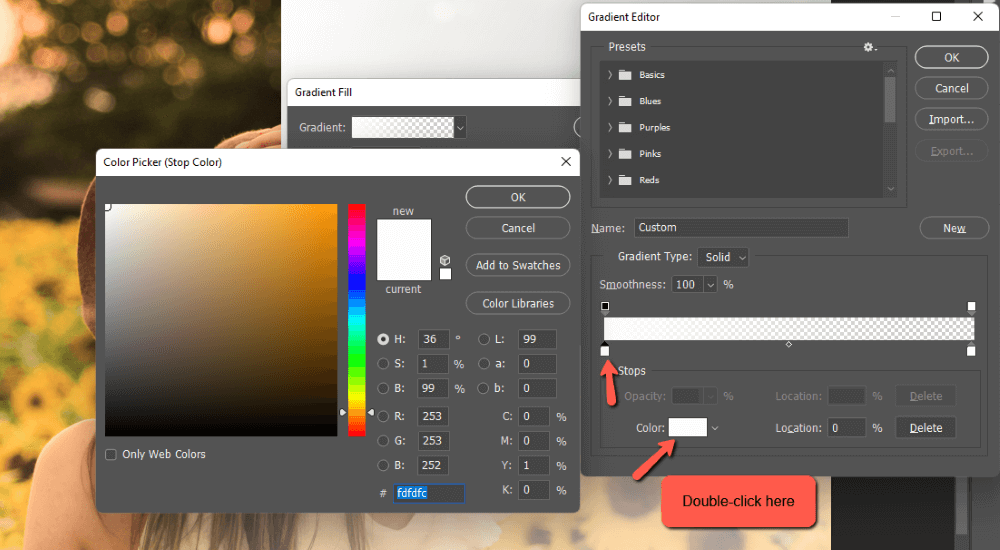
We’re not done with the Gradient Editor yet. Click OK to close the color picker and return to the editor.
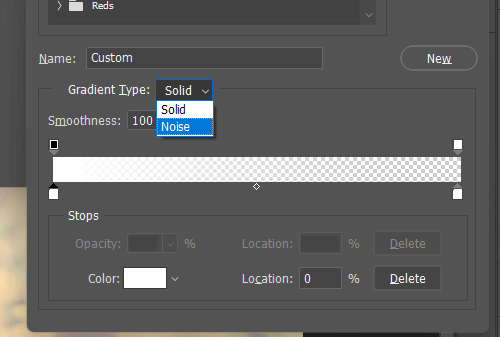
Click on Gradient Type to open the menu and change it to Noise.
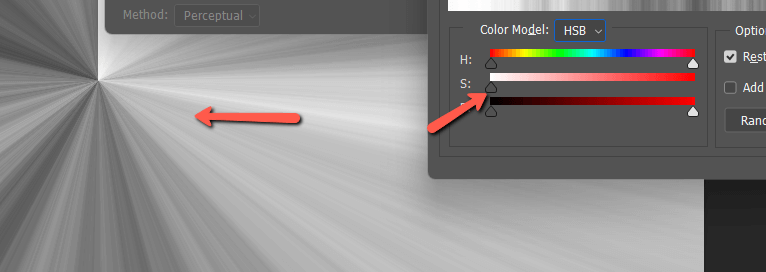
The bottom part of the editor will switch to new settings and the gradient preview will go all psychedelic. Click on the Color Model box to change the setting from RGB to HSB.
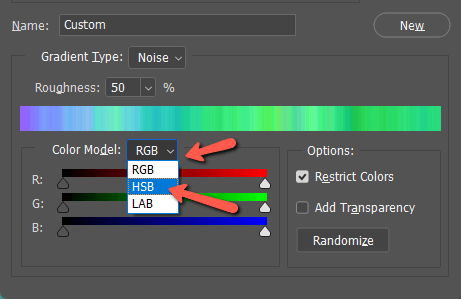
Then grab the S slider on the right and slide it all the way to the left.
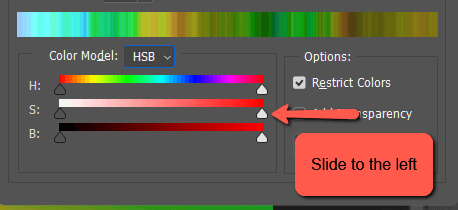
This will turn your gradient black and white.
It’s hard to see at this point, but let’s also turn up the Roughness a bit to around 70%.
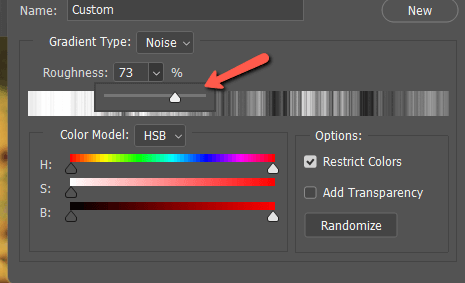
This will make the rays a little stronger. We can always dial back the opacity of the layer later if needed.
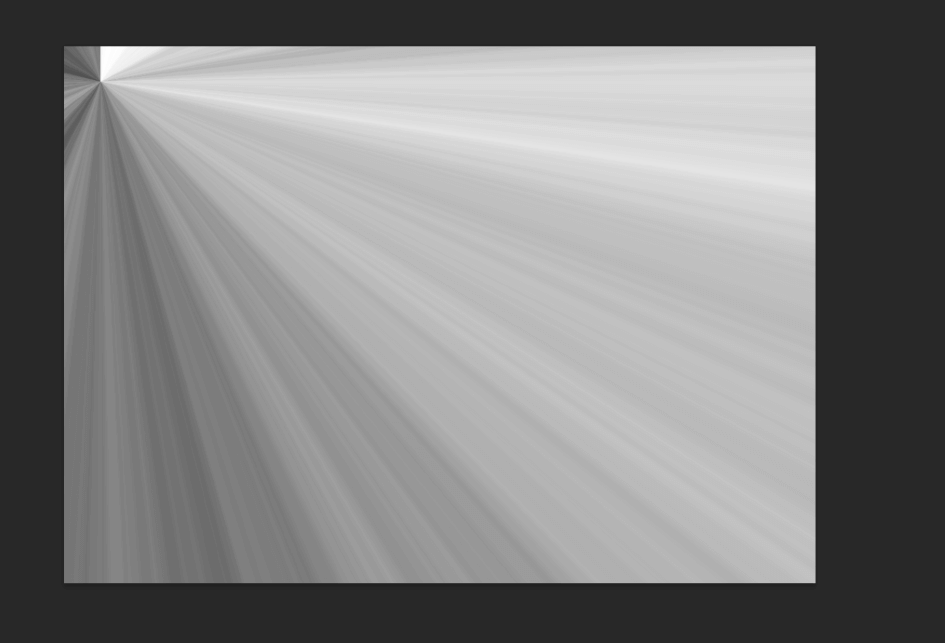
Again, before closing the Gradient Fill window, click and drag your gradient to the correct location for your sun rays. Then click OK to return to the normal workspace.
Step 3: Change the Blend Mode
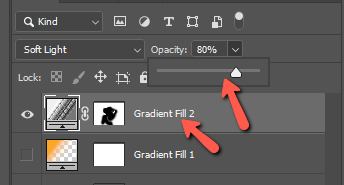
Just as in the last example, we need to change the blend mode to get this to look right. Making sure to have the gradient layer selected, and change the blend mode from Normal to Soft Light.
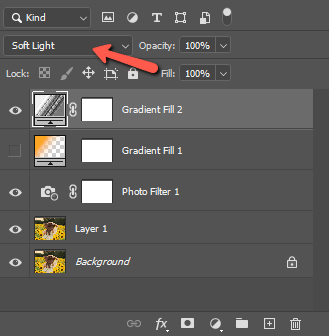
Now we’ve got some pretty awesome sun rays here!
Step 4: Remove Rays as Needed
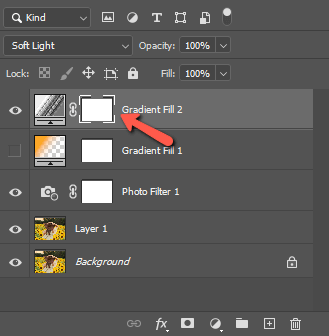
In a real photo, our subject would be blocking the rays, so we need to remove the rays that are running across her. To do this select the Layer Mask of your gradient.
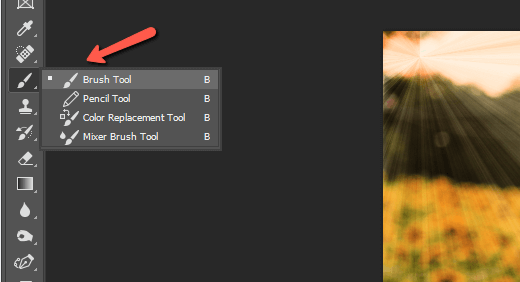
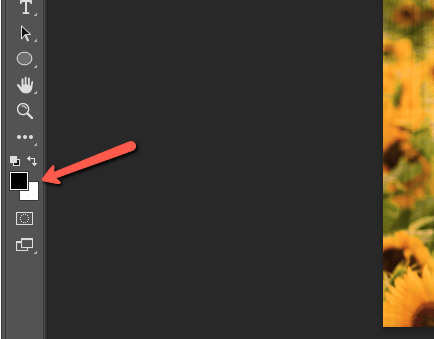
Press B on the keyboard or select the Brush tool from the toolbar on the left.
With black as your foreground color, paint along the areas where you want to remove the rays. Learn more about how to use the brush tool here.
Much better!
Now just bring the opacity of the layer down until it looks right.
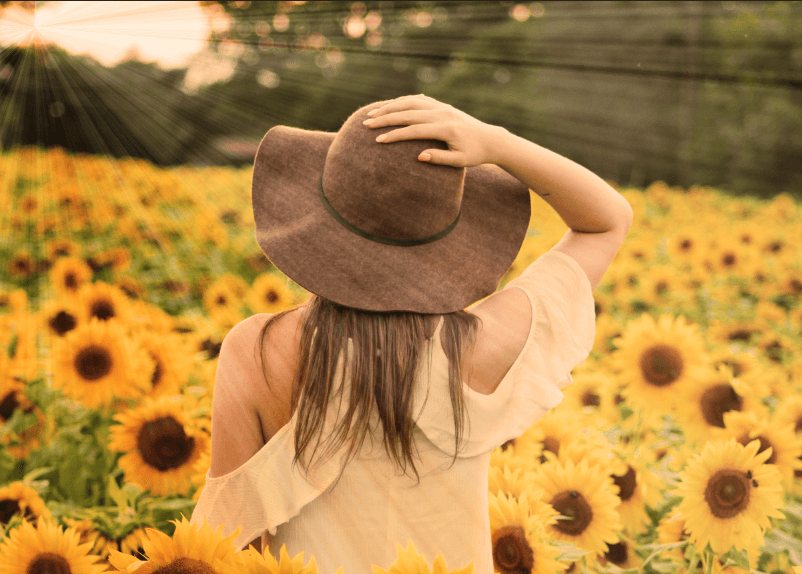
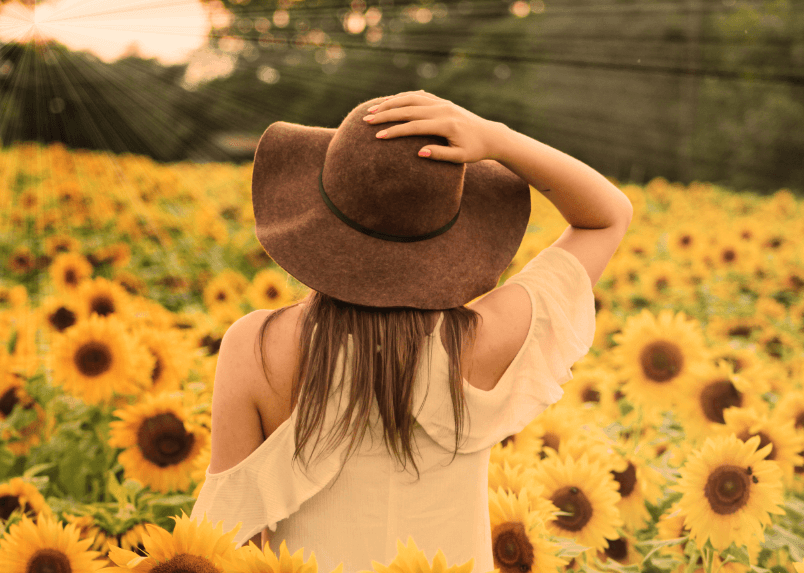
And we have some beautiful sun rays spilling over this field of sunflowers. For fun, I’m going to turn back on that sunset gradient that we created earlier. Let’s see what they look like together!

Well, I’m feeling inspired! How about you? You can add sunshine to lots of different images with beautiful results. Curious about other effects you can create in Photoshop? Check out how to add bokeh here!
About Cara Koch