You’ve probably already heard that Adobe Illustrator is the go-to when creating vector graphics. Honestly, you can make a simple vector shape in Photoshop just fine.
I’ve been working as a graphic designer for over ten years, and I’ve used Photoshop to create many shapes, especially simple ones like the different moon phases, or other combined shapes.
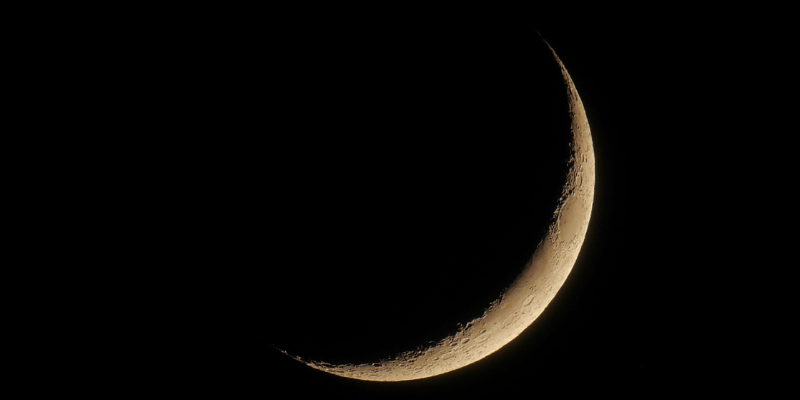
Define simple shapes? Well, anything that can be created with circles or rectangles is considered simple. A crescent moon is created by subtracting two circles. Easy!
In this tutorial, you will learn how to make a crescent moon in Photoshop using two circles and save them to Custom Shape for future use.
Keep reading.
Table of Contents
How to make a Crescent Moon in Photoshop (9 Steps)
Note: Screenshots are taken from Adobe Photoshop CC Mac version. Windows or other versions might look slightly different.
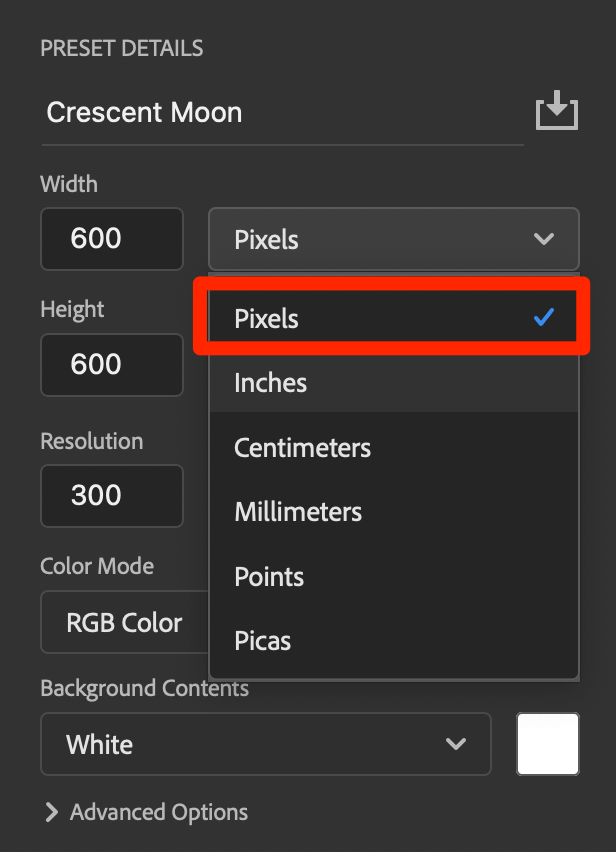
Step 1: Create a new document in Photoshop. Select any size you like in Pixels to create vector shapes, so you are able to scale without losing any image quality. For example, I’m creating a 600×600 pixels new document.
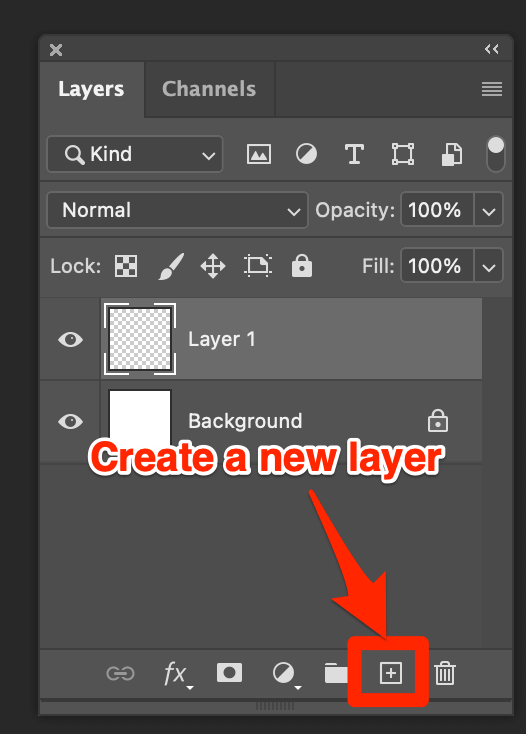
Step 2: Click on the Create a new layer icon on the layer panel to add a new layer.
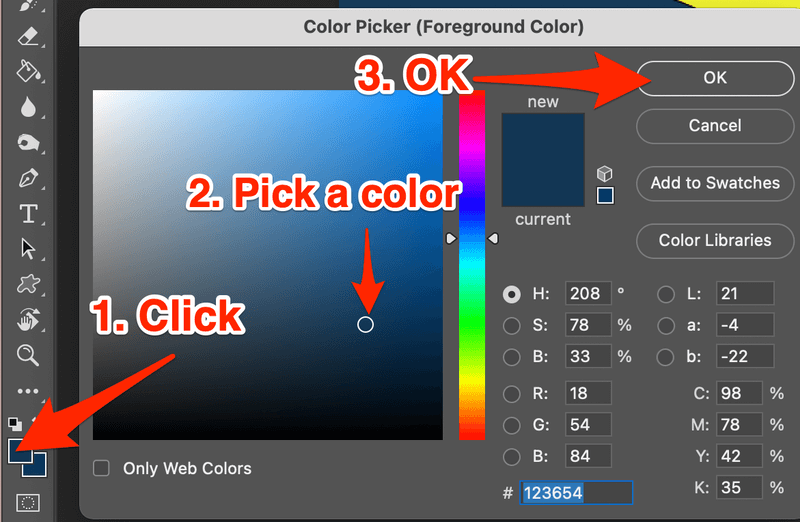
Step 3: Click Set foreground color on the toolbar and use the color picker to choose a background color for the layer.
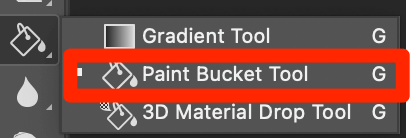
Step 4: Select the Paint Bucket Tool (usually hidden under the Gradient Tool) from the toolbar. Click on the canvas to fill in the background color. If you’re making an icon and want a transparent background, skip this step.
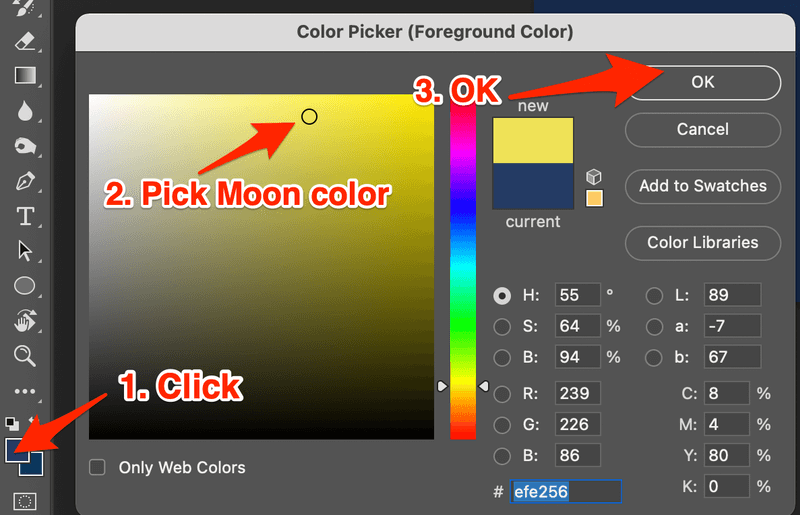
Step 5: Click on the Set foreground color on the toolbar again, and choose a color for the moon.
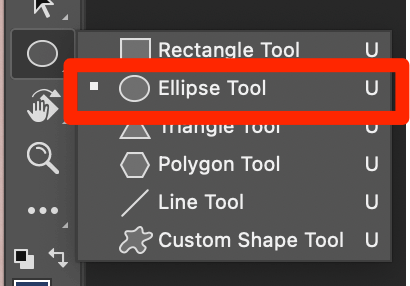
Step 6: Select the Ellipse Tool, usually, it’s hidden under the Rectangle Tool.
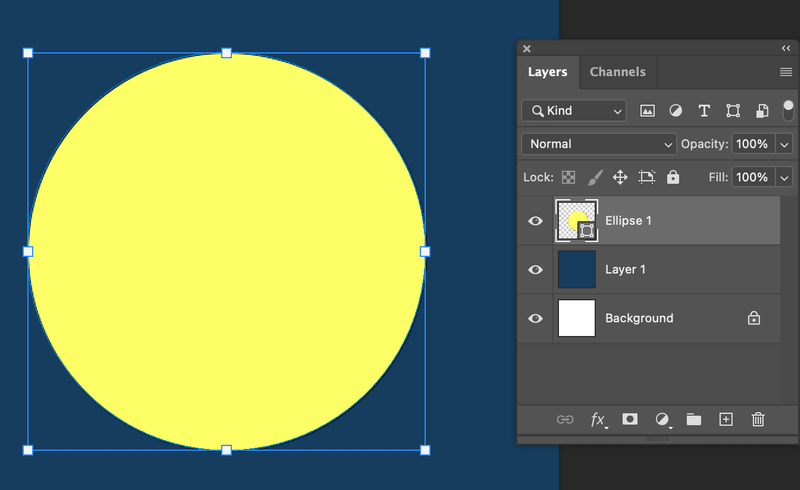
Step 7: Hold down the Shift key, click and drag on the canvas to make a perfect circle (the moon).
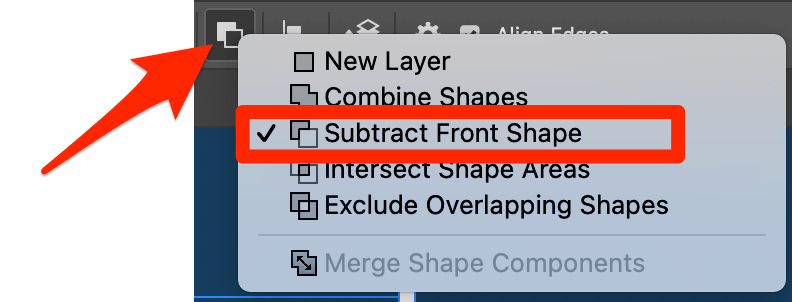
Step 8: With the Ellipse Tool selected go to the top toolbar.
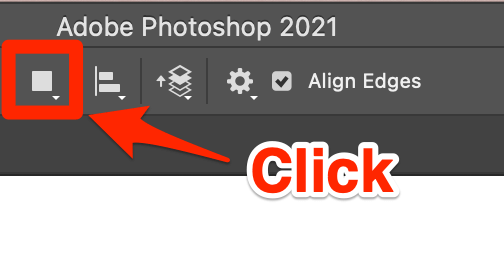
And select Subtract front Shape.
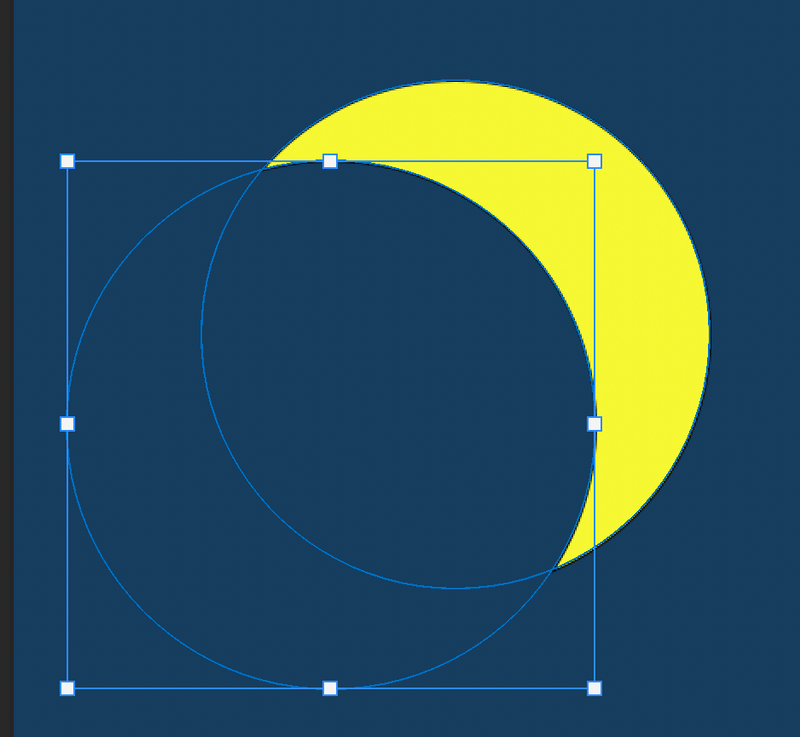
Step 9: Click and drag to make another circle overlapping the existing one. Hold down the Shift key if you want to make a perfect circle. But remember only hit the Shift key after you click, if you hold the Shift key before you click and drag, it wouldn’t subtract the area.
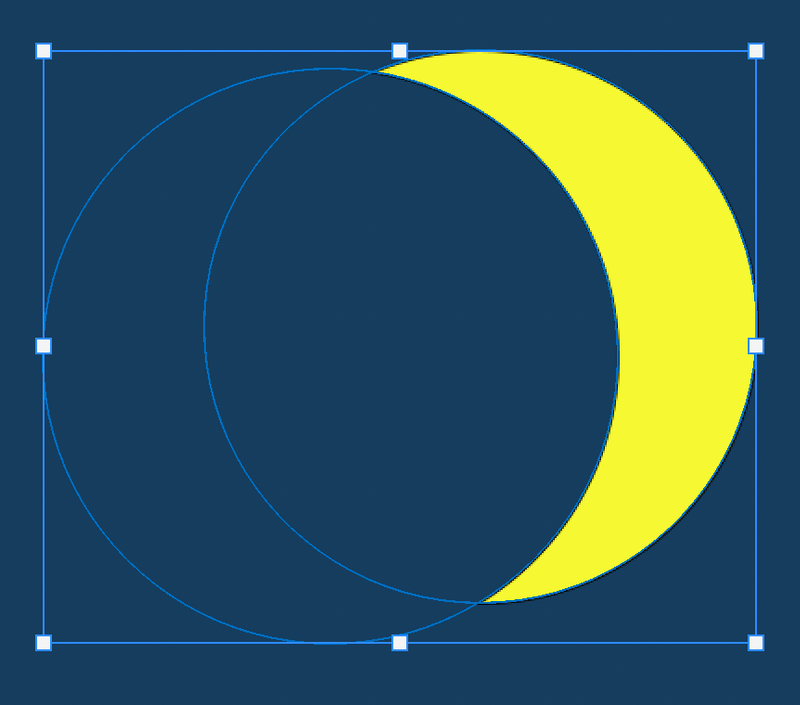
If you want to adjust the subtracted area, select the Path Selection Tool from the toolbar, click on the second circle, and move to the position you’re happy with.

Once you’re happy with the position, deselect the layer by clicking on a different layer in the layers panel or clicking on another tool.
For example, if you want to move the crescent moon shape, choose the Move Tool and you can move around the shape instead of the two circles.

That’s it. You’ve created a crescent moon. You can save it in Photoshop and use it in your future design with just a few extra steps.
How to Save a Shape in Photoshop
You can save any shape you create as a custom shape in Photoshop by following the three steps below.
Step 1: Right-click on the shape you just created.
Step 2: Select Define Custom Shape.
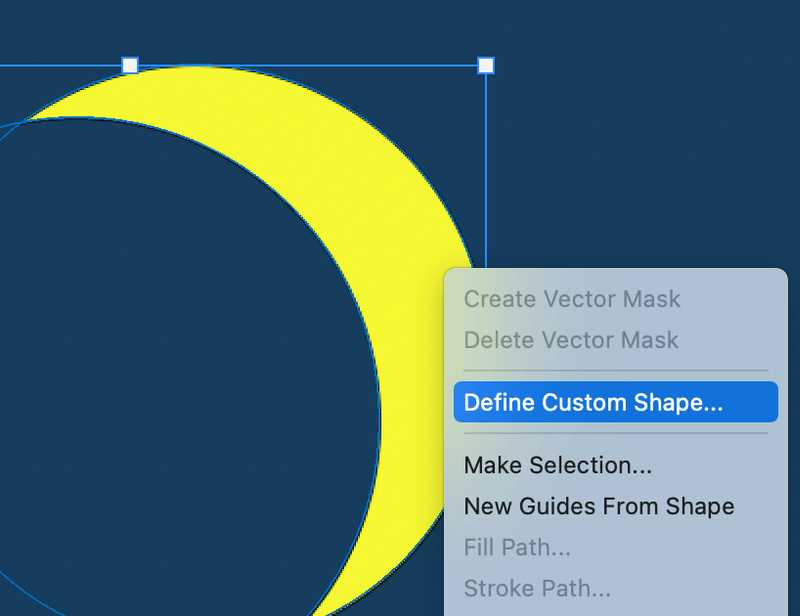
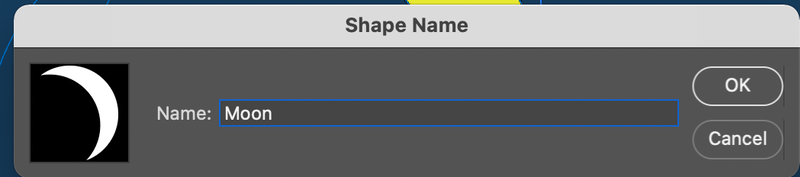
Step 3: Name the shape and click OK.
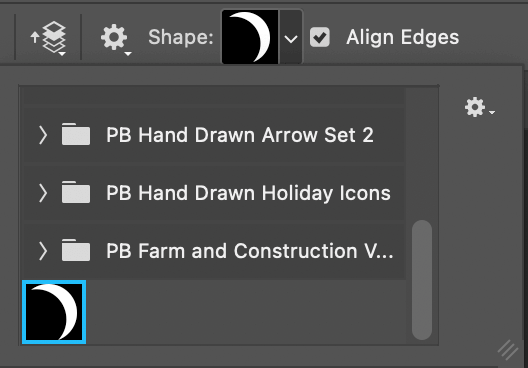
When you choose Custom Shape from the Toolbar, you can find the new moon shape in the Shape dropdown menu.
If you want to change the color, you can go to the Shape Properties panel and change the settings.
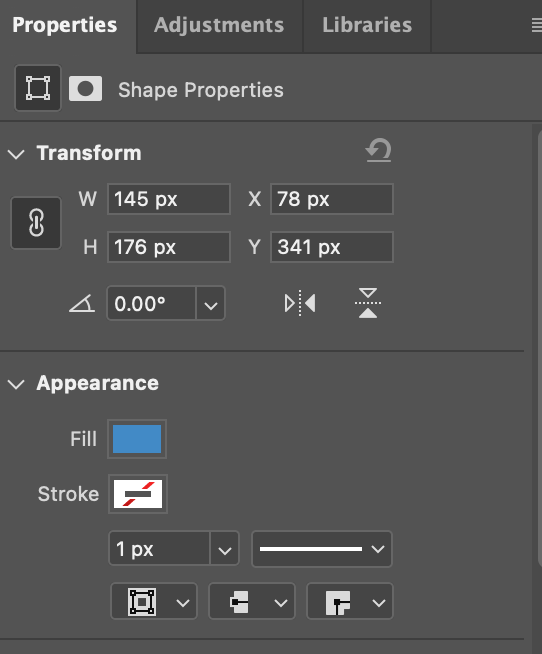
For example, I got rid of the stroke and change the fill color.

Conclusion
You can easily create a crescent moon and save them as a custom shape following the steps above. Remember when you subtract, the new circle must overlap the first circle you create.
Can’t wait to see what you’ll design with the moon shape.
About June
Ankit
Thanks for the awesome tutorial.
Didn’t know that we could subtract too.
krunal
nice tutorial it is so helpful
thank you.
Naveed Ahmed
nice work ..
andijaya
nice tutorial, now i can create crescent easily