Photographs have an amazing ability to tell a whole story with a single frame, but even the best stories can benefit from a little bit of editing.
Whether you need to remove an accidental passerby who wandered into the background of a photo shoot or you want to retcon some painful memories, here are a couple of ways to remove someone from a picture in Photoshop.
(Oh, and yes – Merriam-Webster says that retcon is a real word now.)
Table of Contents
The Quick Guide to Removing People From Photos
If you’re already familiar with Photoshop and the Clone Stamp tool, here’s a quick refresher on how the process works:
- Step 1: Create an empty new layer.
- Step 2: Switch to the Clone Stamp tool, and set the Sample option to Current and Below.
- Step 3: Select your new layer, choose a source point, and clone out the person.
That’s all there is to it! If you’re still getting used to using the Clone tool or if you just want to follow the steps in a bit more detail, then read on.
I’ve got a few helpful tips that can make the removal process easier, as well as an alternative method that can dramatically speed up your editing workflow for simple images.
The Detailed Guide to Removing People from Images
In case you haven’t heard the term before, we’re going to use a non-destructive approach to image editing for this tutorial. Non-destructive editing allows you to complete a perfect edit while still leaving all the original pixels of your image untouched, in case you need them later.
In this example, we’ll create a new section of image background over the top of the person you want to remove from your image.
If you need to go back and adjust your image in the future, you can do so much more easily without having to perform the entire edit from the beginning all over again.
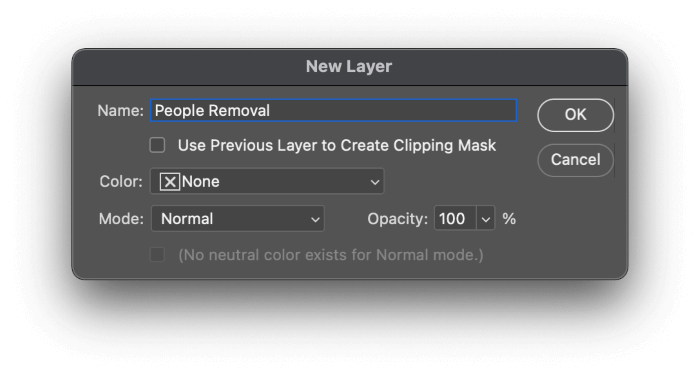
Step 1: Create A New Layer
The first step in the process is to create a blank new layer that will hold all the new background pixels. It’s quite simple, although there are a surprising number of ways you do it.
Open the Layer menu, select the New submenu, and click Layer. Photoshop will open the New Layer dialog box. Give your new layer a descriptive name, and click OK.
You might be tempted to skip the naming process when you’ve only got a single cloning layer, but it’s a good habit to learn – or suddenly you can find yourself lost in a document with 25+ unnamed layers and you can’t tell which layer affects which part of the image.
Just get in the habit of naming them =)
You can also add a new layer with the keyboard shortcut Command + Shift + N (use Ctrl + Shift + N on a PC), or using the Create a new layer button at the bottom of the Layers panel.
Step 2: Clone Stamp Settings
In case you’ve never used it before, the Clone Stamp tool is one of the most amazing digital image editing tools available: it allows you to ‘paint’ using existing content from your image as the source.
This means it’s possible to remove anything from your image with a seamless patch that can fool the eye perfectly. It’s not always easy to use, but it’s very powerful.
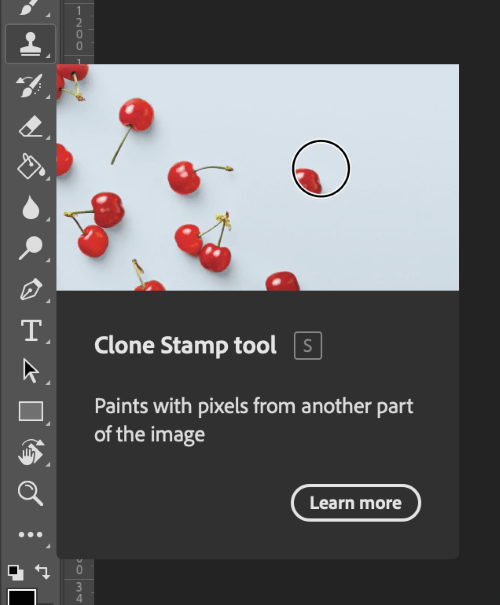
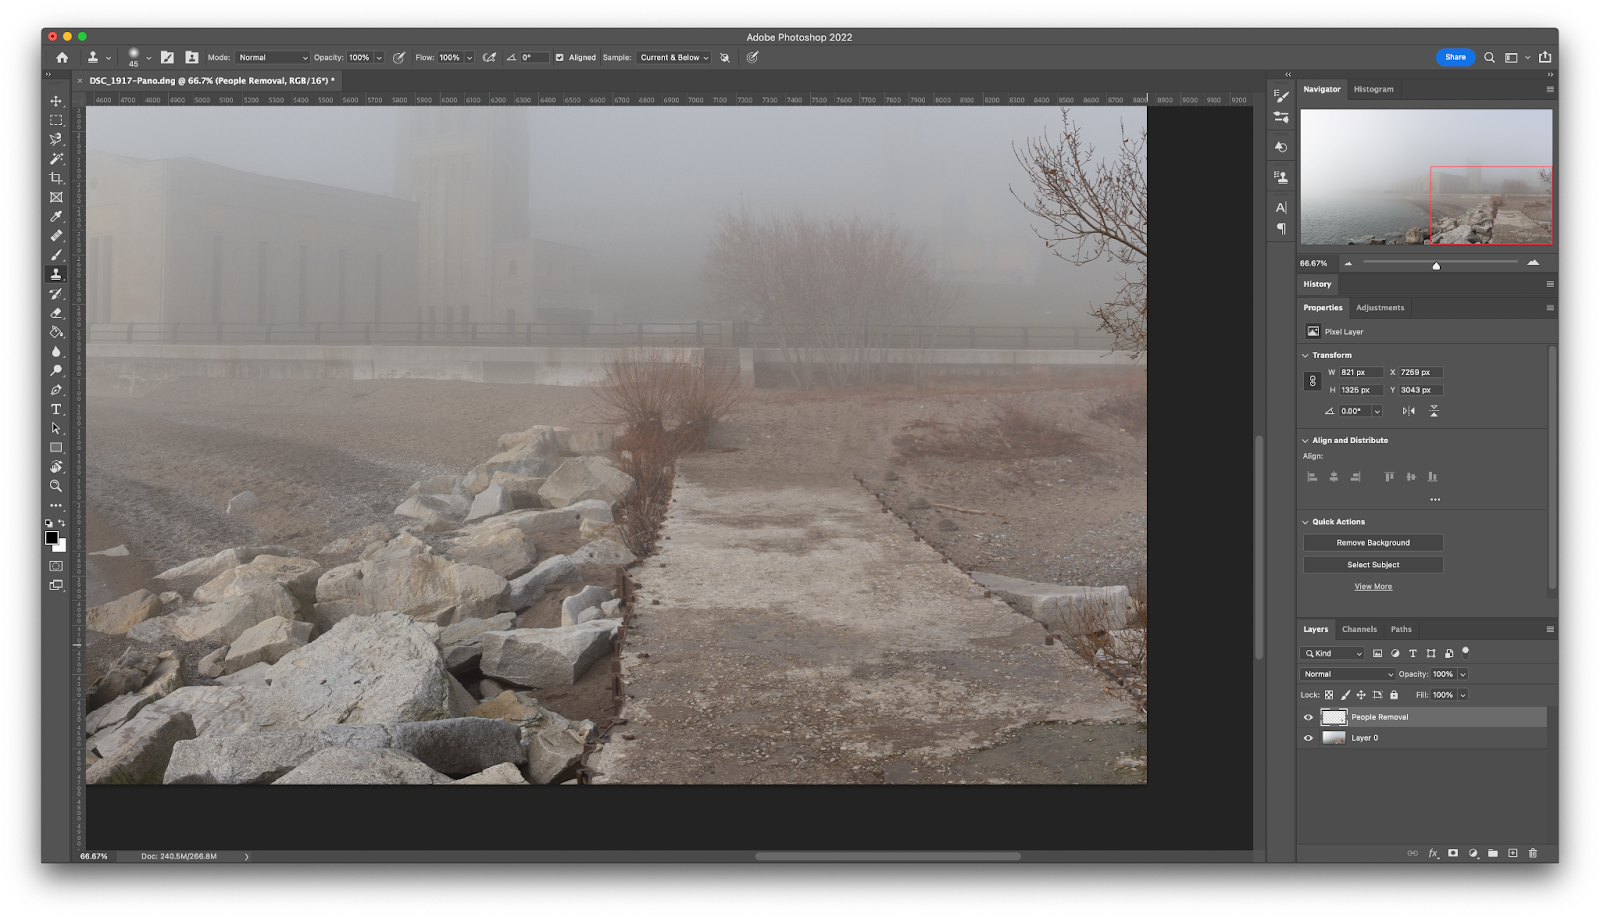
Switch to the Clone Stamp tool using the toolbox icon shown above or the keyboard shortcut S. Next, look at the Options bar that runs along the top of the main document window. You’ll see a setting labeled Sample: with a dropdown menu (shown below).

By default, it’s set to Current Layer, but in order to have your cloned pixels appear on your blank new layer, you’ll have to change it to Current & Below.
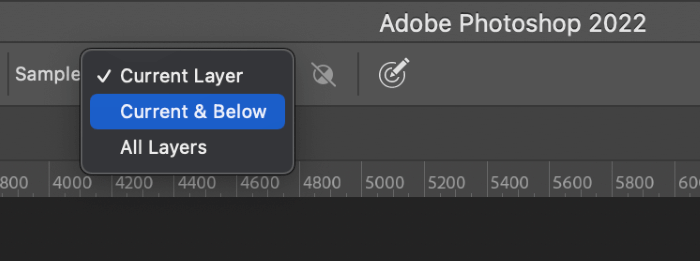
This means that the Clone Tool will use pixel data from the current layer and every layer below it in the layer stack.
Step 3: Time To Clone
Now that you’ve got your Clone Tool set up, it’s time to actually start removing the person from your picture!

Before you can actually start cloning your pixel data, you’ll need to tell Photoshop which part of the image to use as a source. Hold down the Option key (use the Alt key on a PC) and click on the part of the image you want to use as the source.
Choosing the best source point can be tricky, but you’ll have to examine your image and choose the best point for yourself. You’ll get better at it with practice!
One of the most helpful tips is to remember that the human eye is very good at spotting patterns. When you re-use a section of the image, make sure that it doesn’t have a distinctive pattern or texture that will catch the viewer’s eye.
You can blend together several different sections using different brush sizes and opacities to remove the texture repetition and create a more seamless edit.
To get really intuitive with your cloning, you’ll need to get familiar with keyboard shortcuts. Constantly switching your source point can be very helpful for creating realistic-looking edits, and using the keyboard to adjust your brush size, opacity, and edge hardness can really speed up your workflow:
- Use the square bracket keys [ and ] to adjust the size of your brush
- Hold Shift while pressing the square brack keys [ and ] to adjust brush hardness
- Use the number keys along the top of your keyboard to adjust the opacity of your brush: press 2 to set Opacity to 20%, 7 to set it to 70%, and so on.
These shortcuts apply to all of Photoshop’s brush-based tools, so they’re very useful to learn!
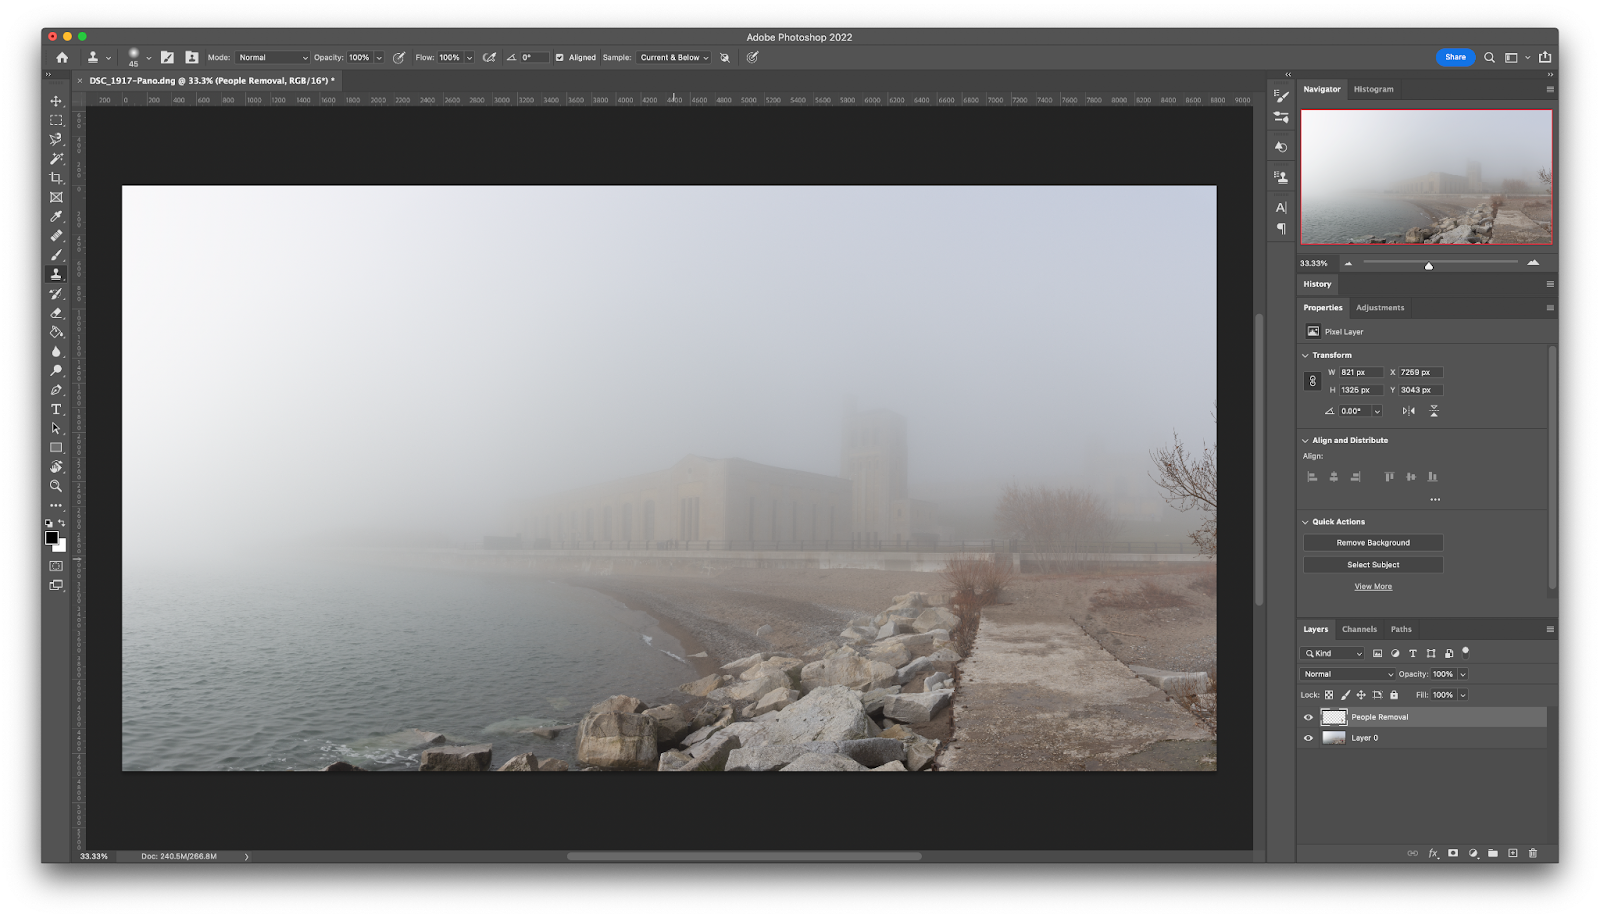
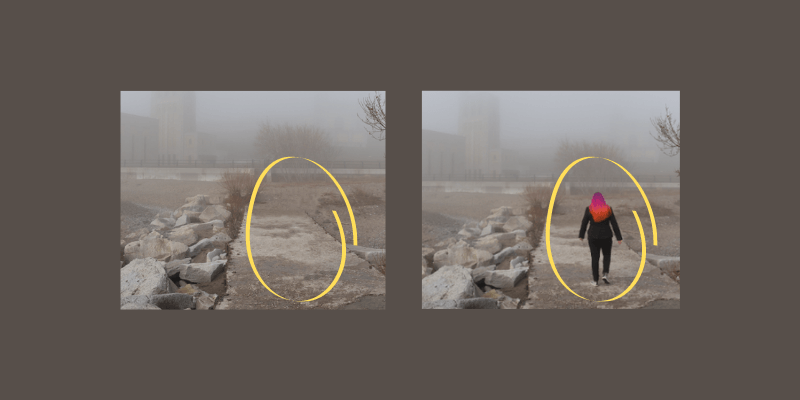
If you hadn’t seen the original image, you might never know a person was there at all!
Alternative Method: Content-Aware Fill
While using the clone stamp to remove people from your photo by hand is very powerful, it can also be very time-consuming.
If your subject is against a plain white wall, it will only take a few seconds to remove them, but most photos have more complex backgrounds and textures that can get in the way.
If you’re not having any luck with the Clone Stamp tool (or you’re just feeling lazy/curious) you can try using Photoshop’s amazing Content-Aware Fill tool to remove the person from your photo. It can automatically generate new image content to fill in.
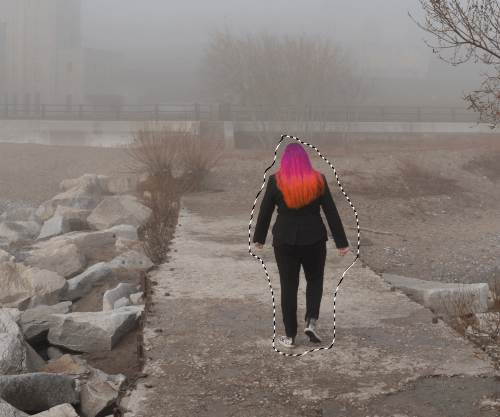
To get started, pick a selection tool like the Lasso Tool and draw a rough selection around the person you want to remove. It doesn’t need to be too accurate, so don’t spend a lot of time on it.
Next, make sure your main image layer is selected (not your cloning layer), then open the Edit menu and select Content-Aware Fill.
Photoshop opens the CAF workspace, which allows you to customize the area that Photoshop uses as the source content, as well as adjust the sampling and output options and a quick preview of the results.
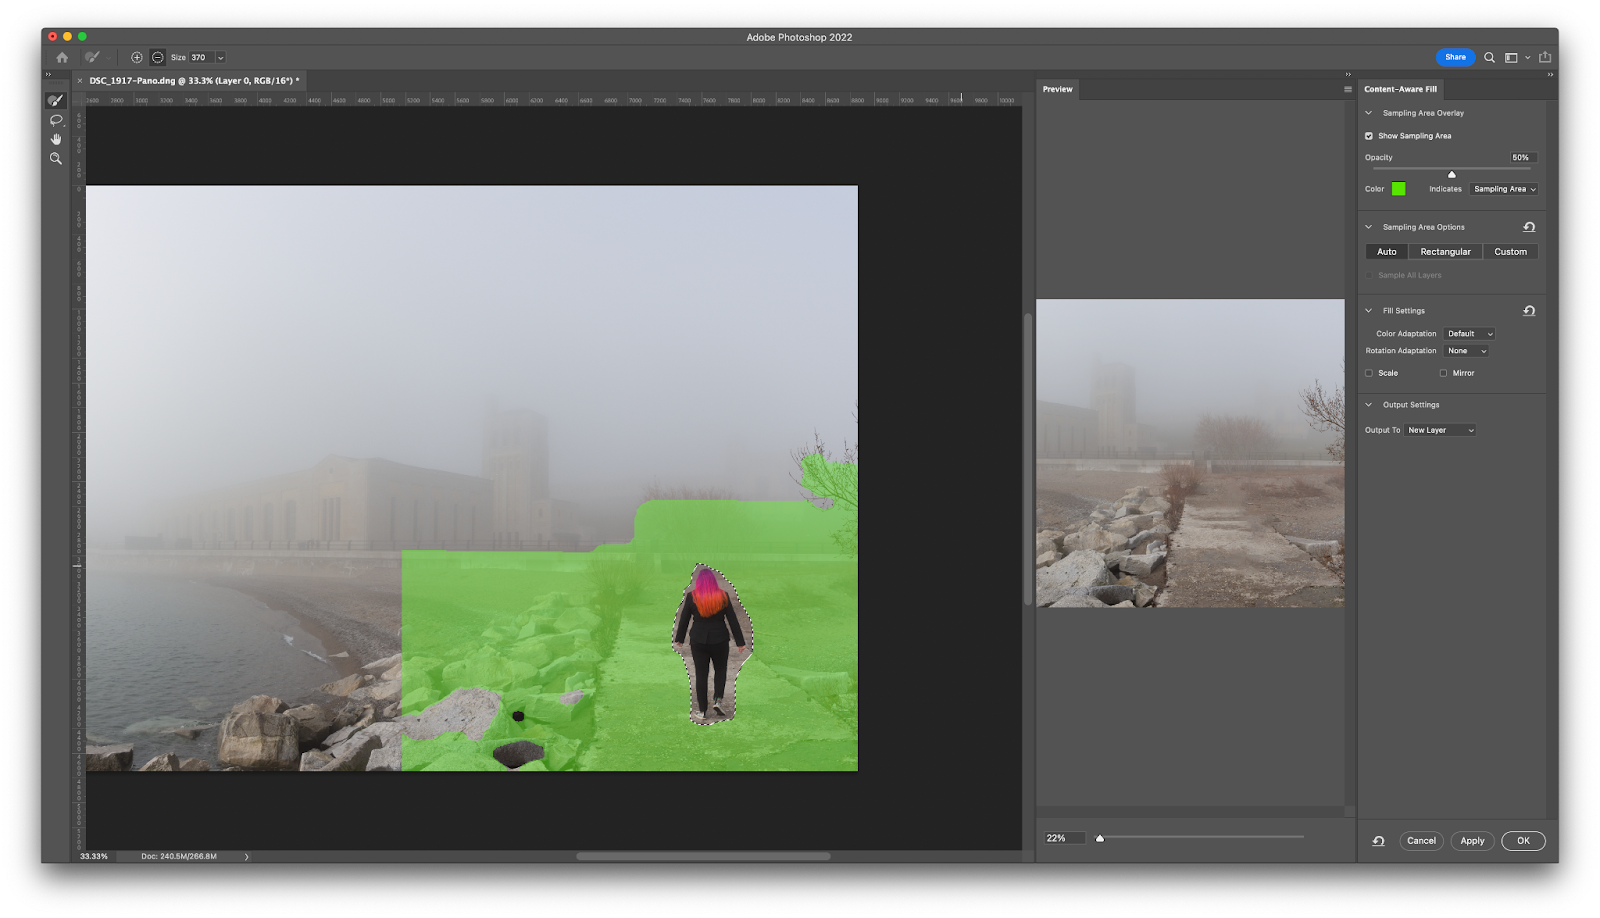
You can adjust the source areas using brush tools located at the left of the workspace, and tweak any settings on the right.
In this case, the result isn’t bad, but I’d prefer to do my own cloning. You can choose to output the new fill pixels onto a new layer, which allows you to use them as a starting point for additional refinement by hand with the Clone Stamp tool.
A Final Word
As you probably noticed while practicing these techniques, they aren’t just restricted to removing people from your images – you can remove just about any object you want. You can also use it to duplicate objects, textures, patterns, or any other part of your image.
Once you start thinking about your image contents as pixel data instead of as real-world objects, you’ll be a huge step closer to becoming a talented image editor.
Happy editing!
About Thomas Boldt