
These days we all want that bright, white, movie star smiles. Modern dentistry makes this affordable for almost anyone in the real world. But what if there were a way to whiten your teeth retrospectively? After all, your teeth weren’t as white as you would like in your wedding photos.
Hello! My name is Cara and I am a professional photographer. I don’t do this often, but every once in a while I have a need to brighten up my subject’s smile just a touch.
And how? By whitening the teeth in Photoshop.
Table of Contents
How to Whiten Teeth in Photoshop
Today we’re going to work with the lion image. Our first impression is that she has quite the chompers (wouldn’t want to meet her alone in a dark alley). However, they are a tiny bit yellow. So let’s make her teeth whiter in Photoshop.
Note: the screenshots below are taken from the Windows version of Photoshop CC. If you are using the Mac version, they will look slightly different.
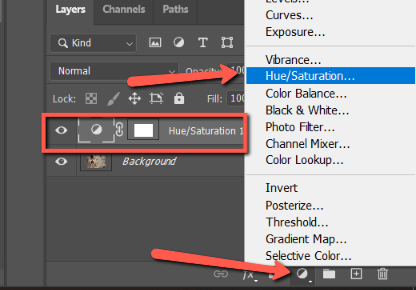
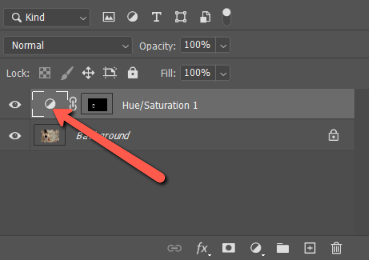
Step 1: Create a Hue/Saturation Adjustment Layer
Open a hue/saturation adjustment layer by clicking on the half-filled circle icon at the bottom of the Layers panel. Choose Hue/Saturation from the menu that pops open and you’ll see the layer appear above the background layer in the layers panel.
Step 2: Adjust the Colors
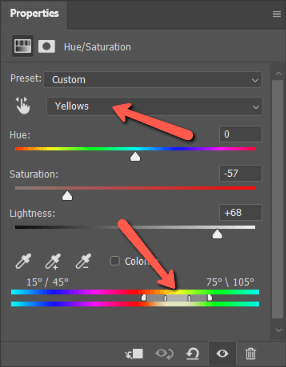
In the box that appears, select Yellows from the dropdown menu.
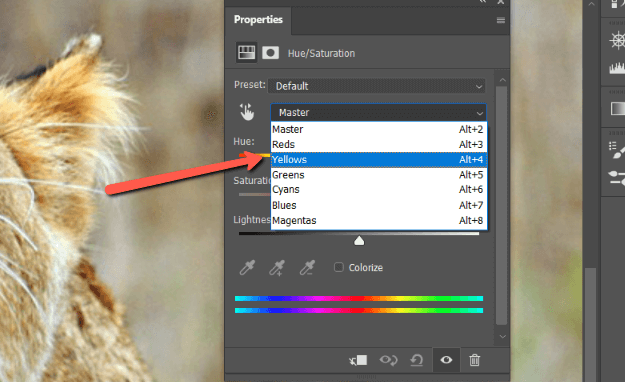
Now you can make color adjustments that will only affect the yellows in the photo. On the sliders, bring down the Saturation and bring up the Lightness.
Step 3: Limit to the Teeth
In some cases, we could stop here. However, this image features yellow in other places, the lioness’ fur, for example. If we leave it like this, she’ll look a little anemic.
To fix this, we need to limit the color changes to her teeth only. Select the hue/saturation mask in the layers panel and press Ctrl + I, (Command + I on a Mac) to invert the mask.
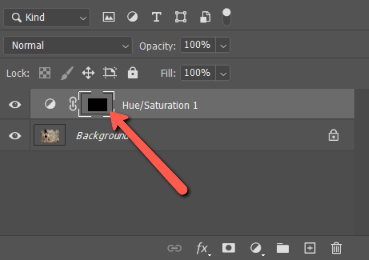
Hit B on the keyboard or select the Brush Tool from the toolbar on the left. Make sure that the white box is on top. If the black box is on top, hit X to switch them.
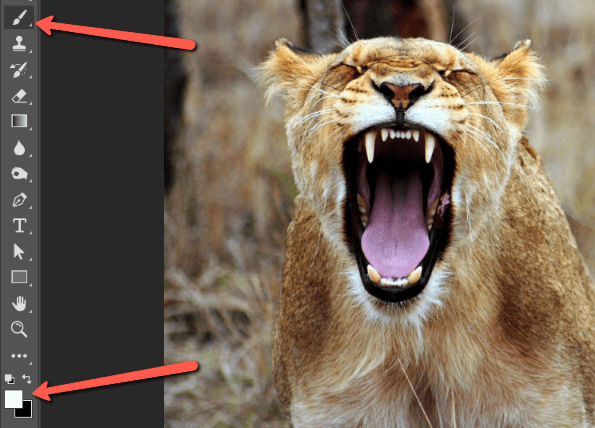
Now, simply paint over just the teeth with an appropriate-sized brush.
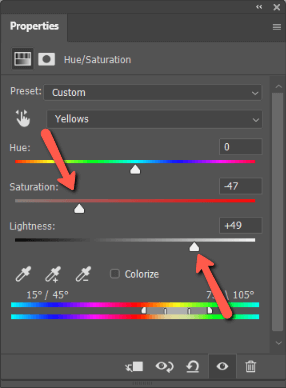
Step 4: Fine-Tune if Necessary
Fine-tuning won’t always be necessary, but you may want to play with it a little. To do this, click on the thumbnail to open the hue/saturation properties.
Click Yellows in the drop-down menu and you’ll see the sliders appear in the yellows range at the bottom. Widening that range allows the hue/saturation adjustment to affect more colors. Narrowing the range means it will affect fewer colors. Play with it to find what works best for your image.
Enjoy a Bright White Smile!
And that’s it! Not everything in Photoshop has to be a long-drawn-out project with lots of fine-tuning and careful selections. Sometimes you can just brighten up some teeth in a couple of minutes and be on your way.
Looking for more Photoshop tips? We’ve got lots of them over on the blog, be sure to check them out!
About Cara Koch