
To double an image’s horizontal and vertical resolution, Super Resolution makes advantage of Adobe’s AI technology, Adobe Sensei. By quadrupling the number of pixels, it effectively transforms a 12-megapixel image into a 48-megapixel one.
A machine learning filter called Enhance Details, which also minimizes image artifacts and enhances minute details in your RAW photos, evolved into Super Resolution without altering the resolution.
In other words, if you’re utilizing RAW files, Enhance Details ensures that the file appears beautiful while Super Resolution makes the file large. Other file formats including JPEG, PNG, and TIFF are still compatible, though.
This also means that anyone using a lower resolution camera, such as the current crop of 24MP cameras, can now output massive image files for prints or any other application that requires a higher resolution image file.
The results of the images I’ve run through this new feature in Photoshop have been astoundingly good.
My name is Aly, I am Adobe Photoshop Certified, and will be showing you how to use Super Resolution in Photoshop in this article.
How to Use Super Resolution in Photoshop
If you’re still wondering why you can’t find it from the Filter menu, that’s because Super Resolution is an Adobe Camera RAW (ACR) function rather than a feature of Photoshop. The steps below will help you understand how it works.
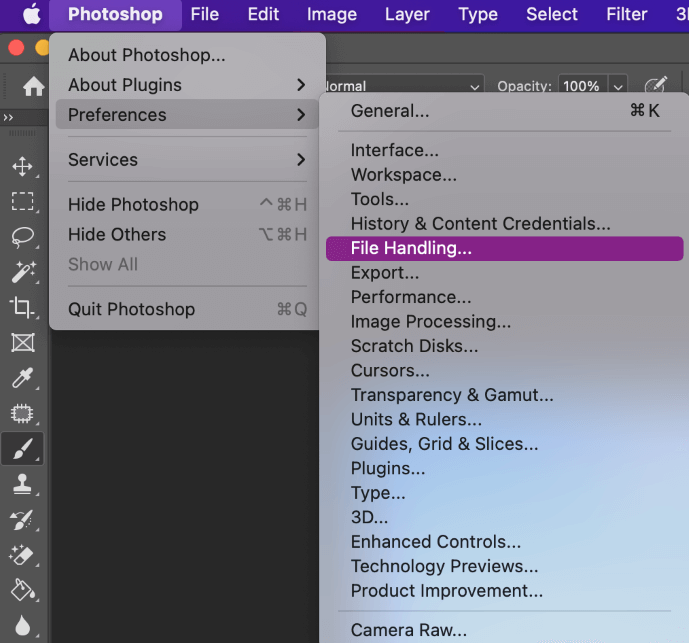
Step 1: Open Photoshop, go up to the overhead menu and choose Photoshop > File Handling.
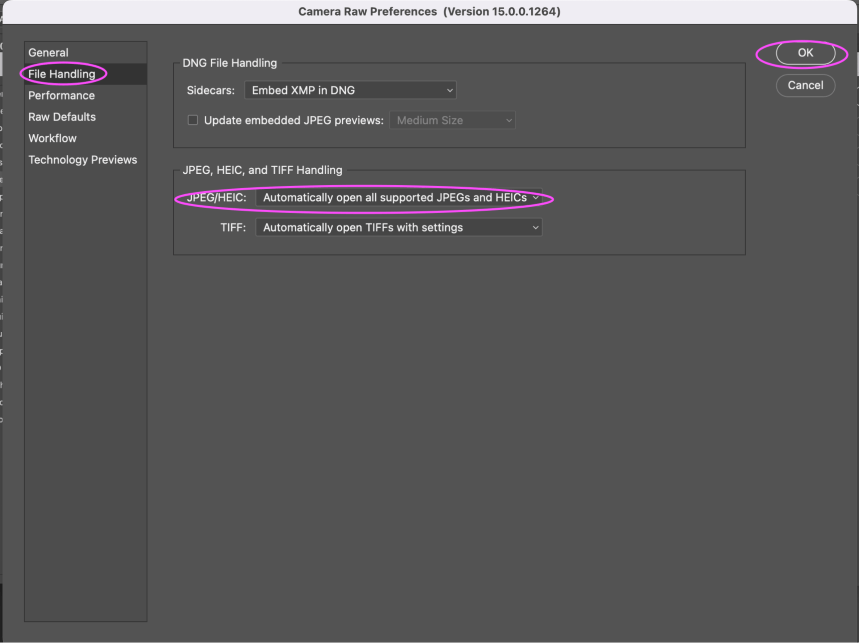
Step 2: From there, click on Camera Raw Preferences > File Handling and change the JPEG/HEIC setting to Automatically Open All Supported JPEGS and Heics.
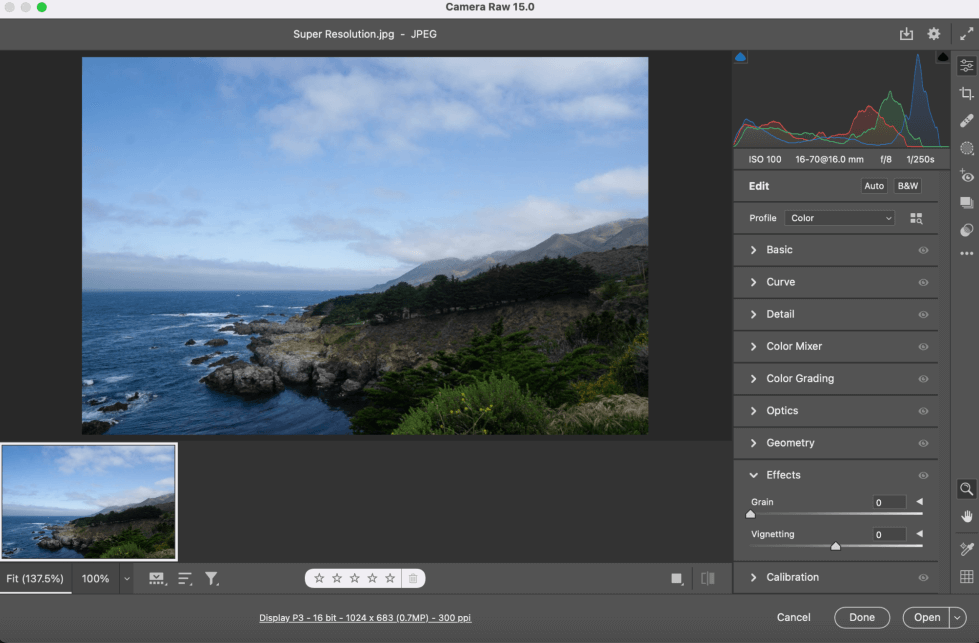
Step 3: Go ahead and open the photo you want to use. Once you open the image, it should look like the same setup I have shown below. If your screen does not look like this, go back to step 2 and make sure you followed the step correctly.
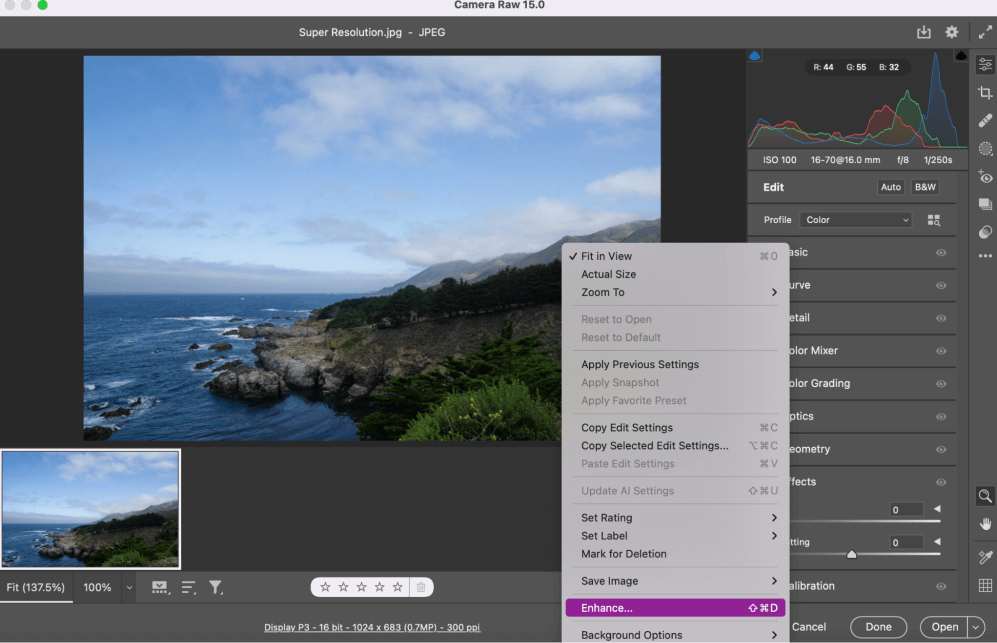
Step 4: Right-click anywhere on your image and choose Enhance.
Step 5: You will now have the super-resolution window open. Basically what this does is double the height and width of your image. It expands and uses AI to enhance.
In the preview window, you can click to see a before and after of the enhanced feature. Once you are done previewing, Click Enhance.
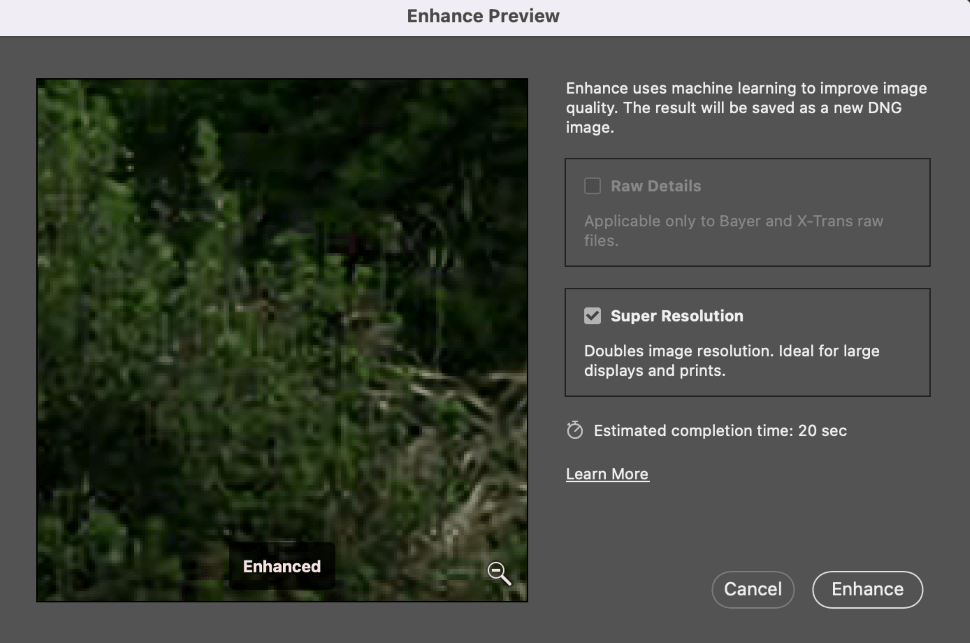
Step 6: After clicking enhance, you should see a little timer at the bottom of your screen letting you know the estimated time remaining that it has to enhance your image. Let it run through and when it is finished the new image will pop up next to the old one.
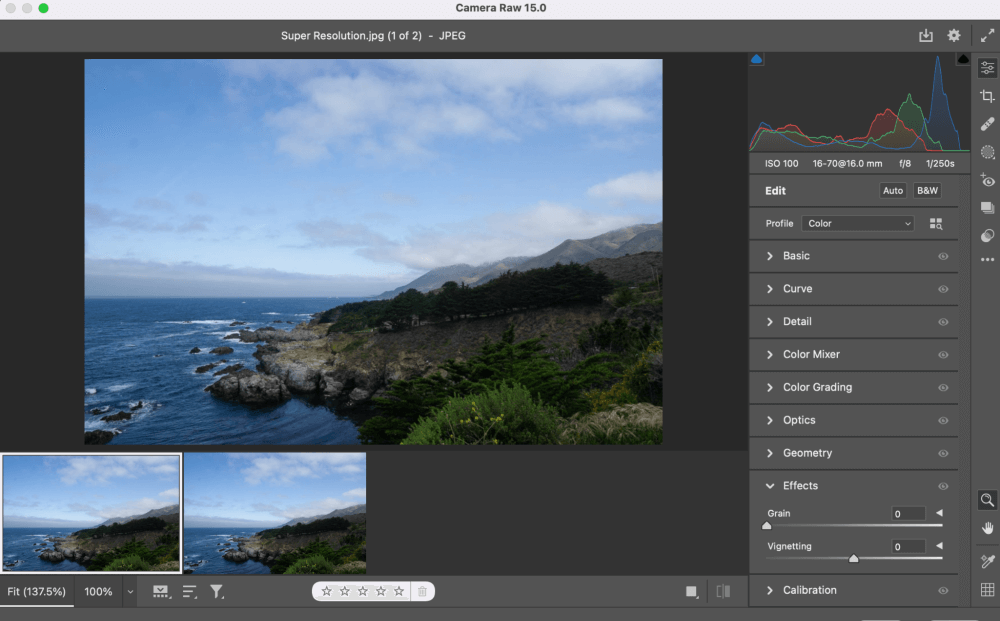
The first image is the original and the second image is the new super-resolution image. It will save as a .DNG file.
That’s it! You can make better prints by resizing older images and tightly cropped photos. If you want to enhance details in images, crop them very tightly.
This could be the best improvement to any camera ever, if you’ve come this far and are still reading through this is one of the most amazing features Adobe has ever added to Photoshop in my opinion.
Final Thoughts
Any chromatic aberration can be greatly exaggerated by Super Resolution. I discovered that correcting chromatic aberration first yielded much better results.
It may also exaggerate noise, which is already a weakness of Adobe RAW processing, so you may need to juggle some noise reduction and sharpening afterward. The main disadvantage is the file size. The Super Resolution process generates a DNG file that is up to ten times larger than the original RAW file.
Any questions about How to Use Super Resolution in Photoshop? Leave a comment and let me know.
About Aly Walters