Ever since the earliest days of photography, image noise has been an inescapable reality. You may have seen old photographs that have an extremely noticeable ‘film grain’ effect, which is the analog version of noise.
While modern digital cameras are much better at eliminating noise than they were in the past, noise can still ruin a great photo if you’re not careful.
My name is Thomas Boldt, and I’ve been immersed in the world of digital photography since I got my first digital camera over 20 years ago, which featured a whopping 3-megapixel sensor that almost always produced noisy images.
Over the last two decades, I’ve spent countless hours removing grainy textures from my images with a variety of techniques, and I can help guide you through the process.
Noise is one of the most frustrating aspects of digital photography, but since it’s such a common issue, there is now a wide range of solutions available to help you control the noise in your images.
Photoshop offers several different options for reducing noise/grain, so let’s take a look at some of the best ways to remove noise and reduce grain.
Table of Contents
A Quick Note on Types of Noise
Digital noise presents itself in two different types: luminance noise, which is monochromatic, and color noise, which as you might guess from the name, ranges through the color spectrum.
Most noise removal systems will target these two types of noise separately since they require slightly different adjustments from a mathematical perspective.
Method 1: The Reduce Noise Filter
The Reduce Noise filter is pretty honestly named since it’s almost impossible to remove all of the noise from an image, but this is a pretty good solution for most images.
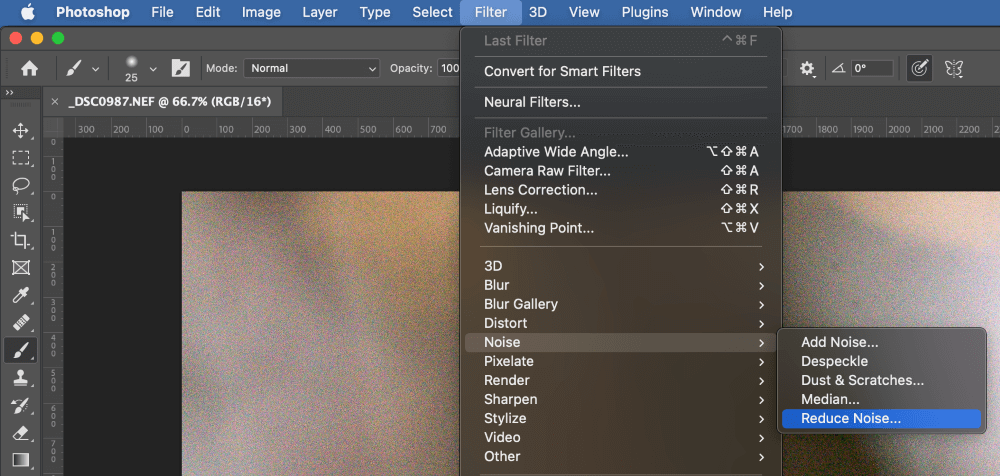
To get started, open the Filters menu, select the Noise submenu, and click Reduce Noise.
Unsurprisingly, Photoshop will open the Reduce Noise filter dialog box to allow you to customize the results.
I find it a bit frustrating that Photoshop doesn’t allow you to resize the Reduce Noise filter window, but I suppose it’s necessary to maintain responsiveness while it applies your settings. Noise reduction can be a very computationally intensive process, especially when working on high-resolution images.
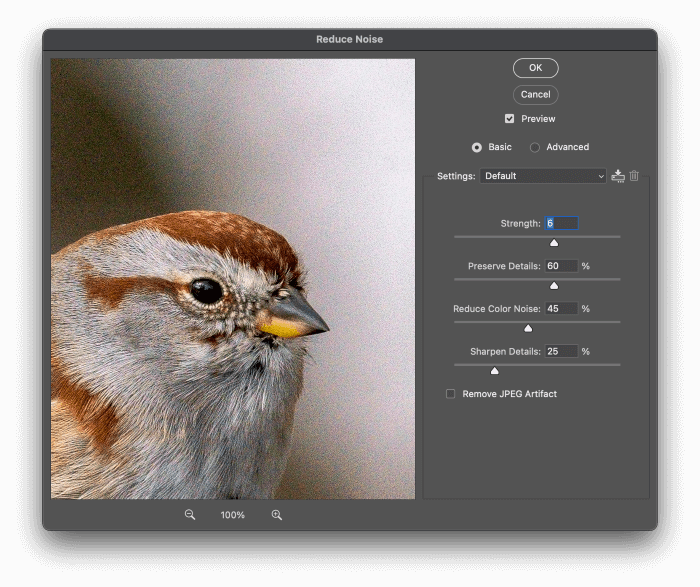
The first thing to notice is that the Reduce Noise filter has two modes: Basic and Advanced. Despite this distinction, the only difference between the two modes is that the Advanced mode allows you to get rid of grain in Photoshop differently on each color channel of your image.

While this might seem like a minor difference, it can have a large impact on your overall results, especially when you learn that some digital cameras often unintentionally produce a lot more grain/noise in a single channel.
This can vary quite a lot depending on your shot parameters and image contents, but you’ll have to examine the channels in your image to see if per-channel noise reduction is helpful.
Below the Basic/Advanced selection, you’ll see a series of sliders. Adobe has done a decent job of prioritizing them in order from top to bottom, which smooths your workflow a bit.

Start out by adjusting the Strength slider. This is exactly what it says it is: the strength of the noise reduction effect. Keep a close eye on the results, as pushing the Strength slider too high can have a dramatic and negative impact on your image quality, blurring fine details and textures.
Next is the Preserve Details slider. This one is a bit more complex since it acts as a modifier to the Strength setting, but it is also well-named. It uses contrast edge detection to determine which areas of your image need to be isolated from the blurring effect caused by the Strength slider.
Most of your noise reduction efforts will be spent on balancing these two sliders against each other until you’re satisfied with the results. It sounds simple, but it can be a difficult decision to make in practice!
Next, you’ll need to determine the amount of color noise reduction. Because color noise presents itself as a sharp color variation from the surrounding pixels (for example, a single stray red pixel in a blue sky is probably noise) this slider doesn’t have a separate Preserve Details slider.
Last but not least, you’ll need to set the amount of sharpening to be applied after the noise reduction process is complete.
I’m not exactly sure why Adobe includes this option, especially at a very high default setting of 25%, since sharpening is usually considered to be a finishing touch right before exporting your image.
With that in mind, I’d suggest that you set this slider to 0% and handle sharpening separately, but if you want a one-step workflow, you can apply it here.
Method 2: The Camera Raw Filter
Typically, it’s a good idea to perform your noise removal as one of the first steps in your image editing workflow, so if you’re importing RAW photos into Photoshop using Camera RAW, you should use the opportunity to apply Camera RAW’s noise reduction tools before any additional editing.
If you’ve already missed that opportunity or you’re not working with a Raw file, you can still use Camera Raw’s noise removal features by applying the Camera Raw filter.
This is a relatively new addition to Photoshop’s arsenal of noise removal tools, but it seems to do a better job than the basic Reduce Noise filter.
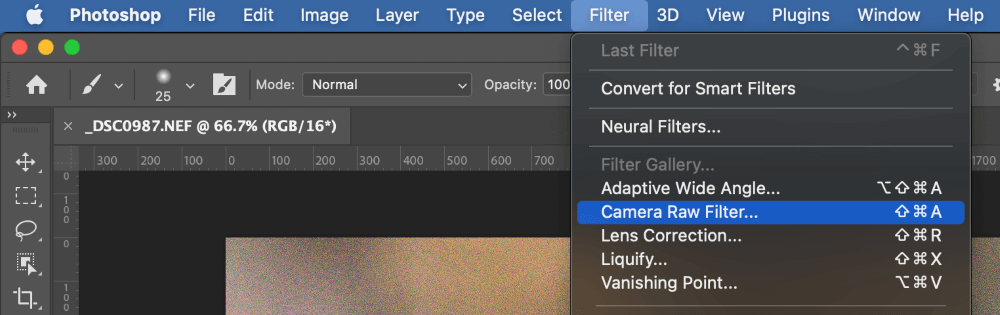
Open the Filters menu and select Camera Raw Filter. Photoshop will open your image using Camera Raw, which you’re probably already familiar with.
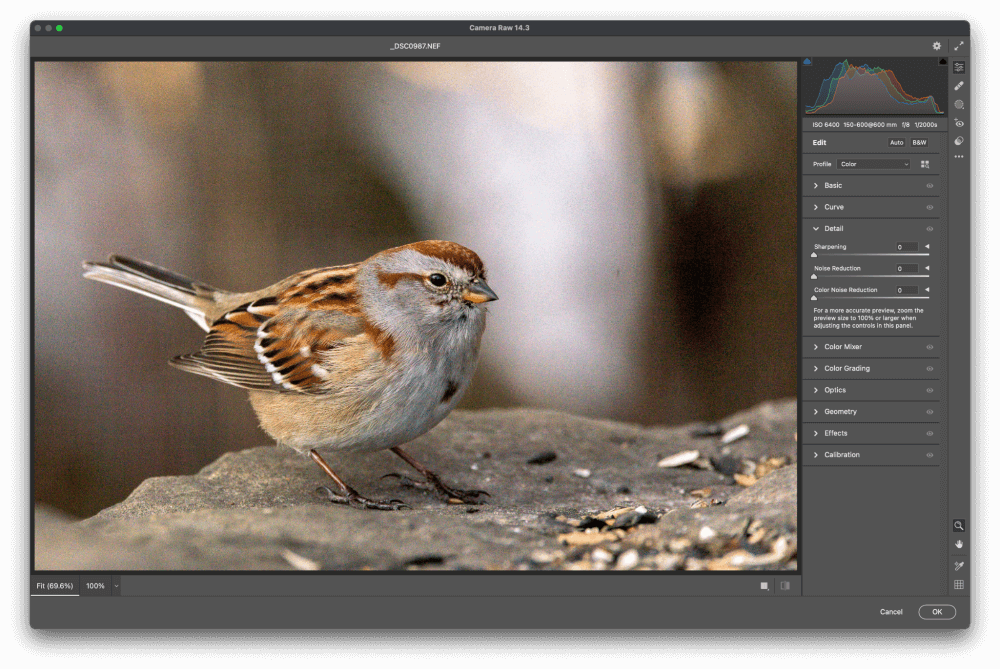
Once your image loads in Camera Raw, you’ll see a large image window on the left displaying your image, and all the settings and customization options listed on the right. Locate the section titled Detail, and click the arrow next to it in order to expand it.
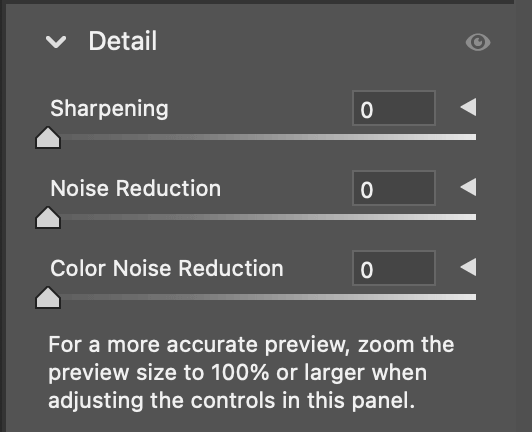
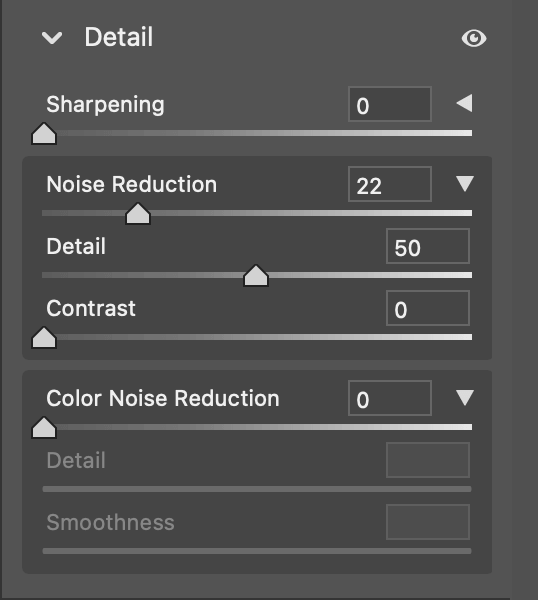
The Noise Reduction slider targets luminance noise, while the Color Noise Reduction slider does exactly what it says on the tin. You can click the small arrows beside each entry to expand another set of customization options which allow you to fine-tune the noise removal process.
As suggested at the bottom of the Detail section, it’s a good idea to do your noise removal work at 100% zoom so that you can get an accurate sense of the strength of the effect.
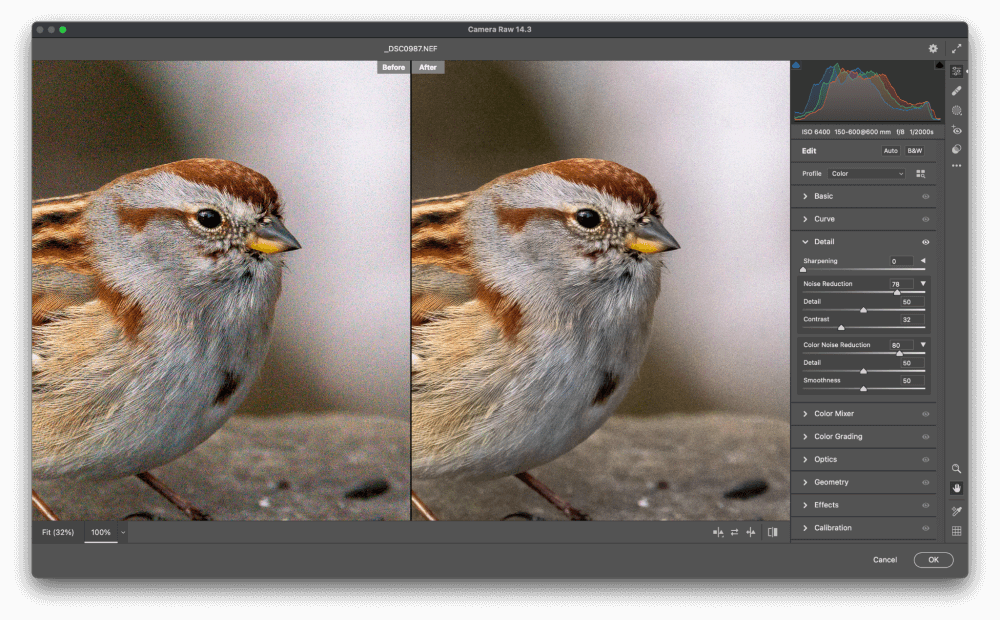
This image is still a bit noisy even after applying the Camera Raw noise reduction tools, but it was also shot at ISO 6400, which almost always produces a noisy and grainy image.
There is still a dramatic reduction in color noise and a significant reduction in luminance noise, allowing the cuteness of the sparrow’s face to shine through.
Future Bonus: The Noise Reduction Neural Filter
In case you’re not familiar with them, neural filters are probably the most exciting thing to happen to Photoshop in years. Neural filters are named after the neural network models that are at the source of machine learning algorithms, and so Adobe still considers most of them to be beta test software.
Many of Adobe’s competitors have already released AI-powered noise reduction tools, but the Noise Reduction neural filter in Photoshop has been slow to reach a wide audience.
At least for me, the Noise Reduction neural filter is still only available through a waitlist – and despite putting my name on the list as soon as possible, I still haven’t gotten a chance to try it out.
I have tested several of their competitors, namely On1 Noise, Topaz DeNoise, and DxO’s DeepPRIME algorithm, and they’re quite impressive. I can only hope that Adobe’s hesitancy to release its version to the public means that it will far surpass the rest – but only time will tell!
A Final Word
That’s just about everything there is to know about how to remove noise in Photoshop! Noise reduction can be one of the most difficult image editing tasks to get right because there are so many different elements to consider.
Just keep in mind that removing 100% of the noise in your image isn’t always the goal; you just want to create a good-looking image where noise isn’t the most obvious feature. Too much noise reduction can be worse than none at all, and who knows – you might even find a good use for the ‘film grain’ effect!
Happy editing!
About Thomas Boldt