Adjusting the size of an image is one of the most basic projects you can do in Photoshop. Usually, it’s a good idea to maintain the existing aspect ratio when resizing an image in order to prevent the image from getting distorted, but there are times when you might want to distort an image by stretching it. I’m not sure when, exactly, but that’s your business 😉
For example, if your image is 300 pixels wide by 200 pixels high, you can scale it to 150 x 100 or even 600 x 400 without distorting it. But if you scale it to 300 x 300, changing only the height dimension, you’ll stretch your image very noticeably.
Table of Contents
The Quick Guide to Stretching an Image in Photoshop
- Step 1: Open the Image menu and select Image Size.
- Step 2: Ensure that the aspect ratio is unlinked by deselecting the chain link icon.
- Step 3: Enter your new pixel dimensions and click OK.
That’s all there is to it! Of course, I’m not sure when you’d really want to stretch an image like this, but now you know how to do it. If you’re not clear on the steps or how aspect ratios work, read on for a more detailed guide to stretching an image in Photoshop.
But if you want to get extremely fancy and stretch your image without distorting it, read on to the last section for an advanced method that uses content-aware fill to create new areas of your image.
The Detailed Guide to Stretching an Image in Photoshop
Note: This guide is intended for users who don’t care about distorting their image. If you want to stretch an image without distorting it, read on to the advanced technique below!
With your image open in Photoshop, open the Image menu and select Image Size.
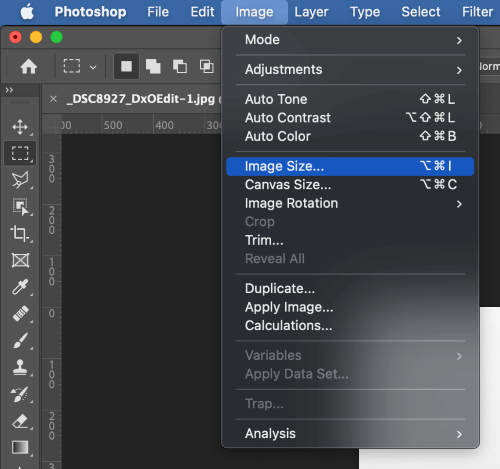
Unsurprisingly, Photoshop will open the Image Size dialog box.
Step 2: Unlinking The Aspect Ratio
By default, Photoshop assumes that you want to maintain your image’s aspect ratio, so when you make an adjustment to the height or width, the other value also scales automatically to keep the same height-to-width ratio.
The only real trick to stretching your image is to make sure that the width and height dimensions are unlinked. Between the Width and Height rows is a small chain-link icon, which Photoshop uses to show that the two values are linked together.
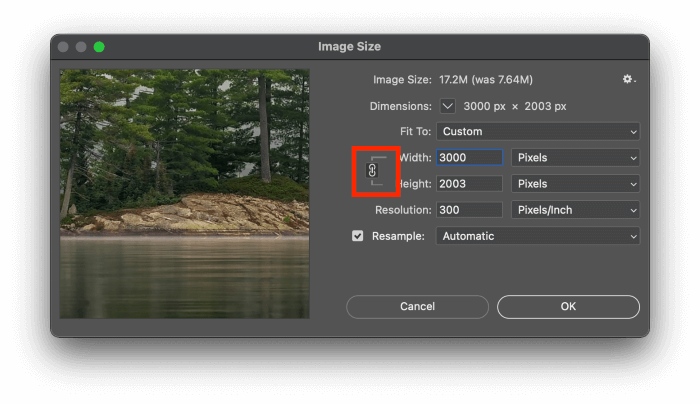
When I enter 3000 into the Width box, the Height value automatically adjusts because the values are linked. Simply click the chain link icon (highlighted above) and you’ll be able to edit the two values independently from each other.

Click the button, and your image will stretch itself out to the new dimensions you specified.
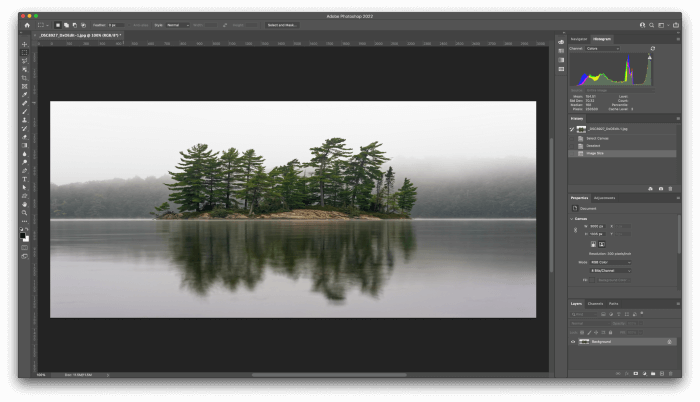
As you can see, the distortion isn’t extremely noticeable, but that’s mostly because of the subject matter. If you did this to a picture with people or text in it, your brain would pick up on the distortion much quicker, and tell you that something is seriously wrong.
Advanced Technique: Stretch An Image In Photoshop Using Content-Aware Fill
Adobe has developed some truly amazing editing features powered by machine learning recently, but one of the most useful features is known as Content-Aware Fill.
As you might guess from the name, this feature allows Photoshop to automatically fill an area of your image with computer-generated content sourced from the rest of your image.
It sounds completely amazing, and it is – at least, it is when it works properly.
By combining Content-Aware Fill with the Canvas Size transform tool, it’s possible to stretch an image in Photoshop without actually distorting any of the image content. This technique won’t work perfectly on every image, but if your image has a fairly simple background, Photoshop can usually create more of it for you.
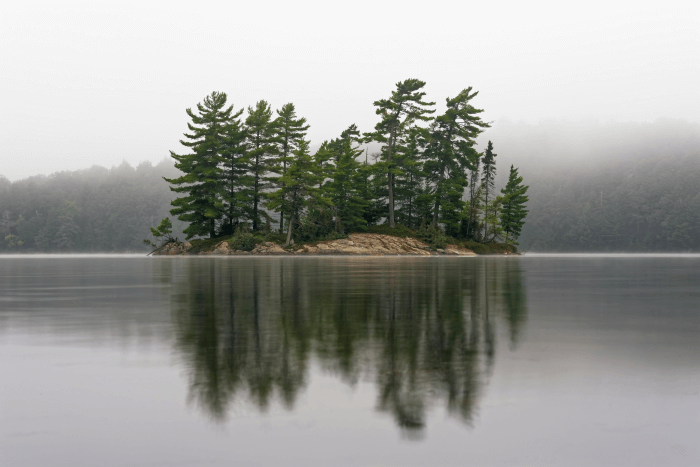
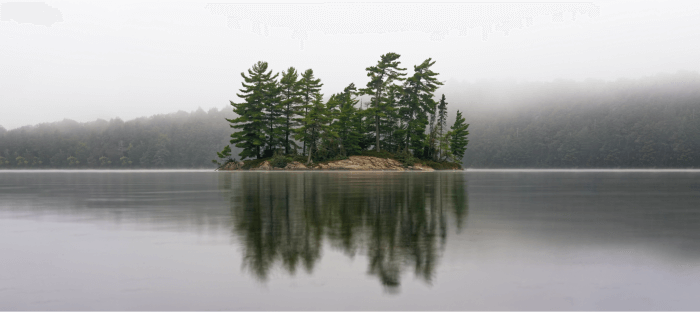
Feeling a bit confused? Let’s take a look at how the process works using this photo of mine.
Step 1: Expand Your Canvas
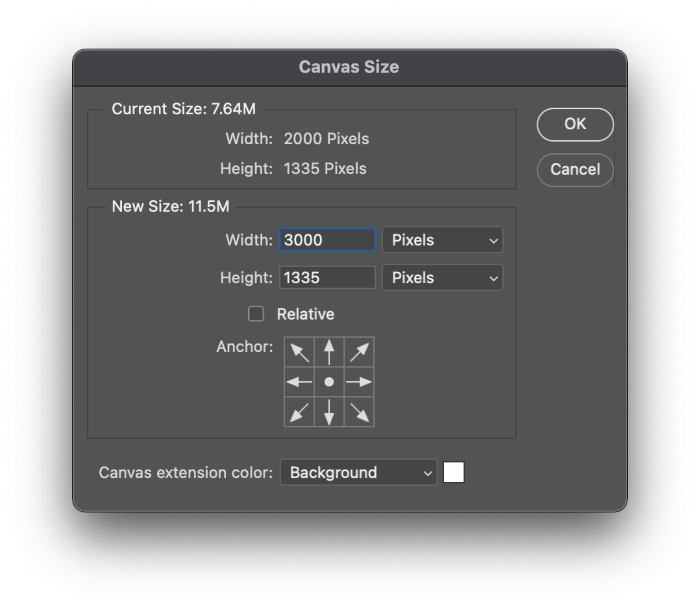
With your image open in Photoshop, open the Image menu and select Canvas Size. In the Canvas Size dialog, increase either the height or the width of your image. Canvas Size allows you to adjust your document dimensions without altering the image contents.
In this example, I want to create new additional background areas on either side of the island, so I’ll adjust the width from 2000 to 3000 pixels.
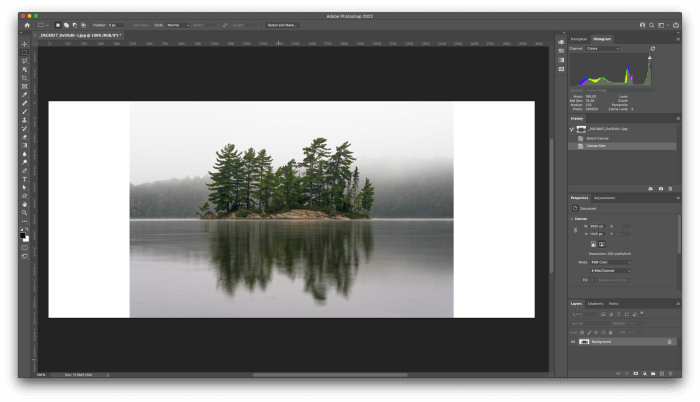
As you can see below, this makes the image dimensions wider without actually distorting my original image. But I’ll need to fill those blank spaces on either side of the original image, and doing it with the clone tool would take forever. It would probably look quite horrible, too!
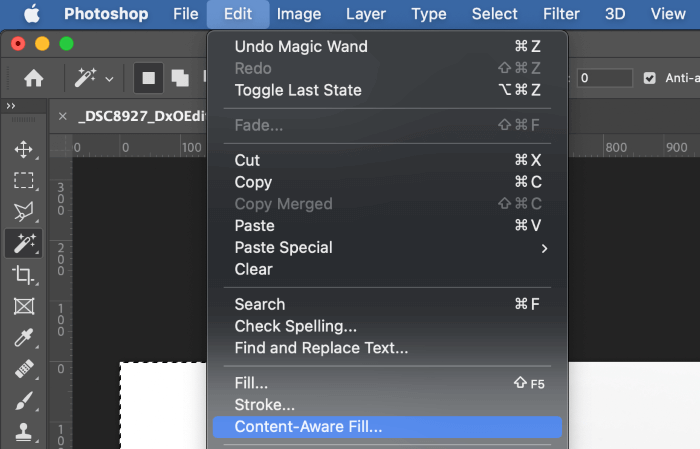
Step 2: Content-Aware Fill
To start using Content-Aware Fill, you need to create a selection. Since I need to fill in the two blank areas on either side of the canvas, I’ll use the Magic Wand tool with the tolerance set to 0 to quickly select them both.
Next, open the Edit menu and select Content-Aware Fill.
Because those selections define the areas that need to be filled, Photoshop does an almost perfect job of processing the photo without any help from me.
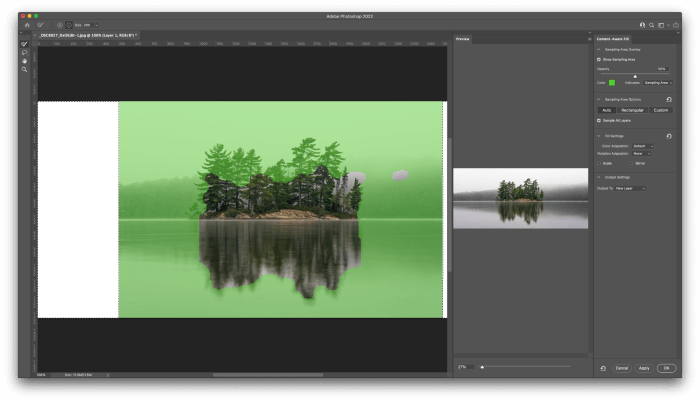
The green areas indicate which parts of the original image Photoshop will use as source material for creating new image content. It’s made a couple of odd choices, as you can see, but the result in the image preview looks good enough to move ahead with.
Photoshop even places the newly generated content on its own separate layer for you, ready for any additional editing that may be required.
It’s important to remember that this technique won’t work perfectly in every situation. The more complex the background is, the more noticeable Photoshop’s generated content will be, but it’s always worth a try! Sometimes, it actually looks even cooler when it makes a mistake 😉
A Final Word
That’s everything there is to know about how to stretch an image in Photoshop! Unless you’re trying to be silly (read: making a meme), it’s usually not a good idea to stretch your images to the point that they look distorted.
If you use the advanced Content-Aware Fill technique, you can stretch images without distorting them!
About Thomas Boldt