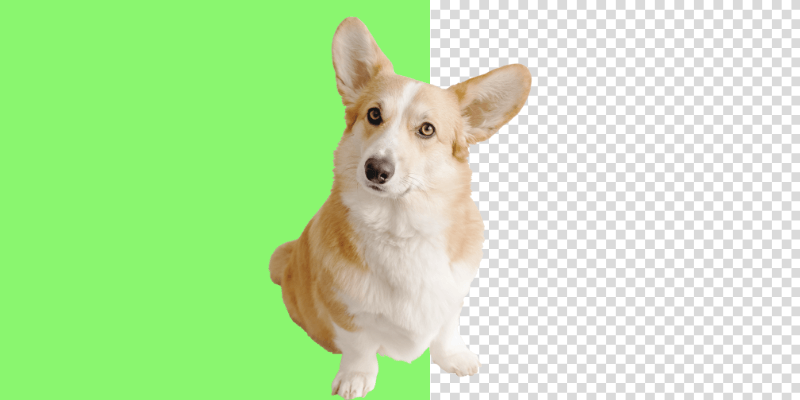
When we record a video or have an image with a green screen background, we must edit the movie to get rid of the green screen background and add a new one.
This article will show you how to quickly remove a green screen using Select Color. I’ll then explain a quick method for eliminating green edges from your photo or movie using Select and Mask after the original selection is finished.
I have over five years of Adobe Photoshop experience and am Adobe Photoshop certified. In this article, I’ll teach you how to remove a green screen from a movie or image in Photoshop.
Key Takeaways
- The color range option will usually work best.
- This will help you if you would like to replace the background.
How to Remove a Green Screen in Photoshop
Prepare your image or video in Photoshop.
Step 1: There are numerous ways to do this with Photoshop. The button labeled Select Subject is one option. Select > Color Range is another tool that will also remove the green screen. I am going to be using Select > Color Range.
Step 2: On the screen, a color range box will appear. I usually like to change the selection preview to Quick Mask just to make things easier to see, but feel free to try the other selections to see which one is your favorite.
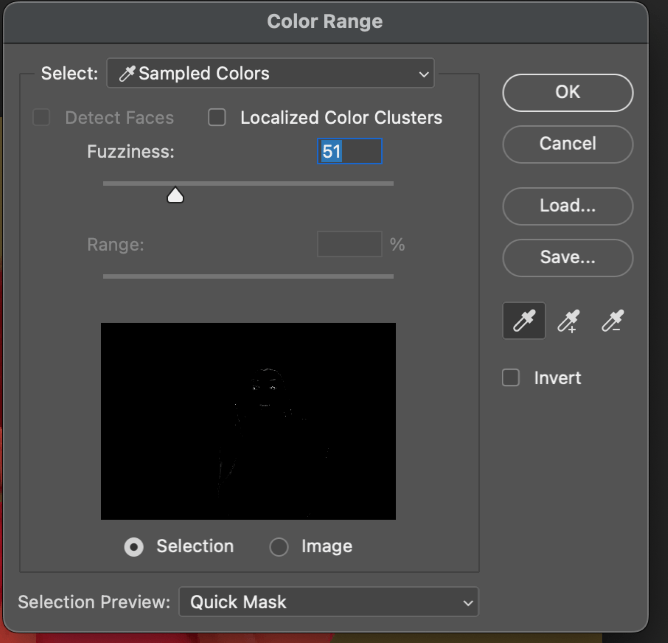
Step 3: From this point, we’ll use the Eyedropper tool in the color range box to select a section of the green screen. Hold Shift while continuing to select the entire background that is green. You can always press Ctrl + Z to undo your selections if you make too many. Once you’re satisfied, press OK.
Step 4: Add a layer mask to your image. After that, choose from the dropdown selection. The selection’s shape will automatically fill out the mask. If you wish to add an image drag and drop it into the new layer.

Step 5: The mask may look good, but some green may still be showing along the edges. To fix this, go to Select and Mask by double-clicking the layer mask. To reduce the green edges of a mask in Select and Mask, I like to combine the Feather, Contrast, and Shift Edge attributes.
Step 6: There can be some leftover green edges after Select and Mask. By choosing the layer mask while pressing control, we can eliminate those first. That will produce a selection centered on the topic. Next, select Modify > Contract and Contract by 2 from the Select menu.
You can also try 1 if you think 2 are too powerful. You can invert the selection by choosing Select > Inverse.
Bonus Tips
- Remember always to save your work always!
- You may have to do multiple steps to get all the green out of your image or movie.
Final Thoughts
Photoshop is great for those looking to remove the green screen background, and as you can see, there’s not much to it! And now you have the skills to put them to use!
You most likely won’t have to use this technique too much since this is more for individuals working with green screens, but it is also a great way to learn how to remove other backgrounds and replace them with something else.
Any questions about removing a green screen in Photoshop? Leave a comment and let me know.
About Aly Walters