
Whether you’re creating a branding masterpiece or outlining text for a meme, working with text in Photoshop has never been easier. Modern versions allow you to create a huge range of non-destructive text effects using a feature called Layer Styles, including perfect text outlines – all with just a few clicks!

Note: This guide should work for any version of Photoshop released in the last two decades or so, and possibly as far back as version 5.0. Your interface may look different from Photoshop 2022 in the screenshots below, but the basic principle has stayed the same.
Table of Contents
The Quick Guide To Outline Text In Photoshop
If you just need a quick refresher guide about how to create a text outline in Photoshop, here’s the quick version:
- Step 1: Right-click your text layer in the Layers panel and choose Blending Options.
- Step 2: Select Stroke from the Layer Styles dialog and customize the options as needed.
- Step 3: Click OK.
That’s all there is to it! Photoshop will outline your text perfectly using the settings you’ve selected.
The Detailed Guide To Outline Text In Photoshop
If you’re just starting to learn Photoshop or if you want a more detailed explanation of the process of outlining text in Photoshop, read on to learn how to get the most out of your text outlines as well as a couple of bonus tips and techniques at the end.
Step 1: Create Your Text
Switch to the Type tool using the Tools panel or the keyboard shortcut T, and create the text that you want to outline.

For this process to work, the text must be on its own individual layer with a transparent background, since it works by detecting the edges of the image data within the layer.
If the text is already merged with the rest of the image, the outline process won’t work and you’ll have to use a different and much more complicated method.
In this example, each word is on its own layer, allowing me to add outlines to just the word ‘buzz’ as you saw earlier.
Step 2: Adding Your Outline
Once your text layer is prepared, it’s time to add a layer style. Like many of the tools and settings in Photoshop, there are multiple ways to do this, but my preferred way is to right-click on the text layer in the Layers panel and choose Blending Options from the top of the popup menu.
If the Layers panel isn’t visible in your current workspace, you can bring it to the front by opening the Window menu and selecting Layers from the list, or you can use the keyboard shortcut F7. For the vast majority of Photoshop projects, you’ll want to have the Layers panel open!
You can also click the fx icon at the bottom of the Layers panel and select Stroke from the list, or open the Layers menu, select the Layer Style submenu, and click Stroke.
However you get there, Photoshop will open the Layer Style dialog box, shown below.
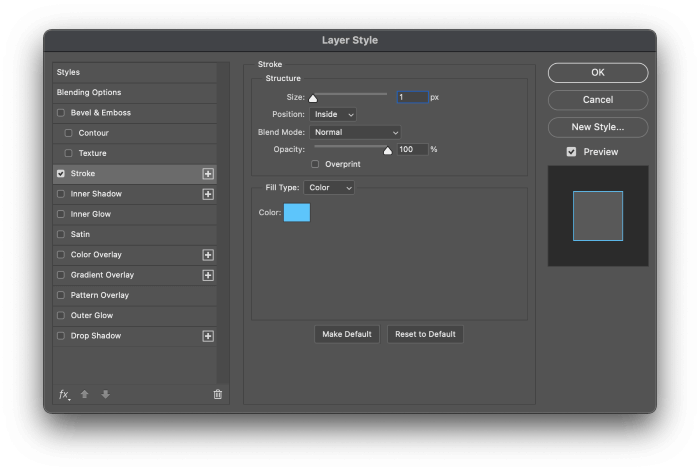
At this point, the options are easy to play around with. You can set the width and position of the stroke, as well as experiment with blend modes and opacity settings. You can also adjust the Fill Type to be a solid color, a gradient, or a pattern.
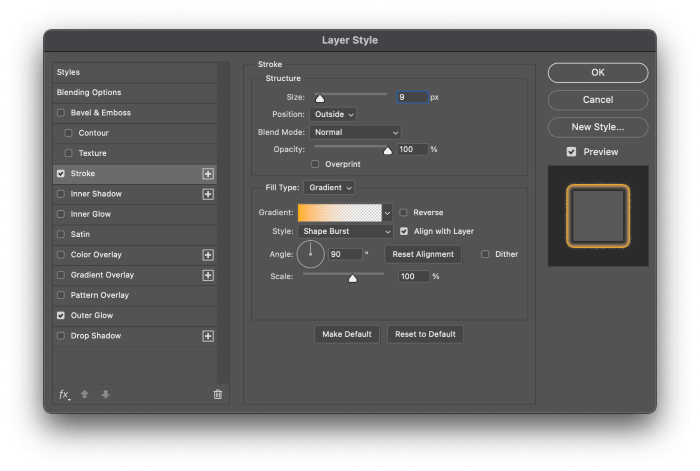
I doubt that you’ll ever be able to find a good use for the pattern fill type, but gradient outlines can create some cool effects.
Step 3: Finalize Or Repeat
At this point, if you’re happy with the preview of your outline, just click the OK button and you can move on with your project. You can also toggle the outline effect on and off using the Preview checkbox to compare the ‘before and after results of your work.
If you want to add an additional outline around your text, you can! Click the + icon beside the Stroke entry in the left pane of the Layer Style window, and a new Stroke entry will be added.
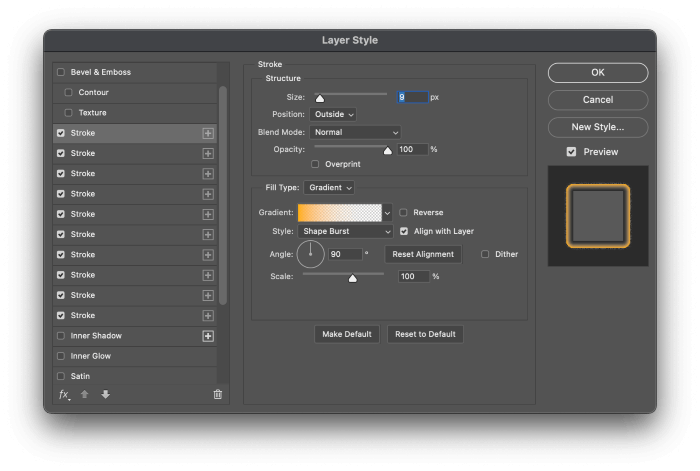
Customize the new Stroke options just the way you did in Step 2, or add as many different strokes as you want until you’ve created the effect that you’re going for.
Bonus: Getting Fancy With Text Outlines
There’s more to the world of outlined text than just the Stroke layer style.
Outline Text Using Outer Glow
If you want a softer result for your text outline, you can try using the Outer Glow layer style instead of Stroke. Outer Glow gives you a lot more control over the edges of your outline, and allows for a greater range of effects, although it can take a bit more time to configure.
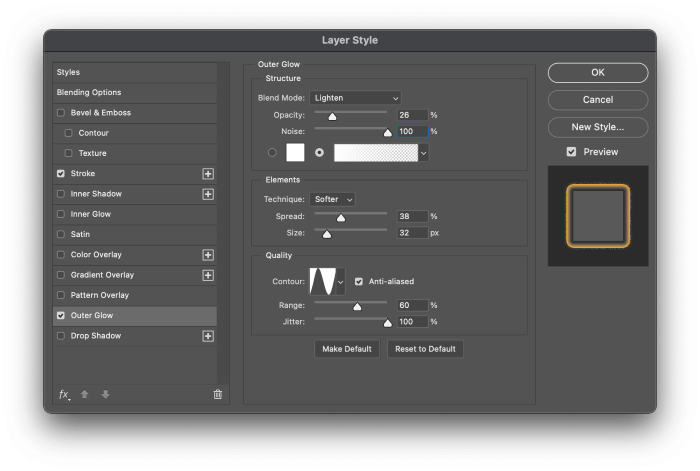
The Outer Glow option makes working with gradient outlines much more precise, although you can customize it so much that you can actually create a similar result to the Stroke option if you wanted. You can even combine a Stroke and an Outer Glow together for more complex outline effects, so feel free to experiment!
Rasterize Your Outline
While it’s usually a good idea to keep your text outlines as a layer style for maximum flexibility, you can also separate the outline from your text.
This lets you distort and transform it any way you want, giving you the ultimate creative control – and you can always just recreate another text outline by repeating the steps in the guide if you need to!
Once you’ve finalized your outline using the Stroke or Outer Glow options, make sure your text layer is still selected in the Layers panel. Open the Layer menu, select the Layer Style submenu, and click Create Layer. This will convert your non-destructive layer style into a new pixel layer, ready to be transformed or edited however you want.

You might have to do a bit of cleanup work, as layer styles often rely on clipping or layer order to achieve their effects when converted to a separate layer, but it can be a handy way to create an outline for use as a shadow or other lighting/blending effect in a different part of the image.
A Final Word
That’s just about everything there is to know about how to outline text in Photoshop using modern non-destructive techniques. You could mess around doing everything manually with selection tools, but you’ll get much better results using layer styles – and much faster, too!
Happy outlining!
About Thomas Boldt