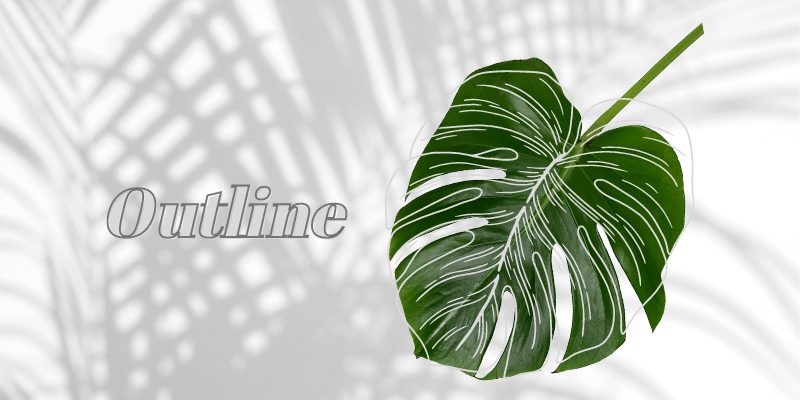
Wondering how to outline an image or subject in Photoshop? The quick answer is to cut out the object using the selection tool and add a stroke.
Hey there! I’m Cara and sometimes I outline subjects in my images to emphasize them when adding them to a design. This technique isn’t about realism, but it is great for creating eye-catching posters, flyers, etc.
Curious about what you need to do? Let’s take a look!
Quick Note: the tutorial below is based on the Windows version of Adobe Photoshop CC. If you are using the Mac version, it can be slightly different.
Table of Contents
Step 1: Cut Out Your Subject
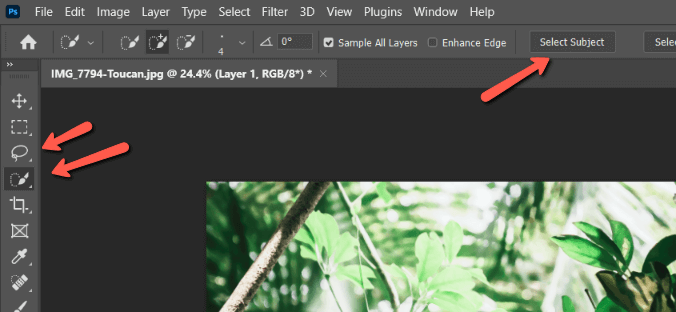
First up, we need to tell Photoshop what part of the image we want to outline. To do that, let’s separate the subject from the background.
Press Ctrl + J or Command + J to make a copy of the image. It’s always a good idea to keep an untouched copy to go back to if needed.
Choose any of the selection tools from the toolbar. This will make the Select Subject button appear in the Options bar. Click it and Photoshop will do its best to determine the subject and select it.
Photoshop didn’t do too badly, especially with the complexity of this image. We can clean it up with one of the selection tools. Learn more about cutting out objects in this tutorial.

Once satisfied, click the Mask button at the bottom of the Layer’s panel. This will cut the subject out and put it on its own layer.
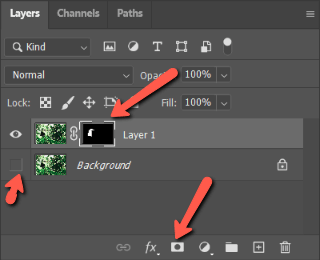
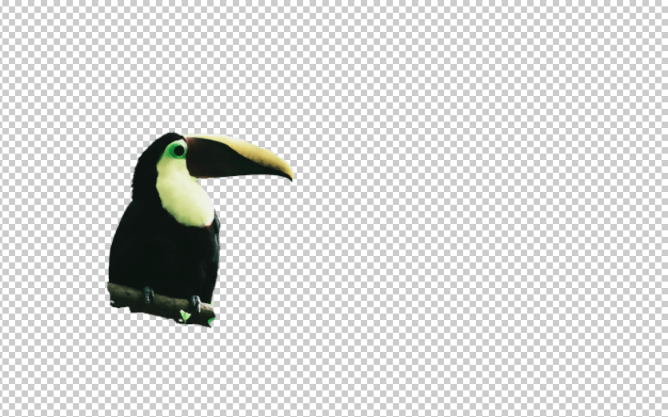
Hide the background layer by pressing the icon that looks like an eye to the left of the thumbnail. You’ll see the toucan there by himself.
Step 2: Add a Stroke
To create the outline, let’s add a stroke layer style. Double-click on the mask layer to open the Layer Styles panel. Click the Stroke option on the left side.

Set the options in the box to how you want the stroke to appear. The size determines the thickness of the line. Make sure to set the Position to Outside so the line rests on the outside of the image.
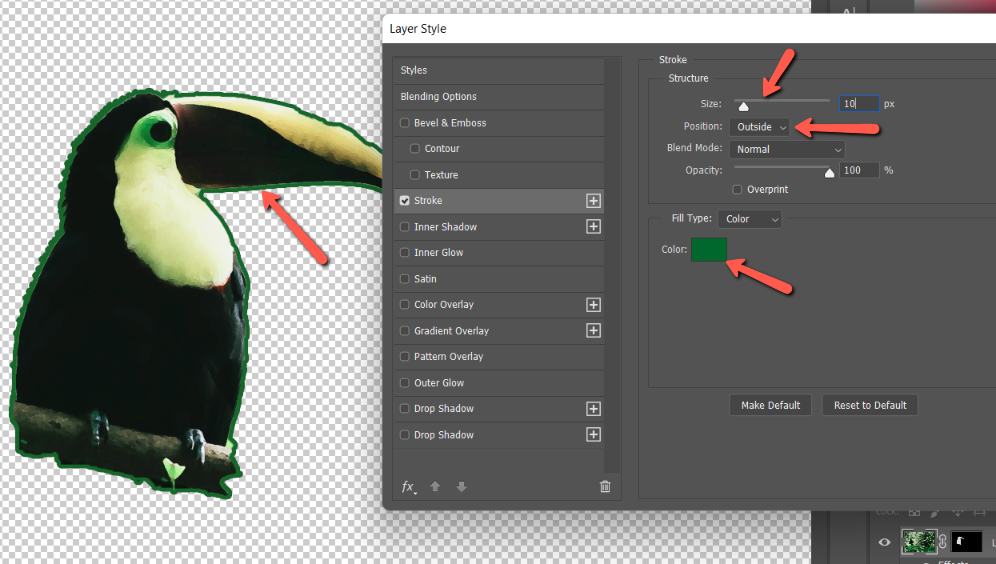
You can adjust the opacity if you want and choose a color by double-clicking on the color swatch. You can choose a color with the eyedropper tool by clicking on the image or picking whatever color you want from the picker.
Different Strokes for Different Folks
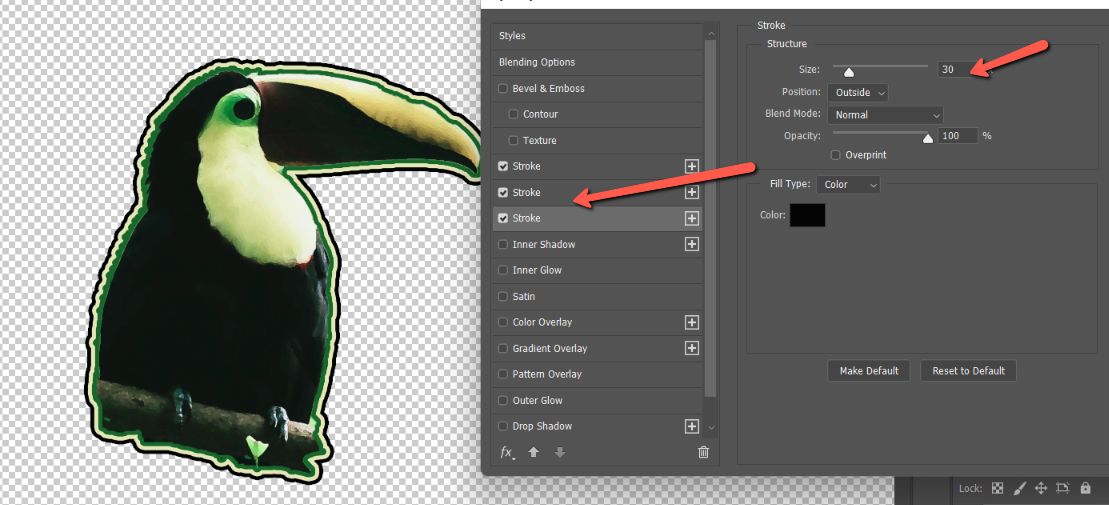
If one line was all you needed, you’re set! But Photoshop allows us to keep adding outlines as we please. Let me show you how that works.
Click the plus sign to the right of the Stroke option. This creates another Stroke option below it. As with layers, these stroke options need to stay in order. The biggest one has to be on the bottom, otherwise, it will cover up the others.

Your new stroke will appear with the same settings, so nothing will change in the image just yet. Change the color and increase the pixel size to make the second stroke thicker and come out from behind the first one.
Here I’ve added 3 strokes at 10, 20, and 30 pixels. Each one is a different color so you can see each outline.
Pretty nifty! That’s how you make an outline of an image in Photoshop.
Curious about other tricks in Photoshop? We’ve got a wealth of information here for you. Try this article on how to duplicate shapes in Photoshop here!
About Cara Koch