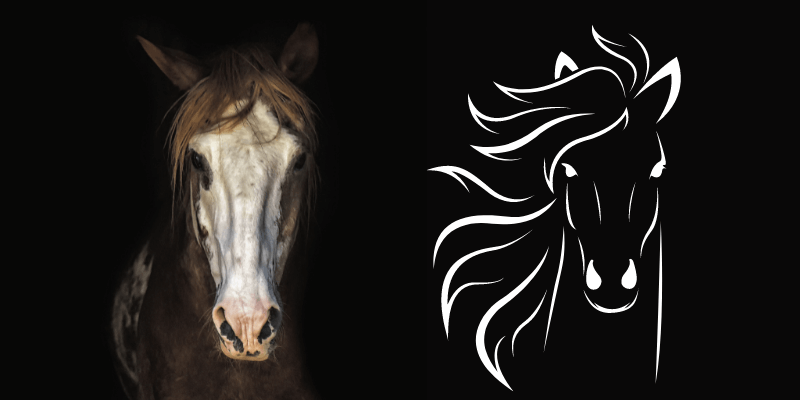
Have you ever tried to resize an image in Photoshop, only to end up with a blurry or pixelated mess? This can happen with raster images (images that are made up of pixels).
Photoshop is primarily designed to work with raster images, but it can also work with vector images. You can scale these path-based images up or down without running into the quality loss you get when scaling raster images.
Hey there! I’m Cara. As a photographer, I primarily work with raster images in Photoshop. However, sometimes I work with graphic design and vector images come in super handy.
There is a simple way to convert raster images into vector images when necessary. So without further ado, let me show you how to vectorize an image in Photoshop!
Please note that the tutorials and screenshots below are based on Photoshop CC for Windows. If you are on a Mac version, they can look slightly different.
Table of Contents
Step 1: Choose and Prep the Image
The method we’re going to cover here is a pretty easy way to vectorize a logo or other image in Photoshop. However, it doesn’t work well with complex photos. Stick with logos, line art, or another simple image for this task.
I pulled this image of a cat from Pixabay.com.
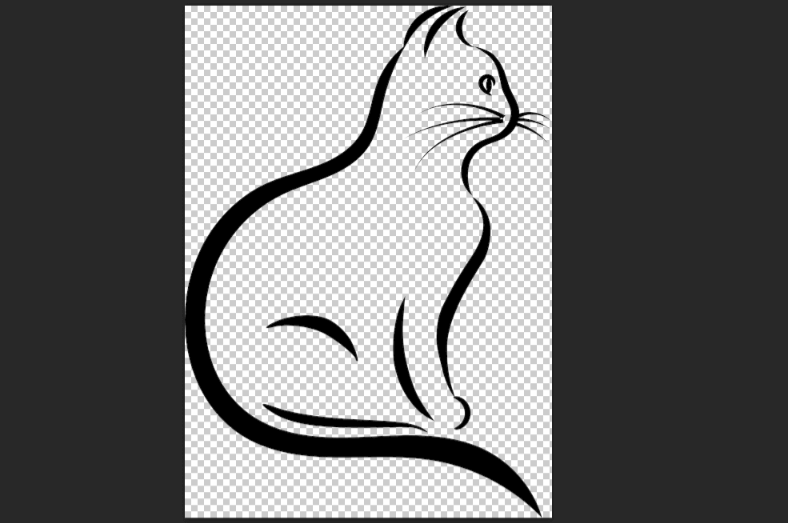
My image is already by itself. If your image has a background, you’ll need to remove the background first.
Step 2: Turn it Into a Path
Raster images are made of pixels, vector images are made of paths. To turn our image into a vector image, we need to create a path.
If you’ve read some of our other posts, you might remember that the Pen Tool creates a path. However, in this case, there is an easier way to create the path than painstakingly drawing around the image with the Pen tool.
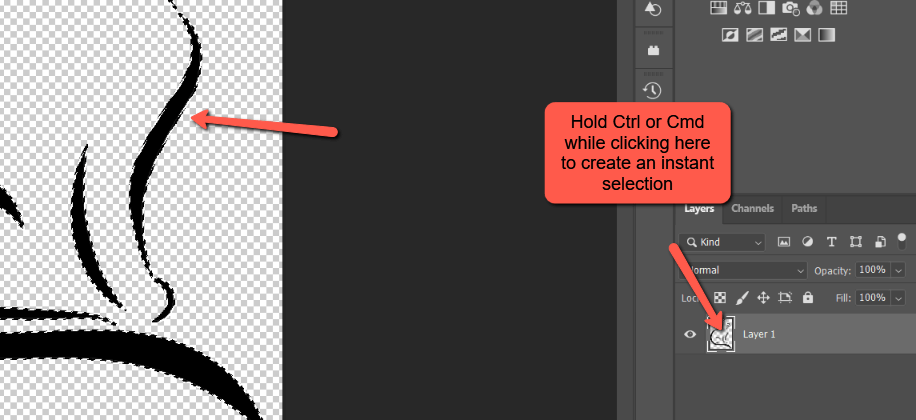
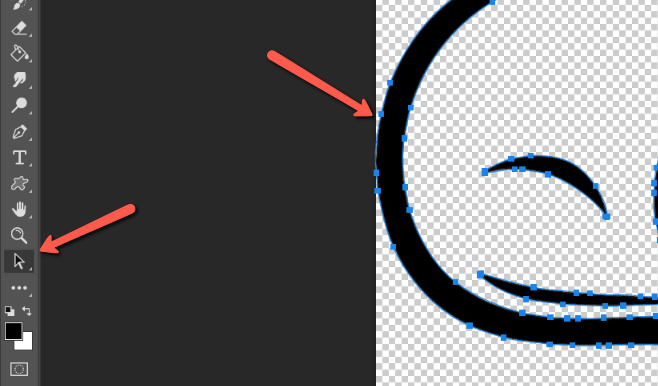
Since there is no background, you can make an instant selection of your image. Simply hold down Ctrl or Command key while clicking on the image thumbnail in the Layers panel.
Activate the Marquee tool by pressing M on the keyboard. It doesn’t matter which Marquee tool is currently on top, any of them will do.
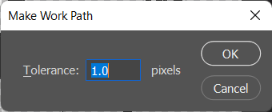
Right-click on your image to access the menu. Choose Make Work Path from the list.
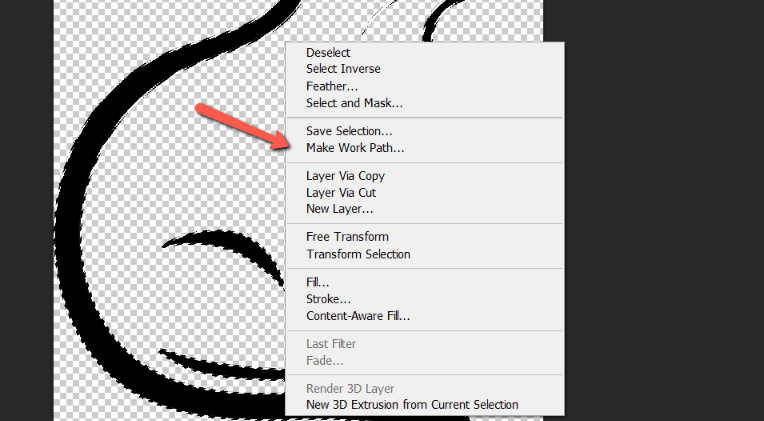
In the box that opens, leave the Tolerance at 1 pixel and press OK.
Step 3: Turn It into a Vector with a Vector Mask
The selection will turn into a path. Now we want to further modify it into a vector mask.
Choose the Direct Selection tool from the bottom of the toolbar. Or press A on the keyboard.
With this tool active, right-click again on your image. Choose Create Vector Mask from the top of the menu that appears.
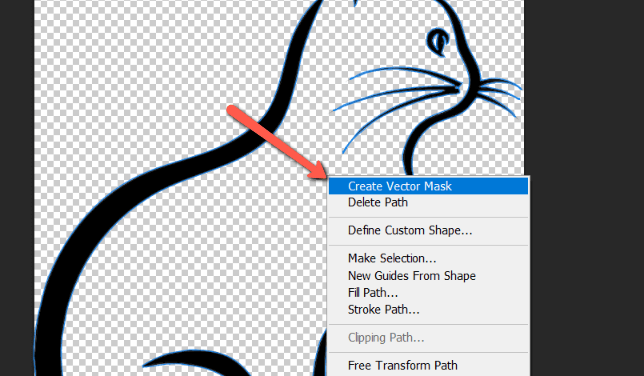
The Vector Mask will appear in the Layers panel.

Step 4: Save as a Vector File
To maintain your image’s vector status, you have to export it as a vector. If you save it as a JPEG or PNG, you’ll end up right back where you started.
Go to File and choose Save a Copy.
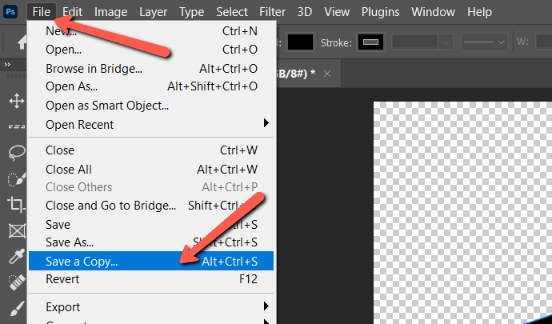
Click in the Save as Type box and select the Photoshop EPS (*.EPS) option from the list.
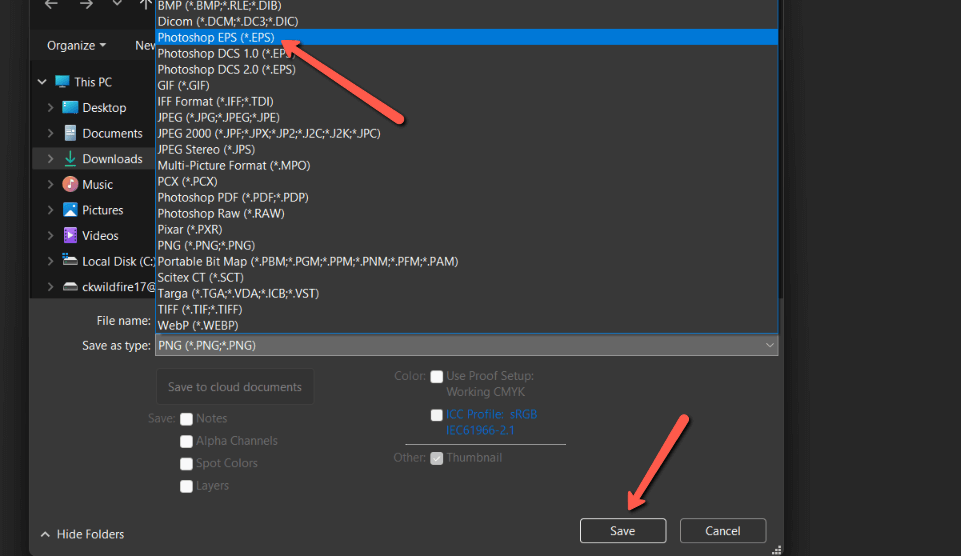
Click Save and voila! You have successfully created a vector image.
How to Vectorize a Logo in Photoshop
One of the most common reasons you might want to make a vector image is to be able to scale a logo. Businesses use their logo on small business cards and scale it up big to use on billboards. Trying to do that with a JPEG or PNG version of the logo will turn it into a mess.
Wondering how to vectorize a logo in Photoshop? It’s basically the same method as vectorizing an image, so you can use the method above.
- Remove the background
- Select the logo and turn the selection into a path
- Add a vector mask
- Save as a vector file
It couldn’t be simpler!
Wondering what else you might do with a vector image? Check out how to make a pattern in Photoshop here!
About Cara Koch
Duarte Silva
Thank you so much, really helpful and clear! Worked like a charm.
June
Perfect! Happy to hear!