
Adding an overlay can make your Twitch broadcast more interesting and capture your audience’s attention better. But how do you make one?
Hey there! I’m Cara and I’m going to tell you that, once again, Photoshop comes to the rescue! Follow along and I’ll show you how to make a Twitch overlay with Photoshop!
Quick note: The screenshots in the tutorial below are based on Photoshop CC for Windows, other versions might look slightly different but should be similar.
Table of Contents
Planning a Twitch Overlay
Before you begin designing, map out the elements you want to include in your overlay. A box for the live stream is key, of course, and a webcam that shows your face is also a good idea. Followers like seeing your reactions to the gameplay.
Other overlays you might use include alerts for welcoming new followers or other actions, chat overlays for discussions, and ad overlays to promote your sponsors.
Step 1: Create a New Project
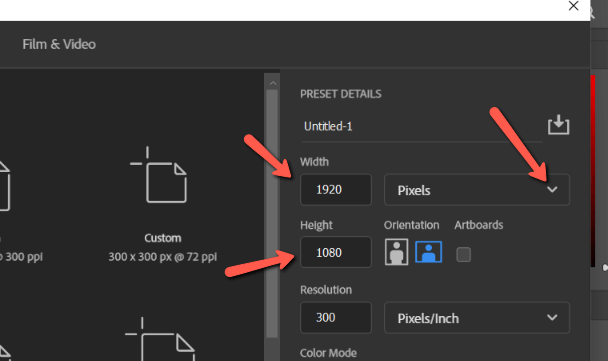
Open a new document by going to File and choosing New.

Sizing is important so that your overlay looks correct during your broadcast. You don’t want your elements bunching up or otherwise looking out of proportion. So choose 1920 pixels wide x 1080 high. If the unit of measure is something else, open the dropdown menu and pick pixels.
Near the bottom, you can choose the background color. Choose from the options in the dropdown menu or click the color swatch on the right to open the color picker. Once you’re satisfied with the color, click Create.
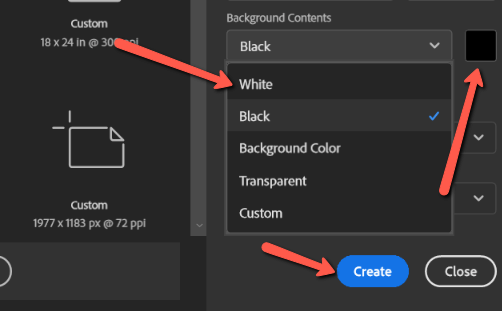
If you want to get more creative with your background color, you can change it after creating your project.
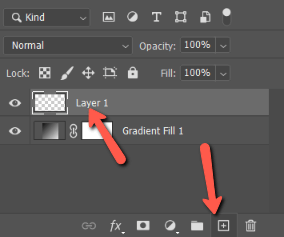
I’m going to add a gradient by choosing the Gradient adjustment layer. Open this menu by clicking the half-filled circle at the bottom of the Layers panel.
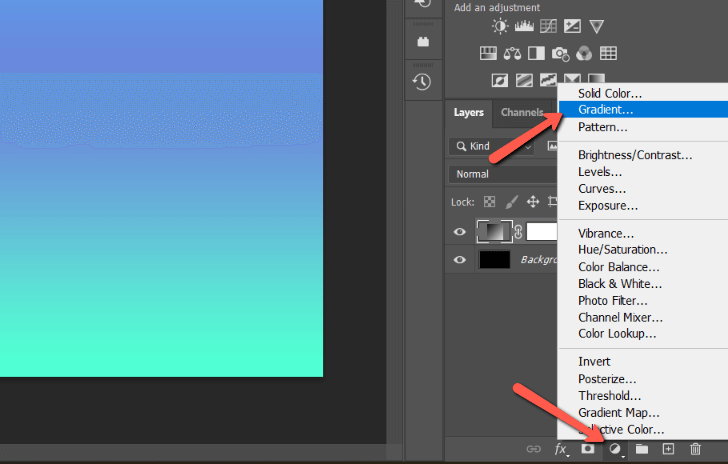
To throw in a quick gradient, open the preset options by clicking the arrow to the right of the gradient preview swatch. Choose one of the preset gradients from the color family folders.
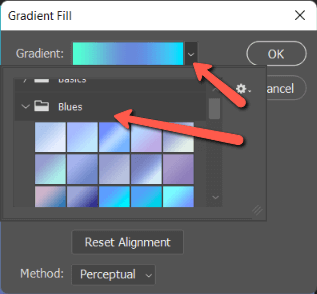
Make sure to pick something that will fit with your game’s theme.
Pro tip: Take a screenshot of the game and open it in Photoshop. This will make color matching easier and make your overlay look that much more professional.
Step 2: Create a New Layer for the Windows
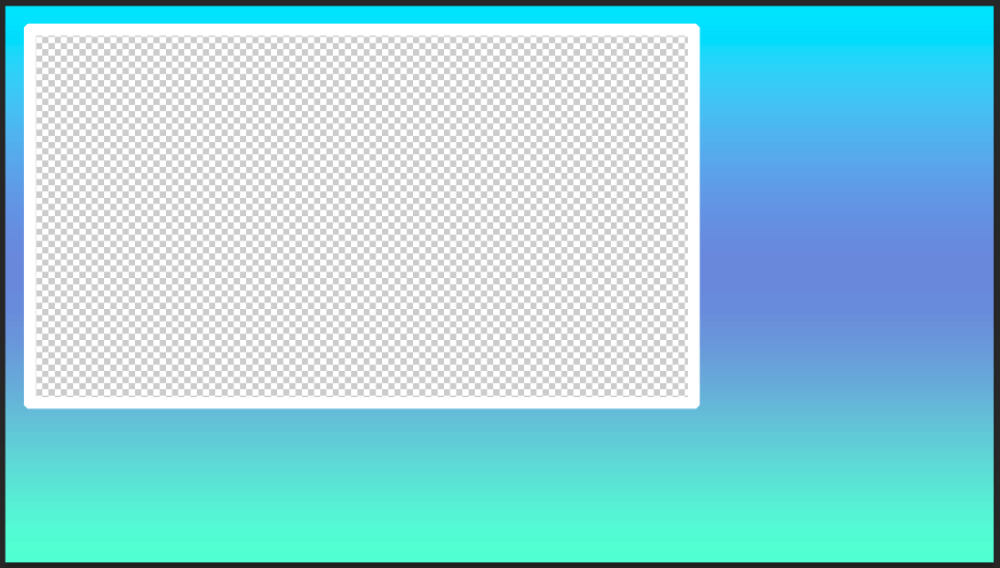
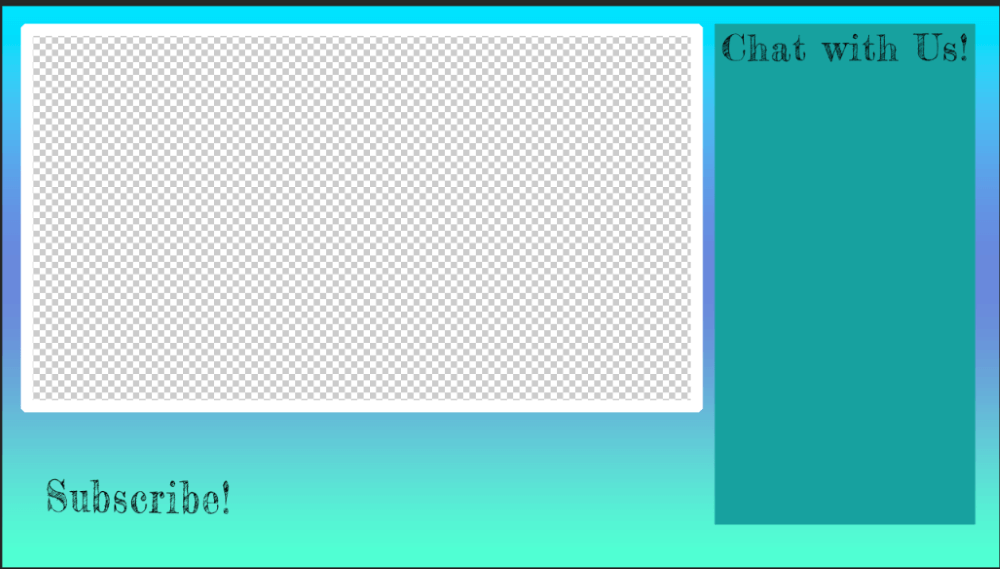
Now you need to mark out where everything will go. You need at least a large window for the live stream and a smaller one for your webcam.
Create a new layer so you can draw on it without disrupting the background layer. Press the icon that looks like a plus sign within a square at the bottom of the Layers panel.
I also got rid of the black background layer because we don’t need it. Just click and drag the layer down to the trash can on the bottom right of the Layers panel.
Step 3: Draw the Window
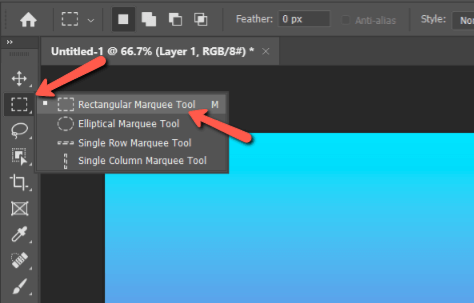
Now select the Rectangular Marquee tool from the top of the toolbar on the left.
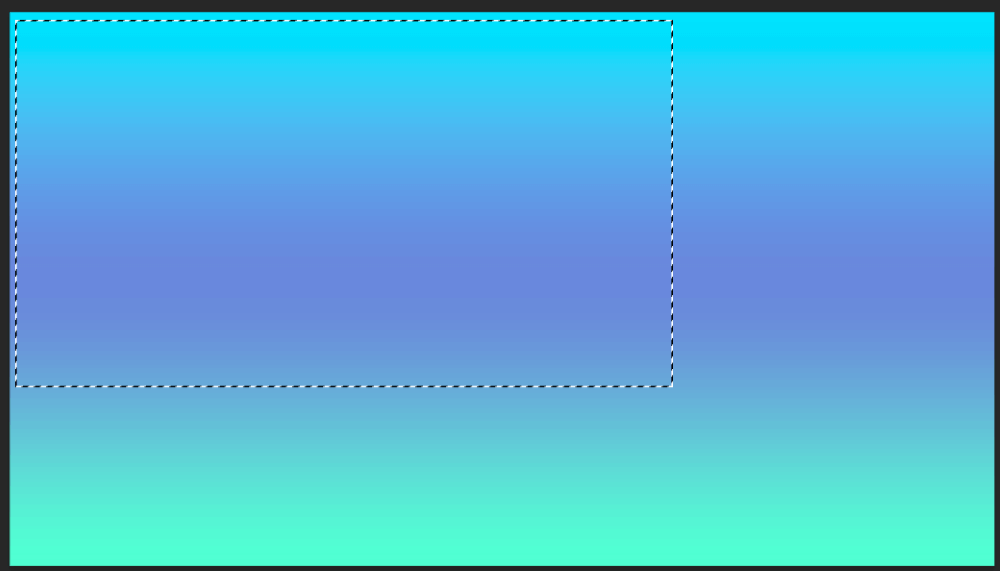
Click and drag to draw a rectangle on your overlay. So that the game will show up correctly, stick with a widescreen format for the sizing. For example, 1280 x 720 pixels.
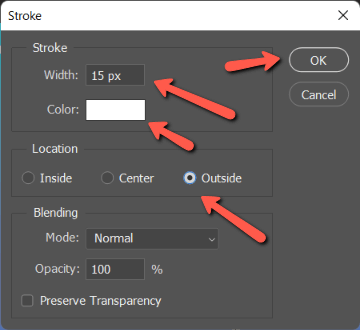
The marching ants line is just a selection, we need an actual line. Right-click within the selection and choose Stroke from the menu.
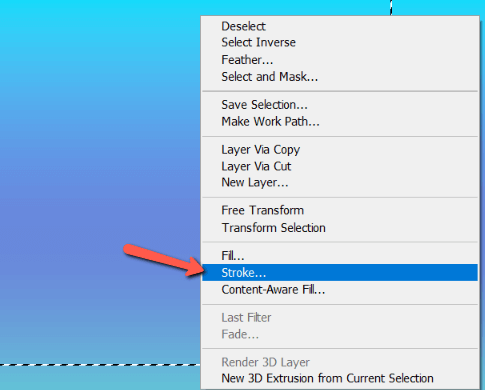
Choose the color and width of the line from the box that opens. Choose the Outside button so that the line sits out the outside of the selection. Press OK when you’re happy.
Step 4: Make the Window Transparent
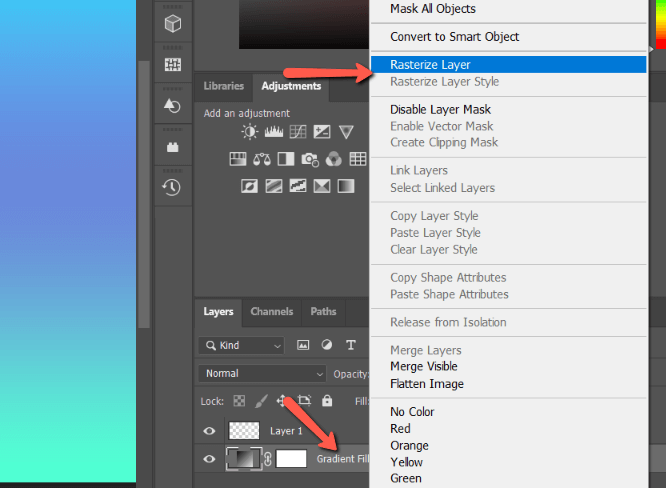
If you did as I did with the gradient layer, you’ll need to rasterize the background layer before you can make the box transparent. Right-click on the gradient layer and choose Rasterize Layer from the menu.
Press Backspace or Delete to remove the background inside your selection. Press Ctrl + D or Command + D to remove the marching ants.
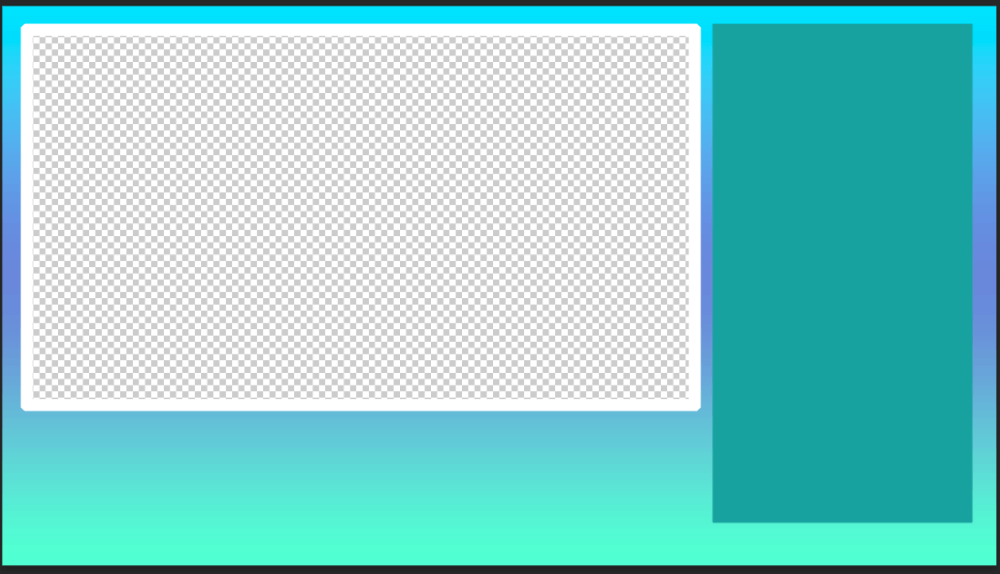
Step 5: Add Other Windows
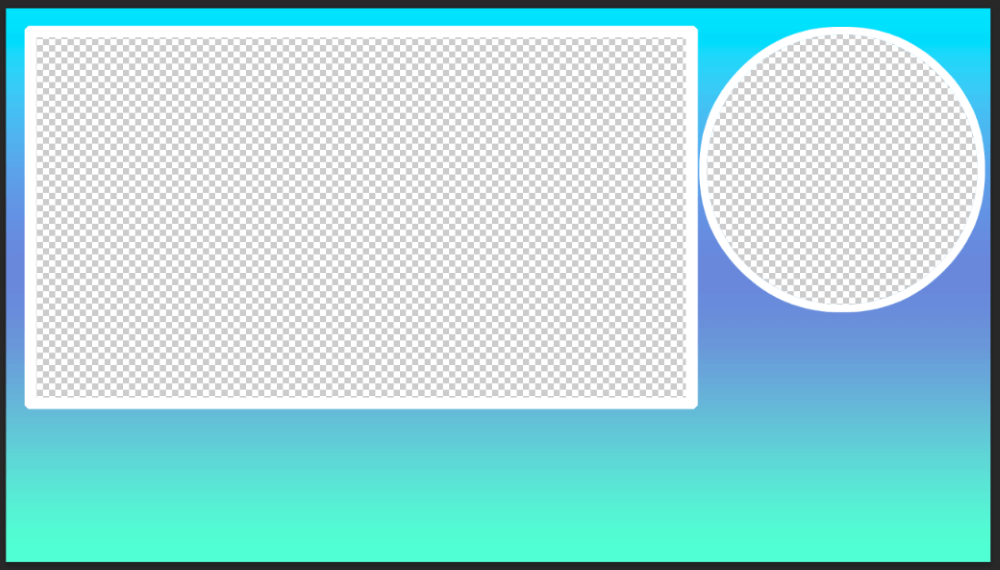
Followers want to see your reactions to the gameplay so a webcam window is usually a great addition. You can follow the same steps outlined in steps 2 to 4 to create another transparent window.
Remember, you can use the Elliptical Marquee tool instead for a different shape. Hold Shift while dragging out the selection to create a perfect circle.
What if you prefer to add a chat window? No problem! Use the same technique with the Rectangular Marquee tool to draw the rectangle. This time when you right-click on the shape, choose Fill instead to fill in the shape with a different color.
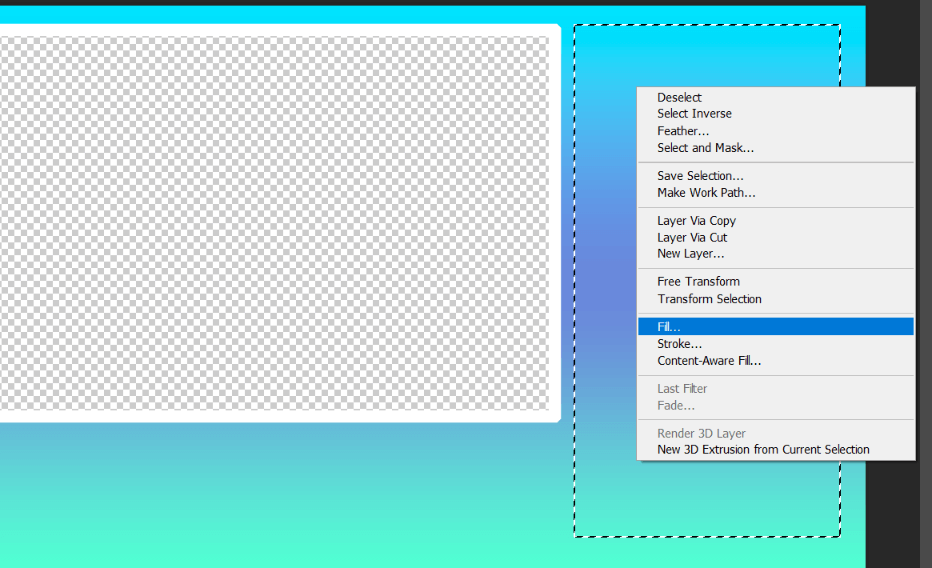
Select Color in the Contents box to open the color picker and choose the color you want for the background of your chat box.
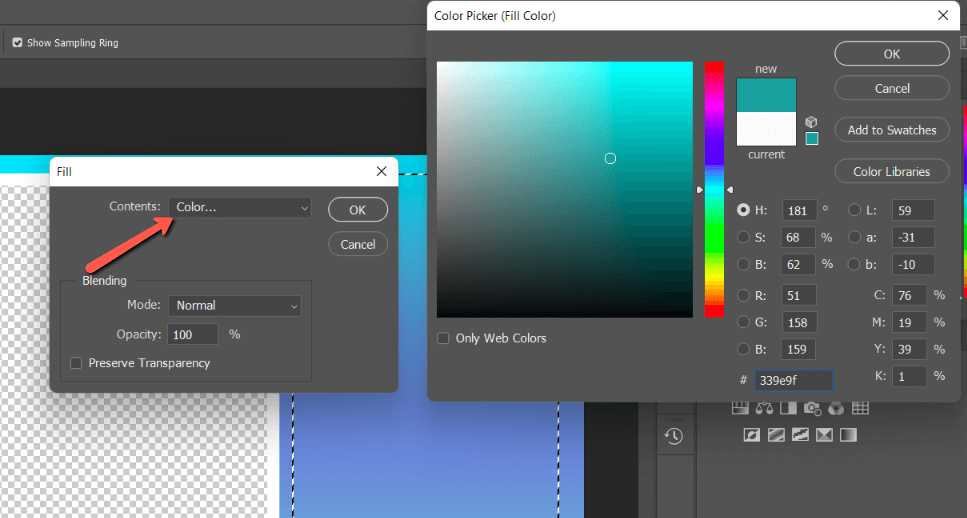
Press Ctrl + D or Command + D to deselect the rectangle.
Step 6: Add Text
Text is a key element to get your followers engaged. For example, you can add messages prompting them to jump in on the discussion or inviting them to subscribe.
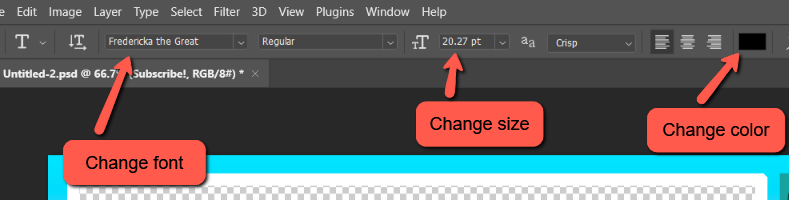
To add text, open the Horizontal or Vertical Type tool from the toolbar or press T on the keyboard.
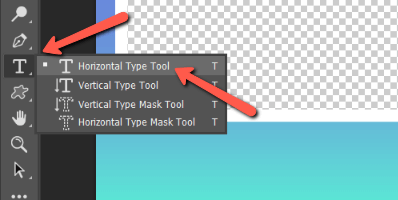
Click on your project where you would like to add text and type what you want to say. In the Options bar across the top, you can change the font, size, and color to customize the text.
For more cool text effect ideas and how to create them, check out our Text Tutorials section.
Step 7: Add Other Elements
At this point, you can add whatever you want to customize the look of your overlay. This includes social media and channel logos or other decorations, including shapes, images, etc. that fit with your theme.
Step 8: Saving Your Overlay
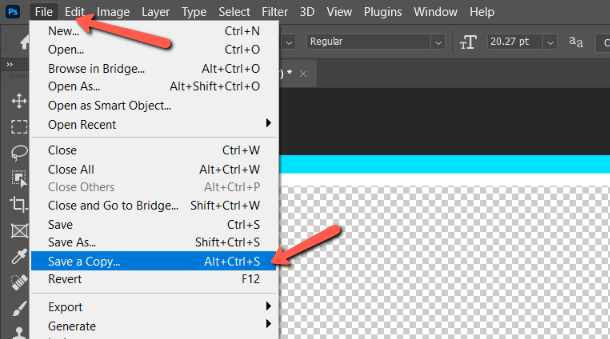
Once you’re happy with the overlay, you need to save your overlay. In order to maintain transparency, you must save it as a PNG.
Go to File and choose Save a Copy.
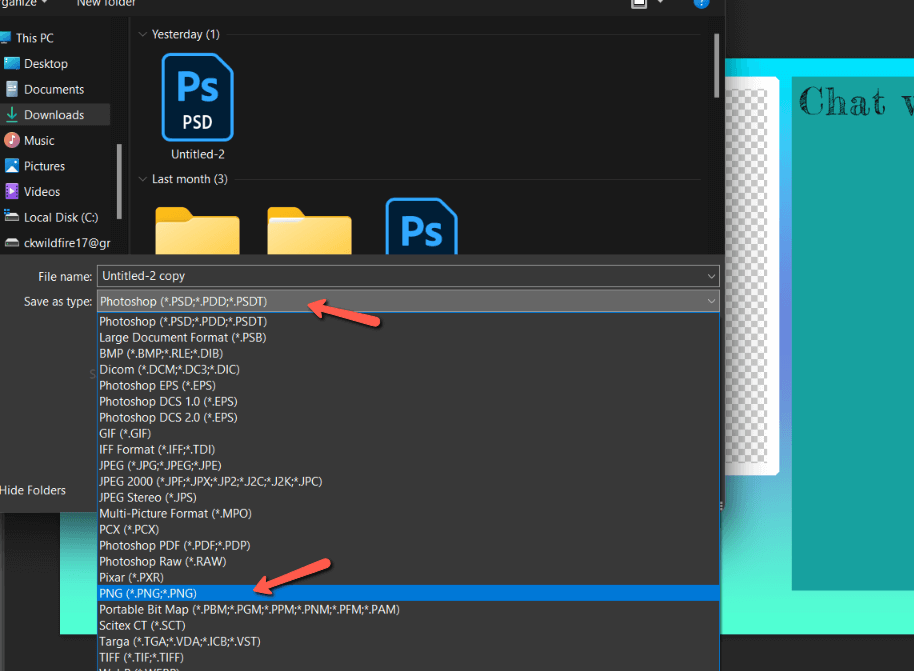
Choose PNG from the list and name your overlay how you like. If you want to be able to make changes later, you’ll need to save another copy as a PSD file.
Now you just learned how to make your own Twitch overlay in Photoshop here!
About Cara Koch