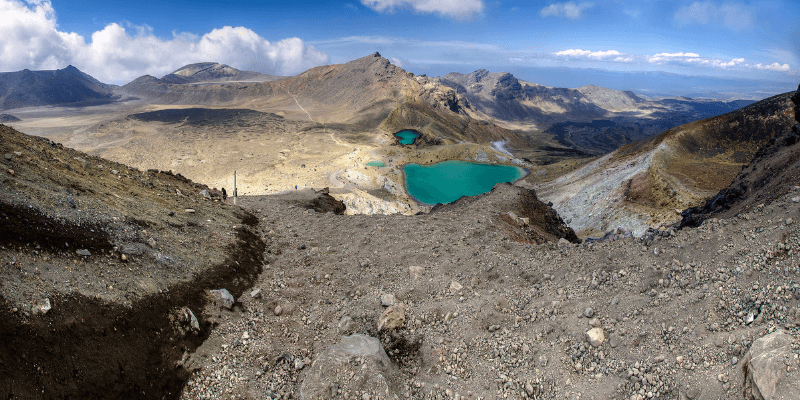
In photography, a panorama is a continuous view of a room or scene that surrounds a subject. It is sometimes referred to as a wide-angle, full-length view. These are simple to make with Photoshop.
I have over five years of Adobe Photoshop experience and am Adobe Photoshop certified. In this article, I’ll teach you how to make a panorama photo in Adobe Photoshop.
Key Takeaways
- The Photomerge command in Photoshop can be used to produce a panoramic.
- You must first take the photographs you wish to stitch together in order to make a panorama in Photoshop.
How to Make a Panorama in Photoshop
For the best result, you’ll need to have a couple of similar images. Get the images ready and follow the steps below to create a panorama in Photoshop.
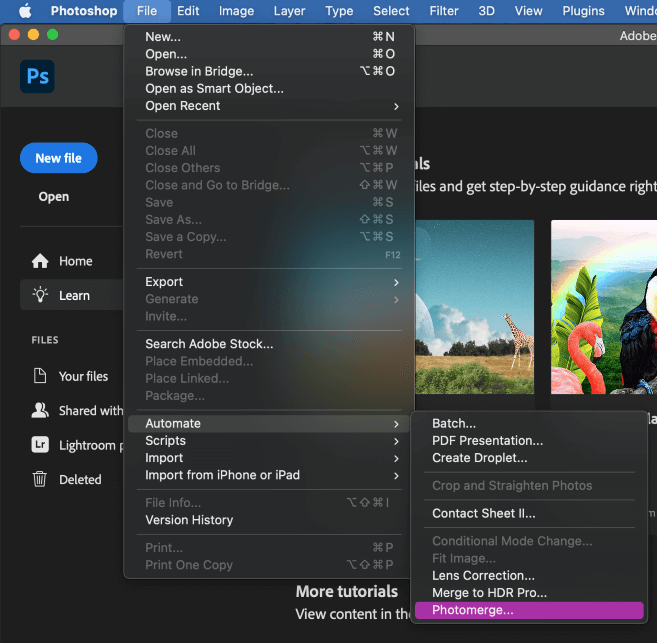
Step 1: Choose File > Automate > Photomerge in Photoshop from the top menu. Select each image by going to the folder where you placed them. Select OK. In the Photomerge dialog box, a list of the picture files will now appear.
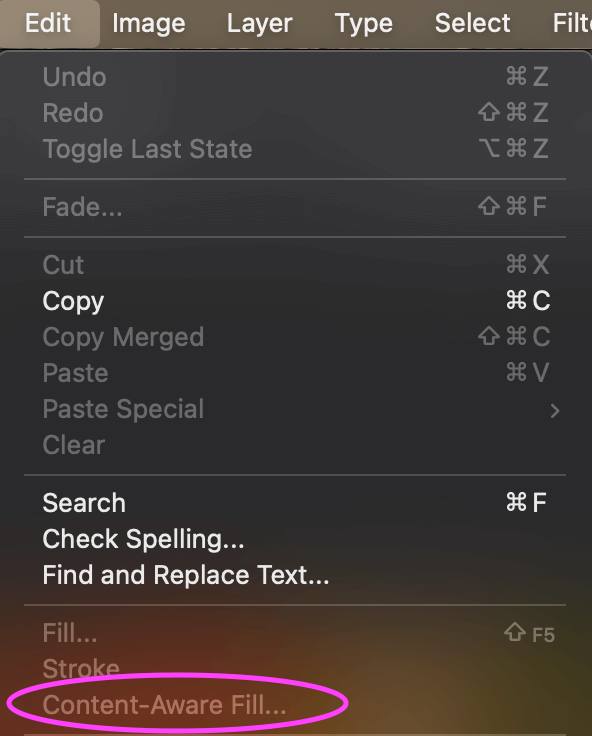
Step 2: Some panorama photos have some blank spaces left at the top and bottom after Photoshop merges them. Photoshop will make an effort to fill these areas if the content-aware fill option is checked.
You can find that by Edit > Content-Aware Fill. An outline of marching ants will be seen on the image once the photomerge is finished to show which sections Photoshop filled in.
The program will then automatically select the images one by one and attempt to merge them into one panoramic photo. If your photos don’t quite match, you may get an error because the program cannot merge the images automatically.
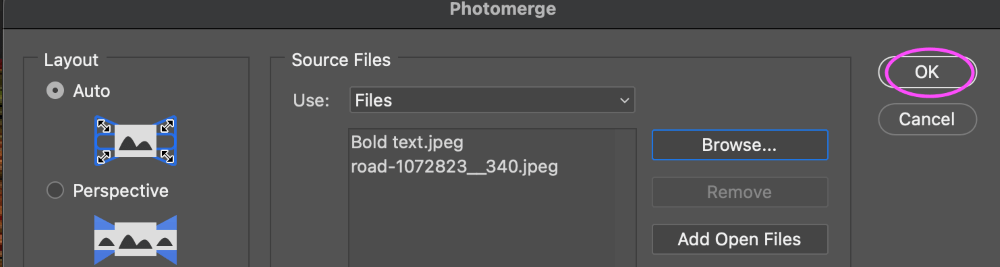
Step 3: Click OK when you’re ready. A panorama will now start to be created in Photoshop. It will read each of the images you’ve chosen and check for overlaps.
Then it will produce a new file with distinct layers representing the chosen portions of each image. These layers and layer masks will be shown in the bottom right corner of your program.
Depending on the checkboxes you chose in the Photomerge window, the number of photographs you asked Photoshop to combine, and the processing speed of your computer, Photoshop may take some time to build your panoramic image.
Step 4: The final product will be a composite image made up of various layers. If you choose to Content-Aware Fill the transparent sections, a merged layer may also appear at the top of the layers panel.
Step 5: Your panoramic image is now complete! To get a clear image that may be edited, merge the layers now. If you found any white areas in your panorama after not using the Content-Aware Fill option in the Photomerge window, you can either crop them out or remove them using the Clone Stamp tool or the Patch tool.
You can choose to save your panorama image as a TIFF file. When you save your file as a TIFF file, you can choose to remove layers and save a duplicate of it. You can also do this to make your file smaller.
Bonus Tips
- There may occasionally be distinct lines separating the images in a panorama. The lines can be merged to make them disappear. Select Preview after selecting the Advance Blending menu item to the right of the Photomerge window. The application will calculate color irregularities. The pictures will now merge together.
Final Thoughts
Making photos that will successfully stitch together to form a panoramic is the most challenging step in making Photoshop panoramic. Remember to maintain the same camera settings and level between shots. You must plan ahead in order to build panoramas in Photoshop. Your final photograph will be more effective if you have your intended subject in mind as you shoot the photos.
Any questions about making a panorama in Photoshop? Leave a comment and let me know.
About Aly Walters