
Without any doubt, Photoshop is the best software available for creating composite images. But before you can start blending your images into a new piece of digital art, you’ve got to get them all into the same document!
As with most things in Photoshop, there are several different ways to accomplish this, so in this post, I’ll give you a quick rundown of the three methods to add a new image to your Photoshop document.
Table of Contents
Method 1: Copy & Paste
This is my favorite method by far, thanks to the fact that you can accomplish it entirely using keyboard shortcuts. I’ve mentioned this in other articles, but learning Photoshop’s keyboard shortcuts is the single best thing you can do to improve your productivity.
The process is actually quite simple, especially if you’re already familiar with using the standard copy and paste shortcuts that are standardized across all programs and operating systems.
Open the File menu, and click Open. Browse to select the image you want to insert and click OK. You can also use the keyboard shortcut Command + O (use Ctrl + O if you’re using Photoshop on a PC).
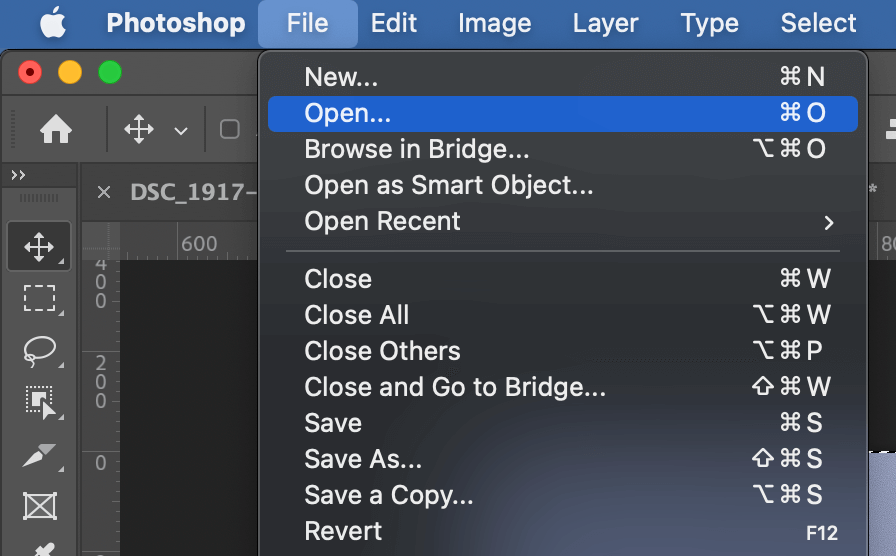
Photoshop should automatically create a new document tab for your image and switch to it automatically.
Use the standard ‘Select All’ keyboard shortcut Command + A (Ctrl + A on PC) to select all the pixels in your image.
You should see a selection marquee appear around the edges of your document window, indicating that you’ve selected all the pixels in the image.
Once they’re selected, use the standard keyboard shortcut Command + C (Ctrl + C on PC) to copy the contents of your selection into your computer’s temporary clipboard.
Next, switch back to your main Photoshop document, and use the standard keyboard shortcut Command + V to paste the contents of your clipboard into the main document.
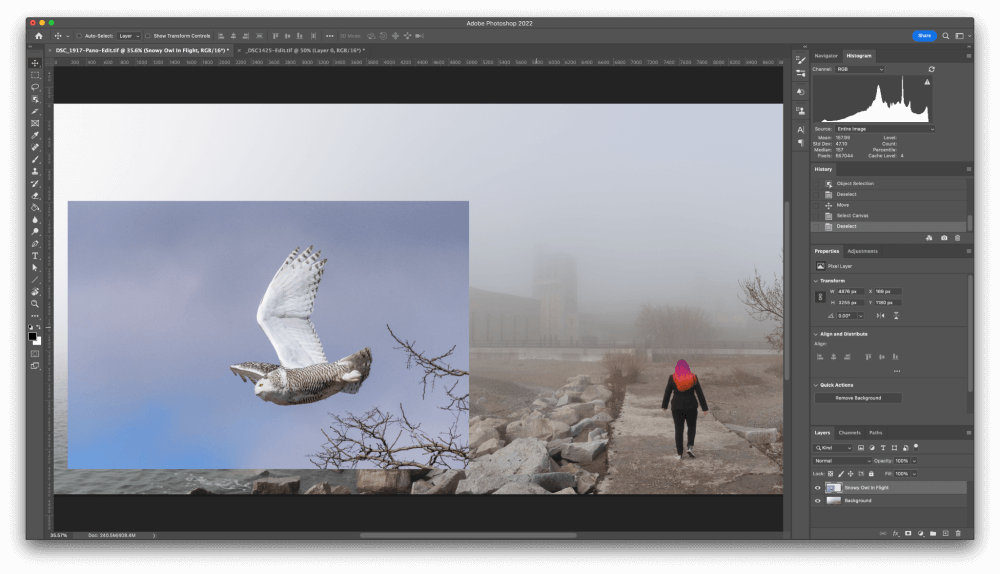
Photoshop will automatically create a new layer and fill it with the pixel data you copied earlier. At this point, you can start applying a mask to hide the background or any other edits that you need in order to finish your project.
Method 2: Duplicate
If you don’t like using keyboard shortcuts and the temporary clipboard, there is another way to insert an image in Photoshop.
Open the File menu and click Open. Browse to select the image you want to insert and click OK. Photoshop will open a new document tab for your image and automatically switch to it.
Locate the Layers panel, which is located by default in the bottom left corner of the interface. A standard photo should only have one layer, which automatically gets labeled Background, or in some cases, using the image filename.
Right-click on the layer entry in the Layers panel, and click Duplicate Layer.
Unsurprisingly, Photoshop will open the Duplicate Layer dialog box, which gives you plenty of options on what to do with your duplicated layer.
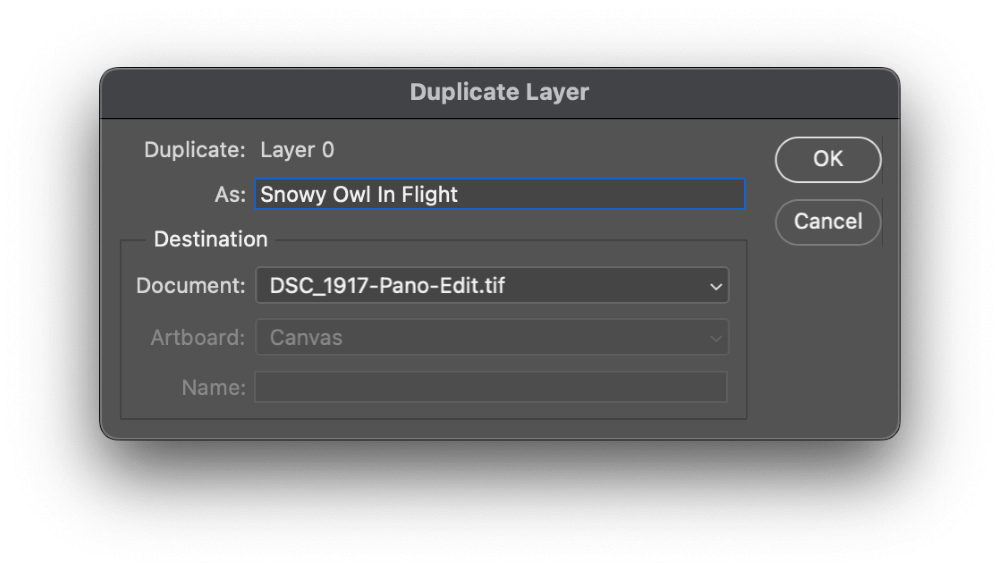
Enter a descriptive name in the As field (in case this is confusing, you’re not alone, but they mean “Duplicate this layer with the name”), and use the Document dropdown menu to select the document you want to insert this image into.
In case you haven’t actually created your target document yet, you can select New and have Photoshop automatically create a new document with the same dimensions.
Method 3: Linking And Embedding Images
The first two methods I’ve mentioned are the most common methods for inserting one image into another in Photoshop, but they’re not the only options.
It’s also possible to place external files into your Photoshop document as Smart Objects using two different but related methods, known as Linking and Embedding. They seem pretty similar at first, but they have a key difference, so let’s take a closer look at how it all works.
(In case you’re not familiar with the concept of Smart Objects, you can read more about them from Adobe here)
If you open the File menu, you’ll see two options near the bottom of the menu: Place Linked and Place Embedded.
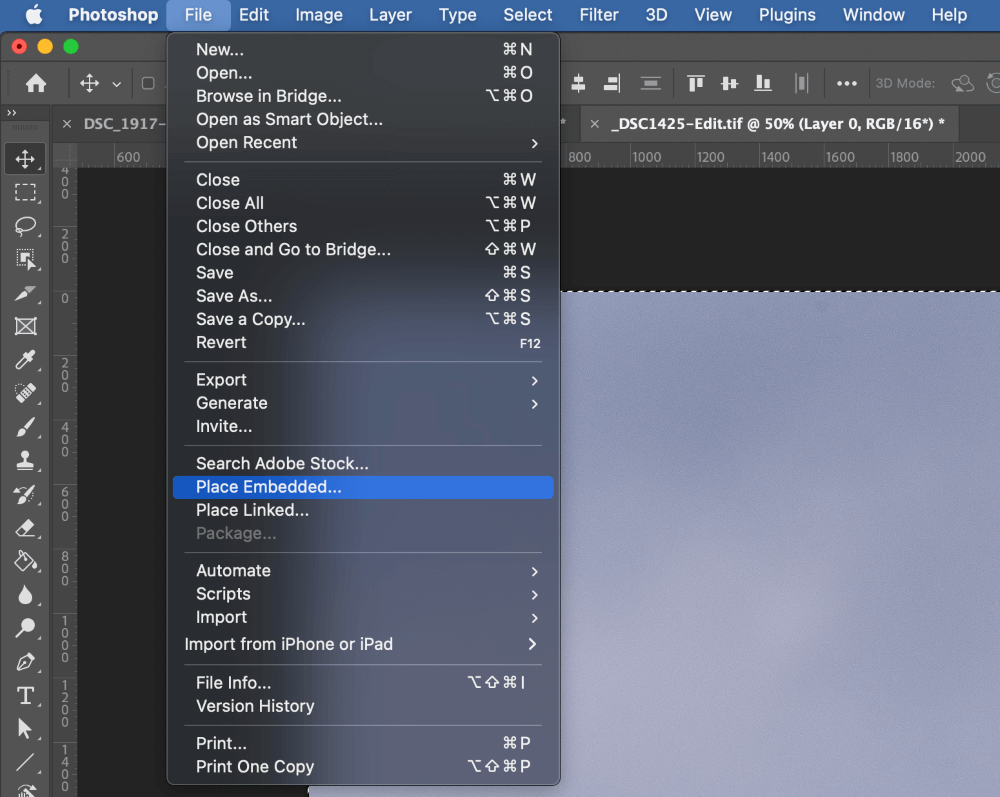
The Place Linked command allows you to insert an image into your Photoshop document, but the image you see is actually a placeholder thumbnail that represents the original file.
As a result, you can’t actually edit the linked file from within your primary Photoshop document, but rather you’ll have to open the original file itself.
When you make changes to that original file, you can ‘refresh’ the link to update the placeholder thumbnail in your primary document.
The Place Embedded command allows you to ‘embed’ another image into your current Photoshop document. Photoshop creates a new Smart Object containing the image you want to insert, and it becomes visible in your primary document.
Unlike with a Linked file, you can edit the embedded smart object using any of the normal Photoshop commands that apply to smart objects, but any edits that you make to the original file are not applied.
A Final Word
Those are the simplest ways to insert an image in Photoshop! Once you get more comfortable combining images in the same document, you’ll start seeing possible combinations and composites everywhere, which is one of my favorite things about Photoshop.
Happy editing!
About Thomas Boldt
Gordon
Hi. I have 2 images opened separately in Ps. How do I embed one into the other using a keystroke?
June
Hi Gordon,
You can select one of the images and drag it to the same document as the other image.