High dynamic range photography, also known as HDR photography, allows you to combine multiple different exposures into a single image.
Each image is exposed a slightly different amount, and when combined, they show more of a scene than it would be possible to capture in a single photograph.
For example, if you’ve ever tried to take a picture of the sunset and discovered that your foreground came out extremely underexposed, you’ve already experienced the problem that HDR is trying to solve.
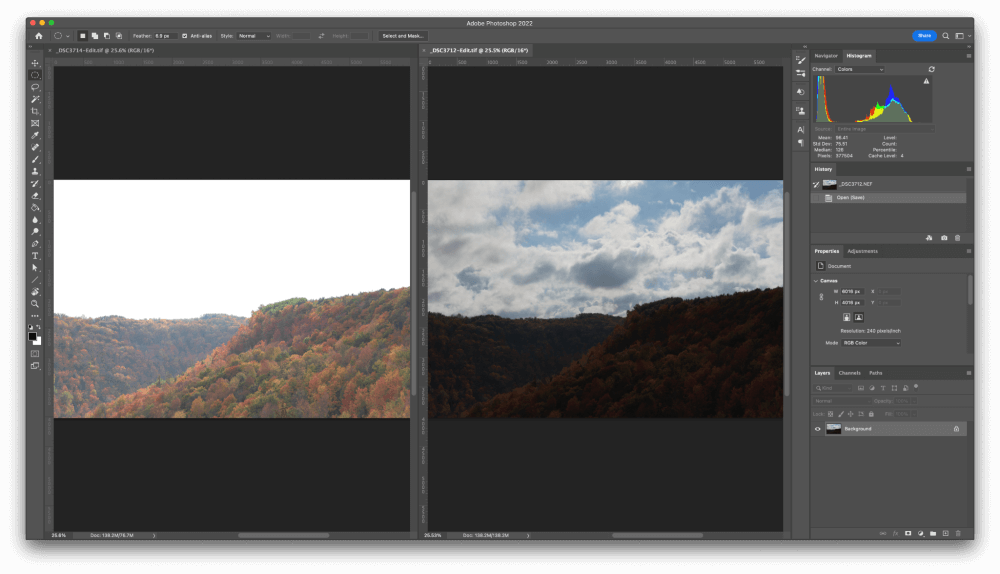
Instead, if you take one picture exposed for the sky and one picture exposed for the foreground, you can combine them in Photoshop and recreate an image that’s closer to what you actually see in person.
That’s how the theory goes, at least – the reality is more complex and involves some mental trickery on your brain’s part, but let’s leave that aside and focus on how to do HDR in Photoshop.
Usually, in these tutorial articles, I’ll start with a quick explanation for those of you who want the TLDR (too long; didn’t read) version and a longer explanation for those of you who want more details, but that doesn’t really apply in this situation – so let’s dive right in.
Table of Contents
Automatic HDR Merging in Photoshop
Even though it’s not a dedicated HDR app, Photoshop offers a simple process for automatically handling the creation of an HDR image.
Step 0: Image Prep
If you’re serious about creating the best possible HDR images, you’ll already be photographing in RAW mode. RAW image files are (as you might guess) a raw dump of the camera’s sensor data without any kind of processing applied to them.
If you want to do any kind of processing using CameraRAW (or Lightroom or any other RAW image editor), make sure to do so before you start the HDR merging process!
Step 1: Merge to HDR Pro
Once your images are prepared to your satisfaction, it’s time to switch back to Photoshop.
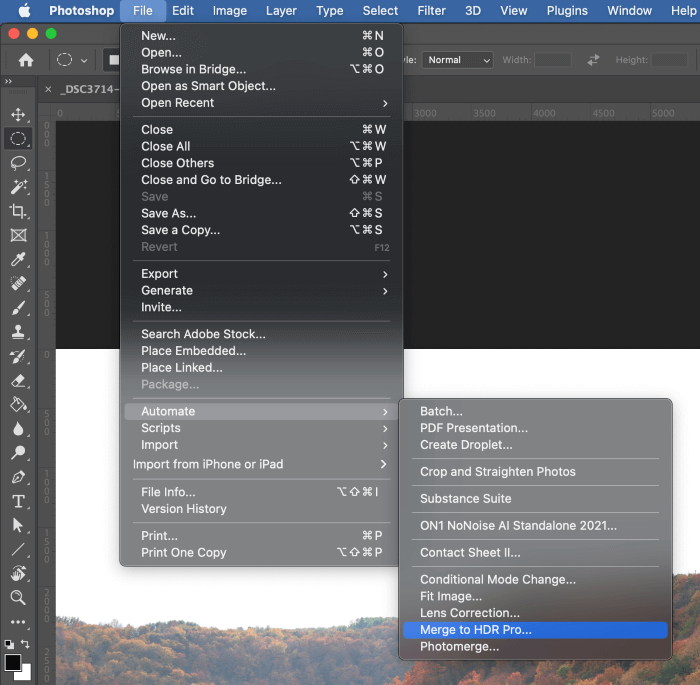
Open the File menu, select the Automate submenu, and click Merge to HDR Pro.
This brings up a new dialog box that you can use to select all the images that you want to merge. If you’ve already got them open in Photoshop, you can click the Add Open Files button to keep things simple, or you can use the Browse button to find each file by hand.
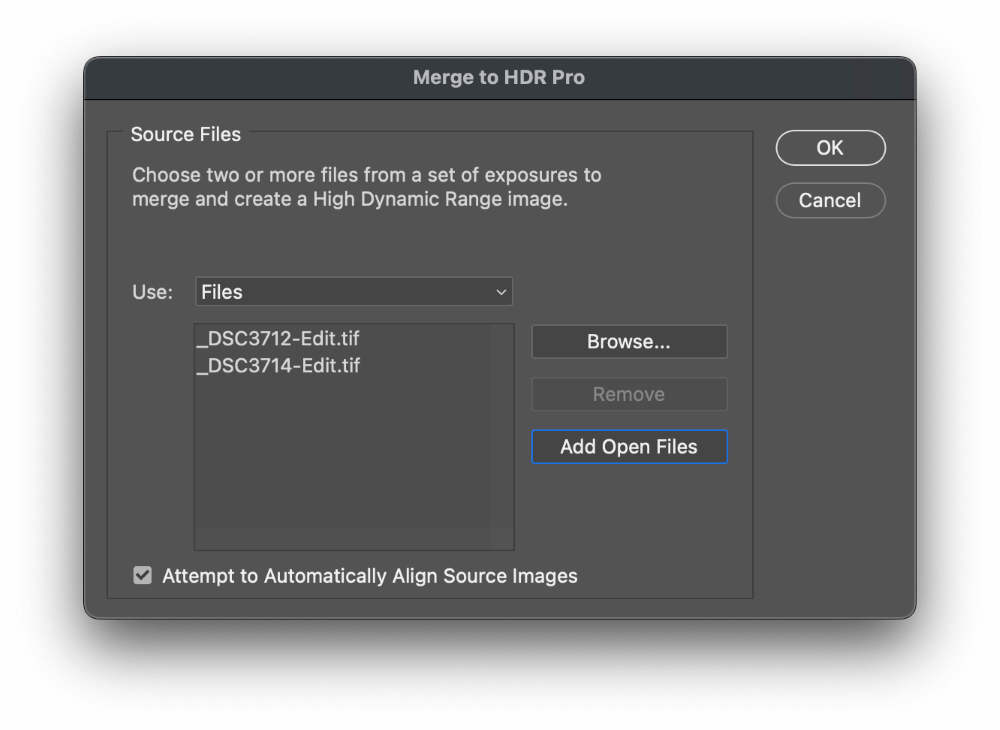
Photoshop also includes an option at the bottom of the window, Attempt to automatically align source images, which does exactly what it says on the label.
This is useful if your bracketed images were taken while you were hand-holding your camera, as in my example. If you used a tripod for your shots, you won’t need to worry about this and you can just leave it enabled.
I don’t think there’s any benefit to disabling it, except that it may slightly speed up the merging process when using a large number of source images.
Once you’ve added all the images you want to merge, click the OK button. Photoshop will analyze the images, attempt to align them, and then begin merging the bracketed images you’ve selected into a new Photoshop document.
Step 2: Adjust HDR Settings
It wasn’t too long ago that Photoshop’s HDR settings were pretty basic, but the HDR Pro process has a lot more improvements and HDR-specific options for how your images will be merged and how the tone mapping will be applied.
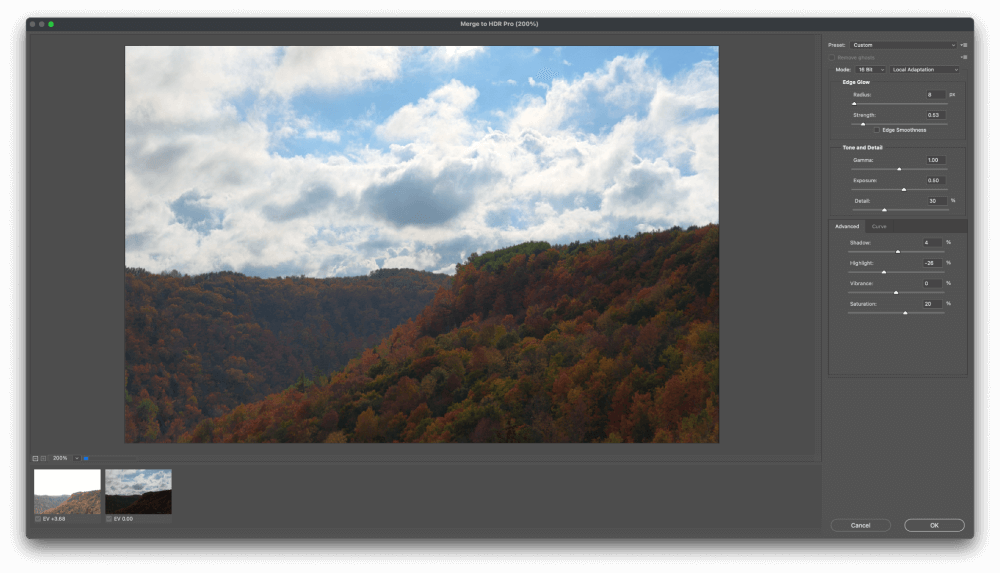
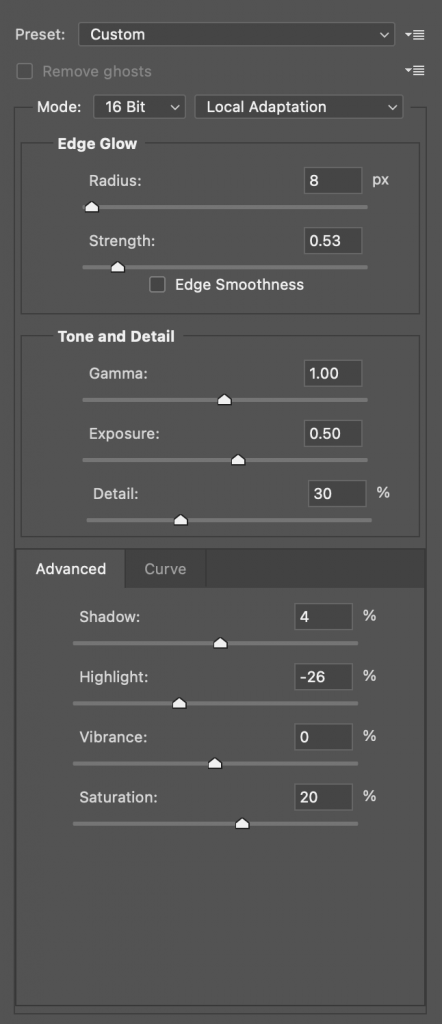
I have to include a separate screenshot just to show you the settings panel in detail, but you’ll immediately notice that there’s a lot going on.
Things can get a bit confusing, especially if you want to work with 32-bit images, but for this tutorial, I’m going to focus on the most common usage, which applies to 16-bit and 8-bit images.
For most situations, leaving the Mode setting at 16-bit and Local Adaptation will provide the best results unless you’re already an HDR expert.
(If you want to do a deep dive into the world of HDR, Adobe has put together an exhaustively detailed explanation of each setting and how it affects your image).
Leave your Gamma setting at 1.00 to maximize your dynamic range, and adjust the exposure value if necessary. The Detail setting affects image sharpness, so use it sparingly; it’s usually a better idea to apply image sharpening after all your other editing tasks are completed.
Fine-tune the Shadow and Highlight sliders, and be cautious with the Vibrance and Saturation sliders the way you would be in any normal image edit. You can also switch to the Curve tab to use a Curves-style interface for adjusting the image tones.
Once you’re happy with the look of the preview image, click the OK button, and Photoshop will merge your images with your chosen settings.
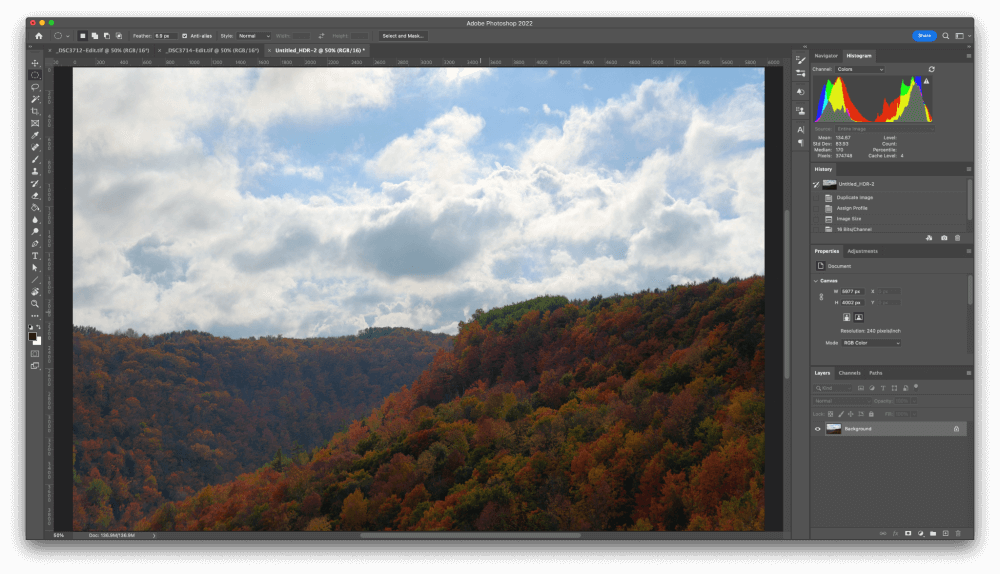
It may take some time to process all the merging steps, so be patient, sit back, and watch Photoshop move by itself for a change 😉
A Note About Manual Merging
It’s also possible to manually merge bracketed images into an HDR image, but it’s a complex process that doesn’t really gain much by being done by hand.
It requires complex luminosity masking and a better understanding of bit depth than most people have, so for 99.9% of photographers, it’s a better idea to use the automatic Merge to HDR Pro method.
Using Third-Party Plugins
HDR is a very popular subgenre of photography, and there are a lot of programs and plugins dedicated to HDR imagery.
There are several plugins available for Photoshop that provide a great deal more control and customization options than Photoshop’s built-in HDR tools, so if you’re interested in doing a lot of HDR work you should try some of them!

To explore your options, open the Plugins menu and select Browse Plugins. The Creative Cloud app will open to the Plugins Marketplace, allowing you to browse and install new Photoshop plugins. Some are free, but many of them require a purchase.
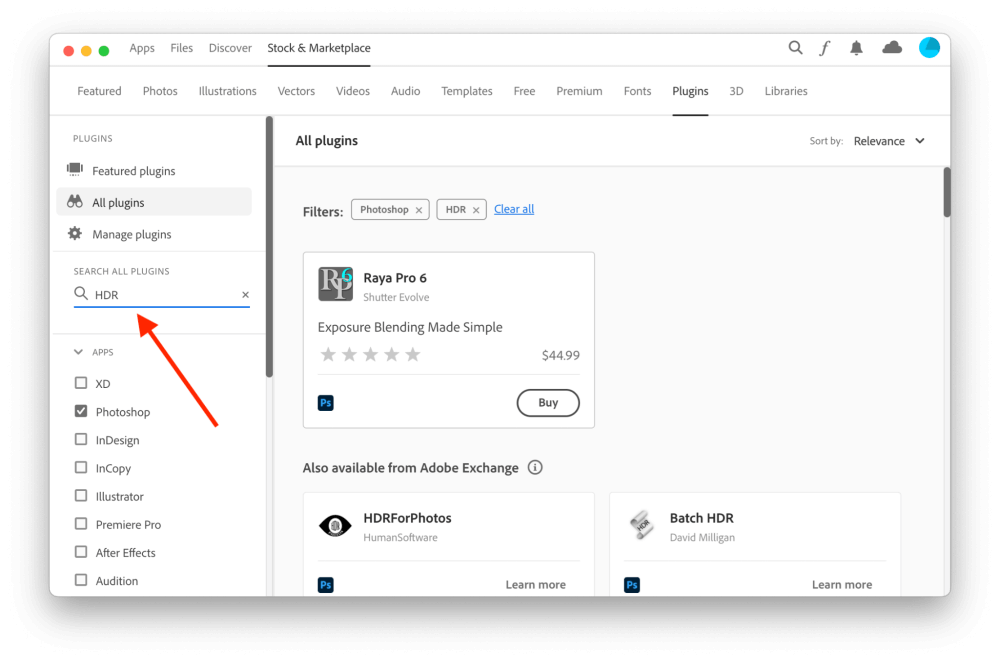
On the left side of the Creative Cloud app, search HDR to see all the options available. Some will be immediately installable, but others may require the use of the Adobe Exchange website.
I believe that the Exchange site is gradually being phased out in favor of the Creative Cloud app marketplace, but the process is still underway as of this writing.
A Final Word
HDR can be an exciting and useful tool, whether you’re taking better landscape photos or property images for the real estate market.
Personally, I find that most HDR photos look a bit fake, so I generally use other methods for expanding dynamic range such as highlight and shadow adjustments in a single 16-bit image – but to each their own!
Happy merging!
About Thomas Boldt
Jerry Aaron
Thanks – very helpful and thoughtful step-by-step instructions!
June
You’re welcome, Jerry!