Help! Your image looks like something out of an early 2000s video game. Are you stuck with it like this or is there a good way to unpixelate an image in Photoshop?
Hey there! I’m Cara, a self-declared lover of all things Photoshop and I’m really glad you asked. Before you give up on that photo let’s take a look at how to depixelate an image in Photoshop.
Keep in mind that you can’t miraculously get a high-quality high-resolution image from a pixelated image. However, you can clean it up a bit. Let’s take a look!
Note: the screenshots in the tutorial below are based on the Windows version of Photoshop CC. If you are on a Mac, they can be a bit different.
Table of Contents
Step 1: Add Some Pixels
Let’s take a look at this image I downloaded from Pixabay.com. If we zoom in on the bird’s eye, we can see that there is a bit of pixelation in the image.
If you’re trying to print an image, you generally want your resolution to be set at 300 ppi (pixels per inch). However, down to 72 ppi is perfectly acceptable for viewing on a screen. Pictures downloaded from the web often come at this lower resolution.
If you’re having trouble with pixelation, it’s likely that the resolution is low. Let’s start by bumping it up. Go to Image in the menu bar and choose Image Size.
The resolution of this image is set at 96 ppi. Let’s change the resolution to 300 ppi. Make sure that the resample box is checked. Photoshop will try to intelligently fill in the correctly colored pixels to bring up the resolution while losing as little quality as possible.
Click OK. This should already clear up some of the pixelations but let’s look at what we can do further.
Step 2: Despeckle Filter
Before we start adding filters, let’s make these edits non-destructive. Press Ctrl + J or Command + J to duplicate the image. Right-click on the duplicate layer and choose Convert to Smart Object.
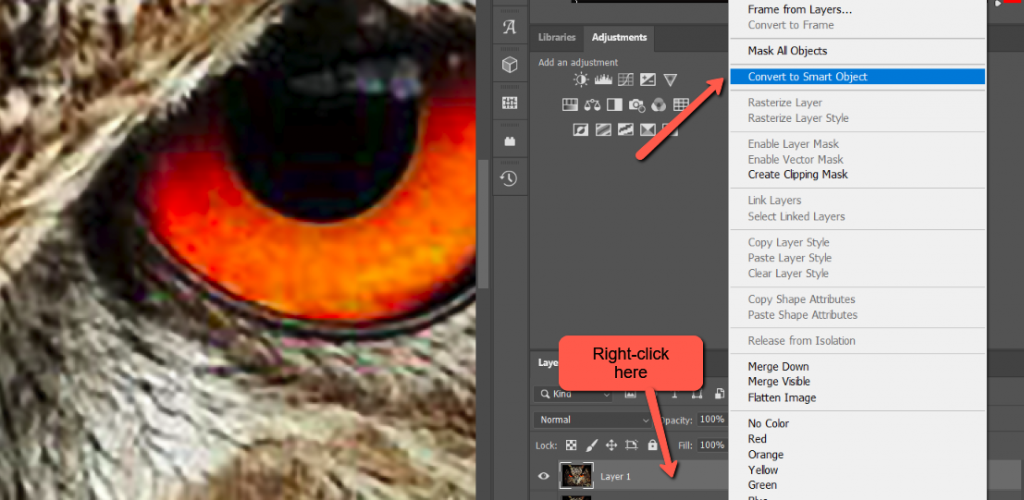
This makes the filters we’re going to add next editable so you can come back and make adjustments.
Go to Filter in the menu bar, hover over Noise and choose Despeckle. You can do this a couple of times if you like. Press Alt + Ctrl + F or Option + Command + F to reapply the same filter.
This will help smooth the pixelated edges a little.
Step 3: Gaussian Blur Filter
To further soften the edges, you can add a Gaussian Blur filter.
Go to Filter, hover over Blur, and choose Gaussian Blur.
In the box that opens, choose the Radius amount. More pixels mean more blur and a little goes a long way for this technique. I’ve got mine set at 0.3 pixels.
Choose what works for your image and press OK.
Step 4: Unsharp Mask
Now, we’ve blurred things a bit with the first two filters so let’s define the lines with a sharpening filter. Go to Filter hover over Sharpen and choose Unsharp Mask.
Be careful not to go too crazy with these values or the image will look oversharpened. This is especially true in images of people. Oversharpening skin augments wrinkles and blemishes and just doesn’t look good. We can push it a little in this image to define the feathers.
And here’s the final product!
Before:
After:
It’s pretty impressive how much of a difference it can make!
Curious about other things you can do in Photoshop? Check out our article on resizing images without losing picture quality.
About Cara Koch